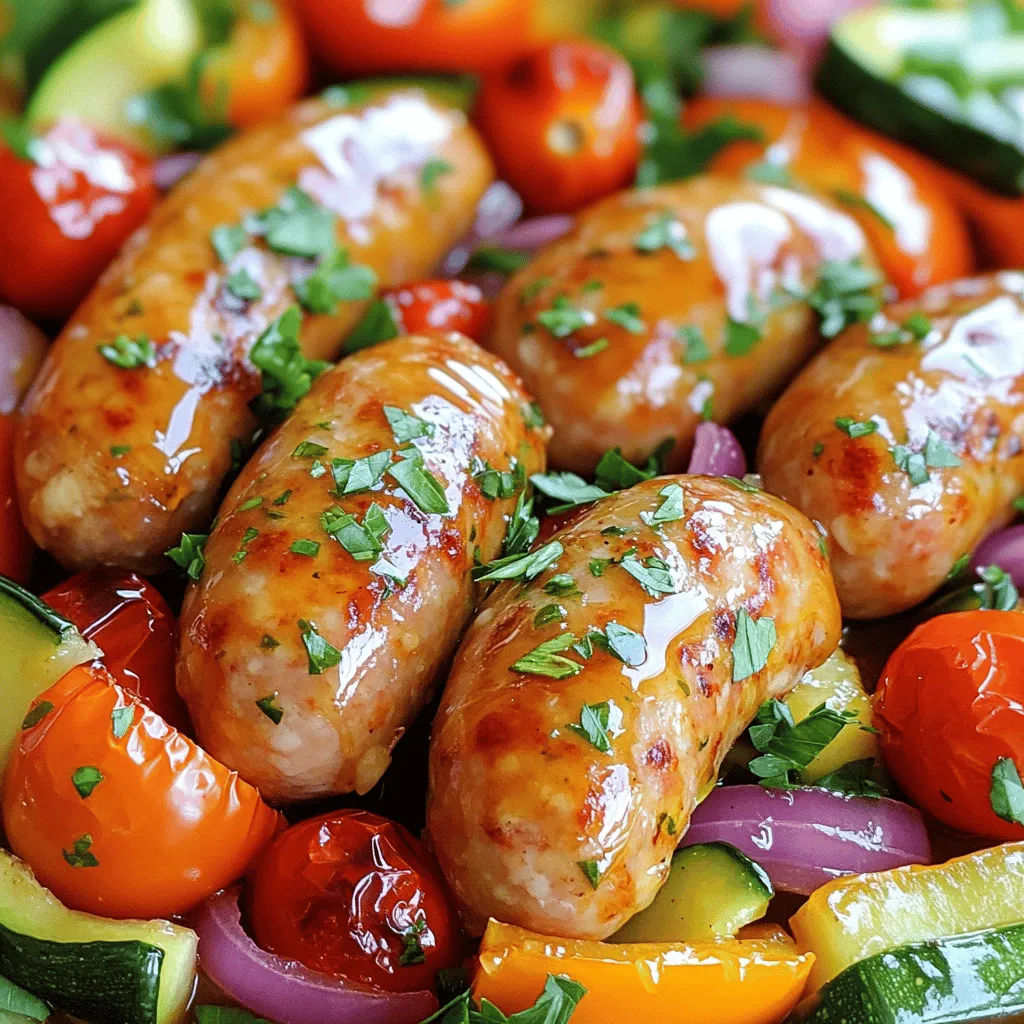
If you’re looking for a quick and tasty dinner, try my Honey Garlic Chicken Sausage Sheet Pan Delight. This simple recipe combines juicy chicken sausages with fresh veggies, all glazed in a sweet and savory sauce. It’s an easy one-pan meal perfect for busy nights. Plus, clean-up is a breeze! Let me show you how to whip up this delicious dish that everyone will love!
Ingredients
To make Honey Garlic Chicken Sausage Sheet Pan Delight, you will need these simple ingredients:
– Chicken Sausages (4, choice of spicy or mild)
– Honey (2 tablespoons)
– Garlic (3 cloves, minced)
– Soy Sauce (1 tablespoon, low-sodium)
– Fresh Ginger (1 teaspoon, grated)
– Bell Pepper (1, sliced)
– Zucchini (1, sliced)
– Red Onion (1, cut into wedges)
– Cherry Tomatoes (1 cup)
– Olive Oil (2 tablespoons)
– Salt and Pepper (to taste)
– Fresh Parsley (for garnish)
These ingredients work well together. The chicken sausages give protein, while honey adds sweetness. Garlic and ginger bring a nice kick. Bell pepper, zucchini, and cherry tomatoes add color and nutrition. This mix not only tastes great but also looks good on the plate.
Each ingredient has a role. The honey garlic sauce coats the chicken and veggies, making them juicy and flavorful. Use fresh garlic and ginger for the best taste. Feel free to pick your favorite bell pepper color.
Gather these items, and you are ready to create a meal everyone will love!
Step-by-Step Instructions
Preparation Steps
– Preheating the Oven
Start by preheating your oven to 400°F (200°C). This step is key. A hot oven helps cook the sausages and veggies evenly.
– Mixing the Honey Garlic Sauce
In a small bowl, whisk together 2 tablespoons of honey, 3 minced garlic cloves, 1 tablespoon of low-sodium soy sauce, and 1 teaspoon of grated fresh ginger. Mix until smooth. This sauce adds a sweet and savory twist.
– Arranging Ingredients on the Sheet Pan
On a large sheet pan, place 4 chicken sausages. Add sliced bell pepper, zucchini, red onion wedges, and 1 cup of cherry tomatoes. Spread them out. Each bite should have a mix of flavors.
– Drizzling Olive Oil and Seasoning
Drizzle 2 tablespoons of olive oil over the vegetables and sausages. Sprinkle with salt and pepper to taste. Toss everything gently to coat. This will help the veggies roast perfectly.
Cooking Steps
– Pouring the Sauce Over the Ingredients
Pour the honey garlic mixture over the sausages and veggies. Make sure everything is well coated. This step makes the dish flavorful and sticky.
– Baking Instructions
Place the sheet pan in your preheated oven. Bake for 25-30 minutes. Check that the sausages are cooked through and the veggies are tender and caramelized.
– Final Touches Post Baking
Once done, take the sheet pan out of the oven. Let it cool for a few minutes. Garnish with freshly chopped parsley before serving. This adds a pop of color and freshness.
Tips & Tricks
Tips for Perfect Cooking
– Ensuring Even Cooking of Ingredients
Spread the vegetables and sausages in a single layer. This helps them cook evenly. If they are stacked or crowded, some may cook faster than others.
– Adjusting Cooking Time for Different Ovens
Ovens can vary in heat. Keep an eye on your dish. If your oven runs hot, check it a few minutes early. If it runs cool, you may need to add a few more minutes.
– Garlic and Honey Ratio Tips
For a stronger garlic flavor, use more minced garlic. If you want a sweeter dish, add a bit more honey. Find the balance that you love most.
Presentation Ideas
– Serving Style Suggestions
Serve directly from the sheet pan for a fun family-style meal. For a more polished look, plate each serving on colorful dishes.
– Adding Colorful Garnishes
Fresh parsley adds a nice touch. Consider lemon wedges for a pop of color and a burst of flavor.
– Pairing with Side Dishes
This dish pairs well with rice, couscous, or a fresh salad. Choose sides that add different textures and flavors to the meal.

Variations
Ingredient Swaps
Alternative Sausages Options
You can switch the chicken sausages for turkey or plant-based options. Each choice brings its own flavor. Look for spicy or mild versions to suit your taste.
Vegetable Substitutes
Feel free to swap out veggies based on what you have. Broccoli, asparagus, or carrots work great. Use seasonal vegetables for the best taste and freshness.
Sauce Variations (using different sweeteners)
If honey isn’t your favorite, try maple syrup or agave nectar. Both will add a unique twist to the sauce. Each sweetener changes the flavor profile, making it interesting.
Flavor Enhancements
Adding Spice with Chili Flakes
Want some heat? Sprinkle chili flakes over the dish before baking. This adds a nice kick and balances the sweetness of the honey.
Using Fresh Herbs for Extra Flavor
Chop fresh herbs like basil or thyme to mix in before serving. This adds a burst of flavor and freshness to each bite.
Incorporating Citrus Zest
Grate some lemon or lime zest into the honey garlic sauce. The citrus enhances the dish and adds brightness. This small change makes a big difference!
Storage Info
Storing Leftovers
When it comes to storing leftovers, I recommend refrigerating the dish right away. Keep it in an airtight container. This way, it stays fresh for up to three days. Simply wait until the dish cools down before sealing it.
If you want to save it longer, freezing is a great option. Portion the leftovers into smaller containers. This helps you defrost just what you need. You can freeze it for about three months. Just remember to label the containers with the date.
Reheating Instructions
When it’s time to enjoy your leftovers, reheating them properly is key. The best method is to use the oven. Preheat your oven to 350°F (175°C). Place the dish in an oven-safe dish and cover it with foil. Heat for about 15-20 minutes or until it’s warm throughout.
If you’re short on time, you can use the microwave. Place the food in a microwave-safe bowl. Cover it loosely with a lid or microwave-safe wrap. Heat it in 30-second bursts to avoid overcooking. Stir the dish between intervals to ensure even heating.
By following these steps, your Honey Garlic Chicken Sausage will taste just as good as the first time!
FAQs
How long does it take to cook Chicken Sausage in the oven?
It takes about 25 to 30 minutes to cook chicken sausage in the oven. Make sure your oven is set to 400°F (200°C). This heat ensures the sausages cook through and the veggies become tender.
Can I use other types of sausage?
Yes, you can use other types of sausage. Try pork, turkey, or even plant-based options. Just keep the cooking time the same, but check for doneness.
Is it necessary to peel the zucchini?
No, you do not need to peel the zucchini. The skin adds color and nutrients. Just wash it well and slice it.
How can I adjust the recipe for a larger group?
To serve more people, simply double the ingredients. Use a bigger sheet pan or multiple pans. Make sure the sausages and veggies have space to cook evenly.
This blog post shared a tasty recipe for chicken sausage and veggies. We covered all the ingredients needed, plus easy steps to prepare and cook everything. I also gave you tips for better cooking and fun variations to change up the flavors. Lastly, I shared how to store leftovers and reheat them properly.
Cooking should be fun and creative, so don’t be afraid to try new things! Enjoy every bite of your delicious meal!


