Honey Garlic Roasted Carrots for a Flavorful Side

Are you ready to elevate your dinner game? Honey Garlic Roasted Carrots are the perfect blend of sweet and savory, making them an unforgettable side dish. With just a few simple ingredients like baby carrots, honey, and garlic, you’ll create a colorful and tasty addition to any meal. Join me as I guide you through easy steps to achieve beautifully caramelized carrots that everyone will love! Let’s dive in!
Ingredients
To make honey garlic roasted carrots, you need a few simple ingredients. Here’s what you’ll need:
– 1 lb baby carrots (or regular carrots cut into sticks)
– 3 tablespoons honey
– 2 tablespoons olive oil
– 4 garlic cloves, minced
– 1 teaspoon fresh thyme leaves (or ½ teaspoon dried thyme)
– Salt and pepper to taste
– 1 tablespoon balsamic vinegar (optional for tanginess)
– Fresh parsley, chopped for garnish (optional)
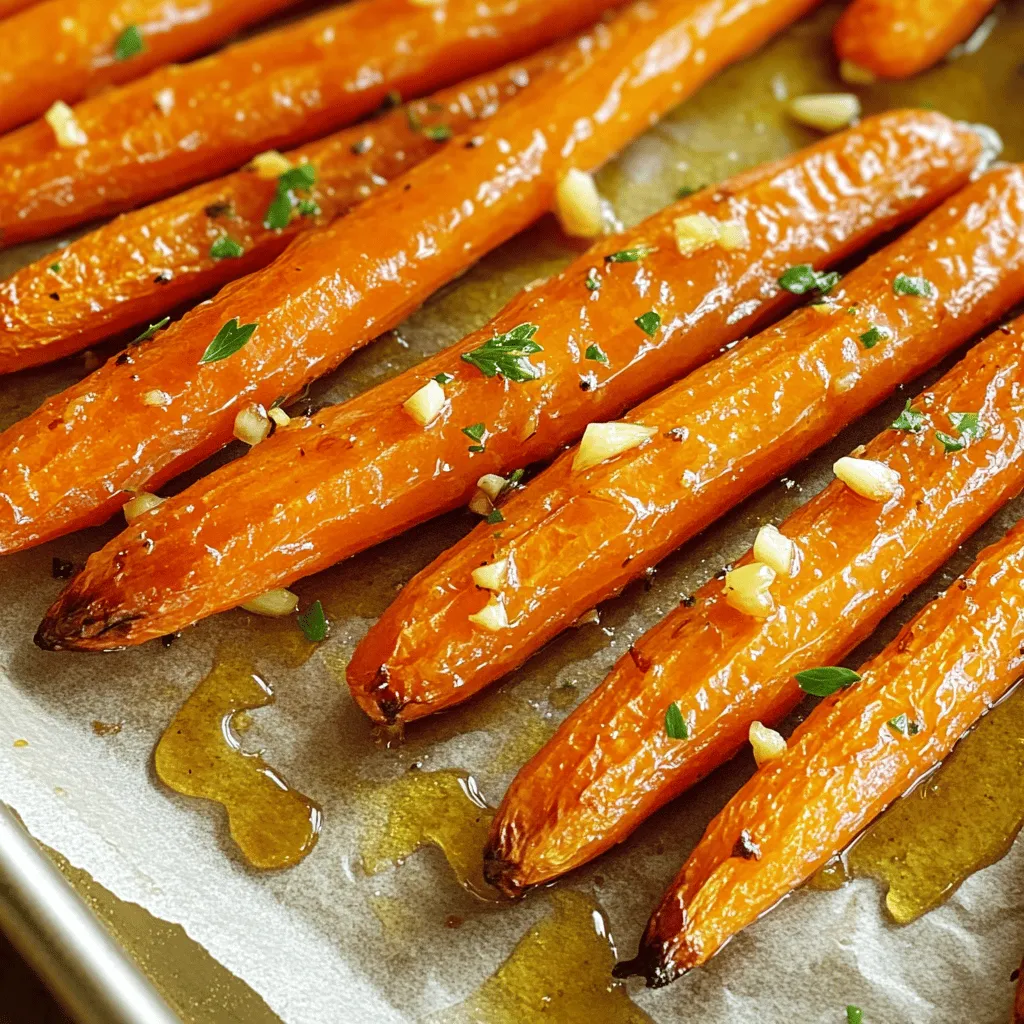
These ingredients come together to create a dish that is both sweet and savory. The baby carrots are tender and sweet, while the honey and garlic add rich flavor. The thyme gives a fresh note, and the balsamic vinegar, if used, adds a nice touch of tang. Chopped parsley at the end not only looks pretty but also adds a fresh taste.
When selecting your carrots, try to pick ones that are bright in color and firm to the touch. This ensures that you get the best flavor and texture. Don’t worry if you only have regular carrots on hand; just cut them into sticks to match the baby carrots.
Gather these ingredients, and you are ready to create a delightful side dish that pairs well with many meals.
Step-by-Step Instructions
Preparation Steps
– Preheat the oven and prepare the baking sheet
Start by preheating your oven to 400°F (200°C). This high temperature helps to caramelize the carrots. Line a baking sheet with parchment paper. This step makes cleanup easy and keeps your carrots from sticking.
– Mix the honey garlic sauce
In a mixing bowl, combine 3 tablespoons of honey, 2 tablespoons of olive oil, and 4 minced garlic cloves. Add 1 teaspoon of fresh thyme leaves, and season with salt and pepper. If you want extra flavor, mix in 1 tablespoon of balsamic vinegar. Whisk everything together until it blends well.
– Coat the carrots
Add 1 pound of baby carrots to the bowl. Toss them in the honey garlic sauce until they are fully coated. This step ensures each carrot gets that sweet and savory flavor.
Roasting Instructions
– Spread carrots on the baking sheet
Take the coated carrots and spread them out in a single layer on the prepared baking sheet. Make sure they are not crowded. This space allows the heat to circulate and helps them roast evenly.
– Roast and stir
Place the baking sheet in the preheated oven. Roast the carrots for 25-30 minutes. Be sure to stir them halfway through. This stirring helps them brown and caramelize nicely.
– Check for doneness
After 25 minutes, check if the carrots are tender. You can do this by poking them with a fork. If they are soft and caramelized, they are done! If not, give them a few more minutes in the oven.
Tips & Tricks
Selecting the Best Carrots
When choosing carrots, you have options. Baby carrots are sweet and easy to use. They cook quickly and look nice on a plate. Regular carrots can be cut into sticks. They have a strong flavor and can be cheaper.
Organic carrots often taste better. They are grown without harmful chemicals. Non-organic carrots may be fine, but check for freshness. Look for firm, bright carrots, regardless of type.
Achieving Perfect Caramelization
Caramelization adds a great flavor to your dish. Set your oven to 400°F (200°C). This temperature helps the sugars in carrots brown nicely. If you want a softer texture, you can lower the heat a bit.
Cooking time is key too. Roast your carrots for 25-30 minutes. Stir them halfway through to ensure even cooking. If they are not tender after 30 minutes, give them a few more minutes.
Enhancing Flavor
You can easily boost flavors in your carrots. Try adding herbs like rosemary or dill for a twist. Fresh herbs give a bright taste. Dried herbs work too if fresh ones are not available.
Balsamic vinegar is a great addition. It adds tang and depth. Mix it into your honey garlic sauce for a richer flavor. This simple change can make a big difference in taste.

Variations
Vegan Option
If you want a vegan version, you can swap honey for maple syrup. Maple syrup gives a lovely sweetness that works well with carrots. The rest of the recipe stays the same. You still mix it with olive oil, garlic, and herbs. Maple syrup has a different flavor, but it still tastes great.
Different Vegetables
You can use other root veggies, like parsnips or sweet potatoes. These add different textures and flavors. You can even combine carrots with these veggies for a colorful dish. Mixing in some green beans or peas can add a nice crunch too. This way, you can enjoy a tasty mix of flavors on your plate.
Flavor Tweaks
To change the taste, consider adding citrus zest. Lemon or orange zest can brighten the dish. Just sprinkle some on before serving. If you like spice, try adding red pepper flakes or cayenne pepper. This gives the carrots a nice kick. You can adjust the heat based on your taste. These simple tweaks make your Honey Garlic Roasted Carrots even more exciting.
Storage Info
Storing Leftovers
To keep Honey Garlic Roasted Carrots fresh, store them in the fridge. Place them in an airtight container. They will stay good for about three to five days. Avoid leaving them out at room temperature for too long.
If you want to store them longer, freezing is a good option. Let the carrots cool down first. Then, place them in a freezer bag. Try to remove as much air as you can. Frozen carrots will last for three months. When ready to eat, thaw them in the fridge overnight.
Reheating Recommendations
For reheating, I recommend using the oven. This method keeps the carrots crispy and tasty. Preheat your oven to 350°F (175°C). Spread the carrots on a baking sheet. Heat them for about 10 to 15 minutes.
If you’re short on time, the microwave works too. Place the carrots in a microwave-safe dish. Cover them with a damp paper towel. Heat in short bursts of 30 seconds. Stir between each burst to keep them moist.
No matter how you reheat them, enjoy the rich flavor!
FAQs
How long do Honey Garlic Roasted Carrots last in the fridge?
Honey Garlic Roasted Carrots can last up to four days in the fridge. Store them in an airtight container. This keeps them fresh and tasty. The flavors may change a bit, but they stay good to eat.
Can I use different sweeteners instead of honey?
Yes, you can use other sweeteners. Maple syrup or agave nectar works well. These options give a similar sweet taste. You may need to adjust the amount for sweetness.
What can I serve with Honey Garlic Roasted Carrots?
Honey Garlic Roasted Carrots pair well with many dishes. Try them with roasted chicken or grilled fish. They also go great with quinoa or rice. Add a fresh salad for a complete meal.
Is this dish suitable for meal prep?
Yes, this dish is perfect for meal prep. You can make it ahead and store it. Just reheat when ready to eat. The carrots taste great warm or at room temperature.
This blog post covers how to make honey garlic roasted carrots. You need just a few simple ingredients and clear steps. We explored tips for selecting the best carrots and achieving great flavor. I shared variations for vegans, different vegetables, and flavor tweaks. Lastly, we discussed storage and reheating options.
Try this recipe for a tasty side dish. With these simple instructions, you can create a healthy and flavorful treat. Enjoy your cooking!


![To make Honey Sriracha Brussels Sprouts, gather the following ingredients: - 1 pound Brussels sprouts, trimmed and halved - 3 tablespoons olive oil - 2 tablespoons honey - 2 tablespoons Sriracha sauce - 1 teaspoon garlic powder - Salt and pepper to taste - Optional garnish: 1 tablespoon sesame seeds - Optional garnish: 2 green onions, chopped Each ingredient plays a key role. The Brussels sprouts give a hearty base. Olive oil helps to crisp them up. Honey adds sweetness, while Sriracha brings heat. Garlic powder enhances flavor. Salt and pepper bring everything together. If you want to add flair, sprinkle sesame seeds and green onions on top. You can find the full recipe in the article. Enjoy the sweet and spicy blend! - Preheat your oven to 425°F (220°C). - Line a large baking sheet with parchment paper. - In a large bowl, mix the halved Brussels sprouts, olive oil, honey, Sriracha sauce, garlic powder, salt, and pepper. - Toss well to coat each sprout evenly. - Spread the Brussels sprouts on the baking sheet, cut side down. - Roast for 20-25 minutes until they are tender and crispy. I love the way the heat from the Sriracha blends with the sweetness of honey. It creates a perfect balance. The garlic powder adds a subtle depth. Remember, tossing halfway helps them cook evenly. If you want to know more, check out the Full Recipe for all the details! To get crispy Brussels sprouts, start with fresh sprouts. Make sure to trim and halve them. Oven heat is key; preheat to 425°F (220°C). Use a baking sheet lined with parchment paper. This helps with cleanup and browning. Toss the sprouts halfway through cooking. This ensures even heat and crispiness. If you skip this step, some may burn while others stay soggy. For extra flavor, think about adding spices. A pinch of cayenne or paprika can bring heat. Fresh herbs like thyme or rosemary also work great. They add depth to the sweet and spicy mix. Try different types of honey or Sriracha, too. Each honey has its own unique taste. You might prefer a lighter honey for a sweet touch. A spicier Sriracha can kick up the heat. Experiment and find your favorite mix. For the full recipe, check out the details above. {{image_2}} You can swap Brussels sprouts for other veggies. Broccoli, cauliflower, or green beans work well. Each adds a unique taste and texture. Try mixing these veggies for fun flavors. You can also explore different sauces. Instead of honey and Sriracha, use teriyaki or balsamic glaze. This change will give you a new flavor profile. Want to make this recipe vegan? Replace honey with maple syrup or agave nectar. This keeps the sweet taste without animal products. You can also make it gluten-free. Just ensure your Sriracha and any other sauces are gluten-free. For low-carb options, skip the honey or use a sugar substitute. This keeps the dish tasty while reducing carbs. Check the [Full Recipe] for more ideas on how to adapt this dish! To keep your Honey Sriracha Brussels sprouts fresh, store leftovers in the fridge. Place them in an airtight container. This helps keep the flavors intact. Make sure to cool them down first. If you plan to eat them soon, they can last up to four days. For longer storage, you can freeze them. Use a freezer-safe bag or container. Make sure to remove as much air as possible. They can last up to three months in the freezer. When you're ready to enjoy your Brussels sprouts again, reheating is key. The best method is using an oven. Preheat it to 350°F (175°C). Spread the sprouts on a baking sheet. Heat for about 10-15 minutes. This will help keep them crispy. If you're in a hurry, you can use a microwave. Place them in a microwave-safe dish. Heat in short bursts of 30 seconds. Check often to avoid sogginess. To keep that crunch, try reheating in a skillet. Just a few minutes over medium heat will do the trick. Enjoy the sweet and spicy goodness of these Brussels sprouts again! For the full recipe, check the earlier section. What do I serve with Honey Sriracha Brussels Sprouts? You can serve these sprouts with rice or quinoa. They also pair well with grilled chicken or fish. For a hearty meal, try them alongside a steak. The sweet and spicy flavors complement many dishes. Can I use frozen Brussels sprouts for this recipe? Yes, you can use frozen Brussels sprouts. Just thaw them first and pat them dry. This helps to get a nice crispy texture. The cooking time may be a bit longer, so keep an eye on them. How spicy are these Brussels sprouts? The heat level depends on how much Sriracha you use. Two tablespoons give a nice kick, but you can adjust it to your taste. If you prefer less heat, use one tablespoon of Sriracha. How do I make the recipe ahead of time? You can prepare the Brussels sprouts up to a day in advance. Toss them in the sauce and store in the fridge. When ready to cook, spread them on the baking sheet and roast as directed. Can I make this on the stovetop? Yes, you can cook these on the stovetop. Heat oil in a large pan over medium heat. Add the Brussels sprouts cut side down and cook until browned. Then, toss them with the sauce and cover to steam until tender. What are some popular side dishes to pair with it? Some great side dishes include mashed potatoes or a fresh salad. You can also serve them with roasted carrots or sweet potatoes for a colorful plate. These sides balance the flavors well. You learned how to make delicious Honey Sriracha Brussels sprouts. Using simple ingredients, we created the perfect balance of sweet and spicy flavors. I shared tips for achieving that crispy texture and ideas for variations, like different veggies or sauces. Don’t forget the best storage and reheating methods to keep them tasty. Enjoy these sprouts as a side dish or a fun main course. Cooking can be easy and satisfying. Try it out, and make it your own!](https://dailydishly.com/wp-content/uploads/2025/06/e27bd237-cd9d-45ea-93fd-8494cb919a9a-768x768.webp)


![To make a tasty Roasted Red Pepper Quinoa Salad, gather these ingredients: - 1 cup quinoa, rinsed - 2 large red bell peppers - 1/2 cup cherry tomatoes, halved - 1/4 cup red onion, finely chopped - 1/2 cup cucumber, diced - 1/4 cup feta cheese, crumbled (optional) - 3 tablespoons olive oil - 2 tablespoons balsamic vinegar - 1 teaspoon garlic powder - Salt and pepper to taste - Fresh parsley, chopped for garnish This salad is not just delicious; it’s healthy too. Here’s why each ingredient matters: - Quinoa: A great source of protein and fiber. It helps keep you full and satisfied. - Red bell peppers: High in vitamins A and C, these add color and crunch. They also support your immune system. - Cherry tomatoes: Packed with antioxidants, they boost heart health and add sweetness. - Red onion: Contains quercetin, which may help lower blood pressure and cholesterol. - Cucumber: Hydrating and low in calories, cucumbers make your salad light and fresh. - Feta cheese: Adds creaminess and flavor; it’s a source of calcium. - Olive oil: A source of healthy fats, it’s good for your heart. - Balsamic vinegar: Adds tanginess and may help regulate blood sugar levels. - Garlic powder: Great for flavor, it also has health benefits like boosting your immune system. - Fresh parsley: Rich in vitamins K and C, it also freshens your breath. Fresh veggies make the salad shine. Here are some tips: - Red bell peppers: Look for bright colors and firm skin. Avoid soft spots. - Cherry tomatoes: Choose shiny, plump tomatoes. They should smell sweet. - Cucumber: Pick cucumbers that feel firm and are dark green. - Red onion: Look for heavy onions with smooth skin. Avoid any that feel soft or have dark spots. - Fresh parsley: Choose parsley that is bright green and crisp. Avoid yellow or wilting leaves. When you use fresh ingredients, your Roasted Red Pepper Quinoa Salad will taste amazing. Don't forget to check the [Full Recipe] for all the steps! To make the quinoa, start by rinsing one cup under cold water. This helps remove any bitter taste. In a medium saucepan, mix the rinsed quinoa with two cups of water. Bring it to a boil over high heat. Once it boils, lower the heat to a simmer. Cover the pot and let it cook for about 15 minutes. The water should absorb fully. After that, fluff the quinoa with a fork and let it cool. This fluffy base gives the salad its nice texture. Next, we need to roast the red peppers. Preheat your oven to 425°F (220°C). Cut the peppers in half and remove the seeds. Place them skin-side up on a baking sheet. Roast them for about 25 minutes. You want the skins to be blistered and slightly charred. Once roasted, take them out and let them cool. After cooling, peel off the skin and chop the peppers into bite-sized pieces. This smoky flavor adds depth to our salad. Now it’s time to bring everything together. In a large mixing bowl, combine the cooled quinoa, chopped roasted peppers, halved cherry tomatoes, diced cucumber, and finely chopped red onion. To make the dressing, whisk together three tablespoons of olive oil, two tablespoons of balsamic vinegar, one teaspoon of garlic powder, and salt and pepper to taste in a small bowl. Pour this dressing over the salad mixture. Toss gently to combine everything well. If you like, add some crumbled feta cheese for extra creaminess. Finally, garnish with fresh parsley before serving. You can find the full recipe here. To get the best texture for your quinoa, rinse it well. This step removes any bitterness. Use a fine mesh strainer and run cold water over the quinoa for about a minute. After rinsing, cook it with a 2:1 water-to-quinoa ratio. Bring it to a boil, then lower the heat and cover it. Let it simmer for 15 minutes. When done, fluff it with a fork. This keeps the grains separate and light. Use fresh herbs to boost the flavor of your salad. Fresh parsley adds brightness. You can also try basil or cilantro for a twist. For extra flavor, add spices like cumin or smoked paprika. These spices will give depth and warmth to your dish. Just a pinch can make a big difference. Mix them into your dressing or sprinkle them on top before serving. A beautiful presentation makes your salad more inviting. Use a large, shallow bowl to showcase the colors. Arrange the ingredients in sections for a vibrant look. You can also serve it in individual bowls for a personal touch. Garnish with extra parsley or a sprinkle of feta on top. Drizzle a little olive oil or balsamic vinegar just before serving to add shine. Check out the Full Recipe for more serving ideas! {{image_2}} To make this salad vegan, skip the feta cheese. You can add nuts or seeds for creaminess. Toasted sunflower seeds or sliced almonds work well. They add crunch and flavor without dairy. You can also swap balsamic vinegar for a splash of lemon juice. This keeps the salad bright and fresh. Good news! Quinoa is naturally gluten-free. This salad is a great choice for those with gluten issues. Just ensure that all your other ingredients are also gluten-free. Check labels on dressings and canned items. You can enjoy this dish without worry. Want to boost the protein? You have options! Chickpeas are a great choice. They add fiber and taste. Just rinse and toss them in. Grilled chicken is another option. Cook it simply with salt and pepper, then slice it up. This makes the salad filling and tasty. Feel free to mix and match proteins based on your needs. For the full recipe, check out the details above. To keep your roasted red pepper quinoa salad fresh, store it in an airtight container. This will help lock in flavor and moisture. If you have extra dressing, store it separately. This way, the salad won’t get soggy. Place the container in the fridge right away. You can eat this salad cold, but if you prefer it warm, reheat it gently. Use the microwave for quick warming. Heat for 30 seconds, then stir. Check if it’s warm enough. You can also use a skillet. Heat on low for a few minutes, stirring often. This salad stays fresh in the fridge for about three days. After that, the veggies may lose their crunch, and the flavors might fade. Always check for any strange smells or changes in color before eating. If you see any signs of spoilage, it’s best to toss it out. Enjoy your meal while it's fresh! For the complete recipe, see the [Full Recipe]. Yes, you can make this salad ahead of time. I often prepare it in the morning for lunch later. The flavors blend well after sitting for a few hours. Just keep it in the fridge. If you want, hold off on adding the dressing until you're ready to eat. This keeps everything fresh and crisp. If you need a substitute for quinoa, try brown rice or farro. Both add great texture. You can also use couscous or bulgur for a quick cook time. Each option gives a unique taste and feel. Just make sure to adjust the cooking time based on what you choose. To adjust spice levels, use less garlic powder or add more veggies. If you like heat, try adding red pepper flakes or diced jalapeños. For a milder taste, skip the feta cheese. Taste as you go, so you get it just right for you. This blog post covered how to create a tasty salad. We discussed each ingredient, their benefits, and how to choose fresh veggies. You learned clear steps to prepare quinoa, roast peppers, and mix your salad well. We shared tips for perfect texture, flavor boosts, and neat serving ideas. You can also explore vegan or gluten-free options and add proteins. Lastly, proper storage keeps your leftovers fresh. Use this guide to enjoy healthy salads any time!](https://dailydishly.com/wp-content/uploads/2025/06/1f28db07-8093-4cb7-8796-796da85cb13a-768x768.webp)