Honey Garlic Shrimp Skewers Flavorful BBQ Delight
![- 1 pound large shrimp, peeled and deveined - 1/4 cup honey - 3 cloves garlic, minced - 2 tablespoons soy sauce - 1 tablespoon fresh lemon juice For the best flavor, fresh ingredients work wonders. When I use large shrimp, they soak up the marinade well. Honey adds sweetness, while garlic brings a rich taste. Soy sauce provides a savory kick, and lemon juice balances the flavors. - 1 tablespoon olive oil - 1 teaspoon crushed red pepper flakes - Salt and pepper to taste - Skewers (soaked in water if wooden) Olive oil helps the shrimp cook well on the grill. The red pepper flakes add a bit of heat, so adjust them based on your spice preference. Always season with salt and pepper to enhance the dish. If you use wooden skewers, soaking them prevents burning while grilling. - Lemon wedges - Fresh parsley Lemon wedges brighten the dish and make it look appealing. Fresh parsley adds a pop of color and freshness. These garnishes make your skewers not just tasty but also beautiful. For the full recipe, check out the details above. First, gather your marinade ingredients. In a bowl, mix together the honey, minced garlic, soy sauce, lemon juice, olive oil, crushed red pepper flakes, salt, and pepper. Whisk this mixture well until it’s blended. Next, add your peeled and deveined shrimp to the bowl. Make sure each shrimp gets coated with the marinade. Cover the bowl with plastic wrap and place it in the fridge. Let it marinate for at least 30 minutes. This helps the shrimp soak up all that yummy flavor. While the shrimp marinates, it's time to get your grill ready. Preheat the grill to medium-high heat. If you use wooden skewers, soak them in water for about 30 minutes. This step is key. It stops the skewers from burning while grilling. Now for the fun part! Start by threading the marinated shrimp onto the skewers. Leave a little space between each shrimp to help them cook evenly. Place the skewers on the grill. Cook the shrimp for about 2-3 minutes on each side. You’ll know they’re done when they turn pink and opaque. During cooking, brush any extra marinade over the shrimp. This gives them an extra burst of flavor. Once cooked, remove the skewers from the grill and let them rest for a minute. Enjoy these delicious Honey Garlic Shrimp Skewers! For the full recipe, check out the details above. To get the best Honey Garlic Shrimp Skewers, set your grill to medium-high heat. This temperature cooks the shrimp nicely without burning them. You want the grill hot enough to sear the shrimp but not so hot that they turn dry. Leave a little space between each shrimp on the skewers. This helps them cook evenly. If they are too close, they will steam instead of grilling. Proper spacing lets the heat circulate around each piece. Want to spice things up? You can add extra herbs like cilantro, basil, or even a pinch of cumin. These will give your skewers a unique twist. If you want a touch of sweetness, try adding a bit of orange juice or zest. For a different flavor, you can swap the marinade. Try teriyaki sauce for a sweet and savory taste. Or use a spicy chili paste for heat. The options are endless, and each twist can create a new favorite. Pair your Honey Garlic Shrimp Skewers with fresh sides. A light salad with mixed greens and a citrus dressing works great. You can also serve them with a side of grilled vegetables for added color and flavor. For presentation, arrange the skewers on a large platter. Add lemon wedges and sprigs of parsley for a pop of color. This not only makes it look appealing but adds freshness to each bite. Don’t forget to have extra dipping sauce on the side for your guests! {{image_2}} You can change the main protein in this recipe. If you want to swap shrimp for chicken, use boneless chicken breast cut into bite-sized pieces. For a plant-based option, tofu works great too. Just press the tofu to remove excess water before marinating. You can also switch the sweetener. If honey is not your thing, try maple syrup or agave. These options will add a unique twist to the flavor. You can cook these shrimp in different ways. Grilling adds a smoky taste, which makes the dish special. However, if you don’t have a grill, you can bake the shrimp in the oven. Set your oven to 400°F (200°C) and cook for about 10-12 minutes. Another great option is to use a skillet on the stovetop. Heat a bit of oil and cook the shrimp for 2-3 minutes on each side until they turn pink and opaque. To enhance the taste, you can add tropical elements. Pineapple chunks or shredded coconut can give your skewers a fun twist. Don’t be afraid to experiment with herbs! Fresh cilantro, basil, or mint can add freshness and depth. Try adding a mix of herbs to see what suits your taste best. For the full recipe, check out the Honey Garlic Shrimp Skewers section. After you enjoy your honey garlic shrimp skewers, store any leftovers in the fridge. Place them in a clean, airtight container. This will keep them fresh and safe to eat. Try to eat them within three days for the best taste. If you want to keep them longer, you can freeze them. Wrap the skewers tightly in plastic wrap or foil, then put them in a freezer bag. Cooked shrimp skewers can last up to three months in the freezer. When it's time to eat your leftovers, reheating them properly is key. The oven works best for this. Preheat your oven to 350°F. Place the skewers on a baking sheet and cover them with foil. Heat for about 10-15 minutes until warm. If you're in a rush, you can use the microwave. Place the shrimp on a microwave-safe plate and cover it with a damp paper towel. Heat in short bursts of 30 seconds until warmed. To keep the shrimp juicy, avoid overheating them. Cooked honey garlic shrimp skewers can last in the fridge for about three days. After that, the shrimp may spoil. Signs of spoilage include a sour smell, a slimy texture, or discoloration. If you notice any of these signs, it's best to throw them away. Always prioritize your health and safety when it comes to food storage. For the best flavor, marinate the shrimp for at least 30 minutes. This time allows the shrimp to soak up the sweet and savory notes of the marinade. If you have time, marinating for up to 2 hours enhances the taste even more. Just remember not to exceed this time, as shrimp can become mushy. Yes, you can use frozen shrimp. To prepare frozen shrimp, first, thaw them in the fridge overnight. If you need them quicker, place the shrimp in a sealed bag and submerge it in cold water for about 15-20 minutes. Once thawed, rinse them under cold water and pat dry before marinating. Several sides pair well with Honey Garlic Shrimp Skewers. Try serving them with: - Steamed rice or quinoa for a filling base. - Grilled vegetables like zucchini or bell peppers for a colorful plate. - A fresh salad with mixed greens and a light vinaigrette for crunch. - Garlic bread to soak up any extra sauce. Yes, you can make Honey Garlic Shrimp Skewers in the oven. Preheat your oven to 400°F (200°C). Place the skewers on a baking sheet lined with foil. Bake for about 8-10 minutes, flipping halfway through. The shrimp should be pink and opaque when done. This method is perfect if you don’t have a grill. For more details, check the [Full Recipe]. This blog post covers all you need for perfect Honey Garlic Shrimp Skewers. You learned about the key ingredients, including shrimp, honey, and garlic. I shared step-by-step grilling instructions and useful tips for a better cook. Plus, I offered variations for different tastes and storage advice for leftovers. Now you can make delicious skewers with confidence. Enjoy trying new flavors and impressing your friends and family with this recipe!](https://dailydishly.com/wp-content/uploads/2025/07/c236e5ff-bf7a-4bb5-97d9-fa918dc47393.webp)
Get ready for a flavor-packed meal with my Honey Garlic Shrimp Skewers! These skewers are easy and quick, perfect for a summer BBQ. The mix of sweet honey and savory garlic will have everyone coming back for seconds. In this article, I’ll walk you through each step, share tips, and offer some delicious variations. Let’s make your next cookout a hit!
Ingredients
Main Ingredients
– 1 pound large shrimp, peeled and deveined
– 1/4 cup honey
– 3 cloves garlic, minced
– 2 tablespoons soy sauce
– 1 tablespoon fresh lemon juice
For the best flavor, fresh ingredients work wonders. When I use large shrimp, they soak up the marinade well. Honey adds sweetness, while garlic brings a rich taste. Soy sauce provides a savory kick, and lemon juice balances the flavors.
Additional Ingredients
– 1 tablespoon olive oil
– 1 teaspoon crushed red pepper flakes
– Salt and pepper to taste
– Skewers (soaked in water if wooden)
Olive oil helps the shrimp cook well on the grill. The red pepper flakes add a bit of heat, so adjust them based on your spice preference. Always season with salt and pepper to enhance the dish. If you use wooden skewers, soaking them prevents burning while grilling.
Garnishing Ingredients
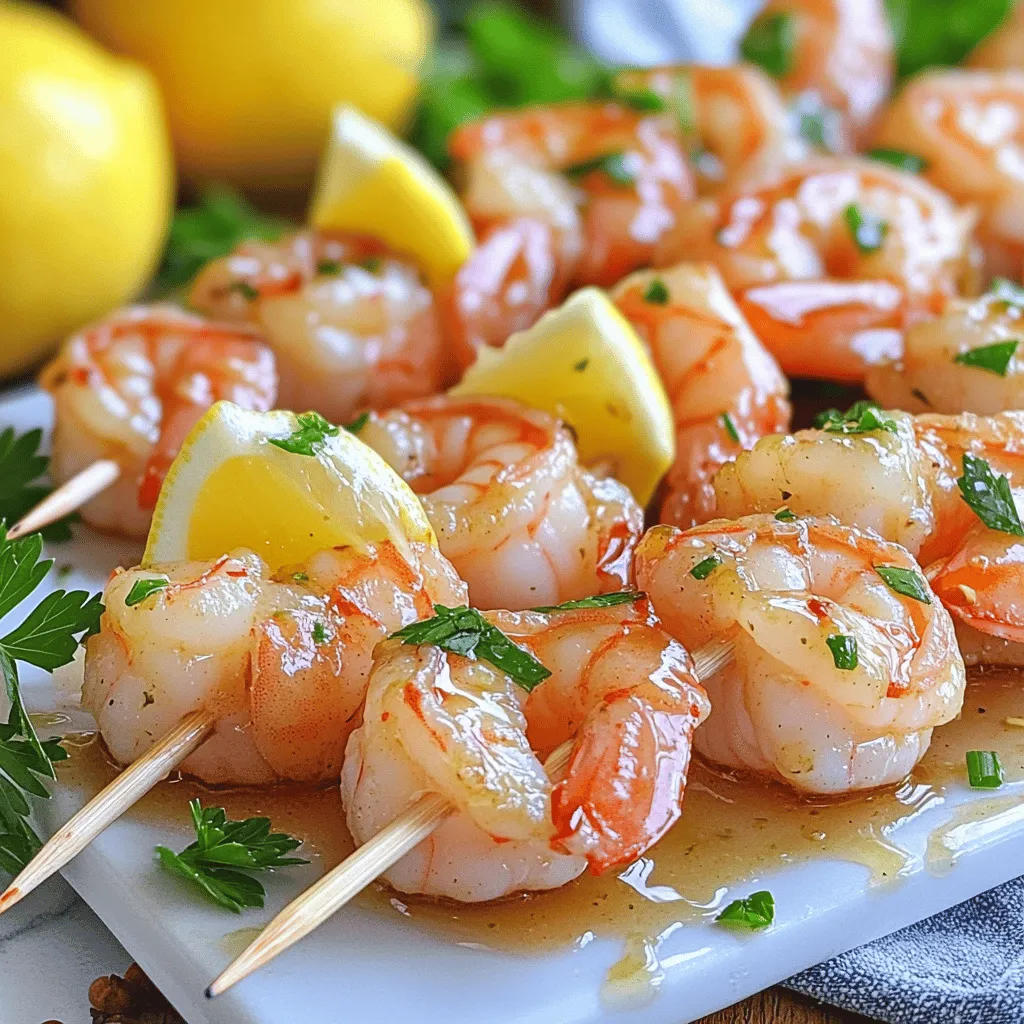
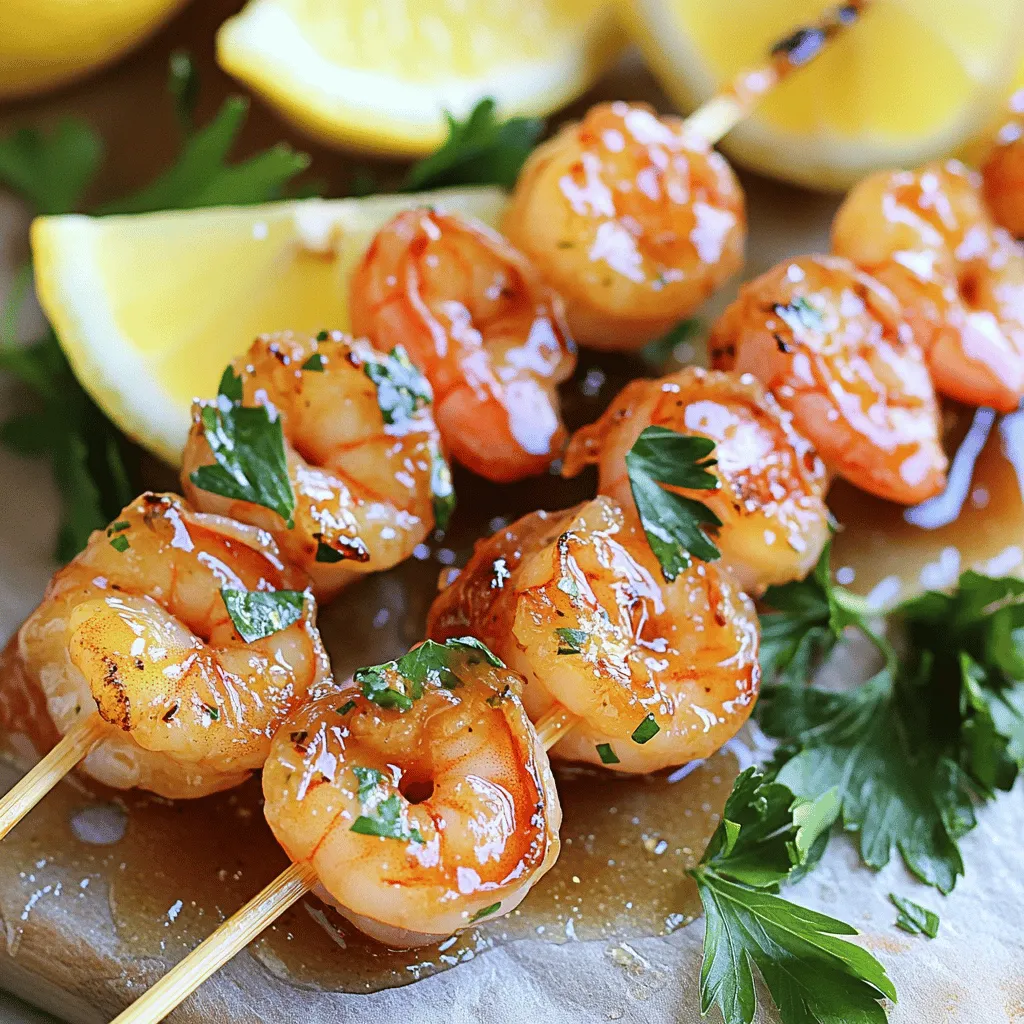
– Lemon wedges
– Fresh parsley
Lemon wedges brighten the dish and make it look appealing. Fresh parsley adds a pop of color and freshness. These garnishes make your skewers not just tasty but also beautiful.
Step-by-Step Instructions
Marinating the Shrimp
First, gather your marinade ingredients. In a bowl, mix together the honey, minced garlic, soy sauce, lemon juice, olive oil, crushed red pepper flakes, salt, and pepper. Whisk this mixture well until it’s blended. Next, add your peeled and deveined shrimp to the bowl. Make sure each shrimp gets coated with the marinade. Cover the bowl with plastic wrap and place it in the fridge. Let it marinate for at least 30 minutes. This helps the shrimp soak up all that yummy flavor.
Preparing to Grill
While the shrimp marinates, it’s time to get your grill ready. Preheat the grill to medium-high heat. If you use wooden skewers, soak them in water for about 30 minutes. This step is key. It stops the skewers from burning while grilling.
Grilling the Shrimp
Now for the fun part! Start by threading the marinated shrimp onto the skewers. Leave a little space between each shrimp to help them cook evenly. Place the skewers on the grill. Cook the shrimp for about 2-3 minutes on each side. You’ll know they’re done when they turn pink and opaque. During cooking, brush any extra marinade over the shrimp. This gives them an extra burst of flavor. Once cooked, remove the skewers from the grill and let them rest for a minute. Enjoy these delicious Honey Garlic Shrimp Skewers!
Tips & Tricks
Perfecting the Grill
To get the best Honey Garlic Shrimp Skewers, set your grill to medium-high heat. This temperature cooks the shrimp nicely without burning them. You want the grill hot enough to sear the shrimp but not so hot that they turn dry.
Leave a little space between each shrimp on the skewers. This helps them cook evenly. If they are too close, they will steam instead of grilling. Proper spacing lets the heat circulate around each piece.
Flavor Enhancements
Want to spice things up? You can add extra herbs like cilantro, basil, or even a pinch of cumin. These will give your skewers a unique twist. If you want a touch of sweetness, try adding a bit of orange juice or zest.
For a different flavor, you can swap the marinade. Try teriyaki sauce for a sweet and savory taste. Or use a spicy chili paste for heat. The options are endless, and each twist can create a new favorite.
Serving Suggestions
Pair your Honey Garlic Shrimp Skewers with fresh sides. A light salad with mixed greens and a citrus dressing works great. You can also serve them with a side of grilled vegetables for added color and flavor.
For presentation, arrange the skewers on a large platter. Add lemon wedges and sprigs of parsley for a pop of color. This not only makes it look appealing but adds freshness to each bite. Don’t forget to have extra dipping sauce on the side for your guests!

Variations
Ingredient Swaps
You can change the main protein in this recipe. If you want to swap shrimp for chicken, use boneless chicken breast cut into bite-sized pieces. For a plant-based option, tofu works great too. Just press the tofu to remove excess water before marinating.
You can also switch the sweetener. If honey is not your thing, try maple syrup or agave. These options will add a unique twist to the flavor.
Cooking Methods
You can cook these shrimp in different ways. Grilling adds a smoky taste, which makes the dish special. However, if you don’t have a grill, you can bake the shrimp in the oven. Set your oven to 400°F (200°C) and cook for about 10-12 minutes.
Another great option is to use a skillet on the stovetop. Heat a bit of oil and cook the shrimp for 2-3 minutes on each side until they turn pink and opaque.
Flavor Profiles
To enhance the taste, you can add tropical elements. Pineapple chunks or shredded coconut can give your skewers a fun twist.
Don’t be afraid to experiment with herbs! Fresh cilantro, basil, or mint can add freshness and depth. Try adding a mix of herbs to see what suits your taste best.
Storage Info
Storing Leftovers
After you enjoy your honey garlic shrimp skewers, store any leftovers in the fridge. Place them in a clean, airtight container. This will keep them fresh and safe to eat. Try to eat them within three days for the best taste. If you want to keep them longer, you can freeze them. Wrap the skewers tightly in plastic wrap or foil, then put them in a freezer bag. Cooked shrimp skewers can last up to three months in the freezer.
Reheating Recommendations
When it’s time to eat your leftovers, reheating them properly is key. The oven works best for this. Preheat your oven to 350°F. Place the skewers on a baking sheet and cover them with foil. Heat for about 10-15 minutes until warm. If you’re in a rush, you can use the microwave. Place the shrimp on a microwave-safe plate and cover it with a damp paper towel. Heat in short bursts of 30 seconds until warmed. To keep the shrimp juicy, avoid overheating them.
Shelf Life
Cooked honey garlic shrimp skewers can last in the fridge for about three days. After that, the shrimp may spoil. Signs of spoilage include a sour smell, a slimy texture, or discoloration. If you notice any of these signs, it’s best to throw them away. Always prioritize your health and safety when it comes to food storage.
FAQs
How long do I need to marinate the shrimp for the best flavor?
For the best flavor, marinate the shrimp for at least 30 minutes. This time allows the shrimp to soak up the sweet and savory notes of the marinade. If you have time, marinating for up to 2 hours enhances the taste even more. Just remember not to exceed this time, as shrimp can become mushy.
Can I use frozen shrimp for this recipe?
Yes, you can use frozen shrimp. To prepare frozen shrimp, first, thaw them in the fridge overnight. If you need them quicker, place the shrimp in a sealed bag and submerge it in cold water for about 15-20 minutes. Once thawed, rinse them under cold water and pat dry before marinating.
What are some good sides to serve with Honey Garlic Shrimp Skewers?
Several sides pair well with Honey Garlic Shrimp Skewers. Try serving them with:
– Steamed rice or quinoa for a filling base.
– Grilled vegetables like zucchini or bell peppers for a colorful plate.
– A fresh salad with mixed greens and a light vinaigrette for crunch.
– Garlic bread to soak up any extra sauce.
Can I make these skewers in the oven?
Yes, you can make Honey Garlic Shrimp Skewers in the oven. Preheat your oven to 400°F (200°C). Place the skewers on a baking sheet lined with foil. Bake for about 8-10 minutes, flipping halfway through. The shrimp should be pink and opaque when done. This method is perfect if you don’t have a grill.
This blog post covers all you need for perfect Honey Garlic Shrimp Skewers. You learned about the key ingredients, including shrimp, honey, and garlic. I shared step-by-step grilling instructions and useful tips for a better cook. Plus, I offered variations for different tastes and storage advice for leftovers.
Now you can make delicious skewers with confidence. Enjoy trying new flavors and impressing your friends and family with this recipe!
![- 1 pound large shrimp, peeled and deveined - 1/4 cup honey - 3 cloves garlic, minced - 2 tablespoons soy sauce - 1 tablespoon fresh lemon juice For the best flavor, fresh ingredients work wonders. When I use large shrimp, they soak up the marinade well. Honey adds sweetness, while garlic brings a rich taste. Soy sauce provides a savory kick, and lemon juice balances the flavors. - 1 tablespoon olive oil - 1 teaspoon crushed red pepper flakes - Salt and pepper to taste - Skewers (soaked in water if wooden) Olive oil helps the shrimp cook well on the grill. The red pepper flakes add a bit of heat, so adjust them based on your spice preference. Always season with salt and pepper to enhance the dish. If you use wooden skewers, soaking them prevents burning while grilling. - Lemon wedges - Fresh parsley Lemon wedges brighten the dish and make it look appealing. Fresh parsley adds a pop of color and freshness. These garnishes make your skewers not just tasty but also beautiful. For the full recipe, check out the details above. First, gather your marinade ingredients. In a bowl, mix together the honey, minced garlic, soy sauce, lemon juice, olive oil, crushed red pepper flakes, salt, and pepper. Whisk this mixture well until it’s blended. Next, add your peeled and deveined shrimp to the bowl. Make sure each shrimp gets coated with the marinade. Cover the bowl with plastic wrap and place it in the fridge. Let it marinate for at least 30 minutes. This helps the shrimp soak up all that yummy flavor. While the shrimp marinates, it's time to get your grill ready. Preheat the grill to medium-high heat. If you use wooden skewers, soak them in water for about 30 minutes. This step is key. It stops the skewers from burning while grilling. Now for the fun part! Start by threading the marinated shrimp onto the skewers. Leave a little space between each shrimp to help them cook evenly. Place the skewers on the grill. Cook the shrimp for about 2-3 minutes on each side. You’ll know they’re done when they turn pink and opaque. During cooking, brush any extra marinade over the shrimp. This gives them an extra burst of flavor. Once cooked, remove the skewers from the grill and let them rest for a minute. Enjoy these delicious Honey Garlic Shrimp Skewers! For the full recipe, check out the details above. To get the best Honey Garlic Shrimp Skewers, set your grill to medium-high heat. This temperature cooks the shrimp nicely without burning them. You want the grill hot enough to sear the shrimp but not so hot that they turn dry. Leave a little space between each shrimp on the skewers. This helps them cook evenly. If they are too close, they will steam instead of grilling. Proper spacing lets the heat circulate around each piece. Want to spice things up? You can add extra herbs like cilantro, basil, or even a pinch of cumin. These will give your skewers a unique twist. If you want a touch of sweetness, try adding a bit of orange juice or zest. For a different flavor, you can swap the marinade. Try teriyaki sauce for a sweet and savory taste. Or use a spicy chili paste for heat. The options are endless, and each twist can create a new favorite. Pair your Honey Garlic Shrimp Skewers with fresh sides. A light salad with mixed greens and a citrus dressing works great. You can also serve them with a side of grilled vegetables for added color and flavor. For presentation, arrange the skewers on a large platter. Add lemon wedges and sprigs of parsley for a pop of color. This not only makes it look appealing but adds freshness to each bite. Don’t forget to have extra dipping sauce on the side for your guests! {{image_2}} You can change the main protein in this recipe. If you want to swap shrimp for chicken, use boneless chicken breast cut into bite-sized pieces. For a plant-based option, tofu works great too. Just press the tofu to remove excess water before marinating. You can also switch the sweetener. If honey is not your thing, try maple syrup or agave. These options will add a unique twist to the flavor. You can cook these shrimp in different ways. Grilling adds a smoky taste, which makes the dish special. However, if you don’t have a grill, you can bake the shrimp in the oven. Set your oven to 400°F (200°C) and cook for about 10-12 minutes. Another great option is to use a skillet on the stovetop. Heat a bit of oil and cook the shrimp for 2-3 minutes on each side until they turn pink and opaque. To enhance the taste, you can add tropical elements. Pineapple chunks or shredded coconut can give your skewers a fun twist. Don’t be afraid to experiment with herbs! Fresh cilantro, basil, or mint can add freshness and depth. Try adding a mix of herbs to see what suits your taste best. For the full recipe, check out the Honey Garlic Shrimp Skewers section. After you enjoy your honey garlic shrimp skewers, store any leftovers in the fridge. Place them in a clean, airtight container. This will keep them fresh and safe to eat. Try to eat them within three days for the best taste. If you want to keep them longer, you can freeze them. Wrap the skewers tightly in plastic wrap or foil, then put them in a freezer bag. Cooked shrimp skewers can last up to three months in the freezer. When it's time to eat your leftovers, reheating them properly is key. The oven works best for this. Preheat your oven to 350°F. Place the skewers on a baking sheet and cover them with foil. Heat for about 10-15 minutes until warm. If you're in a rush, you can use the microwave. Place the shrimp on a microwave-safe plate and cover it with a damp paper towel. Heat in short bursts of 30 seconds until warmed. To keep the shrimp juicy, avoid overheating them. Cooked honey garlic shrimp skewers can last in the fridge for about three days. After that, the shrimp may spoil. Signs of spoilage include a sour smell, a slimy texture, or discoloration. If you notice any of these signs, it's best to throw them away. Always prioritize your health and safety when it comes to food storage. For the best flavor, marinate the shrimp for at least 30 minutes. This time allows the shrimp to soak up the sweet and savory notes of the marinade. If you have time, marinating for up to 2 hours enhances the taste even more. Just remember not to exceed this time, as shrimp can become mushy. Yes, you can use frozen shrimp. To prepare frozen shrimp, first, thaw them in the fridge overnight. If you need them quicker, place the shrimp in a sealed bag and submerge it in cold water for about 15-20 minutes. Once thawed, rinse them under cold water and pat dry before marinating. Several sides pair well with Honey Garlic Shrimp Skewers. Try serving them with: - Steamed rice or quinoa for a filling base. - Grilled vegetables like zucchini or bell peppers for a colorful plate. - A fresh salad with mixed greens and a light vinaigrette for crunch. - Garlic bread to soak up any extra sauce. Yes, you can make Honey Garlic Shrimp Skewers in the oven. Preheat your oven to 400°F (200°C). Place the skewers on a baking sheet lined with foil. Bake for about 8-10 minutes, flipping halfway through. The shrimp should be pink and opaque when done. This method is perfect if you don’t have a grill. For more details, check the [Full Recipe]. This blog post covers all you need for perfect Honey Garlic Shrimp Skewers. You learned about the key ingredients, including shrimp, honey, and garlic. I shared step-by-step grilling instructions and useful tips for a better cook. Plus, I offered variations for different tastes and storage advice for leftovers. Now you can make delicious skewers with confidence. Enjoy trying new flavors and impressing your friends and family with this recipe!](https://dailydishly.com/wp-content/uploads/2025/07/c236e5ff-bf7a-4bb5-97d9-fa918dc47393-300x300.webp)

![- 1 bag (12 oz) tortilla chips - 1 cup black beans, rinsed and drained - 1 cup corn kernels (fresh or frozen) - 1 medium bell pepper, diced (any color) - 1 medium red onion, finely chopped - 1 jalapeño, sliced (seeds removed for less heat) - 1 ripe avocado, diced - 1 cup cherry tomatoes, halved - 1 cup shredded cheese (cheddar or a vegan alternative) - 1 tablespoon olive oil - 1 teaspoon chili powder - 1 teaspoon cumin - Salt and pepper to taste - Fresh cilantro, for garnish - Lime wedges, for serving Gathering fresh ingredients makes a big difference. Tortilla chips form the crunchy base. Black beans add protein and fiber. Sweet corn brings a pop of color and crunch. Diced bell pepper and red onion add flavor and texture. Slice jalapeños for some heat. Diced avocado gives a creamy touch. Halved cherry tomatoes offer freshness. Shredded cheese melts beautifully over the nachos. Olive oil helps sauté the veggies. Chili powder and cumin bring warmth. Lastly, season with salt and pepper for balance. Fresh cilantro and lime wedges are essential for that final zing. For the full recipe, check out the details above. - Preheat the oven: Set your oven to 400°F (200°C). This helps the nachos bake evenly. - Prepare the veggies: In a large skillet, heat one tablespoon of olive oil over medium heat. Add the finely chopped red onion and diced bell pepper. Sauté them for about 3-4 minutes. They should start to soften. Next, add the corn, rinsed black beans, sliced jalapeño, chili powder, cumin, salt, and pepper. Cook this mix for another 2-3 minutes, stirring now and then. This warms everything through and blends the flavors well. - Assemble the nachos: Grab a large baking sheet. Spread the tortilla chips in a single layer. Evenly spoon the sautéed veggie mix over the chips. Finish by sprinkling shredded cheese on top. - Place nachos in the oven: Carefully slide the baking sheet into your preheated oven. - Determine baking time: Let the nachos bake for 10-12 minutes. Keep an eye on them until the cheese melts and bubbles. - Add fresh toppings: Once baked, take the nachos out of the oven. Top them with diced avocado, halved cherry tomatoes, and fresh cilantro. - Serve with lime wedges: Place lime wedges on the side. A squeeze of lime adds a bright flavor to your nachos. Enjoy this loaded veggie nachos recipe! For the full recipe, refer to the above details. To enhance the flavors of your Loaded Veggie Nachos, focus on fresh ingredients. Fresh veggies add brightness. Use ripe avocados and sweet cherry tomatoes for the best taste. Sautéing veggies is key to good nachos. Start with olive oil in a hot pan. Add onions first, and wait until they soften. Then, add bell peppers and corn. This method brings out their natural sweetness. Remember, don’t overcrowd the pan. Give each piece room to cook. Garnishing your nachos makes them look great. Use fresh cilantro for a pop of green. Squeeze lime juice over the top for a fresh taste. You can also add a dollop of sour cream or a drizzle of salsa for color and flavor. When serving, stack the nachos high on a large platter. This makes them fun and inviting. You can also place lime wedges around the nachos for easy access. If you want vegan cheese, look for brands that melt well. Nutritional yeast is a good option for a cheesy flavor without dairy. For toppings, consider your diet. You can swap black beans for chickpeas. Add spinach or kale for more greens. If you want heat, try pickled jalapeños instead of fresh. Explore the [Full Recipe] to get cooking! {{image_2}} You can change up the veggies in loaded veggie nachos to fit the season. In summer, try fresh zucchini or squash. In fall, use roasted sweet potatoes for a sweet taste. Leafy greens, like spinach or kale, add flavor and nutrition. Just toss them in with other veggies before baking. They will wilt nicely and blend in well. Spices and herbs can really change nachos. Try adding smoked paprika or garlic powder for depth. Fresh herbs like cilantro or chives add brightness. For cheese, mix different types. A pepper jack offers heat, while a sharp cheddar gives bite. Vegan cheese can also melt beautifully, making it a great choice. You don't always need tortilla chips. Try baked veggie chips or even pita chips for a twist. Want to go even healthier? Use baked sweet potato slices or cauliflower chips. You can layer nachos on rice or quinoa for a filling meal. Get creative with the base to suit your tastes. For the complete recipe, check out the Full Recipe. To keep your leftover nachos fresh, use airtight containers. Glass or plastic containers work well. You can also wrap them tightly in aluminum foil. Store them in the fridge for up to three days. After that, the chips may get too soggy. To reheat nachos and keep them crunchy, use the oven. Preheat the oven to 350°F (175°C). Spread the nachos on a baking sheet. Heat them for about 10 minutes. This method helps maintain that crispy texture. For toppings, add fresh ingredients like diced avocado or tomatoes after reheating. This keeps them vibrant and tasty. You can freeze nachos before cooking. Just layer the chips and toppings in a freezer-safe bag. Remove all the air to prevent freezer burn. For baked nachos, cool them first. Then, wrap them tightly in plastic wrap and foil. You can store baked nachos for up to two months. To enjoy, just reheat them in the oven. For the full recipe, check out the guide above. Yes, you can prep Loaded Veggie Nachos ahead. Here are some tips for meal prep: - Prep the Veggies: Chop the bell pepper, onion, and other veggies. Store them in airtight containers. - Cook the Mixture: You can sauté the veggie mix in advance. Just reheat it before assembling. - Keep Chips Separate: Store tortilla chips in a sealed bag to keep them crispy. - Layer Right Before Serving: Assemble nachos just before baking for the best crunch. Nachos taste great with various dips. Here are some suggestions: - Guacamole: Creamy and fresh, it pairs well with the flavors. - Sour Cream: A classic choice that adds tanginess. - Salsa: Fresh or cooked, it adds a zesty kick. - Cheese Sauce: For extra creaminess, drizzle warm cheese sauce on top. Yes, you can make Loaded Veggie Nachos gluten-free. Here are some options: - Gluten-Free Chips: Look for tortilla chips labeled gluten-free. Many brands offer this. - Fresh Veggies: Use fresh vegetables, which are naturally gluten-free. - Check Ingredients: Always read labels on sauces and dips to ensure they are gluten-free. For the full recipe with all the steps, check out Loaded Veggie Nachos. Loaded veggie nachos are a fun and tasty dish. You saw the main ingredients, preparation steps, and baking process. With tips on presentation and storage, nachos can be an easy treat. I shared ideas for variations like different veggies or dips. You can even adapt them for any diet. Try making them ahead or freezing leftovers. These nachos can brighten your meal day anytime. Now it’s your turn to enjoy this fun dish!](https://dailydishly.com/wp-content/uploads/2025/07/20e01eb2-8eec-42a8-b556-644040b9c2c2-768x768.webp)


![For this dish, you need 1 pound of fresh asparagus. Look for bright green color and firm stems. Trim the tough ends before cooking. This helps ensure that each bite is tender and tasty. Garlic and lemon are the stars here. You’ll need 4 cloves of garlic, minced finely. This adds a nice punch of flavor. You also need the zest and juice of 1 lemon. The zest gives a bright taste, while the juice adds a fresh tang. You can enhance the dish with extra ingredients. I suggest adding 1 teaspoon of red pepper flakes for a little heat. Fresh parsley, chopped, makes a nice garnish. It adds color and a fresh taste. A pinch of salt and pepper rounds out the flavors, making the dish pop. For the full recipe, check the details above. Start by gathering all your ingredients. You will need: - 1 pound fresh asparagus, trimmed - 4 cloves garlic, minced - 2 tablespoons olive oil - Zest of 1 lemon - Juice of 1 lemon - 1 teaspoon red pepper flakes (optional) - Salt and pepper to taste - Fresh parsley, chopped (for garnish) Wash the asparagus well and trim the ends. This helps remove any tough parts. Next, mince the garlic finely. Zest the lemon carefully to avoid the bitter white pith. Finally, squeeze the juice from the lemon, making sure to catch any seeds. Preheat your oven to 400°F (200°C). This ensures even cooking. In a large bowl, combine the asparagus, minced garlic, olive oil, lemon zest, and red pepper flakes, if you want some heat. Add the lemon juice and season with salt and pepper. Toss everything together well. You want the asparagus to be nicely coated. Now, spread the asparagus on a baking sheet in a single layer. This helps them cook evenly. Roast them in the oven for 15-20 minutes. Toss halfway through to promote even browning. You’ll know they’re done when they are tender and slightly crispy. Once cooked, remove the asparagus from the oven. Transfer it to a serving platter. For a pop of color and freshness, garnish with chopped parsley. This dish pairs well with many meals, making it a versatile side. If you want, you can check out the Full Recipe for more tips and variations! To get your asparagus just right, start with fresh spears. Look for bright green color and firm texture. Trim the tough ends, about one inch from the bottom. This helps avoid bitterness. Spread the asparagus in a single layer on the baking sheet. This ensures even roasting. Toss halfway through cooking for a nice crisp. Roast until tender, about 15-20 minutes. You can add more flavor to your dish. Try a sprinkle of Parmesan cheese before roasting for a savory kick. Fresh herbs like thyme or dill work well too. Add a splash of balsamic vinegar for a tangy twist. Red pepper flakes add heat, but use them sparingly. Lemon zest gives a bright taste that contrasts nicely with garlic. Need to feed more guests? Simply double the ingredients. You can also cut the recipe in half for smaller meals. Adjust the cooking time if you change the amount. Use a larger baking sheet for more asparagus. This keeps them from steaming and ensures a crispy finish. Always check for doneness by tasting a piece. {{image_2}} You can cook garlic lemon asparagus in many ways. Grilling gives it a smoky flavor. Just toss the asparagus with the garlic lemon mix and grill for 5-7 minutes. Sautéing is quick and easy too. Heat a pan, add olive oil, and toss the asparagus for about 5 minutes. Both methods keep the asparagus crisp and full of taste. Want to change up the flavor? Adding cheese is a great option. Feta or Parmesan adds creaminess. Fresh herbs like thyme or basil also work well. Just mix them in before you roast. If you like heat, try adding more red pepper flakes. Each twist brings a new taste to this dish. Seasonal ingredients can brighten this recipe. In spring, add some fresh peas or radishes. In summer, toss in cherry tomatoes for sweetness. Fall calls for butternut squash cubes. Winter may inspire you to add roasted nuts for crunch. Using what's fresh makes this dish more fun and tasty. After you enjoy your garlic lemon asparagus, store leftovers in an airtight container. This helps keep the flavors fresh. Place the container in the fridge. Leftovers last about three to four days. If you notice any off smells or changes in color, it's best to toss them. To reheat your asparagus, use the oven or a skillet. Preheat the oven to 350°F (175°C). Spread the asparagus on a baking sheet and warm for about 10 minutes. This keeps them crispy. If using a skillet, add a splash of olive oil and heat on medium for five minutes. Stir gently to avoid burning. Yes, you can freeze garlic lemon asparagus, but it may change texture. Blanch the asparagus first. Boil for two minutes, then place in ice water. Drain and dry before placing in freezer bags. They can last up to three months in the freezer. When ready to eat, cook straight from frozen. Enjoy the fresh taste by using the [Full Recipe]. Garlic lemon asparagus lasts about 3 to 5 days in the fridge. To store it, put it in an airtight container. This keeps it fresh and tasty. I recommend eating it within this time for the best flavor and texture. If you notice any changes, like a mushy texture, it’s best to throw it out. You can use frozen asparagus, but it will change the dish’s texture. Frozen asparagus tends to be softer when cooked. To use it, thaw the asparagus first. After that, pat it dry to remove excess moisture. This helps achieve a better roast. You might also need to adjust the cooking time. Garlic lemon asparagus pairs well with many dishes. Here are some great options: - Grilled chicken or fish - Pasta with olive oil and herbs - Quinoa or rice dishes - Steak or pork chops - A fresh green salad These ideas help you create a balanced meal. The bright lemon flavor complements rich proteins nicely. For even more inspiration, check out the Full Recipe for Garlic Lemon Asparagus. This article covered how to make delicious Garlic Lemon Asparagus. We talked about key ingredients like fresh asparagus and garlic. I shared clear steps to prepare, cook, and serve it. You learned tips for roasting it perfectly and some fun variations. Also, I gave storage tips to keep it fresh. When you try this dish, enjoy its bright flavors. Feel free to get creative with your own twists. Happy cooking!](https://dailydishly.com/wp-content/uploads/2025/06/b7aeafc4-6d88-42f1-94a5-d1a2b58bd123-768x768.webp)