Kale Caesar Salad with Crispy Chickpeas Delight

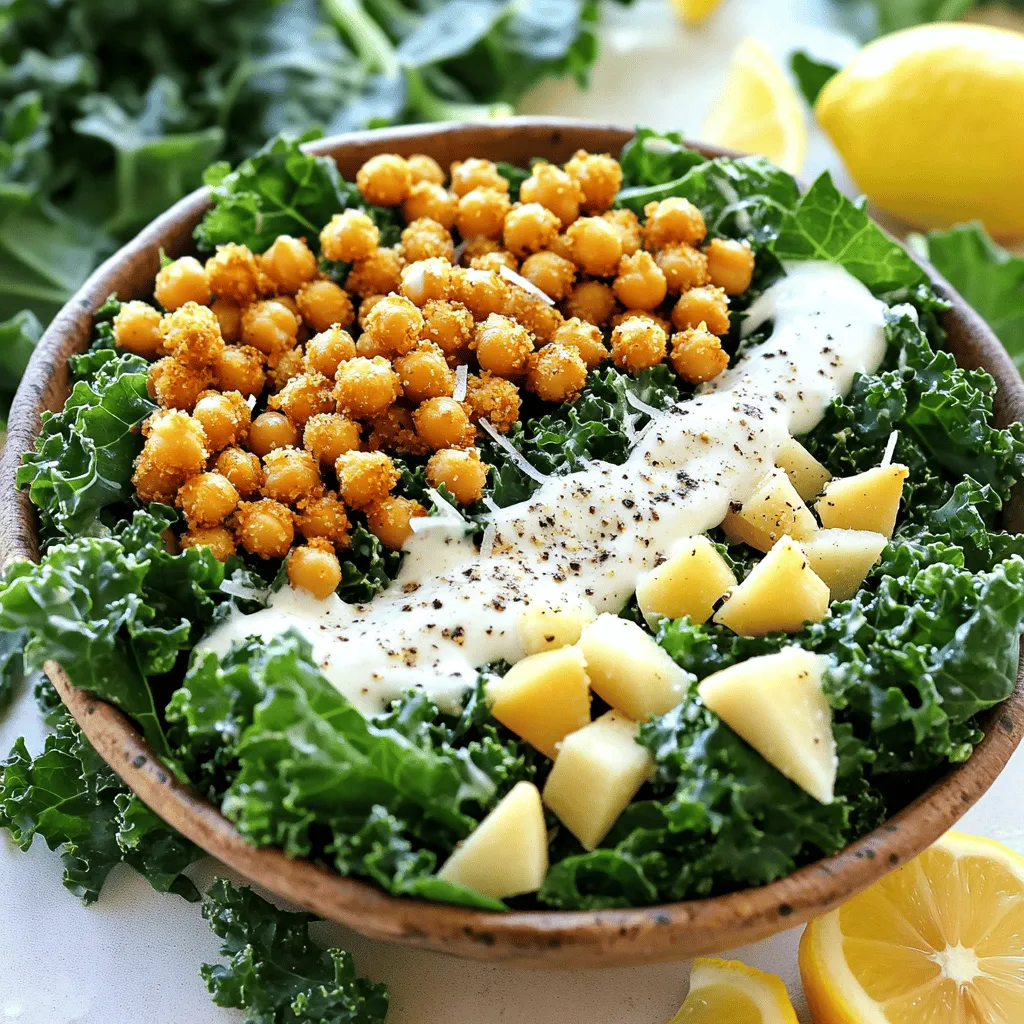
Ready to enjoy a fresh twist on a classic? This Kale Caesar Salad with Crispy Chickpeas combines crunchy greens and savory flavors in a fun and healthy way. I’ll guide you through easy steps to make this vibrant dish, packed with goodness. Whether you stick to the classic recipe or experiment with toppings, this salad will delight your taste buds. Let’s dive in and get cooking!
Ingredients
List of Ingredients
– 1 bunch of kale, stems removed and leaves chopped
– 1 can (15 oz) chickpeas, drained and rinsed
– 2 tablespoons olive oil (divided)
– Salt and pepper to taste
– 1/4 cup grated Parmesan cheese (or nutritional yeast for a vegan option)
– 1/2 cup Greek yogurt (or a vegan alternative)
– 2 tablespoons lemon juice
– 1 tablespoon Dijon mustard
– 1 clove garlic, minced
– 1/4 cup whole wheat croutons (optional)
– Freshly cracked black pepper for garnish
This list gives you everything you need for a tasty Kale Caesar Salad with Crispy Chickpeas. Fresh kale is the star here, with its sturdy leaves that hold up well. Chickpeas add protein and crunch, making the salad filling.
Olive oil is key to making the chickpeas crispy and adding flavor to the kale. Salt and pepper enhance all the tastes. For a cheesy kick, you can use grated Parmesan cheese or nutritional yeast if you prefer a vegan dish.
The dressing includes Greek yogurt for creaminess, which you can swap for a vegan yogurt if needed. Lemon juice brings brightness, while Dijon mustard and garlic add a punch.
If you want to elevate the salad, consider adding whole wheat croutons for extra texture. Finally, sprinkle freshly cracked black pepper on top to finish it off.
Step-by-Step Instructions
Preparation Overview
First, preheat your oven to 400°F (200°C). This is key for roasting the chickpeas. Next, we need to prepare the kale. Grab a large bowl and add the chopped kale leaves. Drizzle one tablespoon of olive oil over the kale. Now, massage the leaves for about 2-3 minutes. This step makes the kale tender and easier to eat.
Detailed Cooking Steps
For the chickpeas, rinse and drain them well. Place them on a baking sheet. Toss the chickpeas with one tablespoon of olive oil, salt, and pepper. Spread them out evenly on the sheet. Roast them in the oven for 25-30 minutes. They should turn golden brown and crispy. Don’t forget to shake the pan halfway through cooking to ensure even crispiness.
While the chickpeas roast, let’s make the dressing. In a small bowl, mix Greek yogurt, lemon juice, Dijon mustard, minced garlic, and half the grated Parmesan cheese. Whisk until smooth. Taste and adjust with salt and pepper as needed.
Combining Ingredients
Once the chickpeas are crispy, take them out of the oven. Now, toss the massaged kale with the dressing until it’s well coated. Add the crispy chickpeas on top, along with croutons if you want some extra crunch. Mix gently to combine everything. Serve your Kale Caesar Salad with crispy chickpeas topped with the remaining Parmesan cheese and a sprinkle of freshly cracked black pepper. Enjoy this delicious meal!
Tips & Tricks
How to Perfect Crispy Chickpeas
To make crispy chickpeas, start by ensuring they are dry. After draining and rinsing, pat them with a towel. This removes moisture. Next, toss the chickpeas in olive oil, salt, and pepper. Spread them evenly on a baking sheet. Roast them in a preheated oven at 400°F for 25-30 minutes. Shake the pan halfway through to ensure even cooking. You want them golden brown and crunchy.
For seasoning, try adding garlic powder or smoked paprika. These spices add great flavor. Balance is key. You want enough seasoning to taste but not overwhelm the chickpeas.
Enhancing the Salad Flavor
To add more flavor, consider toppings like cherry tomatoes or avocado slices. These fresh ingredients add color and taste. You can also use nuts like almonds or walnuts for crunch.
For a creamy dressing, Greek yogurt is perfect. It adds a rich texture. Mix it with lemon juice, Dijon mustard, and minced garlic. This blend creates a zesty flavor. You can replace Greek yogurt with a vegan alternative if needed.
Presentation Suggestions
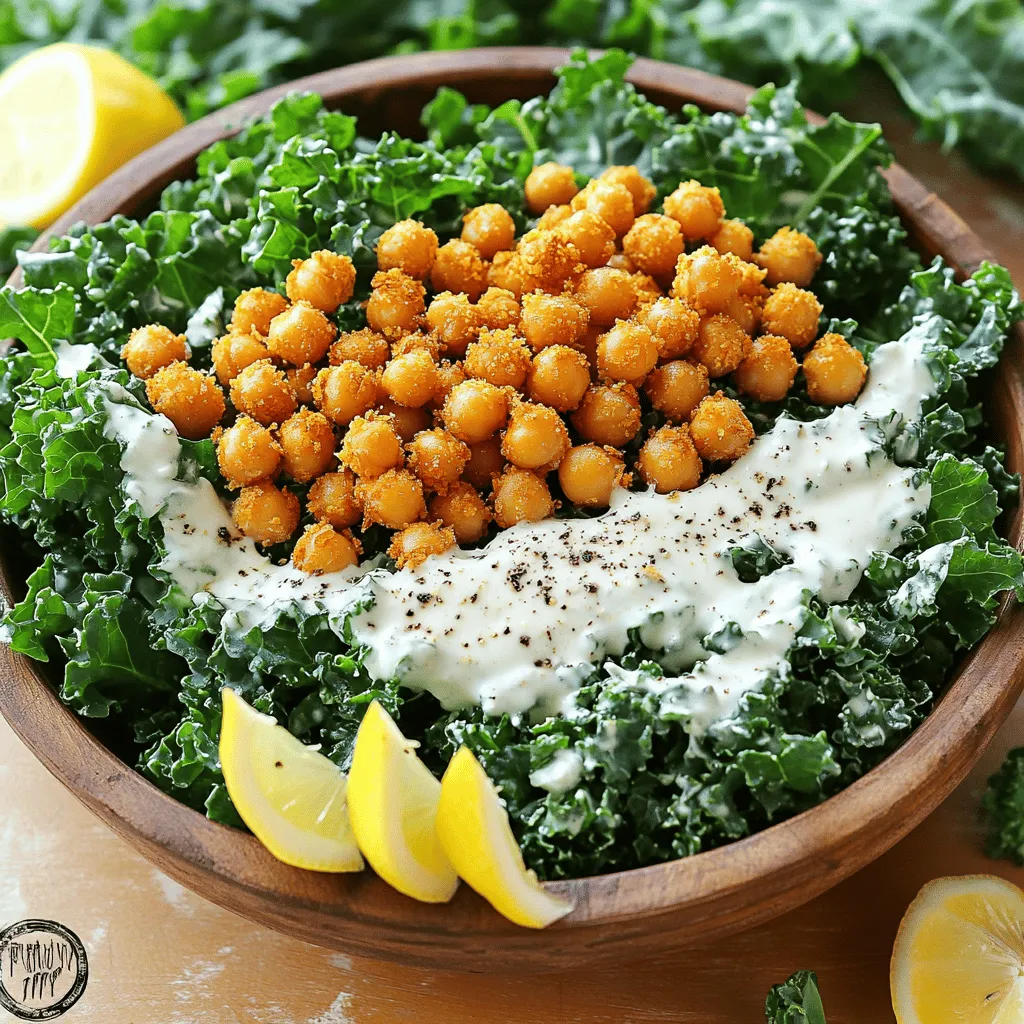
When serving, use large bowls or a platter. This creates a family-style meal. Layer the kale and chickpeas for a colorful look. Top with extra crispy chickpeas and lemon wedges. These garnishes add brightness.
For visual appeal, sprinkle freshly cracked black pepper on top. This simple touch enhances the salad’s look and taste. You can also add fresh herbs like parsley for a pop of color. This makes your Kale Caesar Salad with Crispy Chickpeas even more inviting!

Variations
Different Greens
You can switch out kale for other greens. Try romaine, spinach, or even arugula. Each green brings its own taste and crunch. Mixing greens can make your salad fun and unique. You can also add other salad ingredients. Think about cherry tomatoes, cucumbers, or bell peppers. These add color and flavor to your dish.
Protein Additions
Want to make your salad heartier? Add some protein! Grilled chicken works well and adds great flavor. If you’re vegan, try adding tofu. Just sauté it until golden. This way, you create a well-balanced meal. Protein helps you feel full longer. You can also mix in beans or lentils for a plant-based option.
Dressing Alternatives
Switch up your dressing for different flavors. You can use tahini or avocado for a creamy touch. A vinaigrette made from olive oil and balsamic vinegar is also tasty. For a vegan option, mix hummus with water to thin it out. This gives a nice texture and taste. Feel free to experiment with your favorite herbs and spices too!
Storage Info
Proper Storage Techniques
To keep your Kale Caesar Salad fresh, store leftovers in the fridge. Use an airtight container to seal in moisture. You can also separate the crispy chickpeas from the salad. This keeps them crunchy. Storing them together can make the chickpeas soggy. If you have leftover dressing, keep it in a small jar or container.
Shelf Life
The salad components last about three days in the fridge. The kale will stay fresh for longer if you wash it properly. Chickpeas can last up to five days when stored well. Watch for signs of spoilage. If the kale wilts or turns brown, it’s time to toss it. Also, check for a sour smell or strange textures in the dressing.
Reheating Tips
Crispy chickpeas taste best when reheated in the oven. Preheat the oven to 350°F (175°C). Spread the chickpeas on a baking sheet and heat for about 10 minutes. This helps them regain their crunch. Avoid using the microwave, as it makes them chewy. Enjoy your salad fresh, with crispy chickpeas on top for the best flavor and texture.
FAQs
Can I make this salad ahead of time?
Yes, you can prep parts of this salad in advance. Here are some tips:
– Wash and chop the kale a day before. Store it in a sealed bag.
– Roast the chickpeas earlier and keep them in an airtight container.
– Mix your dressing and store it in the fridge. This keeps it fresh.
– Combine the kale, chickpeas, and dressing just before serving. This way, the salad stays crisp.
What can I substitute for Parmesan cheese?
If you want a dairy-free option, try these vegan cheese alternatives:
– Nutritional yeast gives a cheesy flavor. Use it in the same amount as Parmesan.
– Vegan Parmesan is also available in stores. It adds a similar taste.
– Blended cashews can create a creamy texture. Soak them in water and blend until smooth.
These options keep your salad tasty while fitting your dietary needs.
How do I make this recipe gluten-free?
To make this salad gluten-free, follow these options:
– Use gluten-free croutons or skip them altogether. You can add nuts for crunch.
– Ensure that your Dijon mustard is gluten-free. Most brands are, but check the label.
– The rest of the ingredients are naturally gluten-free. This makes the salad easy to adapt.
By making these small changes, you can enjoy a safe, gluten-free meal.
This blog post covered how to make a tasty kale salad with crispy chickpeas. We explored ingredients, step-by-step cooking, tips for great flavor, and storage ideas. You can easily swap out ingredients or add proteins to fit your taste. Remember, making this salad ahead saves time and keeps your meals fresh. Enjoy experimenting with flavors and variations. Happy cooking!


![To make a tasty Zesty Greek Pasta Salad, you need fresh, vibrant ingredients. Here’s what to gather: - 8 oz. farfalle pasta (or your choice of pasta) - 1 cup cherry tomatoes, halved - 1 cucumber, diced - 1/2 red onion, thinly sliced - 1 cup Kalamata olives, pitted and halved - 1 cup feta cheese, crumbled - 1/4 cup fresh parsley, chopped - 1/4 cup olive oil - 2 tablespoons red wine vinegar (or lemon juice) - 1 teaspoon dried oregano - 1 clove garlic, minced - Salt and pepper to taste These ingredients create a bright flavor that makes the salad shine. You can add your own twist to this salad. Here are some options: - Bell peppers for extra crunch - Artichoke hearts for a tangy bite - Spinach or arugula for more greens - Chickpeas for added protein - Avocado for creaminess Feel free to mix in these ingredients based on what you like. If you can’t find some ingredients, don’t worry! Here are some tips: - Use any pasta shape you prefer. Penne or rotini work well too. - Swap Kalamata olives for green olives if desired. - Feta can be replaced with goat cheese for a different flavor. - Use fresh herbs like dill or mint instead of parsley for a unique taste. These swaps help you create a salad that suits your taste. For the complete recipe, check the [Full Recipe]. To make a great Zesty Greek Pasta Salad, start with the pasta. Use 8 oz. of farfalle or your favorite kind. Bring a big pot of salted water to a boil. Add the pasta and cook it until it's al dente. This usually takes about 8 to 10 minutes. Drain the pasta and rinse it with cold water. This stops the cooking and cools the pasta. You want it nice and firm. Next, let’s make the zesty dressing. In a small bowl, add 1/4 cup olive oil. Then, mix in 2 tablespoons of red wine vinegar. You can use lemon juice if you prefer. Now, add 1 clove of minced garlic and 1 teaspoon of dried oregano. Sprinkle in salt and pepper to taste. Whisk everything until it blends well. This dressing brings a bright flavor to the salad. Now, it's time to combine everything! In a large bowl, add the cooled pasta. Then, toss in 1 cup of halved cherry tomatoes, 1 diced cucumber, and 1/2 sliced red onion. Next, add 1 cup of Kalamata olives and 1 cup of crumbled feta cheese. Pour the zesty dressing over the top. Gently toss to coat everything evenly. Finally, sprinkle 1/4 cup of chopped parsley. Give it one last toss. For the best taste, chill the salad for at least 30 minutes. This lets all the flavors mix nicely. Check the seasoning once more, then serve. Enjoy your fresh and tasty Zesty Greek Pasta Salad! For more details, see the Full Recipe. To make your Zesty Greek Pasta Salad shine, use fresh ingredients. Fresh herbs, like parsley, add bright flavor. A squeeze of lemon juice can also boost taste. For a kick, try adding red pepper flakes. They bring heat without overpowering the dish. When mixing, taste as you go. Adjust salt and pepper as needed for balance. The texture of your pasta salad is key. Cook the farfalle pasta just until tender, or al dente. Rinse it under cold water after cooking. This stops the cooking process and keeps it firm. When you mix in the veggies, chop them evenly. This ensures every bite has a bit of everything. Letting the salad chill helps the flavors blend while keeping the crunch. Presentation matters! Serve your Zesty Greek Pasta Salad in a big bowl. This invites guests to help themselves. For a pop of color, add whole olives on top. A sprinkle of fresh parsley brightens it further. Drizzle a bit more olive oil before serving for shine. Pair it with crusty bread or grilled chicken for a full meal. Enjoy the vibrant colors and flavors! {{image_2}} You can easily add a Mediterranean twist to your Zesty Greek Pasta Salad. Try adding artichoke hearts or sun-dried tomatoes for a new flavor. Roasted red peppers bring a sweet touch. You could also toss in some capers for a salty bite. Each addition makes the dish more vibrant and exciting. Boost the nutrition in your salad with healthy add-ins. Consider adding chickpeas for protein and fiber. Spinach or arugula adds a fresh green crunch. You can also mix in some toasted nuts for healthy fats. Each of these options makes your salad not just tasty, but also good for you. While the olive oil dressing is classic, you can try other options too. A lemon-tahini dressing offers a creamy texture and a tangy flavor. Greek yogurt dressing gives a rich taste and adds protein. A balsamic vinaigrette can bring a sweet twist. Each dressing changes the salad's flavor while keeping it fresh and light. For the full recipe, check out the detailed steps to create this delightful dish. After making your Zesty Greek Pasta Salad, store it in an airtight container. This keeps the flavors fresh and prevents spills. Place parchment paper between layers if you stack ingredients. This way, the salad stays crisp and delicious. Your salad stays tasty in the fridge for about 3 to 5 days. The flavors blend well over time, which is a bonus. Just make sure to check for freshness before eating. If any ingredients look off, it’s best to toss them. I don’t recommend freezing this salad. Freezing can change the texture of fresh vegetables and cheese. However, if you must freeze it, leave out the tomatoes and cucumbers. Store it in a freezer-safe container. It can last up to 2 months. When ready to eat, thaw it in the fridge overnight and mix in fresh veggies before serving. For the complete recipe, check out the Full Recipe section. Yes, you can use any pasta you like. I often choose rotini or penne for this salad. These shapes hold the dressing well. You can even try whole wheat or gluten-free pasta for a healthier option. Absolutely! This salad is great for meal prep. It stays fresh in the fridge for about three days. Just store it in an airtight container. Make sure to add fresh herbs right before serving for the best taste. Adding protein boosts this salad nicely. Grilled chicken, shrimp, or chickpeas work well. You can also try diced turkey or even canned tuna. These options make the salad heartier and more filling. For the full recipe, check out the details above. This blog post covered how to make a tasty Zesty Greek Pasta Salad. We explored key ingredients and options for customization. Simple steps guided the cooking and mixing. Tips helped enhance flavor and texture. We also looked at fun variations and storage tips. In conclusion, you can enjoy this salad in many ways. Whether for a meal or a party, it’s a crowd-pleaser. Get creative with your ingredients, and have fun making it!](https://dailydishly.com/wp-content/uploads/2025/07/db2e56f5-892c-4a59-805f-2ecaeb9e2bc5-768x768.webp)
![For these grilled veggie skewers, you will need: - 1 large zucchini, sliced into thick rounds - 1 red bell pepper, cut into squares - 1 yellow bell pepper, cut into squares - 1 red onion, cut into chunks - 8 cherry tomatoes - 1 cup mushrooms, halved These vegetables bring color and flavor to your skewers. You can mix and match based on your taste. Try using eggplant or asparagus for a twist. The marinade adds zest and depth to the veggies. You will need: - 3 tablespoons olive oil - 2 teaspoons dried oregano - 1 teaspoon garlic powder - Salt and pepper to taste This simple mix enhances the natural flavors of the vegetables. Adjust the salt and pepper to fit your liking. Garnishes can make your skewers pop! Consider using: - Fresh parsley, chopped Adding parsley gives a fresh touch. It also adds a nice green color to the dish. You can also sprinkle feta cheese for a creamy bite. For the full recipe, check the Grilled Mediterranean Veggie Skewers. Start by gathering your veggies. Use a large bowl to combine: - 1 large zucchini, sliced into thick rounds - 1 red bell pepper, cut into squares - 1 yellow bell pepper, cut into squares - 1 red onion, cut into chunks - 8 cherry tomatoes - 1 cup mushrooms, halved Make sure to wash all your vegetables well. This keeps them fresh and clean. Cut them into even pieces. This helps them cook evenly on the grill. Next, we make the marinade. In a small bowl, whisk together: - 3 tablespoons olive oil - 2 teaspoons dried oregano - 1 teaspoon garlic powder - Salt and pepper to taste Mix until well combined. Pour this mixture over your veggies in the large bowl. Toss gently. Make sure every piece is coated. This will add great flavor to your skewers. Now it’s time to grill! First, preheat your grill to medium-high heat. While it heats, thread the marinated vegetables onto the skewers. Alternate between different types for a colorful look. Once the grill is hot, place the skewers on it. Grill for about 10-12 minutes. Turn the skewers occasionally. You want nice grill marks and tender veggies. When they are done, remove them from the grill. Let them cool slightly before serving. You can garnish with fresh parsley for an extra burst of flavor. For the full recipe, check out [Full Recipe]. Enjoy your grilled Mediterranean veggie skewers! To grill veggie skewers well, start with a clean grill. This helps prevent sticking. Preheat your grill to medium-high heat. This temperature cooks veggies evenly and keeps them crisp. Soak wooden skewers in water for at least 30 minutes. This step helps them not burn on the grill. When placing skewers on the grill, leave space between them. This promotes even heat flow. Keep a close eye on them. Turn the skewers every few minutes. This way, every side gets that nice grill mark. To get that perfect char, use high heat for a short time. Grill your skewers for about 10-12 minutes. Turn them often to avoid burning. The goal is tender veggies with those lovely grill lines. You want a bit of caramelization for extra flavor. Don’t forget to watch for the color change, too. When the veggies are brightly colored and tender, they are done. If you want a deeper char, leave them on a bit longer. Just be careful not to overcook them. Serve your grilled Mediterranean veggie skewers warm. They shine on their own, but pair nicely with dips. Try hummus or a yogurt sauce for added flavor. You can also serve them on a bed of fresh greens. This adds a nice crunch and vibrancy. For a fun twist, chop up leftovers and add them to salads. You can also use them in wraps or sandwiches. They keep well, making them a great meal prep option. For the full recipe, check out the details above. Enjoy your grilling! {{image_2}} You can swap in many other veggies for your skewers. Try using eggplant, asparagus, or even cauliflower. Each brings a unique taste and texture. For a sweeter note, add butternut squash or carrots. These flavors will shine when grilled. Don't be afraid to mix and match. The more colorful, the better! For a heartier meal, add protein to your skewers. Chicken or shrimp work well here. Cut them into bite-sized pieces for even cooking. You can marinate them just like the veggies. For a vegan option, try tofu or tempeh. They soak up flavors beautifully. Adding protein makes your skewers more filling and nutritious. While the olive oil and oregano mix is great, you can get creative. Try adding lemon juice or balsamic vinegar for extra zing. A bit of honey can bring a sweet touch. Experiment with spices like smoked paprika or cumin for warmth. Each marinade will change the flavor profile. Feel free to explore and find your favorite! Check out the Full Recipe for more details on creating the perfect skewers. After enjoying your Grilled Mediterranean Veggie Skewers, store leftovers in an airtight container. This keeps the flavors fresh. You can keep them in the fridge for three to four days. Make sure they cool down before sealing. Layer them with paper towels to absorb extra moisture. To reheat your skewers, use a skillet or grill. This helps maintain the charred flavor. Heat them on medium for about five minutes. Turn them gently to warm all sides. You can also use a microwave, but it may make them soft. If you choose the microwave, heat in short bursts to avoid overcooking. Freezing grilled skewers is a great option for meal prep. Let them cool completely first. Then, wrap each skewer in plastic wrap. Place the wrapped skewers in a freezer bag, removing as much air as possible. They can stay fresh for up to three months. To enjoy, thaw in the fridge overnight before reheating. Yes, you can use many types of vegetables. Try eggplant, asparagus, or even corn. Mixing colors and shapes makes your dish fun and tasty. Each vegetable adds its unique flavor. Experiment to find your favorites! Soak wooden skewers for at least 30 minutes. This helps prevent them from burning on the grill. If you forget to soak them, use metal skewers instead. They work great and need no soaking at all. Many sauces taste great with these skewers. Tzatziki sauce adds a cool, creamy bite. A balsamic glaze gives a sweet twist. You can also try a spicy harissa sauce for heat. Each sauce adds its own special touch to the dish. For the full recipe, check it out! Grilled Mediterranean Veggie Skewers are fun and easy to make. We looked at the best veggies, how to prepare them, and tasty marinades. I shared tips for grilling and great serving ideas. You can try different veggies and proteins to mix things up. Remember to store leftovers well so you can enjoy them later. With these guidelines, your grilling efforts will be a hit. Enjoy every bite and happy grilling!](https://dailydishly.com/wp-content/uploads/2025/07/4b70700e-9f85-4317-b9e4-a855a04e592b-768x768.webp)