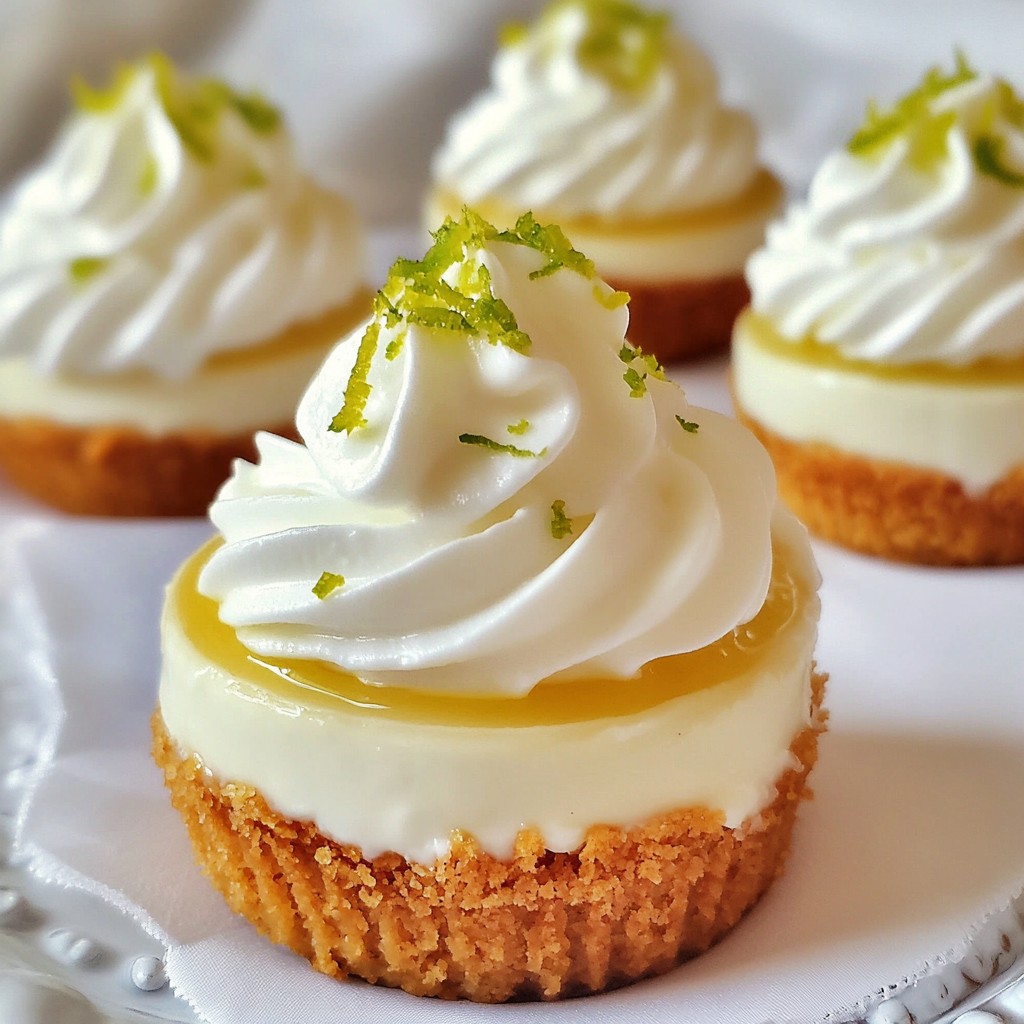
Indulge in a sweet escape with my Key Lime Cheesecake Cups! These delightful treats blend zesty lime flavor with creamy cheesecake, all wrapped in a tasty crust. They're not only easy to make but also perfect for sharing at parties or enjoying solo. In this post, I’ll guide you step-by-step on how to create these scrumptious cups, share tips for the best ingredients, and offer fun variations to suit your taste. Let's dive in!
Why I Love This Recipe
- Refreshing Flavor: The tangy taste of key limes combined with the creamy cheesecake is a delightful way to brighten up your dessert table.
- Easy to Make: With a simple list of ingredients and straightforward steps, these cheesecake cups come together quickly without any baking required.
- Perfect Portion Size: These individual cups are perfect for serving at gatherings, allowing guests to enjoy a personal-sized treat without the fuss.
- Chill Time for Flavor: Letting the cheesecake cups chill enhances the flavors, making each bite even more delicious and satisfying.
Ingredients
List of Ingredients
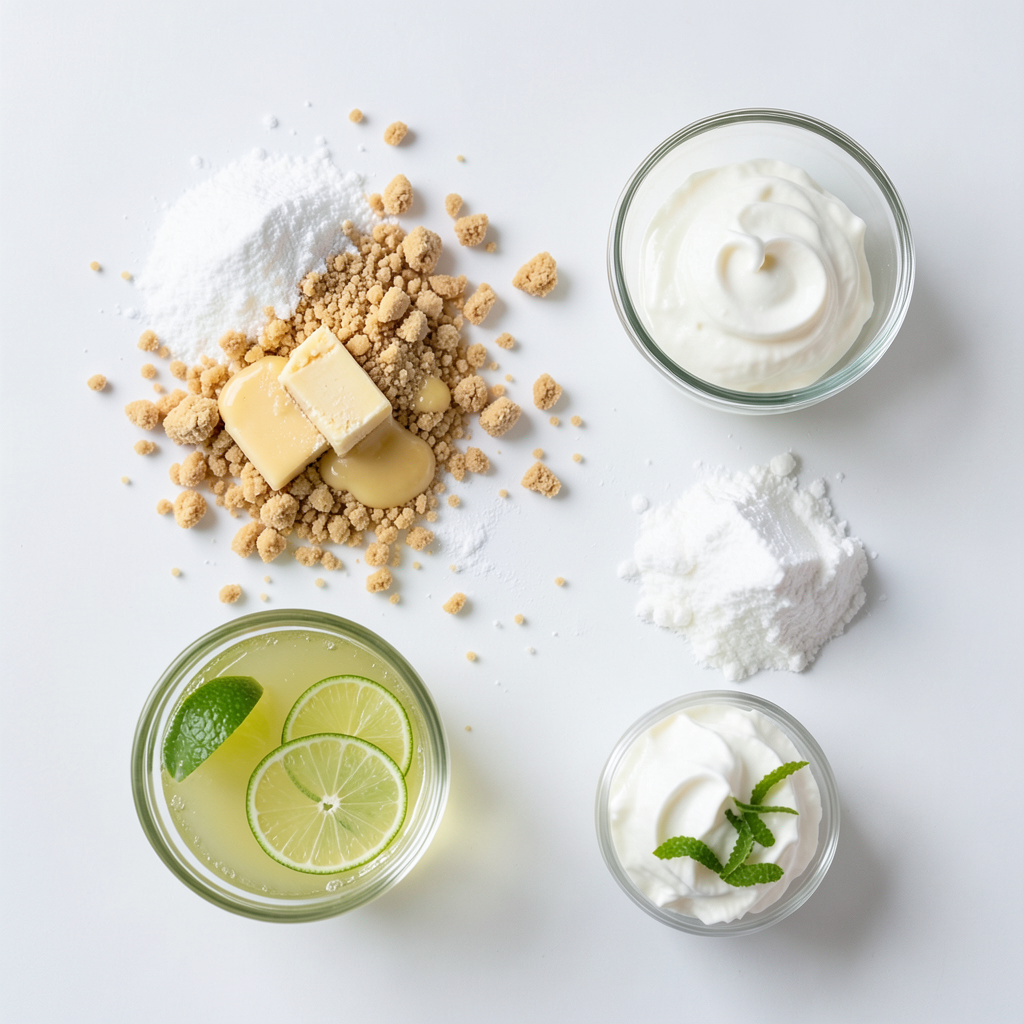
- 1 ½ cups graham cracker crumbs
- ⅓ cup unsalted butter, melted
- 2 tablespoons sugar
- 8 oz cream cheese, softened
- ½ cup powdered sugar
- ½ cup sour cream
- ⅓ cup key lime juice (freshly squeezed for best flavor)
- 1 teaspoon vanilla extract
- Zest of 2 key limes (for garnish)
- Whipped cream (for topping)
Optional Ingredients for Variations
You can switch things up a bit! Here are some ideas:
- Add fruit like berries or mango for extra flavor.
- Use flavored cream cheese for a twist.
- Try coconut cream for a tropical vibe.
Tips on Selecting Quality Ingredients
Choosing the right ingredients is key. Here are my tips:
- Use fresh key limes for the best taste.
- Opt for full-fat cream cheese for creaminess.
- Check your butter; it should be unsalted for better control of flavor.
- Look for high-quality graham crackers; they can make a big difference!
Step-by-Step Instructions
Preparing the Crust
To make the crust, gather a medium bowl. Mix 1 ½ cups of graham cracker crumbs, ⅓ cup melted unsalted butter, and 2 tablespoons of sugar. Stir until it looks like wet sand. This mixture is the base of your cheesecake cups.
Spoon a couple of tablespoons into each serving cup. Press down gently to form a firm crust. Make sure it holds together well. Set these aside while you prepare the filling.
Making the Cheesecake Filling
In a large bowl, beat 8 oz of softened cream cheese and ½ cup of powdered sugar. Mix until it becomes smooth and creamy, which takes about 2 minutes. This step is key for a great texture.
Next, add ½ cup of sour cream, ⅓ cup of freshly squeezed key lime juice, and 1 teaspoon of vanilla extract. Beat again until everything is mixed well. You may need to scrape the bowl's sides to get all the ingredients combined.
Assembling and Chilling the Cups
Now it’s time to assemble! Evenly pour the cheesecake filling into each cup over the crust. Use a spatula to smooth the tops. This makes them look nice.
Place the cups in the fridge for at least 2 hours. This chilling time helps the flavors blend and the filling firm up. Before you serve, top each cup with whipped cream and sprinkle with lime zest. Enjoy your tasty treat!
Tips & Tricks
How to Achieve the Perfect Crust
To get a great crust, use fresh graham cracker crumbs. You can crush them at home for the best flavor. Mix the crumbs with melted butter and sugar until it looks like wet sand. Press the mixture firmly into the cups. This helps the crust hold together well.
Common Mistakes to Avoid
One big mistake is using too much butter. This can make the crust soggy. Also, don’t skip the chilling step. Chilling the cups for at least two hours helps the cheesecake set. If you don’t chill long enough, the filling may be too soft to scoop.
Suggestions for Perfecting Flavor and Texture
For richer flavor, always use fresh key lime juice. Fresh juice gives a bright taste. You can also add more lime zest for extra zing. If you want creamier texture, use full-fat cream cheese. This makes the filling smooth and rich. Don't forget to taste the filling before you assemble to get the right balance of sweetness and tartness.
Pro Tips
- Use Fresh Key Limes: For the best flavor, always use freshly squeezed key lime juice instead of bottled juice. The difference in taste is significant.
- Chill Thoroughly: Allow the cheesecake cups to chill for at least 2 hours. This helps the filling set properly and enhances the flavor.
- Customize the Topping: Feel free to add additional toppings like crushed graham crackers or fresh fruit to enhance the presentation and flavor.
- Make Ahead: These cheesecake cups can be made a day in advance. Just keep them covered in the refrigerator until you're ready to serve.
Variations
Flavor Variations
You can easily change the flavor of your Key Lime Cheesecake Cups. For a fruity twist, add fresh fruits like berries or mango. Just swirl them into the cheesecake mix or layer them on top. You can also try different citrus, like lemon or orange. Each fruit brings a new taste to your cups.
Different Topping Ideas
Toppings can make your dessert fun and unique. Besides whipped cream, consider adding crushed graham crackers for crunch. You can use candied citrus peels for a sweet touch. Chocolate shavings add a rich layer of flavor. Toasted coconut flakes give a tropical vibe, too. Mix and match toppings to find your favorite!
Gluten-Free and Dairy-Free Options
If you need gluten-free options, use gluten-free graham crackers or almond flour for the crust. For a dairy-free version, swap cream cheese with a vegan cream cheese. Use coconut cream instead of sour cream. These tweaks keep the taste while fitting different diets. Enjoy your cheesecake cups no matter your needs!
Storage Info
Best Storage Methods for Leftovers
To keep your Key Lime Cheesecake Cups fresh, store them in the fridge. Use an airtight container or cover each cup with plastic wrap. This will help keep the flavors and textures strong. Avoid stacking the cups to prevent any mess.
How Long Do Key Lime Cheesecake Cups Last?
These cheesecake cups stay fresh for about 3 to 5 days in the fridge. The longer they sit, the softer the crust may get. It's best to enjoy them within this time for the best taste and texture.
Tips for Freezing and Thawing
You can freeze these cheesecake cups if you want to save some for later. To freeze, place them in a freezer-safe container. Make sure to wrap each cup well to prevent freezer burn. When you want to eat them, take them out and let them thaw in the fridge for a few hours. Avoid thawing at room temperature to keep the texture nice.
FAQs
Can I make Key Lime Cheesecake Cups ahead of time?
Yes, you can make Key Lime Cheesecake Cups a day in advance. This treat tastes even better after sitting. The flavors blend well when chilled overnight. Just cover them tightly with plastic wrap before refrigerating. They will stay fresh and tasty. Make sure to add the whipped cream right before serving.
What can I substitute for key lime juice?
You can use regular lime juice if you can't find key limes. The taste will be similar but less tart. Lemon juice is another option, but it will change the flavor slightly. If you want a different taste, try using lemon-lime soda. Just keep the amount the same as key lime juice.
How do I know when the cheesecake is set?
Check the cheesecake cups after chilling for at least two hours. They should feel firm to the touch. The filling will not jiggle when you move the cups. If you want to be sure, insert a toothpick into the center. It should come out clean if they are set. If it's still runny, give them more time in the fridge.
This blog post covered key lime cheesecake cups, from ingredients to storage. You learned how to select quality ingredients, prepare the crust, and make a creamy filling. We shared tips to avoid mistakes and ideas for fun variations. Remember, these cups can fit different diets too!
Storing them well keeps them fresh for longer. Make ahead to enjoy later. Now, it’s time to create your own tasty treats and impress everyone. Enjoy the process, and let your creativity shine!