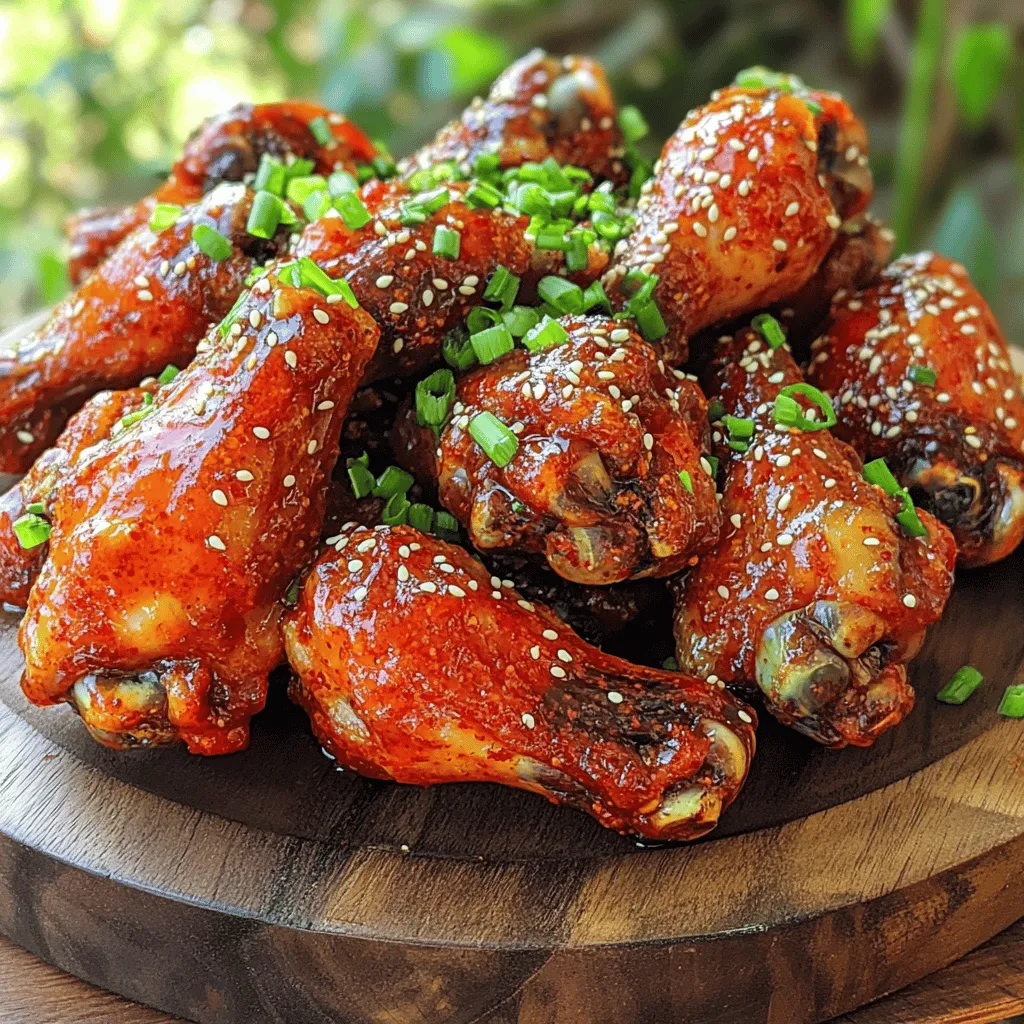
Craving a bold, flavorful dish? Look no further than Korean Gochujang Chicken Wings! These tasty, juicy wings pack a punch with rich, spicy-sweet flavors. I’ll guide you through each step, from gathering ingredients to mastering the perfect bake. Plus, I’ll share fun variations and tips for ultimate crispiness. Get ready to impress everyone at your next gathering with these mouthwatering wings! Let’s dive into the delicious world of Gochujang!
Ingredients
Complete Ingredient List
– 2 lbs chicken wings
– 3 tablespoons gochujang (Korean chili paste)
– 2 tablespoons soy sauce
– 1 tablespoon honey
– 1 tablespoon sesame oil
– 2 cloves garlic, minced
– 1 tablespoon ginger, minced
– 1 tablespoon rice vinegar
– 1 teaspoon ground black pepper
– 1 tablespoon sesame seeds for garnish
– 2 green onions, finely chopped for garnish
Descriptions of Key Ingredients
Gochujang is a thick, spicy paste. It brings heat and a sweet flavor to dishes. Soy sauce adds saltiness and umami. Honey provides sweetness and helps caramelize the wings. Sesame oil adds a nutty taste. Garlic and ginger give the wings a warm, aromatic flavor. Rice vinegar adds a nice tang that balances the sweetness. Black pepper enhances all the flavors. Sesame seeds and green onions are great garnishes that add crunch and color.
Substitutions and Alternatives
You can swap chicken wings for drumsticks if you prefer. If you want less heat, use less gochujang. You can also use sriracha for a different flavor. Honey can be replaced with maple syrup for a unique twist. If you don’t have rice vinegar, apple cider vinegar works well too.
Step-by-Step Instructions
Preparation of Marinade
To make the marinade, you need a few easy ingredients. In a medium bowl, mix together the following:
– 3 tablespoons gochujang (Korean chili paste)
– 2 tablespoons soy sauce
– 1 tablespoon honey
– 1 tablespoon sesame oil
– 2 cloves garlic, minced
– 1 tablespoon ginger, minced
– 1 tablespoon rice vinegar
– 1 teaspoon ground black pepper
Stir these ingredients well until they become smooth. This mixture is what gives the chicken wings their great flavor.
Marinating the Chicken Wings
Now it’s time to marinate the chicken wings. Take 2 lbs of chicken wings and put them into a large resealable bag or bowl. Pour the marinade over the wings. Make sure each wing gets coated. Seal the bag tightly or cover the bowl. Let the wings sit in the fridge for at least 1 hour. For the best taste, marinate overnight.
Baking Process
First, preheat your oven to 425°F (220°C). This heat helps the wings cook and get crispy. Next, line a baking sheet with aluminum foil. This makes cleaning up easier. Place a wire rack on top of the sheet. This allows air to flow around the wings while they bake.
Take the marinated wings out of the fridge. Let the extra marinade drip off. Arrange the wings on the wire rack in a single layer, skin side up. Bake them for 35-40 minutes. Flip the wings halfway through cooking to help them brown evenly. Once they are golden and crispy, take them out of the oven. Garnish with sesame seeds and chopped green onions. Serve hot and enjoy your tasty Korean Gochujang chicken wings!
Tips & Tricks
Achieving Crispiness
To make your chicken wings crispy, start with dry wings. Pat them with paper towels. This helps the skin get crispy in the oven. Using a wire rack is key too. It lets the hot air flow around the wings. Bake them at 425°F for 35-40 minutes. Flip them halfway to get both sides nice and brown. If you want extra crunch, broil them for the last few minutes. Watch them closely so they don’t burn.
Suggestions for the Perfect Marinade
The marinade makes these wings shine. Use gochujang for a spicy kick. Mix it with soy sauce and honey for sweetness. Sesame oil adds a nutty flavor. Don’t forget garlic and ginger for depth. For the best taste, marinate the wings overnight. This allows the flavors to soak in deeply. If short on time, at least marinate them for one hour. The longer, the better!
Serving Recommendations
Serve these wings hot for the best taste. Garnish with sesame seeds and green onions for color and crunch. Offer dipping sauces like ranch or blue cheese for fun. These wings pair well with cold beer or a sweet soda. You can also serve them with rice or veggies for a complete meal.

Variations
Spicy Gochujang Wings with Extra Heat
If you love spice, add more gochujang. You can also add fresh chili peppers. Just slice them up and mix them into the marinade. This will give your wings a fiery kick. If you want an even bolder flavor, add a splash of hot sauce. This extra heat will make your wings unforgettable.
Korean Gochujang Chicken Wings with Honey Garlic Glaze
For a sweeter take, try a honey garlic glaze. You start with the same marinade, but add more honey. Mix in minced garlic and a bit of soy sauce. This combo will balance the heat of gochujang. The result is a sweet, sticky glaze that clings to the wings. You’ll want to lick your fingers after every bite!
Air Fryer Method for Gochujang Wings
Want a quicker cooking method? Use an air fryer. It gives you crispy wings without all the oil. First, marinate the wings as usual. Preheat your air fryer to 380°F (193°C). Place the wings in a single layer in the basket. Cook for about 25 minutes, flipping halfway through. Your wings will come out crispy and delicious!
Storage Info
How to Store Leftover Wings
After enjoying your gochujang chicken wings, let them cool. Place the wings in an airtight container. Store them in the fridge for up to three days. Make sure to separate layers with parchment paper to keep them from sticking together.
Reheating Techniques
To reheat, preheat your oven to 350°F (175°C). Place the wings on a baking sheet. Heat them for about 10 to 15 minutes. This keeps the wings crispy and juicy. You can also use a microwave for quick reheating. Just use a microwave-safe plate and cover the wings with a damp paper towel. Heat in short bursts to avoid drying them out.
Freezing Instructions
If you want to save wings for later, freezing works great. First, let the wings cool completely. Then, wrap each wing in plastic wrap. Place them in a freezer bag, removing as much air as possible. You can freeze them for up to three months. To enjoy later, thaw overnight in the fridge before reheating.
FAQs
What is Gochujang?
Gochujang is a thick, red Korean chili paste. It has a sweet and spicy flavor. Made from fermented soybeans, glutinous rice, and chili powder, it adds depth to dishes. You can use it in marinades, soups, and stews. It gives Korean Gochujang Chicken Wings a unique taste that you can’t resist.
Can I use a different type of meat?
Yes, you can use other meats. Chicken thighs or drumsticks work well. You can also try pork or tofu for a vegetarian option. Just adjust the cooking time as needed. Each meat will soak up the gochujang flavor, making each bite delicious.
How long do I need to marinate the wings?
You should marinate the wings for at least 1 hour. For the best taste, marinate them overnight. This allows the flavors to penetrate deeply into the meat. The longer they sit, the juicier and more flavorful they become.
What dipping sauces pair well with Korean Gochujang Chicken Wings?
Many sauces complement these wings. A classic option is a simple soy sauce dip. You can also try a sweet chili sauce for extra sweetness. For a refreshing flavor, serve with a yogurt-based sauce. Each option adds a new twist to your meal.
This blog post covered all you need for delicious Gochujang chicken wings. We detailed the key ingredients and provided smart substitutes. You learned how to prepare the marinade, marinate the wings, and bake them to perfection.
I shared tips for extra crispiness and tasty serving ideas. You can even try fun variations like spicy wings or air-fried options. Lastly, I outlined how to store or reheat leftovers. Enjoy your wings, and don’t forget to experiment!


