Lemon Dill Roasted Salmon Flavorful and Easy Recipe

If you want a quick meal that’s fresh and full of flavor, you’ve come to the right place! This Lemon Dill Roasted Salmon recipe is easy to follow and promises to impress. I will guide you through choosing the right ingredients, perfecting your marinade, and roasting techniques. You’ll also find helpful tips and serving suggestions to make your dish shine. Let’s dive into this tasty journey together!
Ingredients
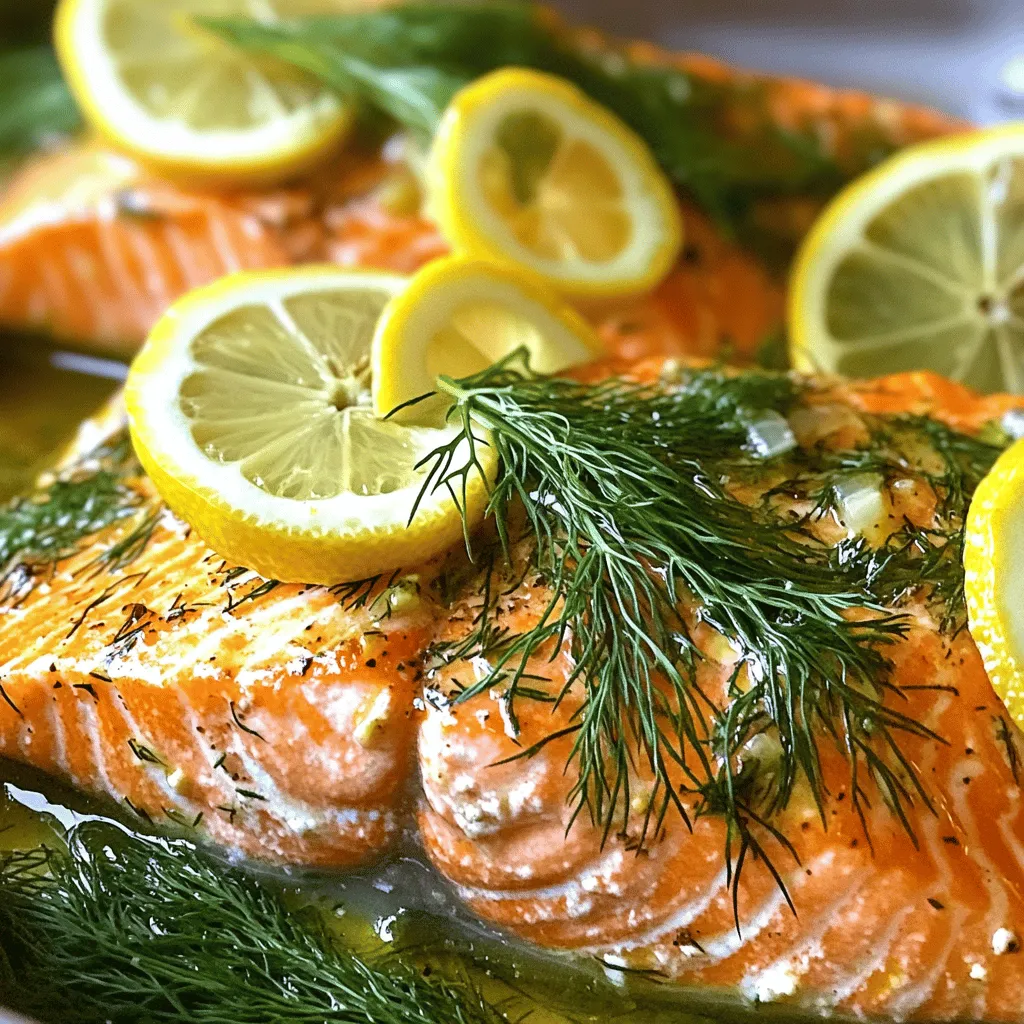
Essential Ingredients for Lemon Dill Roasted Salmon
– 4 salmon fillets (6 ounces each)
– 2 tablespoons olive oil
– 2 tablespoons fresh lemon juice
– Zest of 1 lemon
– 2 tablespoons fresh dill, chopped (or 1 tablespoon dried dill)
– 3 cloves garlic, minced
– Salt and pepper to taste
– Lemon slices for garnish
– Fresh dill sprigs for garnish
These ingredients come together to create a simple yet tasty dish. Salmon is the star here, and it pairs well with lemon and dill. The olive oil adds richness, while garlic brings depth. Together, they make the salmon flavorful and juicy.
Optional Ingredients for Enhanced Flavor
– Capers for a salty bite
– Honey for a touch of sweetness
– Red pepper flakes for heat
You can add capers if you like a briny taste. Honey can balance the acidity of lemon, making it sweeter. If you want some spice, red pepper flakes can do the trick. Feel free to mix and match these to suit your taste!
Equipment Needed for Cooking
– Baking dish
– Mixing bowl
– Measuring spoons
– Knife and cutting board
– Oven
These tools make the cooking process easy. A baking dish holds the salmon, and a mixing bowl helps combine your marinade. Use a knife and cutting board to prepare your ingredients. Lastly, make sure your oven is ready for roasting.
Step-by-Step Instructions
Preparation of the Marinade
To start, gather your ingredients. You need olive oil, lemon juice, lemon zest, dill, garlic, salt, and pepper. In a small bowl, mix the olive oil, lemon juice, and zest. Add chopped dill and minced garlic. Stir until everything blends well. This mix will add great taste to the salmon.
Marinating the Salmon
Now, take your salmon fillets. Place them in a baking dish. Pour the marinade over the salmon. Make sure each fillet is fully covered. This step is key for flavor. Let the salmon sit for 15 to 20 minutes at room temperature. This gives time for the flavors to soak in.
Roasting Techniques for Perfect Salmon
Preheat your oven to 400°F (200°C). After marinating, place the salmon skin-side down in the dish. Put the dish in the oven. Roast for 12 to 15 minutes. You’ll know it’s ready when it flakes easily with a fork. Once done, take it out and let it rest for a few minutes. Serve it with lemon slices and fresh dill sprigs for a nice touch.
Tips & Tricks
How to Achieve Flaky Salmon Every Time
To get flaky salmon, cook it at the right temperature. Preheat your oven to 400°F (200°C). This heat cooks the salmon evenly. Use a fork to test for doneness. If it flakes easily, it’s ready. The ideal cooking time is 12-15 minutes. Don’t overcook it; this will dry out the fish.
Common Mistakes to Avoid
One common mistake is not marinating long enough. Allow your salmon to soak in the marinade for 15-20 minutes. This helps to infuse flavor. Another mistake is using too much heat. High heat can burn the outside while leaving the inside raw. Lastly, avoid overcrowding the baking dish. Give each fillet space to cook properly.
Serving Suggestions for Lemon Dill Roasted Salmon
Lemon dill roasted salmon pairs well with various sides. Serve it with a fresh green salad for a light meal. Roasted vegetables also complement the flavors nicely. For a heartier option, try quinoa or rice. Garnish with extra lemon slices and dill sprigs for a touch of color.

Variations
Substitutes for Salmon
If you want to change things up, many fish work well here. You can use trout, cod, or halibut instead of salmon. Each fish has a different taste but can soak up the lemon and dill flavors nicely. Make sure to adjust the cooking time based on the thickness of the fish.
Alternative Flavor Profiles
Lemon and dill give a bright taste, but you can try other flavors too. For a spicy kick, add red pepper flakes to the marinade. If you love a sweet touch, mix in some honey or maple syrup. You might even swap dill for fresh parsley or basil for a different twist. These changes can make your dish unique.
Cooking Methods: Baking vs. Grilling
Baking is easy and keeps the fish moist.Grilling adds a nice char and smoky flavor. If you choose to grill, use medium heat and cook the salmon for about 5-7 minutes per side. The grilling method also gives a crisp texture to the fish.
Storage Info
Best Practices for Storing Leftover Salmon
To store leftover salmon, first let it cool. This prevents sogginess. Place the salmon in an airtight container. Make sure to add a layer of parchment paper between the fish and the lid. This keeps it fresh. If you follow these steps, your salmon will taste great later.
Reheating Tips for Preserving Flavor
When reheating salmon, you want to keep it moist. Preheat your oven to 275°F (135°C). Place the salmon on a baking sheet. Cover it with foil to trap steam. Heat for about 15 minutes. This method helps keep the flavor strong. You can also use a microwave, but watch the time. Heat it in short bursts to avoid drying it out.
Freezing vs. Refrigerating
Refrigerating is best for short-term storage. Leftover salmon stays good for about three days. If you want to keep it longer, freezing is the way to go. Wrap the salmon tightly in plastic wrap. Then, place it in a freezer bag. It can last up to three months in the freezer. Just remember to label the bag with the date. When you’re ready to eat it, thaw it in the fridge overnight. This method helps maintain flavor and texture.
FAQs
How long should I bake Lemon Dill Roasted Salmon?
You should bake Lemon Dill Roasted Salmon for 12-15 minutes. Check the salmon at 12 minutes. It is ready when it flakes easily with a fork. Cooking time may vary based on the thickness of your fillets. If your fillets are thicker, you might need a few more minutes. Always check to avoid overcooking.
Can I use dried dill instead of fresh?
Yes, you can use dried dill. Use 1 tablespoon of dried dill for this recipe. Dried herbs have a stronger flavor than fresh herbs. If you choose dried dill, add it to the marinade as you would fresh. The taste will still be great, but fresh dill adds a special touch.
What to serve with Lemon Dill Roasted Salmon?
You can serve Lemon Dill Roasted Salmon with many sides. Some good choices include:
– Steamed green beans
– Roasted potatoes
– Quinoa salad
– Mixed greens with a light vinaigrette
These sides balance the rich salmon flavor. They also offer a nice pop of color on your plate.
You now have all the tools to make delicious Lemon Dill Roasted Salmon. Use the essential and optional ingredients to enhance your dish. Follow the step-by-step instructions for perfect results every time. Remember the tips to avoid common mistakes and achieve flaky salmon. Don’t hesitate to explore variations, and always store leftovers properly. By following these steps, you’ll impress your friends and family. Lemon Dill Roasted Salmon is not just a meal; it’s an experience worth sharing. Enjoy your cooking journey!


![To make delicious Garlic Herb Roasted Fingerling Potatoes, you need just a few key items. Here’s what you will need: - 1.5 pounds fingerling potatoes, halved lengthwise - 4 cloves garlic, minced - 3 tablespoons olive oil - 1 tablespoon fresh rosemary, chopped - 1 tablespoon fresh thyme, chopped - 1 teaspoon sea salt - ½ teaspoon black pepper - Zest of 1 lemon These ingredients are simple, but they create a wonderful taste. The fingerling potatoes give a nice texture, while garlic adds a rich flavor. Apart from the main ingredients, a few seasonings can elevate the dish. I recommend using: - Sea salt for balanced flavor - Black pepper for warmth - Fresh rosemary for a woodsy aroma - Fresh thyme for a hint of earthiness These herbs and spices work well together. They bring out the best in the potatoes and make them taste gourmet. You can customize your dish with some optional add-ins. Here are a few ideas: - Crushed red pepper for spice - Parmesan cheese for a savory twist - Other herbs like parsley or dill for freshness These add-ins can change the flavor profile. Feel free to experiment based on your taste preferences. For the full recipe, check out the instructions above. First, wash the fingerling potatoes well under cold water. Scrub them gently to remove any dirt. Then, slice them in half lengthwise. This helps them cook evenly. Place the cut potatoes into a large bowl. Now, add the minced garlic to the bowl with the potatoes. Next, pour in the olive oil. Sprinkle in the fresh rosemary and thyme. Then, add the sea salt, black pepper, and lemon zest. Toss everything together. Make sure all the potatoes get coated well. This mix brings out great flavors in the dish. Preheat your oven to 425°F (220°C). Spread the coated potatoes on a baking sheet lined with parchment paper. Arrange them cut side down for the best crisp. Roast them in the oven for 25-30 minutes. Flip the potatoes halfway through. This step helps them cook evenly. Look for a golden color and a tender inside. When done, take them out and let them cool for a few minutes. Adjust seasoning if needed. Serve hot for a delightful treat! For the complete recipe, check out the [Full Recipe]. To get that perfect crispiness, choose small fingerling potatoes. They have thin skins that roast well. Cut them in half lengthwise. This allows the cut side to get nice and brown. Toss them in olive oil and seasonings, then lay them cut side down on the baking sheet. This placement helps them crisp up beautifully. Roasting at 425°F (220°C) makes a big difference. The high heat brings out their natural sugars and creates a great texture. Timing is key for the best Garlic Herb Roasted Fingerling Potatoes. Roast them for about 25-30 minutes. Check them halfway through and flip for even cooking. If you want extra crunch, leave them in for a few more minutes. If your oven runs hot, lower the temperature a bit to avoid burning. Use a fork to test if they are tender. They should be soft inside and crispy outside. You can add a twist to your Garlic Herb Roasted Fingerling Potatoes. Try adding some grated Parmesan cheese during the last five minutes of roasting. It melts and gives a savory kick. Want some heat? Add a pinch of red pepper flakes to the mix. Fresh herbs like parsley or chives can also brighten the dish. For a tangy finish, drizzle a bit of balsamic glaze before serving. Each of these tweaks makes the dish even more delightful. For the complete recipe, check out the Full Recipe. {{image_2}} Want a kick? Add some heat to your Garlic Herb Roasted Fingerling Potatoes. You can mix in red pepper flakes or cayenne pepper. Start with half a teaspoon and adjust to your taste. The spice will blend well with the garlic. You’ll love the extra flavor it brings to the dish. For a heartier meal, consider adding vegetables. Bell peppers and zucchini work great. Chop them into bite-sized pieces. Toss these veggies in with the potatoes. They will roast nicely and soak up the garlic and herb flavors. This makes your dish colorful and healthy. You do not have to use the oven! You can try cooking these potatoes in an air fryer. Set it to 400°F (200°C) for about 15-20 minutes. Shake the basket halfway through for even cooking. If you want a smoky flavor, grill the potatoes. Wrap them in foil with the seasoning and grill for 20-25 minutes. Both methods give you crispy, tasty potatoes. You can find the Full Recipe to try these variations. To keep your Garlic Herb Roasted Fingerling Potatoes fresh, store them in an airtight container. Let them cool to room temperature first. This helps to prevent moisture buildup. Place the container in the fridge. They will stay good for about 3 to 5 days. If you want to keep them longer, freezing is a great option. When you’re ready to enjoy your leftovers, reheating is key. Preheat your oven to 350°F (175°C). Spread the potatoes on a baking sheet in a single layer. This helps them heat evenly. Bake for about 10 to 15 minutes until they are warm. You can also reheat them in a skillet over medium heat. This gives them a nice crisp again. If you want to freeze your potatoes, here’s what to do. First, let them cool completely. Place them in a freezer-safe bag or container. Squeeze out as much air as you can before sealing. They can last up to 3 months in the freezer. When you’re ready to use them, thaw them in the fridge overnight before reheating. This helps keep their texture and flavor intact. For more details on making these delightful potatoes, check out the Full Recipe. The best potatoes for roasting are fingerling potatoes. They have a creamy texture and a great taste. Their shape allows for even cooking and crispy skin. Other good choices are Yukon Gold and red potatoes. They add flavor and hold up well during cooking. Yes, you can prepare these potatoes ahead of time. You can cut and season them a few hours before cooking. Just store them in a bowl covered with water to prevent browning. When ready, drain them and roast as per the full recipe. This saves time and effort when you're ready to eat. To serve more people, simply double or triple the recipe. Use more fingerling potatoes and adjust the seasonings accordingly. Keep the same ratios for garlic, herbs, and oil. Ensure you use a larger baking sheet for even roasting. Roast in batches if needed, to keep them crispy. In this post, we explored how to make garlic herb roasted fingerling potatoes. We covered essential ingredients, step-by-step cooking methods, and useful tips for crispiness. You learned about delicious variations, smart storage techniques, and answered common questions. Now you can create tasty roasted potatoes that shine on any table. Enjoy experimenting with flavors, and remember, simple adjustments can make a big difference. Happy cooking!](https://dailydishly.com/wp-content/uploads/2025/06/1341fca4-d817-4f84-a737-3e9321494587-768x768.webp)


![- 1 cup quinoa, rinsed - 2 cups water or vegetable broth - 1 large cucumber, diced - 1 red bell pepper, diced - 1 cup cherry tomatoes, halved - 1/4 red onion, finely chopped - 1 cup fresh parsley, chopped - 1/4 cup tahini - 2 tablespoons lemon juice - 1 tablespoon olive oil - 1 clove garlic, minced - Salt and pepper to taste This salad starts with quinoa as the base. Quinoa is a great source of protein and fiber. Rinsing the quinoa helps remove its bitter coating. Use fresh veggies for crunch and color. I love using cucumbers and bell peppers for a fresh bite. Cherry tomatoes bring sweetness and juicy flavor. The red onion adds a nice kick, while parsley gives a fresh touch. The tahini sauce is the star. It adds a creamy texture and nutty flavor. Mix tahini with lemon juice, olive oil, and garlic for a bright dressing. This makes the salad so tasty! - 1/4 cup sunflower seeds or chopped nuts for crunch For extra flavor and texture, you can add sunflower seeds or nuts. They give a nice crunch. Try almonds or walnuts for a rich taste. Fresh herbs like mint or cilantro can also brighten the dish. - Calories per serving: About 250 - Macronutrient breakdown: 10g protein, 12g fats, 30g carbs - Dietary considerations: Gluten-free, vegan, and packed with nutrients This salad is not just tasty; it's also healthy! Each serving has around 250 calories. You get protein from quinoa and tahini. The veggies add vitamins and minerals. Plus, it fits many diets, like vegan and gluten-free. Snack on this salad for a boost of energy! Check the Full Recipe for all the details. 1. Start by rinsing 1 cup of quinoa under cold water. This helps remove any bitter taste. 2. In a medium saucepan, combine the rinsed quinoa and 2 cups of water or vegetable broth. 3. Bring the mixture to a boil over medium-high heat. 4. Once boiling, reduce the heat to low, cover, and let it simmer. Cook for about 15 minutes. 5. The quinoa is done when it is fluffy and the water is absorbed. Remove it from heat and let it cool slightly. 1. In a small bowl, mix together 1/4 cup tahini, 2 tablespoons lemon juice, and 1 tablespoon olive oil. 2. Add 1 clove of minced garlic, salt, and pepper to taste. 3. Whisk until smooth. If the dressing is too thick, add a little water to reach your desired consistency. 1. In a large mixing bowl, combine 1 diced cucumber, 1 diced red bell pepper, 1 cup of halved cherry tomatoes, 1/4 finely chopped red onion, and 1 cup of chopped fresh parsley. 2. Add the cooled quinoa to the vegetable mix and gently toss everything together. 3. Drizzle the tahini dressing over the salad and stir well to coat all the ingredients. 4. For extra crunch, sprinkle 1/4 cup of sunflower seeds or chopped nuts on top before serving. For the full recipe, you can check the details provided above. Enjoy your fresh and flavorful Lemon Tahini Quinoa Salad! To cook quinoa, use a 2:1 ratio of water to quinoa. Rinse the quinoa first. This removes the bitter coating. Bring the water to a boil. Once boiling, lower the heat. Cover the pot and let it simmer for about 15 minutes. Fluff the quinoa with a fork after cooking. This keeps it light and airy, avoiding mushy quinoa. Herbs can change the taste of your salad. Fresh mint or dill works well. Try adding basil for a different twist. For spice, consider adding a pinch of cumin or paprika. These spices bring out the flavors of the vegetables and dressing. Presentation matters! Serve the salad in a large bowl. Garnish with lemon slices and fresh parsley. This adds color and appeal. For a fun twist, use clear glasses. Layer the salad for a stunning visual. Pair this salad with grilled chicken or fish for a complete meal. It’s also great beside roasted veggies. {{image_2}} You can easily add more protein to your Lemon Tahini Quinoa Salad. Chickpeas are a great choice. They add texture and a nutty flavor. Just rinse and drain a can of chickpeas. Then, fold them into the salad for extra protein. Grilled chicken or tofu also works well. Cook the chicken or tofu until it’s golden brown. Then, chop it into bite-sized pieces. Mix it in with the salad for a hearty meal. You can change this salad based on the season. In spring, add fresh peas, radishes, or asparagus. These veggies brighten up the dish and add crunch. In winter, you can use roasted root vegetables. Try carrots or sweet potatoes. They add warmth and depth to the salad while keeping it filling. If you want to switch up the flavor, try other dressings. A simple olive oil and vinegar mix gives a light taste. You can also use yogurt for a creamy twist. Adjust the flavors to suit your taste. Add more lemon juice for tanginess. Or, include herbs like dill or cilantro for freshness. For the complete recipe, check out the [Full Recipe]. To keep your Lemon Tahini Quinoa Salad fresh, store it in the fridge. Use an airtight container. This helps maintain flavor and texture. Before putting it away, let the salad cool. Hot food can raise the fridge temperature, which is not good. Your salad lasts about three to five days in the fridge. Check for any changes in color or smell. If it looks slimy or smells off, toss it out. To reheat, use the microwave. Heat it gently to avoid drying it out. Stir it halfway through to ensure even warming. If you want to serve leftovers, try adding fresh herbs or a squeeze of lemon juice. This can brighten the flavors again. For the full recipe, refer back to the main section. To make this creamy dressing, mix the tahini, lemon juice, olive oil, minced garlic, salt, and pepper in a bowl. Use a whisk for a smooth blend. Adjust the thickness by adding water if needed. This dressing adds a zesty flavor and a creamy texture to your salad. Yes, you can prepare this salad in advance. Store the salad and dressing separately in the fridge. This keeps the vegetables crisp. Combine them just before serving. It tastes even better after the flavors meld together. If you can't find tahini, you can use these alternatives: - Sunflower seed butter - Almond butter - Greek yogurt Each of these options has a unique flavor. Sunflower seed butter is nut-free and creamy. Almond butter adds a nutty taste. Greek yogurt gives a tangy kick. Keep in mind that substituting may change the salad's taste. Adjust the amount of lemon juice to balance flavors. Always taste as you go to find your perfect mix. Enjoy experimenting! This blog post covered how to make a delicious Lemon Tahini Quinoa Salad. You learned about essential and optional ingredients, like quinoa, vegetables, and tahini. I gave you step-by-step instructions, plus tips for cooking and flavoring. We explored salad variations and how to store it properly. This salad is versatile and easy to make. Try adding your favorite ingredients to make it unique. Enjoy a tasty and healthy dish that fits any season!](https://dailydishly.com/wp-content/uploads/2025/07/0131a3b2-a937-48f9-ad75-9f78e7be101a-768x768.webp)

