Lemon Dill Salmon Cakes Flavorful and Easy Recipe

Are you ready to whip up a dish that bursts with flavor? These Lemon Dill Salmon Cakes are not just easy to make; they’re a guaranteed crowd-pleaser! Whether you are a busy parent or a novice cook, this recipe fits your lifestyle. I’ll guide you step-by-step, share my cooking tips, and suggest variations to keep things exciting. Let’s dive into the world of flavorful cooking with this delightful recipe!
Ingredients
List of Ingredients
– 1 lb fresh salmon fillets, skin removed
– 1/2 cup breadcrumbs (Panko for extra crunch)
– 1/4 cup plain Greek yogurt
– 1 large egg
– 2 tablespoons fresh lemon juice
– 1 tablespoon lemon zest
– 2 tablespoons fresh dill, chopped
– 1 clove garlic, minced
– Salt and pepper to taste
– 2 tablespoons olive oil (for frying)
Ingredient Notes
Using fresh salmon gives the best flavor. The Panko breadcrumbs add a nice crunch. Greek yogurt gives moisture and creaminess. You can adjust the garlic to your taste. Fresh dill is key for that bright, herb flavor. Always taste your mix before forming the cakes.
Substitutions
If you don’t have fresh salmon, you can use canned salmon. Just drain it well. For breadcrumbs, regular ones will work, but Panko is crunchier. If you want a dairy-free option, try using mashed avocado instead of Greek yogurt. You can swap dill with parsley or basil if you prefer.
Step-by-Step Instructions
Preparing the Salmon
First, let’s get our salmon ready. Preheat your oven to 375°F (190°C). Line a baking sheet with parchment paper. Place the salmon fillets on the sheet. Bake them for about 15 minutes. The salmon should be fully cooked and flaky. Once done, let it cool a bit. Then, flake the salmon into a large mixing bowl. This gives us a great base for our cakes.
Mixing the Ingredients
Now it’s time to mix everything. In the bowl with the flaked salmon, add the following ingredients:
– 1/2 cup breadcrumbs (Panko for extra crunch)
– 1/4 cup plain Greek yogurt
– 1 large egg
– 2 tablespoons fresh lemon juice
– 1 tablespoon lemon zest
– 2 tablespoons fresh dill, chopped
– 1 clove garlic, minced
– Salt and pepper to taste
Stir all these ingredients together until they are well mixed. The mixture should stick together nicely. This is where the flavors come alive. The lemon and dill will shine through.
Forming and Cooking the Salmon Cakes
Next, let’s shape our cakes. Use your hands to form the mixture into patties. Aim for about 3 inches wide and 1/2 inch thick. You should make around 8 patties, but it depends on your size.
Now, heat 2 tablespoons of olive oil in a non-stick skillet over medium heat. Once the oil is hot, place the salmon cakes in the skillet. Be careful not to overcrowd them. Cook for about 4-5 minutes on each side. You want them golden brown and crispy.
Once cooked, take them out and place them on a paper towel to drain excess oil. Serve them warm with lemon wedges and a salad. Enjoy your tasty Lemon Dill Salmon Cakes!
Tips & Tricks
Cooking Techniques for Crispy Cakes
To get the best texture in your salmon cakes, use Panko breadcrumbs. They give a light and crispy crunch. Heat your skillet well before adding the cakes. This step helps them brown evenly. Avoid overcrowding the pan. Cook in batches if needed. This ensures each cake gets nice and crispy.
Flavor Enhancements
Add a pinch of smoked paprika for a different taste. You can also mix in some chopped green onions or parsley for extra freshness. Try using lemon zest from a fresh lemon. It brightens the flavor. Don’t forget to season well with salt and pepper. Taste the mixture before cooking to adjust flavors.
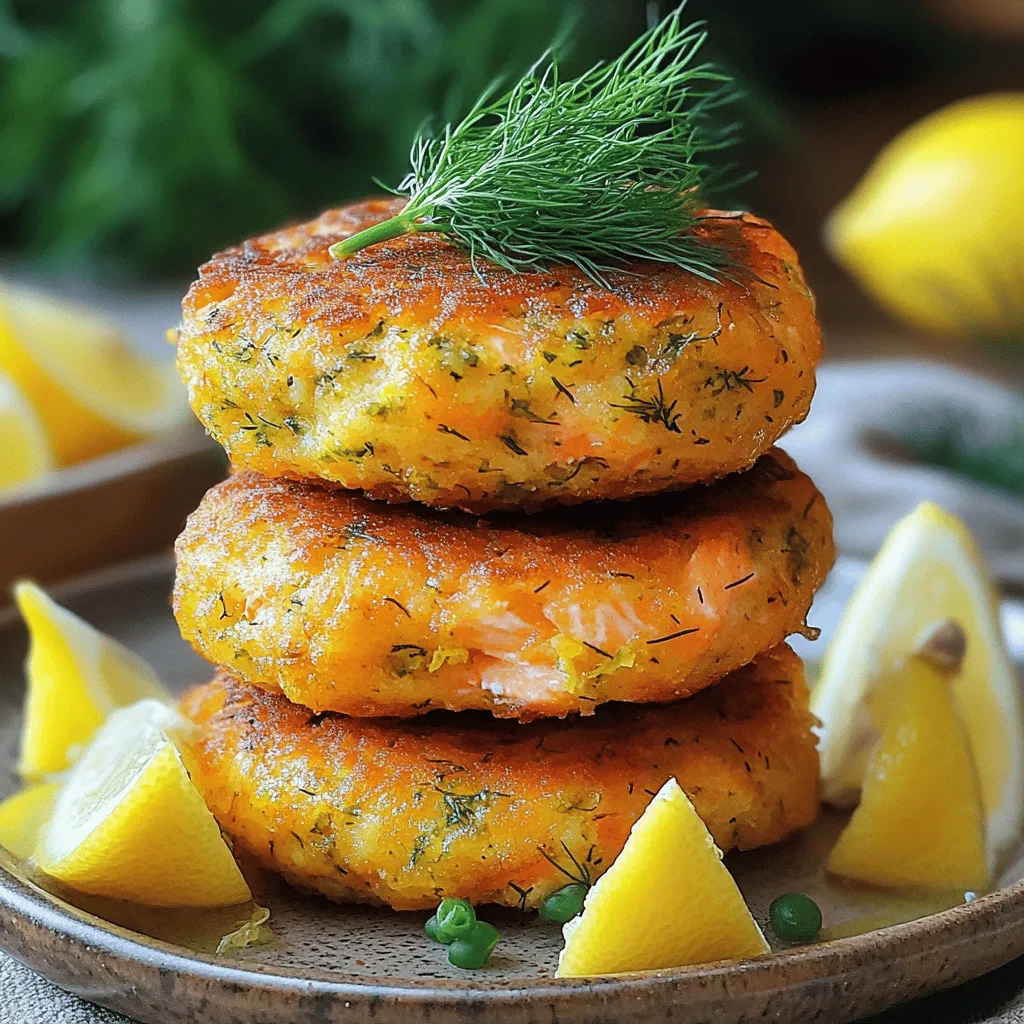
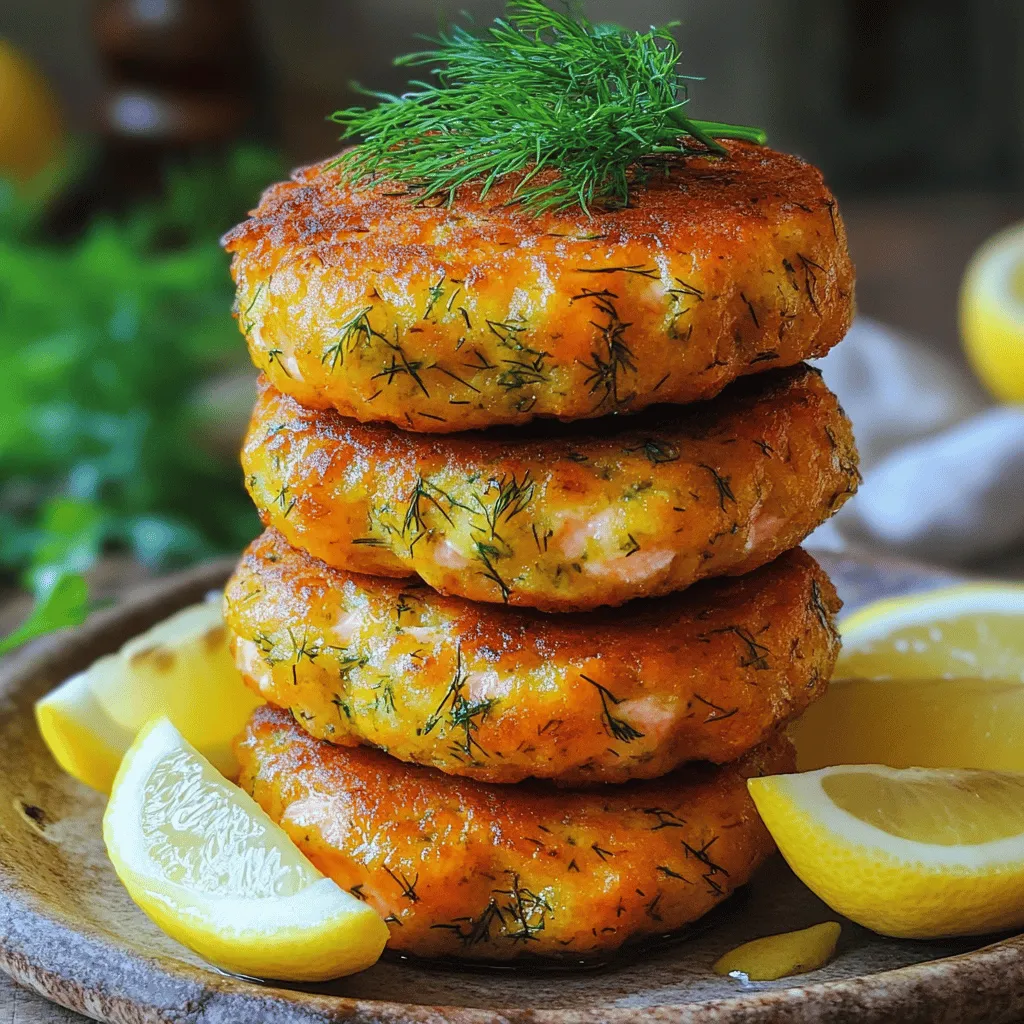
Presentation Tips
Stack your salmon cakes for a neat look. Use a large plate and layer them high. Garnish with a sprig of dill for color. A drizzle of lemon juice adds a fresh touch. Serve with lemon wedges and a salad for a full meal. This makes the dish inviting and fun to eat.

Variations
Alternative Herbs and Spices
You can change the flavor of your salmon cakes with different herbs. Try fresh parsley or basil for a nice twist. If you like heat, add some red pepper flakes. For a more earthy flavor, use thyme or oregano. Each herb brings its own taste. Experiment to find your favorite!
Different Add-ins
You can mix in tasty add-ins to your salmon cakes. Chopped onions or shallots give a sweet taste. Diced bell peppers add color and crunch. Consider using capers for a briny kick. Even shredded cheese can make them richer. Be creative and add what you love!
Cooking Methods (Baking vs. Frying)
You can cook salmon cakes in two main ways: baking or frying. Frying gives a crispy outside and is quick. Heat olive oil in a skillet and cook each side for about 4-5 minutes. Baking is a healthier option. Preheat your oven to 375°F, place the cakes on a baking sheet, and bake for about 20 minutes. Both methods work well, so choose what fits your style!
Storage Info
Refrigeration Tips
To keep your Lemon Dill Salmon Cakes fresh, store them in an airtight container. Place a piece of parchment paper between the layers to avoid sticking. They can last in the fridge for up to three days. Make sure they cool completely before sealing. This helps preserve the flavor and texture.
Freezing Instructions
If you want to save some for later, freezing is a great option. Form the salmon cakes and place them on a baking sheet. Freeze them for about an hour to firm up. Once frozen, transfer them to a freezer-safe bag. They can last in the freezer for up to three months. Just remember to label the bag with the date!
Reheating Guidelines
When you’re ready to enjoy your frozen cakes, thaw them in the fridge overnight. For reheating, a skillet works best. Heat a little olive oil over medium heat and cook each side for about 4 to 5 minutes. This will keep them crispy and flavorful. You can also reheat them in the oven at 350°F (175°C) for about 10-15 minutes. Enjoy your cakes warm for the best taste!
FAQs
How do I know when Salmon Cakes are done?
You can tell when salmon cakes are done by looking at their color. They should be golden brown on both sides. You can also check if the center is hot. If the inside feels warm and flaky, they are ready to eat.
Can I use canned salmon for this recipe?
Yes, you can use canned salmon for this recipe. Just drain the salmon well before mixing it with the other ingredients. Canned salmon saves time and still tastes great. It also makes the recipe easy to prepare.
What can I serve with Lemon Dill Salmon Cakes?
These salmon cakes pair well with several sides. I recommend serving them with a fresh salad or some steamed veggies. You can also add a side of lemon wedges for added flavor. A creamy dip or tartar sauce complements them nicely, too.
How do I make Salmon Cakes without egg?
If you want to make salmon cakes without egg, you can use mashed potatoes or unsweetened applesauce. Both options help bind the ingredients together. Just use about 1/4 cup of either option for every egg you replace.
Can I bake the Salmon Cakes instead of frying?
Yes, you can bake the salmon cakes. Preheat your oven to 375°F (190°C) and place them on a baking sheet. Bake for about 15-20 minutes or until they are golden and cooked through. Baking is a healthier option and still keeps them tasty.
You learned about making tasty lemon dill salmon cakes. I shared ingredient lists, cooking steps, and tips for the best results. Variations let you be creative with flavors and cooking methods. Proper storage keeps your cakes fresh longer. Remember, don’t skip the crispy cooking tips for the best texture. Enjoy trying these ideas and share your yummy results with friends. Happy cooking!


![To make Chicken and Cheese Enchiladas Casserole, you need the right ingredients. Here they are: - 2 cups cooked chicken, shredded - 1 can (15 oz) black beans, rinsed and drained - 1 cup frozen corn - 1 can (10 oz) enchilada sauce (red or green) - 2 cups shredded cheese (cheddar and Monterey Jack mix) - 8 corn tortillas - 1 small red onion, diced - 1 teaspoon ground cumin - 1 teaspoon chili powder - Salt and pepper to taste - Fresh cilantro, for garnish - Sliced jalapeños, for garnish (optional) Each ingredient serves a purpose. The chicken adds protein, while the beans and corn provide fiber. The enchilada sauce gives a rich flavor. The cheese melts beautifully, creating a creamy texture. Tortillas hold it all together. Don't forget the spices! They bring warmth and depth to the dish. Using fresh ingredients makes a big difference. Fresh cilantro adds color and bright flavor. If you want a kick, sliced jalapeños can spice things up. For a full guide on making this dish, check the Full Recipe. - Preheat the oven to 350°F (175°C). - In a large bowl, mix the cooked chicken, black beans, corn, half the enchilada sauce, cumin, chili powder, diced onion, salt, and pepper. Stir it well. This mix gives your casserole a great flavor. - Take a 9x13 inch baking dish and spread a thin layer of the remaining enchilada sauce on the bottom. - Place 4 corn tortillas over the sauce. Overlap them slightly. This helps keep everything together. - Spoon half of your chicken and bean mix over the tortillas. Then sprinkle half of the cheese on top. - Repeat this with another layer of tortillas, the rest of the chicken mixture, and the remaining cheese. - End with a final layer of tortillas and drizzle any remaining enchilada sauce on top. This keeps the dish moist. - Cover the baking dish with aluminum foil. Bake in the preheated oven for 20 minutes. - After 20 minutes, remove the foil. Bake for an extra 10-15 minutes. This lets the cheese get bubbly and golden brown. - Once done, take it out and let it sit for about 5 minutes before slicing. This helps it hold its shape. - For the full recipe, check the detailed instructions above. To make shredding chicken easy, use two forks. Hold one fork in each hand. Pull the chicken apart in opposite directions. This method works great and saves time. You can also use a stand mixer with a paddle attachment. Just place the cooked chicken in the bowl and mix on low speed. To prevent soggy tortillas, lightly fry them in oil first. This step makes them crisp and adds flavor. You can also warm them in the oven for a few minutes. This keeps them from getting too soft when layered in the casserole. For a great side dish, serve Mexican rice or refried beans. These pair nicely with the creamy casserole. You can also add a fresh green salad on the side. A simple salad with lettuce, tomatoes, and avocado adds freshness. To enhance your casserole's look, garnish with fresh cilantro and jalapeño slices. These colorful toppings add a nice touch. A drizzle of extra enchilada sauce can also make it pop. You can serve the casserole on individual plates for a nice presentation. For the full recipe, check out the Chicken and Cheese Enchiladas Casserole section above. {{image_2}} If you have leftover ingredients, use them! You can swap cooked chicken for shredded beef or even pork. If you have extra veggies, toss in bell peppers or zucchini for added color and nutrients. You can also switch the black beans for pinto beans or kidney beans. They add a nice texture and flavor. For a twist, try chickpeas for a protein boost. Adjust the spice levels to fit your taste. Use mild chili powder for a gentle heat or add cayenne pepper for a kick. You can also mix in diced green chiles for extra flavor without too much heat. If you want a meatless version, skip the chicken and add more beans. You can use lentils or quinoa for protein. Toss in spinach or kale for a healthy touch. Enjoy the variety! For the full recipe, check out the [Full Recipe]. To keep your Chicken and Cheese Enchiladas Casserole fresh, store it in an airtight container in the fridge. It will last for about 3 to 4 days. If you want to keep it longer, freeze it. Wrap it well in plastic wrap and aluminum foil. It can last in the freezer for up to 3 months. Just remember to label it with the date. When you're ready to enjoy leftovers, preheat your oven to 350°F (175°C). Place the casserole in an oven-safe dish. Cover it with aluminum foil to keep it moist. Bake for about 20 minutes. If you prefer to use a microwave, slice a portion and place it on a microwave-safe plate. Heat it for 1-2 minutes, checking often. Make sure it is hot throughout. Avoid overheating, as it can make the dish dry. For the best taste, use the oven when possible. How can I make Chicken and Cheese Enchiladas Casserole gluten-free? To make this casserole gluten-free, use corn tortillas. Check that your enchilada sauce is gluten-free too. Many brands offer gluten-free options. Can I prepare this casserole in advance? Yes, you can prepare it a day ahead. Assemble the casserole, then cover and refrigerate. Bake it just before serving. What are the best sides to serve with Chicken and Cheese Enchiladas Casserole? Some great sides include refried beans, Mexican rice, or a fresh salad. These add color and flavor to your meal. Is it possible to add more vegetables to the recipe? Absolutely! You can add bell peppers, zucchini, or spinach. Just chop them small and mix them in with the chicken. Can I use other types of cheese besides cheddar and Monterey Jack? Yes, feel free to experiment! You can use pepper jack for spice or even queso fresco for a creamy touch. This post covered the tasty Chicken and Cheese Enchiladas Casserole. We looked at the main ingredients, steps to create it, tips to perfect it, and storage methods. You can customize this dish easily with varied ingredients or toppings. Remember, cooking should be fun and creative. I hope you enjoy making this hearty casserole as much as I do. Happy cooking!](https://dailydishly.com/wp-content/uploads/2025/06/88aadb9b-53ae-4392-a371-8958c664e0d2-768x768.webp)


. Cooking this dish is fun and easy. With these ingredients, you will make a meal that impresses everyone. First, set your oven to 400°F (200°C). This is the perfect heat for baking salmon. While the oven warms up, grab a baking sheet. Line it with parchment paper and lightly grease it. This helps the salmon cook evenly and keeps it from sticking. In a small bowl, whisk together 2 tablespoons of olive oil and the juice from one lemon. Add 3 tablespoons of chopped dill, 1 teaspoon of garlic powder, and a pinch of salt and pepper. If you want more flavor, mix in 1 tablespoon of Dijon mustard. This sauce is bright, fresh, and easy to make! Place 4 salmon fillets on the prepared baking sheet. Generously brush the lemon dill sauce over each fillet. Next, lay lemon slices on top for extra flavor. Bake the salmon in the oven for about 12 to 15 minutes. You want it to reach an internal temperature of at least 145°F. Let the salmon rest for 5 minutes before serving. Enjoy your Lemon Dill Salmon! For the complete instructions, check out the Full Recipe. To get the best salmon, choose fresh fillets. Look for bright color and no strong odor. Preheat your oven to 400°F (200°C) for even cooking. Cook salmon for 12-15 minutes. The fish is done when it flakes easily with a fork. The internal temperature should reach 145°F. If you want to check, use a meat thermometer. This will help you avoid overcooking your salmon. Let it rest for 5 minutes after baking. This keeps the juices inside. For a bright taste, use fresh lemon juice. This adds a tangy kick that complements salmon. Fresh dill enhances the dish with a herbal note. If you want more depth, add Dijon mustard to the olive oil mixture. Garlic powder gives a warm flavor to the sauce. Remember to season with salt and pepper. This simple step can make a big difference. You can also try adding a pinch of red pepper flakes for heat. Adjust flavors to your liking as you go along. Presentation is key for any dish. Arrange cooked salmon on a clean plate. Use lemon slices and fresh dill sprigs for garnish. This adds color and makes the dish pop. Serve with seasonal vegetables or rice for a complete meal. Consider using a drizzle of olive oil over the top for shine. You can even sprinkle some extra dill on the plate. This not only looks nice but also adds more flavor. Make your dish appealing to both the eyes and the palate. For the complete list of steps and ingredients, check out the Full Recipe. {{image_2}} Grilling salmon adds a smoky flavor. You can easily make grilled lemon dill salmon. Start by marinating the salmon fillets in the lemon dill sauce for about 30 minutes. Heat your grill to medium-high. Place the fillets skin-side down on the grill. Cook for about 6-8 minutes. Flip the salmon and grill for another 5-7 minutes until cooked through. The grill marks will add a nice touch. Adding Dijon mustard gives your lemon dill salmon a sharp twist. Simply mix 1 tablespoon of Dijon mustard into your lemon dill sauce. This adds a zesty flavor that pairs well with the salmon. Follow the same baking steps from the recipe. The mustard will caramelize slightly, giving a tasty crust. If you want a vegan option, use tofu or tempeh. Marinate the tofu in the lemon dill sauce just like the salmon. You can bake or grill it in the same way. For a lighter choice, try using zucchini or eggplant slices. These veggies soak up the flavors well. Just remember to adjust cooking times based on what you use. Explore the full recipe to discover how to create these delicious variations. To keep your leftover lemon dill salmon fresh, store it in an airtight container. Make sure to let it cool first. Place the salmon in the fridge within two hours of cooking. It will last for up to three days. If you want to enjoy it later, consider freezing it. When reheating salmon, do it gently to keep it moist. You can use the oven or the microwave. If using the oven, preheat it to 350°F (175°C). Place the salmon in a baking dish with a splash of water. Cover it with foil, then heat for about 10-15 minutes. For the microwave, heat in short bursts of 30 seconds. Check for warmth, so you don’t overcook it. Freezing lemon dill salmon is simple. Wrap each fillet tightly in plastic wrap. Then, place them in a freezer-safe bag. Remove as much air as possible. Frozen salmon can last for up to three months. When you are ready to eat it, thaw it in the fridge overnight. This keeps the flavor and texture intact. You can follow the full recipe again to enjoy it fresh! The best way to tell if salmon is done cooking is by checking its color and texture. Cooked salmon should look opaque and flaky. You can also use a food thermometer. Aim for an internal temperature of 145°F. If you don't have a thermometer, gently poke it with a fork. If it flakes easily, it's ready to eat. Yes, you can use dried dill instead of fresh. However, fresh dill offers a brighter taste. Use about one-third of the amount when using dried dill. So, if the recipe calls for three tablespoons of fresh dill, use just one tablespoon of dried. Mix it into the olive oil mixture for flavor. Many side dishes pair well with Lemon Dill Salmon. Here are some great options: - Steamed asparagus - Roasted vegetables - Garlic mashed potatoes - Quinoa salad - Rice pilaf Each of these sides complements the light, zesty flavor of the salmon. Enjoy experimenting with your favorites! For the full recipe, check out the Lemon Dill Salmon Delight. This blog post covered the key ingredients for Lemon Dill Salmon, along with step-by-step instructions. You learned how to make a tasty sauce, cook salmon perfectly, and add different flavors. The tips helped you present and store your meal well. Plus, we discussed fun variations, including grilling and vegan options. In summary, making Lemon Dill Salmon can be easy and fun. Enjoy creating your dish and impressing everyone with the taste!](https://dailydishly.com/wp-content/uploads/2025/07/811fb225-badc-4aa2-b5b2-7775fc921ea0-768x768.webp)
