Lemon Dill Salmon Flavorful and Easy Recipe Guide
. Cooking this dish is fun and easy. With these ingredients, you will make a meal that impresses everyone. First, set your oven to 400°F (200°C). This is the perfect heat for baking salmon. While the oven warms up, grab a baking sheet. Line it with parchment paper and lightly grease it. This helps the salmon cook evenly and keeps it from sticking. In a small bowl, whisk together 2 tablespoons of olive oil and the juice from one lemon. Add 3 tablespoons of chopped dill, 1 teaspoon of garlic powder, and a pinch of salt and pepper. If you want more flavor, mix in 1 tablespoon of Dijon mustard. This sauce is bright, fresh, and easy to make! Place 4 salmon fillets on the prepared baking sheet. Generously brush the lemon dill sauce over each fillet. Next, lay lemon slices on top for extra flavor. Bake the salmon in the oven for about 12 to 15 minutes. You want it to reach an internal temperature of at least 145°F. Let the salmon rest for 5 minutes before serving. Enjoy your Lemon Dill Salmon! For the complete instructions, check out the Full Recipe. To get the best salmon, choose fresh fillets. Look for bright color and no strong odor. Preheat your oven to 400°F (200°C) for even cooking. Cook salmon for 12-15 minutes. The fish is done when it flakes easily with a fork. The internal temperature should reach 145°F. If you want to check, use a meat thermometer. This will help you avoid overcooking your salmon. Let it rest for 5 minutes after baking. This keeps the juices inside. For a bright taste, use fresh lemon juice. This adds a tangy kick that complements salmon. Fresh dill enhances the dish with a herbal note. If you want more depth, add Dijon mustard to the olive oil mixture. Garlic powder gives a warm flavor to the sauce. Remember to season with salt and pepper. This simple step can make a big difference. You can also try adding a pinch of red pepper flakes for heat. Adjust flavors to your liking as you go along. Presentation is key for any dish. Arrange cooked salmon on a clean plate. Use lemon slices and fresh dill sprigs for garnish. This adds color and makes the dish pop. Serve with seasonal vegetables or rice for a complete meal. Consider using a drizzle of olive oil over the top for shine. You can even sprinkle some extra dill on the plate. This not only looks nice but also adds more flavor. Make your dish appealing to both the eyes and the palate. For the complete list of steps and ingredients, check out the Full Recipe. {{image_2}} Grilling salmon adds a smoky flavor. You can easily make grilled lemon dill salmon. Start by marinating the salmon fillets in the lemon dill sauce for about 30 minutes. Heat your grill to medium-high. Place the fillets skin-side down on the grill. Cook for about 6-8 minutes. Flip the salmon and grill for another 5-7 minutes until cooked through. The grill marks will add a nice touch. Adding Dijon mustard gives your lemon dill salmon a sharp twist. Simply mix 1 tablespoon of Dijon mustard into your lemon dill sauce. This adds a zesty flavor that pairs well with the salmon. Follow the same baking steps from the recipe. The mustard will caramelize slightly, giving a tasty crust. If you want a vegan option, use tofu or tempeh. Marinate the tofu in the lemon dill sauce just like the salmon. You can bake or grill it in the same way. For a lighter choice, try using zucchini or eggplant slices. These veggies soak up the flavors well. Just remember to adjust cooking times based on what you use. Explore the full recipe to discover how to create these delicious variations. To keep your leftover lemon dill salmon fresh, store it in an airtight container. Make sure to let it cool first. Place the salmon in the fridge within two hours of cooking. It will last for up to three days. If you want to enjoy it later, consider freezing it. When reheating salmon, do it gently to keep it moist. You can use the oven or the microwave. If using the oven, preheat it to 350°F (175°C). Place the salmon in a baking dish with a splash of water. Cover it with foil, then heat for about 10-15 minutes. For the microwave, heat in short bursts of 30 seconds. Check for warmth, so you don’t overcook it. Freezing lemon dill salmon is simple. Wrap each fillet tightly in plastic wrap. Then, place them in a freezer-safe bag. Remove as much air as possible. Frozen salmon can last for up to three months. When you are ready to eat it, thaw it in the fridge overnight. This keeps the flavor and texture intact. You can follow the full recipe again to enjoy it fresh! The best way to tell if salmon is done cooking is by checking its color and texture. Cooked salmon should look opaque and flaky. You can also use a food thermometer. Aim for an internal temperature of 145°F. If you don't have a thermometer, gently poke it with a fork. If it flakes easily, it's ready to eat. Yes, you can use dried dill instead of fresh. However, fresh dill offers a brighter taste. Use about one-third of the amount when using dried dill. So, if the recipe calls for three tablespoons of fresh dill, use just one tablespoon of dried. Mix it into the olive oil mixture for flavor. Many side dishes pair well with Lemon Dill Salmon. Here are some great options: - Steamed asparagus - Roasted vegetables - Garlic mashed potatoes - Quinoa salad - Rice pilaf Each of these sides complements the light, zesty flavor of the salmon. Enjoy experimenting with your favorites! For the full recipe, check out the Lemon Dill Salmon Delight. This blog post covered the key ingredients for Lemon Dill Salmon, along with step-by-step instructions. You learned how to make a tasty sauce, cook salmon perfectly, and add different flavors. The tips helped you present and store your meal well. Plus, we discussed fun variations, including grilling and vegan options. In summary, making Lemon Dill Salmon can be easy and fun. Enjoy creating your dish and impressing everyone with the taste!](https://dailydishly.com/wp-content/uploads/2025/07/811fb225-badc-4aa2-b5b2-7775fc921ea0.webp)
Are you ready to impress your family with a dish that’s both tasty and easy? This Lemon Dill Salmon recipe is packed with vibrant flavors and fresh ingredients. I’ll guide you step-by-step, ensuring you get the most succulent salmon every time. With tips for perfect cooking and exciting variations, you’ll be a culinary star in no time. Let’s dive into this simple yet delicious cooking adventure!
Ingredients
Fresh Ingredients for Lemon Dill Salmon
For a tasty Lemon Dill Salmon, you need fresh ingredients. Here’s what you will use:
– 4 salmon fillets (6 oz each)
– 2 lemons (one for juice, one sliced for garnish)
– 3 tablespoons fresh dill, chopped
Fresh salmon gives the best flavor. Choose fillets that are firm and bright in color. For the lemons, go for juicy ones. Fresh dill adds a bright, herbal taste that makes this dish shine.
Pantry Staple Ingredients
You will also need some common pantry items. These add flavor and help the dish come together. Here’s what to grab:
– 2 tablespoons olive oil
– 1 teaspoon garlic powder
– Salt and pepper to taste
Olive oil helps keep the salmon moist while cooking. Garlic powder gives a nice, savory kick. Salt and pepper are key to enhance all the flavors in your dish.
Optional Ingredients for Extra Flavor
If you want to add more depth to your Lemon Dill Salmon, consider these optional items:
– 1 tablespoon Dijon mustard (optional)
– Fresh dill sprigs for garnish
Dijon mustard brings a tangy flavor that pairs well with the lemon. For garnish, fresh dill sprigs make your dish look nice and add a bit more herb flavor.
Cooking this dish is fun and easy. With these ingredients, you will make a meal that impresses everyone.
Step-by-Step Instructions
Preparing the Oven and Baking Sheet
First, set your oven to 400°F (200°C). This is the perfect heat for baking salmon. While the oven warms up, grab a baking sheet. Line it with parchment paper and lightly grease it. This helps the salmon cook evenly and keeps it from sticking.
Making the Lemon Dill Sauce
In a small bowl, whisk together 2 tablespoons of olive oil and the juice from one lemon. Add 3 tablespoons of chopped dill, 1 teaspoon of garlic powder, and a pinch of salt and pepper. If you want more flavor, mix in 1 tablespoon of Dijon mustard. This sauce is bright, fresh, and easy to make!
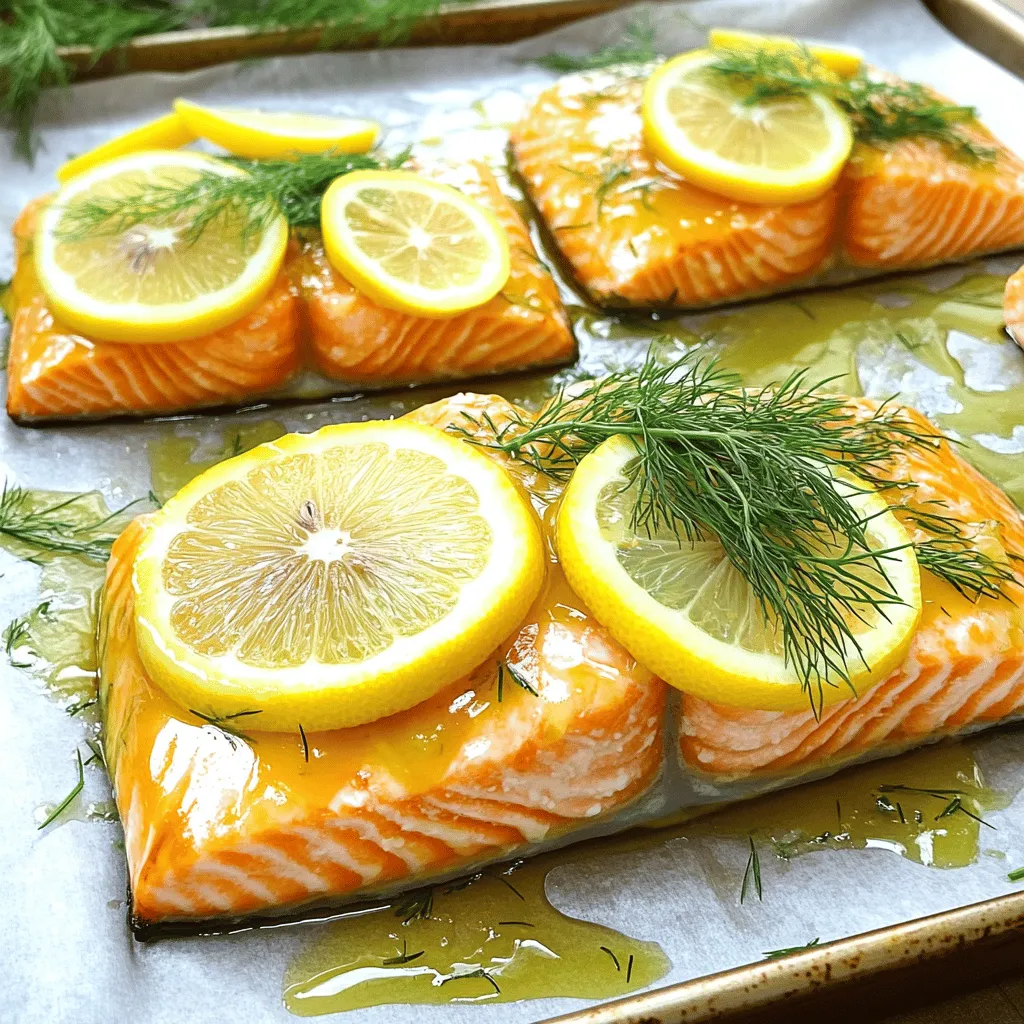
Baking the Salmon Fillets
Place 4 salmon fillets on the prepared baking sheet. Generously brush the lemon dill sauce over each fillet. Next, lay lemon slices on top for extra flavor. Bake the salmon in the oven for about 12 to 15 minutes. You want it to reach an internal temperature of at least 145°F. Let the salmon rest for 5 minutes before serving. Enjoy your Lemon Dill Salmon!
Tips & Tricks
Ensuring Perfectly Cooked Salmon
To get the best salmon, choose fresh fillets. Look for bright color and no strong odor. Preheat your oven to 400°F (200°C) for even cooking. Cook salmon for 12-15 minutes. The fish is done when it flakes easily with a fork. The internal temperature should reach 145°F. If you want to check, use a meat thermometer. This will help you avoid overcooking your salmon. Let it rest for 5 minutes after baking. This keeps the juices inside.
Enhancing Flavor Profiles
For a bright taste, use fresh lemon juice. This adds a tangy kick that complements salmon. Fresh dill enhances the dish with a herbal note. If you want more depth, add Dijon mustard to the olive oil mixture. Garlic powder gives a warm flavor to the sauce. Remember to season with salt and pepper. This simple step can make a big difference. You can also try adding a pinch of red pepper flakes for heat. Adjust flavors to your liking as you go along.
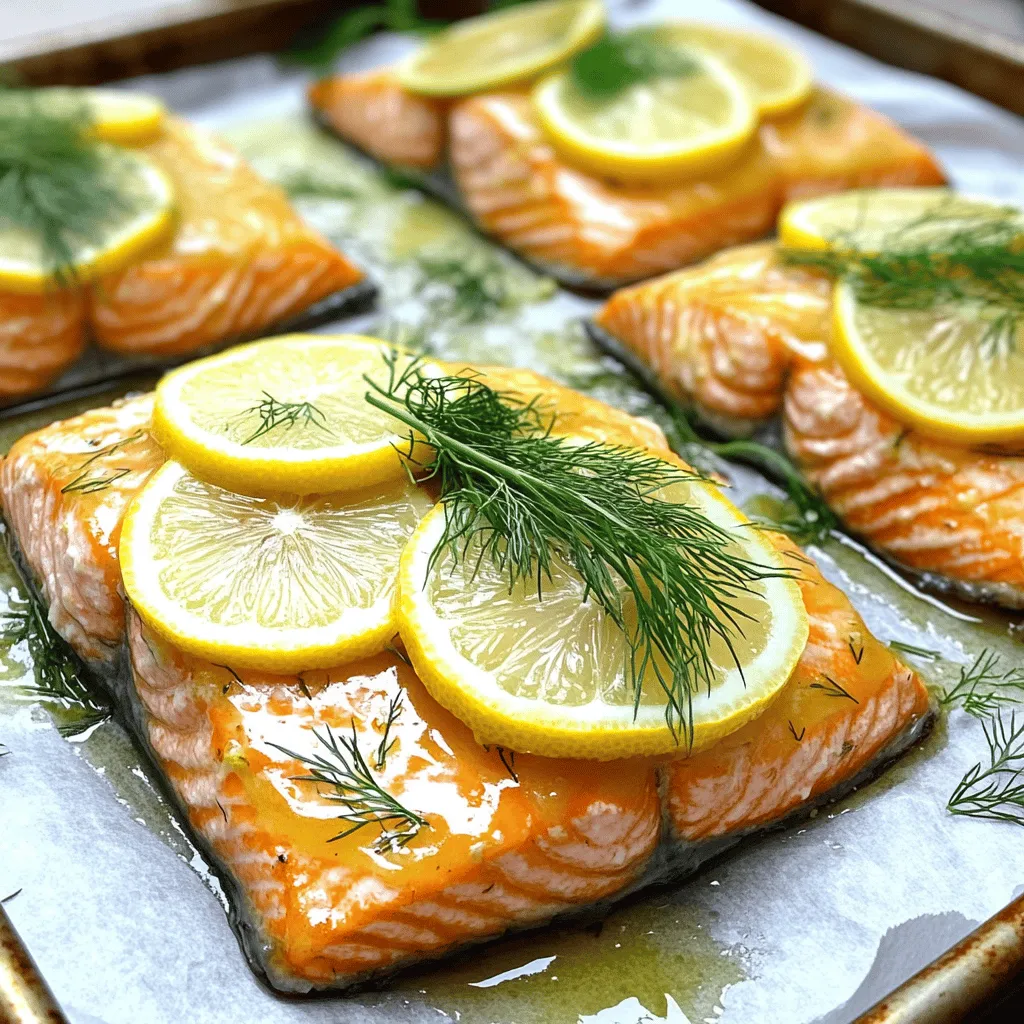
Presentation Tips for Serving
Presentation is key for any dish. Arrange cooked salmon on a clean plate. Use lemon slices and fresh dill sprigs for garnish. This adds color and makes the dish pop. Serve with seasonal vegetables or rice for a complete meal. Consider using a drizzle of olive oil over the top for shine. You can even sprinkle some extra dill on the plate. This not only looks nice but also adds more flavor. Make your dish appealing to both the eyes and the palate.

Variations
Grilled Lemon Dill Salmon
Grilling salmon adds a smoky flavor. You can easily make grilled lemon dill salmon. Start by marinating the salmon fillets in the lemon dill sauce for about 30 minutes. Heat your grill to medium-high. Place the fillets skin-side down on the grill. Cook for about 6-8 minutes. Flip the salmon and grill for another 5-7 minutes until cooked through. The grill marks will add a nice touch.
Lemon Dill Salmon with Dijon Mustard
Adding Dijon mustard gives your lemon dill salmon a sharp twist. Simply mix 1 tablespoon of Dijon mustard into your lemon dill sauce. This adds a zesty flavor that pairs well with the salmon. Follow the same baking steps from the recipe. The mustard will caramelize slightly, giving a tasty crust.
Vegan Alternatives for Lemon Dill Flavoring
If you want a vegan option, use tofu or tempeh. Marinate the tofu in the lemon dill sauce just like the salmon. You can bake or grill it in the same way. For a lighter choice, try using zucchini or eggplant slices. These veggies soak up the flavors well. Just remember to adjust cooking times based on what you use.
Storage Info
How to Store Leftover Lemon Dill Salmon
To keep your leftover lemon dill salmon fresh, store it in an airtight container. Make sure to let it cool first. Place the salmon in the fridge within two hours of cooking. It will last for up to three days. If you want to enjoy it later, consider freezing it.
Reheating Tips for Best Taste
When reheating salmon, do it gently to keep it moist. You can use the oven or the microwave. If using the oven, preheat it to 350°F (175°C). Place the salmon in a baking dish with a splash of water. Cover it with foil, then heat for about 10-15 minutes. For the microwave, heat in short bursts of 30 seconds. Check for warmth, so you don’t overcook it.
Freezing Lemon Dill Salmon for Future Use
Freezing lemon dill salmon is simple. Wrap each fillet tightly in plastic wrap. Then, place them in a freezer-safe bag. Remove as much air as possible. Frozen salmon can last for up to three months. When you are ready to eat it, thaw it in the fridge overnight. This keeps the flavor and texture intact.
FAQs
What is the best way to tell if salmon is done cooking?
The best way to tell if salmon is done cooking is by checking its color and texture. Cooked salmon should look opaque and flaky. You can also use a food thermometer. Aim for an internal temperature of 145°F. If you don’t have a thermometer, gently poke it with a fork. If it flakes easily, it’s ready to eat.
Can I use dried dill instead of fresh?
Yes, you can use dried dill instead of fresh. However, fresh dill offers a brighter taste. Use about one-third of the amount when using dried dill. So, if the recipe calls for three tablespoons of fresh dill, use just one tablespoon of dried. Mix it into the olive oil mixture for flavor.
What side dishes pair well with Lemon Dill Salmon?
Many side dishes pair well with Lemon Dill Salmon. Here are some great options:
– Steamed asparagus
– Roasted vegetables
– Garlic mashed potatoes
– Quinoa salad
– Rice pilaf
Each of these sides complements the light, zesty flavor of the salmon. Enjoy experimenting with your favorites!
This blog post covered the key ingredients for Lemon Dill Salmon, along with step-by-step instructions. You learned how to make a tasty sauce, cook salmon perfectly, and add different flavors. The tips helped you present and store your meal well. Plus, we discussed fun variations, including grilling and vegan options.
In summary, making Lemon Dill Salmon can be easy and fun. Enjoy creating your dish and impressing everyone with the taste!
. Cooking this dish is fun and easy. With these ingredients, you will make a meal that impresses everyone. First, set your oven to 400°F (200°C). This is the perfect heat for baking salmon. While the oven warms up, grab a baking sheet. Line it with parchment paper and lightly grease it. This helps the salmon cook evenly and keeps it from sticking. In a small bowl, whisk together 2 tablespoons of olive oil and the juice from one lemon. Add 3 tablespoons of chopped dill, 1 teaspoon of garlic powder, and a pinch of salt and pepper. If you want more flavor, mix in 1 tablespoon of Dijon mustard. This sauce is bright, fresh, and easy to make! Place 4 salmon fillets on the prepared baking sheet. Generously brush the lemon dill sauce over each fillet. Next, lay lemon slices on top for extra flavor. Bake the salmon in the oven for about 12 to 15 minutes. You want it to reach an internal temperature of at least 145°F. Let the salmon rest for 5 minutes before serving. Enjoy your Lemon Dill Salmon! For the complete instructions, check out the Full Recipe. To get the best salmon, choose fresh fillets. Look for bright color and no strong odor. Preheat your oven to 400°F (200°C) for even cooking. Cook salmon for 12-15 minutes. The fish is done when it flakes easily with a fork. The internal temperature should reach 145°F. If you want to check, use a meat thermometer. This will help you avoid overcooking your salmon. Let it rest for 5 minutes after baking. This keeps the juices inside. For a bright taste, use fresh lemon juice. This adds a tangy kick that complements salmon. Fresh dill enhances the dish with a herbal note. If you want more depth, add Dijon mustard to the olive oil mixture. Garlic powder gives a warm flavor to the sauce. Remember to season with salt and pepper. This simple step can make a big difference. You can also try adding a pinch of red pepper flakes for heat. Adjust flavors to your liking as you go along. Presentation is key for any dish. Arrange cooked salmon on a clean plate. Use lemon slices and fresh dill sprigs for garnish. This adds color and makes the dish pop. Serve with seasonal vegetables or rice for a complete meal. Consider using a drizzle of olive oil over the top for shine. You can even sprinkle some extra dill on the plate. This not only looks nice but also adds more flavor. Make your dish appealing to both the eyes and the palate. For the complete list of steps and ingredients, check out the Full Recipe. {{image_2}} Grilling salmon adds a smoky flavor. You can easily make grilled lemon dill salmon. Start by marinating the salmon fillets in the lemon dill sauce for about 30 minutes. Heat your grill to medium-high. Place the fillets skin-side down on the grill. Cook for about 6-8 minutes. Flip the salmon and grill for another 5-7 minutes until cooked through. The grill marks will add a nice touch. Adding Dijon mustard gives your lemon dill salmon a sharp twist. Simply mix 1 tablespoon of Dijon mustard into your lemon dill sauce. This adds a zesty flavor that pairs well with the salmon. Follow the same baking steps from the recipe. The mustard will caramelize slightly, giving a tasty crust. If you want a vegan option, use tofu or tempeh. Marinate the tofu in the lemon dill sauce just like the salmon. You can bake or grill it in the same way. For a lighter choice, try using zucchini or eggplant slices. These veggies soak up the flavors well. Just remember to adjust cooking times based on what you use. Explore the full recipe to discover how to create these delicious variations. To keep your leftover lemon dill salmon fresh, store it in an airtight container. Make sure to let it cool first. Place the salmon in the fridge within two hours of cooking. It will last for up to three days. If you want to enjoy it later, consider freezing it. When reheating salmon, do it gently to keep it moist. You can use the oven or the microwave. If using the oven, preheat it to 350°F (175°C). Place the salmon in a baking dish with a splash of water. Cover it with foil, then heat for about 10-15 minutes. For the microwave, heat in short bursts of 30 seconds. Check for warmth, so you don’t overcook it. Freezing lemon dill salmon is simple. Wrap each fillet tightly in plastic wrap. Then, place them in a freezer-safe bag. Remove as much air as possible. Frozen salmon can last for up to three months. When you are ready to eat it, thaw it in the fridge overnight. This keeps the flavor and texture intact. You can follow the full recipe again to enjoy it fresh! The best way to tell if salmon is done cooking is by checking its color and texture. Cooked salmon should look opaque and flaky. You can also use a food thermometer. Aim for an internal temperature of 145°F. If you don't have a thermometer, gently poke it with a fork. If it flakes easily, it's ready to eat. Yes, you can use dried dill instead of fresh. However, fresh dill offers a brighter taste. Use about one-third of the amount when using dried dill. So, if the recipe calls for three tablespoons of fresh dill, use just one tablespoon of dried. Mix it into the olive oil mixture for flavor. Many side dishes pair well with Lemon Dill Salmon. Here are some great options: - Steamed asparagus - Roasted vegetables - Garlic mashed potatoes - Quinoa salad - Rice pilaf Each of these sides complements the light, zesty flavor of the salmon. Enjoy experimenting with your favorites! For the full recipe, check out the Lemon Dill Salmon Delight. This blog post covered the key ingredients for Lemon Dill Salmon, along with step-by-step instructions. You learned how to make a tasty sauce, cook salmon perfectly, and add different flavors. The tips helped you present and store your meal well. Plus, we discussed fun variations, including grilling and vegan options. In summary, making Lemon Dill Salmon can be easy and fun. Enjoy creating your dish and impressing everyone with the taste!](https://dailydishly.com/wp-content/uploads/2025/07/811fb225-badc-4aa2-b5b2-7775fc921ea0-300x300.webp)


![- 2 cans (15 oz each) black beans, rinsed and drained - 1 tablespoon olive oil - 1 medium onion, finely chopped - 3 cloves garlic, minced - 1 chipotle pepper in adobo sauce, minced (or more for extra spiciness) - 1 teaspoon ground cumin - 1 teaspoon smoked paprika - Salt and black pepper to taste - 8 small corn or flour tortillas - 1 avocado, sliced - 1 cup cherry tomatoes, halved - Fresh cilantro, chopped for garnish - Lime wedges, for serving Using high-quality ingredients makes a big difference. I prefer fresh, whole foods. Canned beans are great too, but rinse them well. They taste better and are healthier. If you want a vegan dish, this recipe is perfect. Just use corn tortillas. They are usually gluten-free. If you need a gluten-free option, corn tortillas are a good choice. They add a nice crunch. You can also use whole wheat tortillas for a different flavor. - Sour cream - Shredded cheese - Sliced jalapeños Toppings can really enhance your tacos. I love adding sour cream for creaminess. Shredded cheese adds flavor. For heat, try sliced jalapeños. Making toppings at home is often better than store-bought. You control the taste and freshness. Plus, it's fun to experiment. Try making your own salsa or guacamole for a tasty twist. Start by heating the olive oil in a large skillet over medium heat. Once hot, add the finely chopped onion. Sauté it for about five minutes. When the onion softens, add the minced garlic and chipotle pepper. Stir for one to two minutes, until you smell the garlic. Next, add the black beans, ground cumin, smoked paprika, salt, and pepper. Cook this mixture for five to seven minutes. Stir occasionally and mash some beans with a fork. This will make the mixture creamy. If you taste it and think it needs more flavor, add more salt or spices. Now, let's warm the tortillas. You can use a dry skillet or a microwave. For the skillet, place the tortillas over medium heat. Heat each side for about 30 seconds or until they feel soft. If you use a microwave, wrap them in a damp paper towel and heat for 15 to 20 seconds. Corn tortillas can break easily, so handle them gently. Flour tortillas are more flexible, but both taste great! It's time to put everything together! Start by placing a warm tortilla on a plate. Spoon some of the spicy black bean mixture onto the center. Then, add sliced avocado and halved cherry tomatoes on top. Finish with a sprinkle of fresh cilantro for color and flavor. For a pretty presentation, arrange the tacos on a large platter. Add lime wedges next to them for squeezing. You can even serve them with a side of salsa for extra fun! For the full recipe, check out the details above. Temperature control is key when cooking beans. Start with medium heat. This helps the beans warm evenly without burning. Stir often to avoid sticking. The perfect texture for the bean mixture is creamy but not mushy. Lightly mash some beans as you cook. This gives a nice blend of smooth and chunky. To boost flavor, consider adding spices like chili powder or cayenne pepper. Fresh herbs like cilantro or parsley also add brightness. Marinating the bean mixture can deepen the flavor. Let it sit for at least 30 minutes to absorb the spices. This step is easy and makes a big difference. Meal prepping your ingredients is a smart way to save time. Chop onions and garlic a day ahead. You can also mash the beans in advance. Store each ingredient in separate containers. When you're ready, assembly is quick! For faster assembly, warm all tortillas at once. Use a large skillet to heat them. This way, you can serve warm tacos to everyone. For the full recipe, check out the details above. {{image_2}} You can change up your Spicy Black Bean Tacos by adding different proteins. If you want meat, try diced chicken or ground beef. For a plant-based option, use lentils or quinoa. Both options add new flavors and textures. You can spice up those chicken tacos with smoky seasonings. Add chipotle or cayenne for even more heat. Tacos vary by region, so you can get creative! For a twist, make black bean burritos by wrapping the filling in a larger tortilla. You could also create taco bowls by layering the ingredients in a bowl instead of a tortilla. Each method brings its own fun to the table and allows for more customization. Using seasonal produce makes your tacos fresh and vibrant. In summer, add grilled zucchini or corn for a sweet crunch. In the fall, try roasted butternut squash for a warm flavor. You can also use leftover veggies from your fridge. Toss them in with the black beans for a tasty, resourceful meal. To store your taco filling, first let it cool to room temperature. Place it in an airtight container. This keeps it fresh for up to four days in the fridge. If you want to freeze the bean mixture, use a freezer-safe container. Label it with the date. The filling can last up to three months in the freezer. To reheat, simply thaw it overnight in the fridge and warm it on the stove. Stir occasionally until heated through. Store leftover tortillas in a zip-top bag. This helps prevent them from drying out. Keep the bag in the fridge for best results. If your tortillas get stale, don’t worry! You can revive them. Just wrap them in a damp paper towel and microwave for 10-15 seconds. This will make them soft and pliable again. The black bean mixture will last in the fridge for about four days. Tortillas can last one to two weeks if stored well. To stay safe, always check for any odd smells or mold before eating. When in doubt, throw it out! Enjoy your Spicy Black Bean Tacos knowing you stored them safely. For the complete recipe, visit the [Full Recipe] link. To make your tacos less spicy, skip the chipotle pepper. You can also use bell peppers for flavor. Adding a dollop of sour cream or yogurt cools the heat too. If you want a milder taste, use less cumin and smoked paprika. Try adding sweet corn or diced tomatoes for a fresh twist. Yes, you can use canned black beans. They are safe and save you time. Just rinse and drain them to remove extra salt. Canned beans are cooked, so you only need to heat them in your taco mix. This makes cooking easier and faster. Pair your tacos with some tasty sides. Try serving them with Mexican rice or a fresh salad. Guacamole is a great dip too. If you want a drink, serve with limeade or iced tea. These sides balance the flavors and make your meal complete. For more ideas, check out the Full Recipe. In this post, I covered how to make Spicy Black Bean Tacos from start to finish. We explored key ingredients, cooking steps, and tips to enhance flavor and texture. I also shared ideas for variations, storage, and how to handle leftovers. Tacos are fun and easy to make. You can customize them any way you want. Enjoy your cooking adventure!](https://dailydishly.com/wp-content/uploads/2025/06/e30d655b-3f29-4259-b589-8a39593520a7-768x768.webp)
![- 1.5 lbs Brussels sprouts, trimmed and halved - 3 tablespoons maple syrup - 2 tablespoons olive oil - 1 teaspoon garlic powder - 1 teaspoon salt - ½ teaspoon black pepper - ½ cup pecans, roughly chopped (optional) - 1 tablespoon balsamic vinegar (optional) When I make maple roasted Brussels sprouts, I love using fresh, vibrant Brussels sprouts. They have a sweet, nutty taste that pairs perfectly with maple syrup. The maple syrup adds a lovely sweetness that balances the slight bitterness of the sprouts. Olive oil is essential here. It helps in roasting and gives a nice, rich flavor. Garlic powder adds depth, while salt and pepper enhance the natural taste. If you want some crunch, add pecans. They bring a great texture and flavor. I sometimes drizzle balsamic vinegar at the end for a tangy twist. - Baking sheet - Large mixing bowl - Measuring spoons - Knife and cutting board For this recipe, you need a few simple tools. A baking sheet helps with even roasting. A large mixing bowl makes it easy to combine everything. Measuring spoons ensure you get the right amounts. Finally, a knife and cutting board are needed to trim the Brussels sprouts. With these ingredients and tools, you're all set to create a delicious dish. You can check out the [Full Recipe] for step-by-step instructions. Enjoy your cooking adventure! - Preheat your oven to 400°F (200°C). - Trim and halve the Brussels sprouts. This helps them cook evenly and taste great. - In a large mixing bowl, mix Brussels sprouts with olive oil, maple syrup, garlic powder, salt, and pepper. Make sure every sprout gets a nice coat. This mixture adds sweetness and flavor. - Spread the sprouts in a single layer on a baking sheet. This step is key for good roasting. - Roast for 20-25 minutes, shaking the pan halfway. This helps them brown evenly. You want them golden and crispy on the edges. For extra crunch, sprinkle chopped pecans during the last five minutes. You can find the full recipe [here](#). To get crispy Brussels sprouts, spread them out on the baking sheet. Make sure they are in a single layer. This helps them roast evenly. Shake the pan halfway through cooking. This allows hot air to reach all sides. You can add balsamic vinegar for a bit of tang. It gives a nice balance to the sweetness of the maple. Garlic adds depth, too. You can also try spices like paprika or cayenne for extra heat. This way, you can customize the flavors to your taste. These Brussels sprouts go well with proteins like chicken or fish. They make a great side dish. You can also serve them as a healthy snack or appetizer. They are delicious warm or at room temperature. For more ideas, check out the Full Recipe. {{image_2}} You can easily make this dish nut-free. Just omit the pecans. The Brussels sprouts will still taste great with the maple syrup and spices. You won't miss the nuts at all! If you want a vegan version, you can keep it simple. Use maple syrup as your only sweetener. This recipe already has olive oil, so it’s vegan-friendly. Just make sure to check your balsamic vinegar for any added ingredients that aren’t vegan. Want to make your Brussels sprouts special for the season? Add some seasonal spices! A sprinkle of cinnamon or nutmeg gives a warm, festive touch. This twist makes your dish stand out and adds a new flavor layer. Try it next time for a fun change! For the full recipe, check out the [Full Recipe]. Store leftovers in an airtight container in the fridge. Make sure the sprouts cool down first. This keeps them fresh and tasty for your next meal. Reheat in the oven for best texture. Set the oven to 350°F (175°C) and warm for about 10 minutes. If you're in a hurry, you can use the microwave. Heat them for 1-2 minutes, checking often to avoid overcooking. These delicious Brussels sprouts last for up to 3 days in the fridge. If you freeze them, the texture can change, making them mushy. For the best quality, enjoy them fresh or stored in the fridge. Yes, but fresh is recommended for better texture. Frozen Brussels sprouts often lose their crunch. They may also release more water, making them less crispy. If you use frozen ones, be sure to thaw and drain them first. All ingredients are naturally gluten-free; ensure seasonings are free of gluten. Check labels on packaged items. Some sauces or spices may contain hidden gluten. Using fresh ingredients helps keep this dish safe for gluten-free diets. Honey or agave can be used as a replacement, though it will alter flavor. Maple syrup provides a unique taste that is hard to match. If you choose honey, use a little less, as it is sweeter. Agave has a milder flavor and can work well, too. This recipe shows you how to make tasty roasted Brussels sprouts. You need simple ingredients and basic tools. Preheat your oven, mix the sprouts, and roast them for a perfect dish. Remember to try different flavors and store any leftovers properly. These sprouts pair well with any meal or stand alone as a snack. Enjoy trying this recipe and make it your own! Happy cooking!](https://dailydishly.com/wp-content/uploads/2025/07/86ea6ed0-8750-4297-97a9-678adfd456c4-768x768.webp)