If you love seafood, you need to try Lemon Garlic Butter Scallops. This dish is quick to make and packed with flavor. In just a few simple steps, you can create a meal that impresses your family and friends. I’ll share all the tips, ingredients, and variations you need to make this dish a hit at your dinner table. Let’s dive into this easy and tasty recipe!
Ingredients
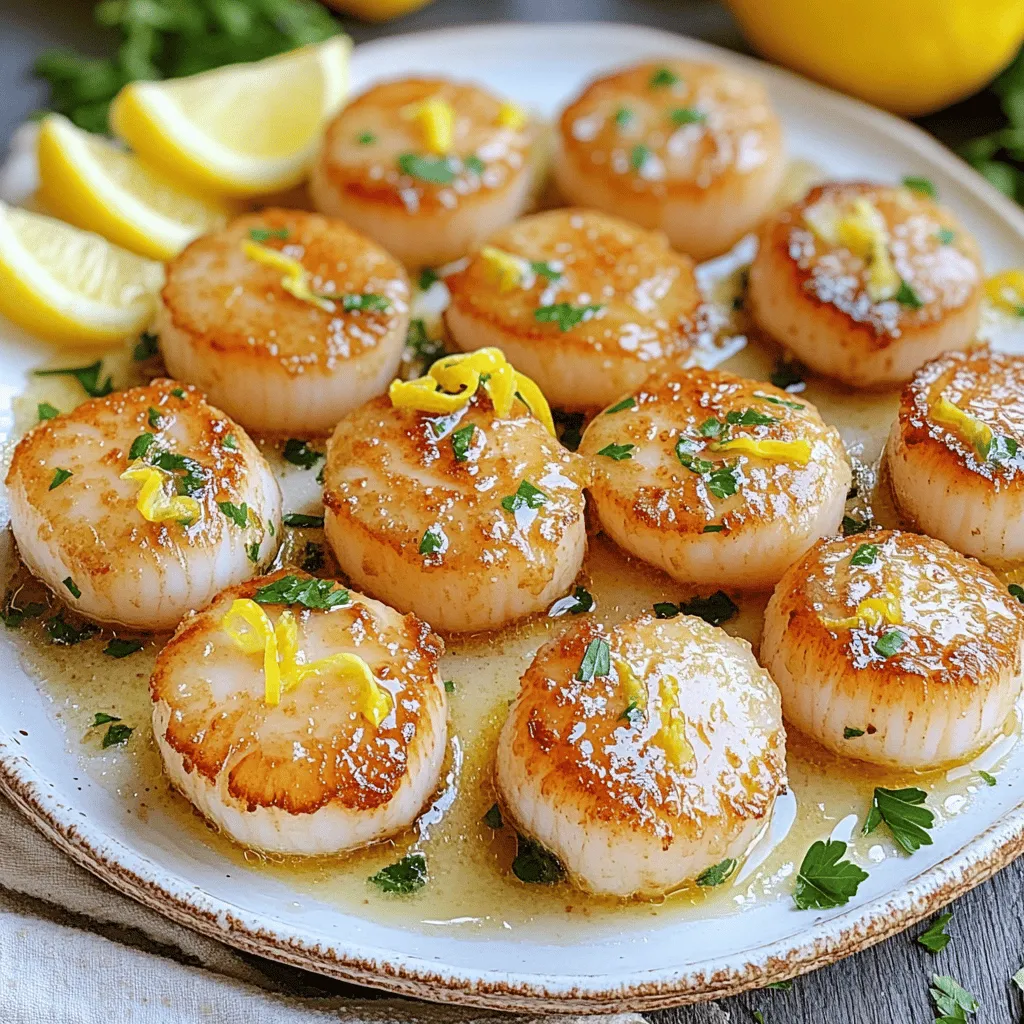
List of ingredients for Lemon Garlic Butter Scallops
– 1 lb sea scallops, cleaned and patted dry
– 4 tablespoons unsalted butter
– 4 cloves garlic, minced
– Juice and zest of 1 large lemon
– 1 tablespoon fresh parsley, chopped
– Salt and pepper to taste
– Lemon wedges for garnish
Importance of ingredient quality
Using high-quality ingredients makes a big difference in flavor. Fresh sea scallops have a sweet taste and tender texture. Look for scallops that are firm and well-cleaned. Fresh garlic adds a strong, rich flavor. Choose a bright, juicy lemon for the best zest and juice. Quality butter enhances the sauce’s creaminess. When you use fresh and good ingredients, your dish will shine.
Substitutions for key ingredients
If you can’t find sea scallops, you can use bay scallops. They are smaller but still tasty. For a dairy-free option, try using olive oil instead of butter. You can replace fresh garlic with garlic powder, but the taste will be milder. If you don’t have lemon, lime juice works well too. Fresh parsley can be swapped with other herbs like basil or cilantro. Enjoy experimenting with these variations!
Step-by-Step Instructions
Preparation of scallops
Start by cleaning the scallops. Use fresh sea scallops for the best taste. Pat them dry with paper towels. This step helps them sear well. If they are wet, they will steam instead of sear.
Heating the pan for perfect sear
Take a large skillet and place it on the stove. Heat it over medium-high heat. Add 2 tablespoons of unsalted butter. Wait until the butter melts and starts to bubble. This tells you the pan is hot enough for the scallops.
Searing scallops to perfection
Now, season the scallops with salt and pepper. It is important to season them well. Place the scallops in the hot pan without crowding them. Sear each side for about 2-3 minutes. You want them golden brown and opaque. Once done, remove them from the pan and keep them warm.
Making the garlic butter sauce
In the same skillet, lower the heat to medium. Add the remaining 2 tablespoons of butter. Once the butter melts, add the minced garlic. Sauté for about 1 minute, but watch closely. You don’t want the garlic to burn, as it can taste bitter.
Combining scallops with sauce
Next, add the lemon juice and zest to the skillet. Stir well to mix all the flavors. Let the sauce simmer for one more minute. Then, return the scallops to the skillet. Toss them gently in the garlic butter sauce to coat them nicely.
Plating and garnishing the dish
For the final touch, plate the scallops. Drizzle them with the lemon garlic butter sauce. Garnish with chopped parsley for color and flavor. Add lemon wedges on the side for a fresh touch. Enjoy your beautiful, tasty dish!
Tips & Tricks
Achieving the best sear on scallops
To get a great sear, use dry scallops. Pat them with a paper towel. Heat your pan until it’s hot. Use a mix of butter and oil for flavor and high heat. Place scallops in the pan without crowding. This helps them cook evenly. Sear each side for 2-3 minutes. You want a golden crust.
Avoiding common cooking mistakes
Don’t skip drying the scallops. Wet scallops won’t sear well. Watch the heat; too high can burn them. If your scallops stick, they aren’t ready to flip. Use a thin spatula for gentle turning. Overcooking makes scallops tough. They should be opaque and tender when done.
Enhancing flavor with additional ingredients
You can add herbs like thyme or basil for depth. A sprinkle of red pepper flakes gives a nice kick. Try adding a splash of white wine to the butter sauce for extra flavor. Capers or sun-dried tomatoes also add a new twist. Don’t forget lemon wedges for serving; they brighten the dish.
Variations
Adding different herbs for flavor
You can enhance the taste of your scallops by adding herbs. Fresh thyme or basil work well. Try dill for a fresh twist. You can mix and match herbs based on your taste. Just chop them fine and add them to the garlic butter sauce. This can boost the flavor and make the dish feel new.
Incorporating vegetables for a complete meal
Adding vegetables can turn your scallops into a full meal. Think about sautéing spinach or asparagus in the same pan. Just add them after you sear the scallops. They will soak up that yummy garlic butter flavor. You can also serve the scallops on a bed of mixed greens. This adds color and nutrition to your dish.
Alternative cooking methods (grilling, broiling)
You don’t have to stick to pan-searing. Grilling scallops gives them a nice smoky flavor. Just remember to soak wooden skewers if you use them. Broiling is another great option. It cooks the scallops quickly and gives them a nice char. Keep an eye on them, as they can cook fast. Each method brings out a different taste in the scallops. Experiment with what you like best!
Storage Info
Best practices for storing leftover scallops
To keep your leftover scallops fresh, place them in an airtight container. Make sure they are completely cooled before sealing the container. Store them in the fridge for up to two days. If you want to keep them longer, freezing is a good option.
How to reheat scallops without drying them out
Reheating scallops can be tricky. To avoid drying them out, use low heat. Place the scallops in a skillet with a bit of butter or oil. Heat them slowly on medium-low heat for about 3-4 minutes. You can also add a splash of lemon juice for extra flavor and moisture.
Freezing tips for scallops
If you want to freeze scallops, make sure they are fresh and clean. Pat them dry and place them in a single layer on a baking sheet. Freeze them for about an hour, then transfer them to a freezer bag. Remove as much air as possible to prevent freezer burn. Frozen scallops can last for up to three months.
FAQs
How long do you cook scallops?
You cook scallops for about 2-3 minutes on each side. They should turn golden brown. The center should look opaque and feel firm. Do not overcook them. Overcooked scallops can become tough and rubbery.
Can I use frozen scallops for this recipe?
Yes, you can use frozen scallops. Just make sure to thaw them completely before cooking. Pat them dry with paper towels to remove excess moisture. This helps achieve a nice sear.
What to serve with Lemon Garlic Butter Scallops?
Lemon Garlic Butter Scallops pair well with several side dishes. Here are some ideas:
– Creamy risotto
– Garlic bread
– Steamed vegetables
– Fresh salad
– Mashed potatoes
These sides complement the scallops and enhance the overall meal.
How do I know when scallops are done cooking?
Scallops are done when they are golden brown on the outside. The inside should be opaque and firm to the touch. If they feel soft or mushy, they need more time. Use a timer to avoid overcooking.
In this post, we explored making Lemon Garlic Butter Scallops. We discussed key ingredients, how to prepare and cook scallops, and tips for best results. You also learned about variations to add excitement to this dish and storage options for leftovers. Cooking scallops can be easy and fun. With the right ingredients and methods, you can make a delicious meal at home. Enjoy your cooking and impress your friends and family with your skills!


