Looking for a quick and tasty dinner? Lemon Garlic Roasted Shrimp is your answer! This dish boasts bold flavors and is ready in no time. With a few simple steps, you’ll delight your family or impress guests. Plus, it’s adaptable for various tastes. Let’s dive into the ingredients, cooking methods, and tips that make this dish a crowd favorite. Get ready to create a meal that shines on your table!
Why I Love This Recipe
- Bright and Zesty Flavor: The combination of fresh lemon juice and zest with garlic creates a vibrant and refreshing taste that perfectly complements the shrimp.
- Quick and Easy: This recipe comes together in just 20 minutes, making it perfect for a weeknight dinner or a last-minute gathering.
- Healthy and Light: With lean protein from the shrimp and healthy fats from olive oil, this dish is nutritious and satisfying without feeling heavy.
- Versatile Serving Options: Serve it over pasta, on a bed of greens, or with crusty bread to soak up the delicious juices for a meal that fits any occasion.
Ingredients
Essential Ingredients for Lemon Garlic Roasted Shrimp
To make Lemon Garlic Roasted Shrimp, you need these key ingredients:
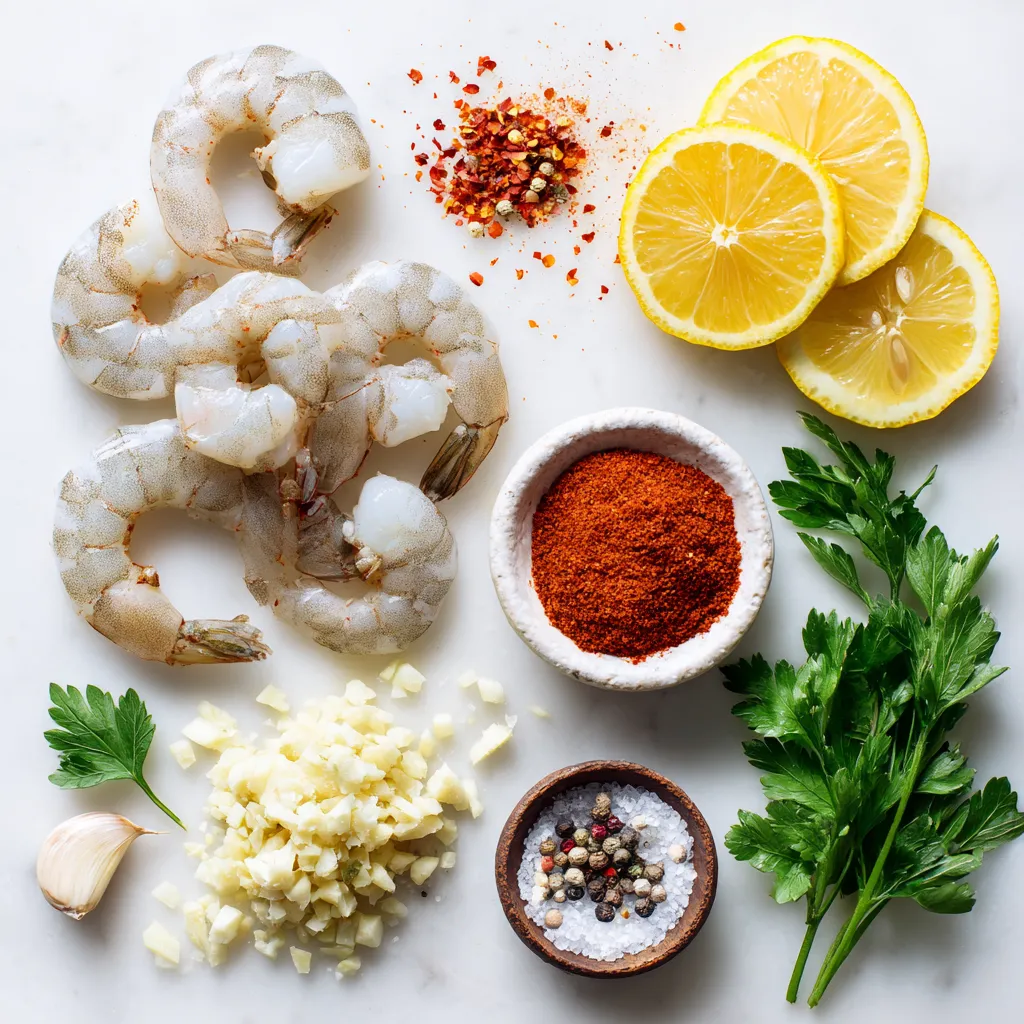
– 1 pound large shrimp, peeled and deveined
– 4 cloves garlic, minced
– 1/4 cup olive oil
– Zest and juice of 1 large lemon
– 1 teaspoon smoked paprika
– Salt and pepper to taste
These ingredients bring a fresh and bright flavor to the shrimp. The garlic adds depth, while the lemon gives a nice zing.
Optional Ingredients for Added Flavor
You can enhance the dish with these optional ingredients:
– 1/2 teaspoon red pepper flakes (for heat)
– 1/4 cup fresh parsley, chopped (for garnish)
– Lemon wedges (for serving)
Red pepper flakes add a nice kick. The parsley makes your dish look beautiful, and lemon wedges offer extra zest.
Ingredient Substitutions
If you don’t have some ingredients, here are a few swaps:
– Use shrimp of any size, but adjust cooking time.
– Substitute lemon juice with lime juice for a different twist.
– If you don’t have smoked paprika, regular paprika works fine.
These swaps still keep the dish tasty. Don’t be afraid to experiment based on what you have!
Step-by-Step Instructions
Preparation and Marinating the Shrimp
First, gather your ingredients. You need one pound of large shrimp, four cloves of garlic, and olive oil. Also, grab a lemon, smoked paprika, red pepper flakes, salt, and pepper.
In a big bowl, mix the minced garlic, olive oil, lemon zest, and lemon juice. Add the smoked paprika, red pepper flakes, salt, and pepper. This mixture gives the shrimp great flavor.
Now, add the peeled and deveined shrimp. Toss them in the bowl until they are fully coated. This step is key for taste. Let the shrimp marinate for about five minutes while you preheat your oven.
Cooking the Shrimp in the Oven
Set your oven to 400°F (200°C). After the shrimp marinate, prepare a baking sheet. Line it with parchment paper. This helps with easy cleanup.
Spread the shrimp in a single layer on the sheet. Make sure they have space. If they are too close, they won’t cook evenly.
Roast the shrimp in the oven for eight to ten minutes. They are ready when they turn pink and opaque. Keep an eye on them to avoid overcooking.
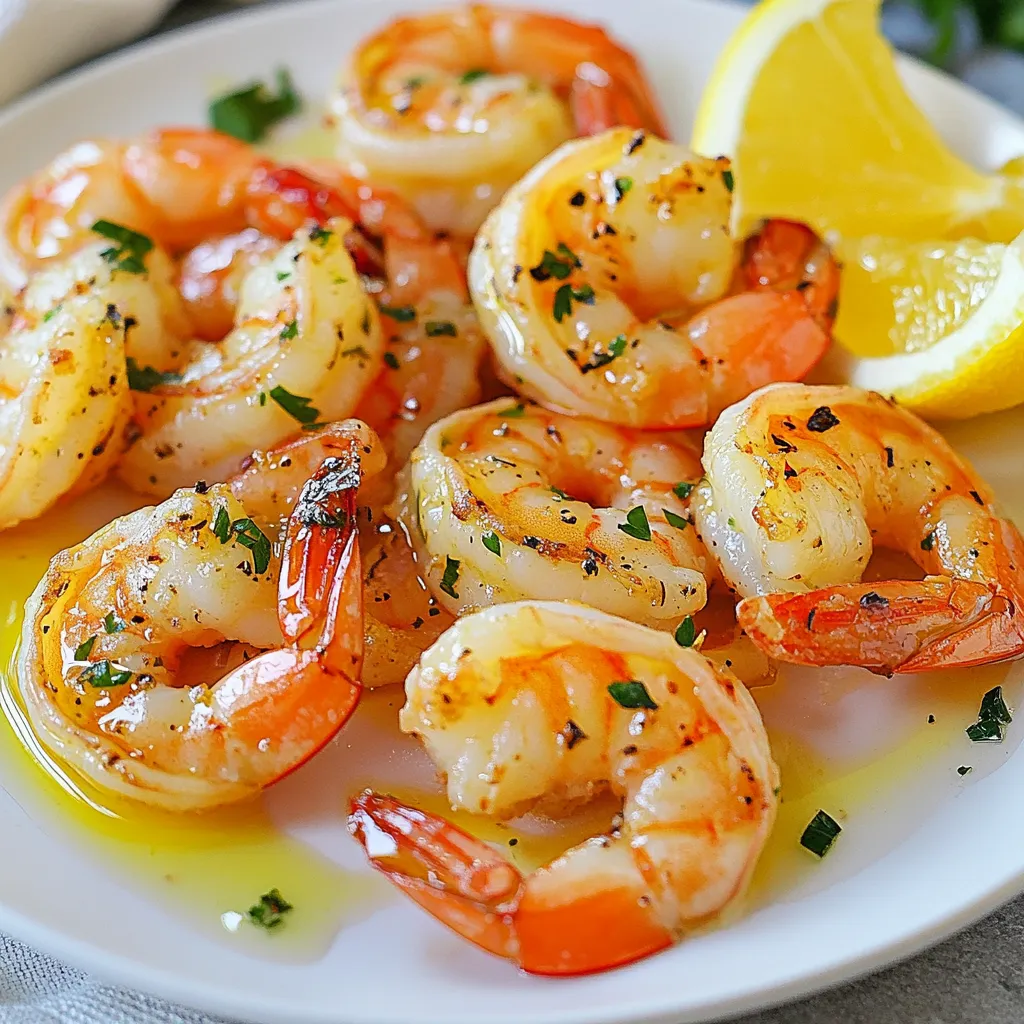
Serving Suggestions and Garnishing Tips
Once cooked, take the shrimp out of the oven. Sprinkle chopped parsley over them. This adds a nice touch and fresh taste.
Serve the shrimp right away. Add lemon wedges on the side for an extra burst of flavor. You can also serve them with rice or pasta for a complete meal. Enjoy your tasty dish!
Tips & Tricks
How to Choose the Right Shrimp
When choosing shrimp, look for large, fresh ones. They should smell like the sea, not fishy. Check for a firm texture. Avoid shrimp with black spots. If you can, buy shrimp that is wild-caught. This shrimp often has better flavor. You can also ask your fishmonger about the shrimp’s source. This ensures you get the best quality.
Tips for Perfect Roasting
To roast shrimp perfectly, preheat your oven to 400°F (200°C). Spread shrimp in a single layer on the baking sheet. This helps them cook evenly. Use parchment paper to prevent sticking. Don’t overcrowd the shrimp. If they touch, they won’t roast well. Roast for 8 to 10 minutes. They should turn pink and opaque when done. Keep an eye on them to avoid overcooking.
Enhancing Flavor with Fresh Herbs and Spices
Adding fresh herbs can boost the flavor of your dish. I like to use parsley for garnish. It adds a nice touch of color and freshness. You can also try using basil or cilantro. For spices, smoked paprika adds depth. If you enjoy heat, sprinkle in red pepper flakes. These simple additions make a big difference in taste. Don’t hesitate to experiment with your favorite herbs!
Pro Tips
- Freshness Matters: Always use fresh shrimp for the best flavor and texture. If using frozen shrimp, ensure they are fully thawed and patted dry before marinating.
- Perfectly Cooked: Keep a close eye on the shrimp while roasting. They cook quickly and should be just pink and opaque when done to prevent overcooking.
- Add More Flavor: For an extra kick, consider marinating the shrimp for 30 minutes to an hour before roasting to allow the flavors to penetrate deeper.
- Serving Suggestions: Pair the roasted shrimp with a light salad or over a bed of pasta for a complete meal. The lemon wedges add brightness, so don’t skip them!
Variations
Spicy Lemon Garlic Shrimp with Extra Heat
To add some spice, mix in more red pepper flakes. You can use one teaspoon instead of half. This makes the dish hotter and bolder. If you like heat, try a dash of hot sauce too. It gives the shrimp a nice kick.
Lemon Garlic Shrimp Skewers for Grilling
For a fun twist, thread the shrimp onto skewers. Use wooden or metal ones for grilling. This method is great for outdoor cooking. Just marinate the shrimp as usual. Then grill them for about 2-3 minutes on each side. They will get a nice char and smoky flavor.
Serving Lemon Garlic Shrimp over Pasta or Rice
You can serve the shrimp over pasta or rice for a heartier meal. Cook your favorite pasta or rice while the shrimp roast. When the shrimp are done, place them on top. Add some of the pan juices for extra flavor. This creates a lovely, filling dish everyone will enjoy.
Storage Info
Proper Refrigeration Techniques
After you enjoy your Lemon Garlic Roasted Shrimp, store leftovers right away. Place the shrimp in an airtight container. This keeps them fresh and flavorful. Store the container in the fridge. The shrimp should stay good for about 3 days. If you want to keep them longer, freezing is a great option.
Reheating Leftover Lemon Garlic Shrimp
When you are ready to eat the leftovers, reheating is simple. You can use a pan on low heat. Add a little olive oil to the pan. Heat the shrimp gently until warm. This helps to keep them juicy. You can also use a microwave. Place the shrimp in a microwave-safe dish. Cover it with a damp paper towel to prevent drying out. Heat in short bursts of 30 seconds.
Freezing Tips for Long-Term Storage
If you have more shrimp than you can eat, freezing is a wise choice. First, let the shrimp cool completely. Then, place them in a freezer bag. Try to remove as much air as possible. Label the bag with the date. The shrimp will stay fresh for about 3 months in the freezer. When you are ready to cook them, thaw in the fridge overnight. This ensures they are ready for your next delicious meal!
FAQs
How long do I roast shrimp in the oven?
You should roast shrimp for 8 to 10 minutes. They cook quickly. When they turn pink and opaque, they are done. Avoid overcooking them. Overcooked shrimp can become tough and rubbery. Keep an eye on them while they roast.
Can I use frozen shrimp for this recipe?
Yes, you can use frozen shrimp. Thaw them first in cold water. This makes them easier to peel and devein. After thawing, dry them well with a paper towel. This helps the marinade stick better. Follow the same steps as with fresh shrimp.
What can I serve with Lemon Garlic Roasted Shrimp?
You can serve many things with Lemon Garlic Roasted Shrimp. Some great options include:
– Rice: White or brown rice pairs well.
– Pasta: Toss shrimp with pasta and a light sauce.
– Salad: A fresh green salad adds crunch.
– Vegetables: Roasted or steamed veggies make a nice side.
Feel free to get creative with your sides. Enjoy the bright flavors of the shrimp!
Lemon garlic roasted shrimp is easy to make and full of flavor. You learned about essential and optional ingredients, along with substitutions. The step-by-step instructions guide you through marinating, cooking, and serving. Tips help you pick the right shrimp and ensure perfect roasting. Variations let you explore unique tastes. Finally, storage tips keep your shrimp fresh. This dish is versatile, delicious, and sure to please. Enjoy creating this meal and impressing your family or friend


