Loaded Greek Fries Tasty and Packed with Flavor

Ready to spice up your snack game? Loaded Greek fries are a tasty twist on a classic favorite. With crispy russet potatoes, zesty toppings, and the bold flavors of Greece, every bite is a delight. I’ll guide you through simple steps to create this savory dish that dazzles at any gathering. Let’s dive into the ingredients and get cooking! Your taste buds will thank you.
Ingredients
List of Ingredients
– 4 large russet potatoes
– 1/4 cup olive oil
– 1 teaspoon garlic powder
– 1 teaspoon paprika
– Salt and pepper to taste
– 1 cup crumbled feta cheese
– 1 cup cherry tomatoes, halved
– 1/2 cup kalamata olives, pitted and sliced
– 1/2 cucumber, diced
– 1/4 red onion, finely chopped
– Fresh parsley, chopped for garnish
– 1/2 cup tzatziki sauce
To make Loaded Greek Fries, you need a few simple ingredients. First, russet potatoes are key for crispy fries. You will want to wash and slice them into thin strips.
Next, olive oil adds richness and helps the fries get that golden color. Garlic powder and paprika give the fries a savory kick. Salt and pepper bring out the flavors.
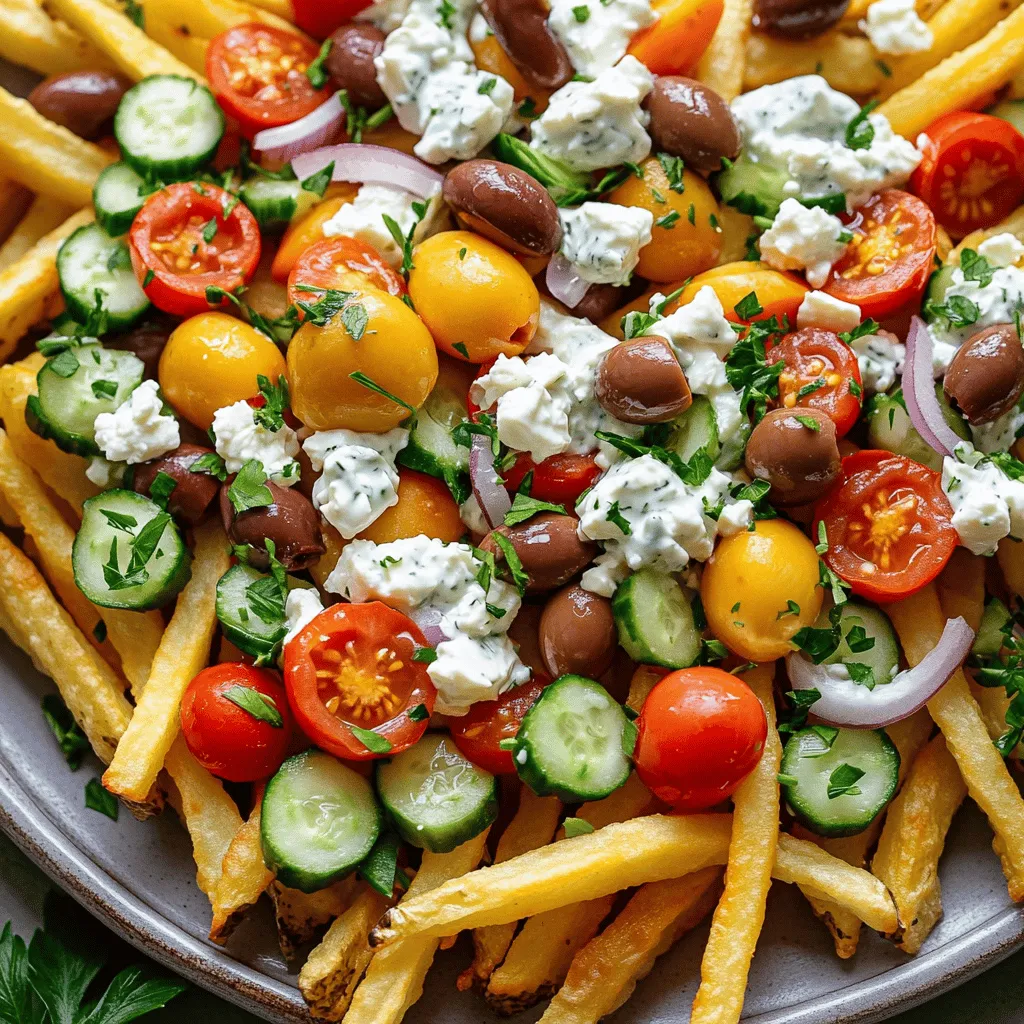
For toppings, crumbled feta cheese adds a salty, creamy touch. Cherry tomatoes bring freshness, while kalamata olives add a briny depth. Diced cucumber and red onion provide crunch and bite.
Don’t forget the fresh parsley! It adds color and a herbaceous note. To finish, a generous dollop of tzatziki sauce gives a cool, creamy contrast.
This combination makes the Loaded Greek Fries both tasty and packed with flavor.
Step-by-Step Instructions
Preparation Steps
1. Preheat the oven to 425°F (220°C). This helps the fries cook evenly.
2. Wash and slice the large russet potatoes into thin fries, about 1/4-inch thick. Thin slices cook better and get crispy.
3. In a large bowl, toss the sliced potatoes with olive oil, garlic powder, paprika, salt, and pepper. Mix well until all fries are coated with seasonings.
Cooking Steps
1. Spread the seasoned fries in a single layer on a baking sheet lined with parchment paper. This prevents sticking.
2. Bake the fries for 25-30 minutes. Flip them halfway through. They should turn crispy and golden brown.
3. While the fries are baking, prepare the toppings. In a medium bowl, mix cherry tomatoes, kalamata olives, cucumber, and red onion. Add olive oil, salt, and pepper. Toss gently.
Final Assembly
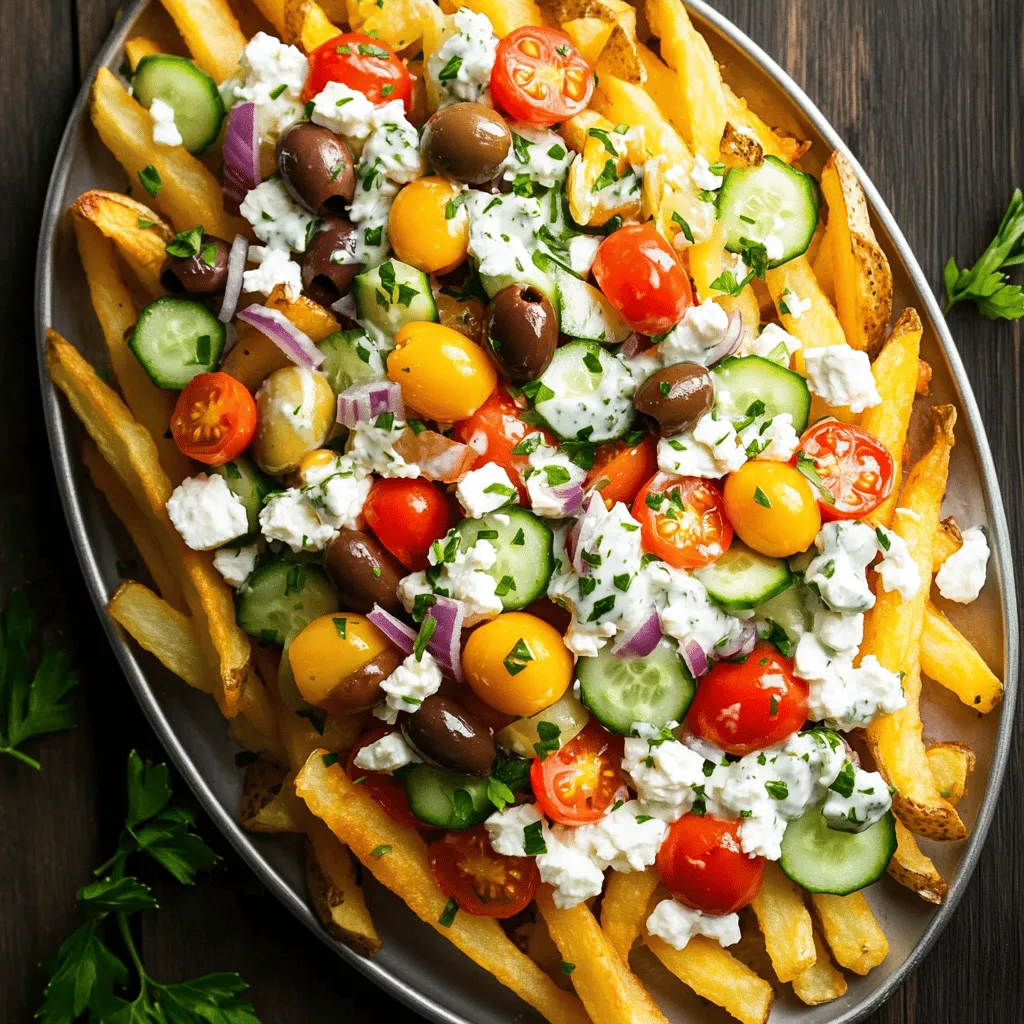
1. When the fries are done, take them out of the oven. Sprinkle crumbled feta cheese over the hot fries.
2. Top with the prepared vegetable mixture and add a generous dollop of tzatziki sauce. This sauce adds creaminess and flavor.
3. Garnish with fresh parsley for a pop of color. Serve the loaded Greek fries on a large platter. Drizzle extra tzatziki sauce over the top for fun. Offer toothpicks for easy eating. Enjoy your delicious creation!
Tips & Tricks
Cooking Tips
To ensure maximum crispiness, start with russet potatoes. Their starch content makes for a perfect fry. Cut them into thin strips, about 1/4-inch thick. This size helps them cook evenly.
Toss the fries with olive oil, garlic powder, paprika, salt, and pepper. Make sure every fry gets coated. The oil helps them crisp up in the oven. Bake at 425°F (220°C) for 25-30 minutes. Flip them halfway for even cooking.
For flavor enhancements, consider adding a pinch of crushed red pepper for heat. Fresh herbs like thyme or oregano can also boost flavor. Mix them into the seasoning before tossing the fries.
Presentation Tips
Serve the loaded Greek fries on a large platter. This makes it easy for everyone to dig in. Drizzle extra tzatziki sauce over the top for a creamy finish. Adding more parsley gives a fresh touch and color.
Using garnish effectively makes the dish pop. A sprinkle of crumbled feta on top adds a nice contrast. You can also place some lemon wedges around for extra zing.
Common Mistakes to Avoid
One common mistake is overcrowding the baking sheet. If there are too many fries, they will steam instead of crisp. Spread them out in a single layer.
Another mistake is skipping the seasoning. Fries can be bland without it. Make sure to season well with salt and other spices. This step brings out the best flavors in your loaded Greek fries.

Variations
Alternative Toppings
You can change things up by swapping feta for goat cheese. Goat cheese has a creamy texture and tangy taste that works well with fries. You can also try adding different vegetables. Roasted bell peppers, arugula, or even artichokes can add nice flavors and textures.
Flavor Customizations
For spice lovers, consider adding a dash of cayenne pepper or crushed red pepper flakes. These spices will give your fries a kick. You can also try different sauces to enhance the flavor. A drizzle of balsamic glaze or a spicy harissa sauce can take your loaded Greek fries to the next level.
Dietary Variations
If you want a vegan option, replace feta with a vegan cheese alternative. You can also add avocado for creaminess. For those who need gluten-free options, ensure you use gluten-free fries or make your own from scratch. This way, everyone can enjoy these tasty loaded Greek fries.
Storage Info
Storing Leftovers
To store your leftover Loaded Greek Fries, let them cool first. Place the fries in an airtight container. Keep them in the fridge for up to three days. This keeps them fresh and tasty. To prevent sogginess, place a paper towel at the bottom of the container. This absorbs extra moisture from the fries.
Reheating Instructions
When it’s time to enjoy your leftovers, you can use either the oven or the microwave. The oven is best for keeping fries crispy. Preheat it to 400°F (200°C). Spread the fries on a baking sheet and heat for 10-15 minutes. Flip them halfway through for even heating. If you use the microwave, heat in short bursts of 30 seconds. This method can make the fries soggy, so be careful.
Freezing Guidelines
Yes, you can freeze Loaded Greek Fries! To freeze, let them cool completely. Use freezer-safe containers or bags. Remove as much air as possible before sealing. They can last for up to three months. When you’re ready to eat them, thaw overnight in the fridge before reheating. This method helps maintain the texture.
FAQs
What are Loaded Greek Fries?
Loaded Greek fries are a fun twist on classic fries. They mix crispy fries with fresh Greek toppings. The dish has roots in Mediterranean cuisine. Here’s what you need for the recipe:
– 4 large russet potatoes
– 1/4 cup olive oil
– 1 teaspoon garlic powder
– 1 teaspoon paprika
– Salt and pepper to taste
– 1 cup crumbled feta cheese
– 1 cup cherry tomatoes, halved
– 1/2 cup kalamata olives, pitted and sliced
– 1/2 cucumber, diced
– 1/4 red onion, finely chopped
– Fresh parsley, chopped for garnish
– 1/2 cup tzatziki sauce
The russet potatoes give a nice, fluffy inside. Olive oil adds a rich flavor. Feta cheese brings a salty, creamy touch. Fresh veggies, like tomatoes and cucumbers, add color and crunch. Tzatziki sauce is the perfect cool finish. Each bite bursts with flavor.
Can I make these fries ahead of time?
Yes, you can make these fries ahead of time! I suggest preparing the fries and toppings separately.
1. Prep the fries: You can slice the potatoes and season them. Store them in water to keep them fresh. When you are ready, just bake them.
2. Toppings: Chop your veggies and mix them with the feta and tzatziki. Store this in the fridge.
When you are ready to serve, bake the fries, then add the toppings. This way, your fries stay crispy!
How can I make this dish healthier?
You can make Loaded Greek fries healthier with a few simple swaps:
– Use sweet potatoes instead of russet potatoes for more vitamins.
– Try baking instead of frying for less oil.
– Reduce the olive oil to a tablespoon or two, and still get great flavor.
– Swap feta cheese for a lower-fat cheese or even a vegan option.
These changes keep the dish tasty but cut down on calories!
This blog post took you through making Loaded Greek Fries. We covered the tasty ingredients, step-by-step cooking, and helpful tips. I shared ways to customize your fries and how to store leftovers. Remember, the key is to keep your fries crispy. Avoid overcrowding the pan and don’t skip the seasoning. Enjoy your fries with fresh toppings for the best flavor. With the right ingredients and care, this dish will impress anyone. Dive into creating your own fantastic Loaded Greek Fries today!


![- 1 medium head of cauliflower, cut into bite-sized florets - 1 cup all-purpose flour (or gluten-free flour) - 1 cup water - 1 teaspoon garlic powder - 1 teaspoon onion powder - 1 teaspoon smoked paprika - ½ teaspoon salt - ½ teaspoon pepper - 1 cup BBQ sauce (your favorite brand or homemade) - 2 tablespoons olive oil - Fresh parsley, chopped (for garnish) Cauliflower is the star of this dish. It has a mild taste and cooks well. When roasted, it turns crispy and tender. Using flour makes a nice batter that sticks to the cauliflower. You can swap all-purpose flour with gluten-free flour for a lighter option. BBQ sauce gives the bites a sweet and tangy flavor. Choose a sauce you love for the best taste. Fresh parsley not only adds color but also a fresh taste. If you don’t have garlic powder, use fresh minced garlic. You can replace onion powder with finely chopped onions. For the BBQ sauce, try teriyaki sauce for a different twist. If you want a spicy kick, add cayenne pepper to the batter. Instead of olive oil, you could use vegetable oil. To make BBQ cauliflower bites, start by gathering your ingredients. You will need: - 1 medium head of cauliflower, cut into bite-sized florets - 1 cup all-purpose flour (or gluten-free flour) - 1 cup water - 1 teaspoon garlic powder - 1 teaspoon onion powder - 1 teaspoon smoked paprika - ½ teaspoon salt - ½ teaspoon pepper - 1 cup BBQ sauce (your favorite brand or homemade) - 2 tablespoons olive oil - Fresh parsley, chopped (for garnish) First, preheat your oven to 450°F (230°C). Line a baking sheet with parchment paper. Next, in a large bowl, whisk together the flour, garlic powder, onion powder, smoked paprika, salt, and pepper. Gradually add the water and mix until smooth. The batter should not have lumps. Now, dip each cauliflower floret into the batter. Make sure each piece is fully coated. Shake off any excess batter before placing them on the baking sheet. Spread them out evenly. Bake the cauliflower for 25-30 minutes until crispy and golden brown. Flip them halfway through to ensure even cooking. After they bake, toss the cauliflower bites in a bowl with BBQ sauce. Coat each piece well. Then, return the coated bites to the baking sheet. Bake them for an additional 10 minutes. This step helps the BBQ sauce caramelize, adding amazing flavor. To get that perfect crunch, ensure your oven is fully preheated. Space the cauliflower bites well on the baking sheet. If they’re too close, they may steam instead of crisp up. When you flip them halfway, be gentle to keep the batter intact. If you want more heat, you can add a pinch of cayenne pepper to the batter. Enjoy this easy recipe with your favorite dip! For the full recipe, check [Full Recipe]. When making BBQ cauliflower bites, avoid these common mistakes: - Overcrowding the baking sheet: This can lead to soggy bites. Space them out. - Not coating evenly: Make sure each floret is fully covered in batter. This helps them crisp up. - Ignoring flipping: Turn them halfway through baking for even cooking. This ensures they brown nicely. To boost the flavors in your BBQ cauliflower bites, try these tips: - Add spices: Include a pinch of cayenne for heat or smoked salt for depth. These small changes make a big impact. - Use homemade sauces: If you have time, make your own BBQ sauce. Homemade sauces can balance sweetness and tang perfectly. - Experiment with herbs: Mix in dried herbs like oregano or thyme to the batter for added flavor. For a complete meal, pair your BBQ cauliflower bites with: - Fresh salads: A crisp green salad balances the rich flavors of the bites. - Dips: Serve with ranch or blue cheese dressing for an extra zing. - Grains: Quinoa or brown rice makes a filling side dish. They soak up any extra sauce wonderfully. For the full recipe, check out the detailed instructions above! {{image_2}} If you want a gluten-free option, swap regular flour for gluten-free flour. This change makes the batter just as tasty. Try almond flour or a gluten-free all-purpose mix. Both options work well and keep the flavor. Just make sure to check the labels for hidden gluten. To add some heat, mix crushed red pepper flakes into your batter. Start with a pinch and test it out. You can also use spicy BBQ sauce instead of the regular kind. This will give your cauliflower bites a nice kick. Another idea is to add cayenne pepper to the flour mix. It amps up the spice level without losing flavor. You can bake or air fry your BBQ cauliflower bites. Baking gives a crispy texture with less oil. It's easy and requires no special equipment. To bake, follow the full recipe and set your oven to 450°F (230°C). If you use an air fryer, preheat it to 375°F (190°C). Cook in small batches for about 15-20 minutes. Shake the basket halfway through for even cooking. Air frying can make the bites even crispier, so choose what works best for you! To keep your BBQ cauliflower bites fresh, place them in an airtight container. Make sure they are completely cool before sealing. This helps maintain their crispy texture. If you have extra BBQ sauce, store it separately. You can use it later for dipping. When you reheat, use an oven or an air fryer. Preheat your oven to 350°F (175°C). Spread the cauliflower bites on a baking sheet. Heat them for about 10-15 minutes. This keeps them crunchy. Avoid using a microwave, as it makes them soggy. BBQ cauliflower bites last up to three days in the fridge. If you freeze them, they can last up to three months. Just make sure to store them in a freezer-safe bag. Label the bag with the date to keep track. For the best taste, eat them fresh or within a few days. For more detailed instructions, refer to the Full Recipe. To make BBQ Cauliflower Bites vegan, swap the all-purpose flour with chickpea flour, or use any gluten-free flour. For the batter, mix flour with water, garlic powder, onion powder, smoked paprika, salt, and pepper. This keeps the recipe plant-based. Most BBQ sauces are vegan, but check the label to be sure. Yes, you can use frozen cauliflower. Thaw the florets first and pat them dry. This helps remove excess moisture, which can make the bites soggy. The cooking time may change slightly, so keep an eye on them as they bake. Each serving of BBQ Cauliflower Bites has about 150 calories. They contain around 6 grams of protein, 25 grams of carbs, and 4 grams of fat. The exact numbers depend on the BBQ sauce you choose. This dish is a healthier alternative to traditional wings, offering fiber and vitamins. You can find BBQ-flavored cauliflower bites at many grocery stores. Look in the frozen section or the snack aisle. Brands like Trader Joe's or Whole Foods often have tasty options. You can also check online for delivery right to your door. Making homemade BBQ sauce is simple. Combine 1 cup of ketchup, 1 tablespoon of apple cider vinegar, 2 tablespoons of brown sugar, and 1 teaspoon of smoked paprika in a bowl. Stir well until smooth. Adjust the sweetness or tanginess to your taste by adding more sugar or vinegar. This sauce works great with BBQ Cauliflower Bites. For the full recipe, check the previous sections. In this post, we explored tasty BBQ cauliflower bites. We covered what goes into them, how to cook them, and even some great tips. Remember to avoid common mistakes for the best flavor. You can try different cooking methods and store them properly for later. Whether you like it spicy or gluten-free, there are options for everyone. Enjoy making these bites at home!](https://dailydishly.com/wp-content/uploads/2025/07/c817df8d-a837-4fbb-907d-71a741e00c94-768x768.webp)


![- 1 can (15 oz) chickpeas, rinsed and drained - 1 cup cherry tomatoes, halved - 1 cucumber, diced - 1/2 red onion, finely chopped - 1/2 cup Kalamata olives, pitted and sliced - 1/4 cup fresh parsley, chopped - 1/4 cup feta cheese, crumbled (optional) - 3 tablespoons olive oil - 2 tablespoons lemon juice - 1 teaspoon dried oregano - Salt and pepper to taste Gathering the right ingredients is key to a great Mediterranean chickpea salad. Start with a can of chickpeas. Make sure to rinse and drain them well. This step helps remove excess salt. Next, grab fresh cherry tomatoes. Slice them in half for extra flavor. Then, pick a crisp cucumber. Dice it into small pieces. This adds crunch to the salad. You will also need a red onion. Finely chop half of it. This will give a nice bite without being too strong. For a burst of flavor, use Kalamata olives. Slice them up and mix them in. Fresh parsley makes this salad vibrant. Chop a quarter cup and add it too. If you like cheese, crumbled feta is great. It adds creaminess, but it’s optional. Now, for the dressing, you will need olive oil and lemon juice. Use three tablespoons of olive oil and two tablespoons of lemon juice. A teaspoon of dried oregano adds an herby note. Don’t forget salt and pepper to taste. This combination of ingredients makes a fresh and tasty salad. For the full recipe, check out the details provided earlier. 1. First, grab a large mixing bowl. Add the chickpeas, cherry tomatoes, diced cucumber, red onion, Kalamata olives, and chopped parsley. Mix them well. 2. Next, take a small bowl. Whisk together the olive oil, lemon juice, dried oregano, salt, and pepper. This will be your dressing. 3. Pour the dressing over the salad mixture. Toss gently until everything is coated. 4. If you like, sprinkle crumbled feta cheese on top. Give the salad one last toss. 5. Taste the salad. Adjust the seasoning if you want. Add more salt, pepper, or lemon juice if needed. 6. Chill the salad in the fridge for at least 15 minutes. This helps the flavors mix together. - Serve the salad cold for the best taste. - It works well as a side dish or a light main meal. - You can garnish with extra parsley or lemon slices to make it pretty. For the complete recipe, check out the [Full Recipe]. How to properly rinse chickpeas Rinsing chickpeas is easy. Open the can and pour the chickpeas into a strainer. Rinse under cold water for about 30 seconds. This removes excess salt and helps improve the taste. Rinsing also reduces the thick liquid that can make the salad soggy. Tips for chopping vegetables evenly Chop your vegetables to similar sizes. This makes the salad look nice and helps flavors mix well. Use a sharp knife for clean cuts. Cut the cherry tomatoes in half and dice the cucumber into small cubes. When chopping the red onion, aim for tiny pieces. This ensures each bite has a balanced taste. Making the dressing ahead of time You can prepare the dressing before you make the salad. Mix olive oil, lemon juice, oregano, salt, and pepper in a small bowl. Store it in the fridge for up to two days. This gives the flavors time to blend, making your salad even tastier when you are ready to serve. Overdressing the salad Using too much dressing can make your salad soggy. Start with a smaller amount and add more if needed. Toss the salad gently to coat it evenly without drowning the ingredients. A light touch keeps the salad fresh and crisp. Not chilling before serving Chilling the salad is key for flavor. After mixing everything, let it sit in the fridge for at least 15 minutes. This helps the flavors blend and makes the salad refreshing. A cold salad is more enjoyable, especially on warm days. Skipping the resting time for flavors Letting the salad rest is important. If you serve it right after making, the flavors might not be well mixed. Allowing it to sit for a short while lets the ingredients soak up the dressing. This makes every bite delicious. {{image_2}} You can make this salad your own by swapping some ingredients. - Substituting canned chickpeas for dried: Canned chickpeas are quick and easy. If you use dried chickpeas, soak them overnight and cook them until soft. This adds a fresh taste. - Dairy-free options (omit feta): If you want a dairy-free meal, just leave out the feta cheese. The salad still tastes great without it. - Adding extra vegetables like bell peppers or radishes: Feel free to add bell peppers, radishes, or any crunchy veggie you like. This adds color and extra crunch. You can boost the flavor of your salad in many ways. - Adding spices like cumin or paprika: A pinch of cumin or paprika adds warmth and depth. It gives the salad a nice twist. - Incorporating different herbs (basil, mint): Try adding fresh basil or mint. These herbs give a bright flavor that complements the salad. - Using different types of olives: Swap out Kalamata olives for green olives or even garlic-stuffed olives. Each type brings its own unique taste. These variations can make your Mediterranean Chickpea Salad even more exciting! For a detailed recipe, check the Full Recipe. To store your Mediterranean Chickpea Salad, place it in an airtight container. This keeps the salad fresh and tasty. If you store it well, it can last for about 3 to 5 days in the fridge. Make sure to mix it gently before serving again. This helps blend the flavors. Can you freeze this salad? I recommend not freezing it. Freezing can change the texture of the vegetables. However, if you want to freeze components, you can. Freeze chickpeas and olives separately. This keeps them fresh. When you are ready to eat, thaw them in the fridge. Then, mix them with fresh veggies. Enjoy a fresh taste, even after freezing! What is the best way to prepare chickpeas for this salad? The best way to prepare chickpeas is to use canned ones. They are quick and easy. Rinse and drain them well under cold water. This removes extra salt and keeps the salad fresh. If you prefer dried chickpeas, soak them overnight. Then, cook them until tender before use. Can I make Mediterranean Chickpea Salad ahead of time? Yes, you can make this salad ahead of time. It keeps well in the fridge for up to three days. Making it in advance allows the flavors to blend better. Just remember to keep the dressing separate if you want to keep it crisp. What other proteins can I add to this salad? You can add various proteins to this salad. Some great options are grilled chicken, tuna, or shrimp. If you want plant-based protein, try adding quinoa or diced tofu. These options keep the salad filling and tasty. Calories, fat, protein, and fiber content per serving Each serving of Mediterranean Chickpea Salad has about 250 calories. It contains around 10 grams of fat, 12 grams of protein, and 8 grams of fiber. This makes it a great option for a healthy meal. Health benefits of chickpeas and fresh vegetables Chickpeas are high in protein and fiber. They help keep you full and satisfied. Fresh vegetables add vitamins and minerals. Ingredients like tomatoes and cucumbers provide hydration and antioxidants. Eating this salad supports a healthy diet and boosts energy. Enjoy the fresh and tasty flavors! This Mediterranean Chickpea Salad is fresh, easy, and full of flavor. You learned about key ingredients, step-by-step prep, and tips to avoid common mistakes. Remember to chill your salad for the best taste. Feel free to make variations with your favorite veggies or herbs. Proper storage keeps leftovers tasty for days. Enjoy this healthy dish as a light meal or side. You now have all the tools to impress your friends and family with this delicious salad.](https://dailydishly.com/wp-content/uploads/2025/06/fb0d24a9-5bed-414f-a871-f83a97a0d7ee-768x768.webp)
. High-quality images are key for any recipe. They help you see the colors and textures of the dish. When serving, a bright bowl can make your salad pop. Try to layer the ingredients for a beautiful look. You can also add a sprig of cilantro on top for that finishing touch. How long does the salad last in the fridge? This salad lasts about 2 to 3 days in the fridge. Store it in a sealed container. The avocados may brown, but the taste stays good. Can I use canned beans instead of dried? Yes, canned beans are great for this salad. They save time and are easy to use. Just rinse and drain them before adding. Can I make this salad ahead of time? You can make this salad a few hours ahead. Just wait to add the avocados until right before serving. This keeps them fresh and green. What are the best toppings to add? Toppings like crumbled feta, fresh cilantro, or diced jalapeños really enhance the salad. You can also add a sprinkle of nuts for crunch. Is this salad gluten-free? Yes, this salad is naturally gluten-free. It contains no wheat or gluten products. What are the health benefits of black beans and avocados? Black beans are high in fiber and protein. They help with digestion and keep you full. Avocados are rich in healthy fats and vitamins. They support heart health and skin. This salad is a nutrient-packed choice. For the full recipe, check out the detailed instructions and enjoy creating this tasty dish! This avocado and black bean salad is fresh, nutritious, and easy to make. You learned about essential ingredients, how to prepare them, and tips for the best results. The recipe allows for tasty twists and options for everyone. Enjoy creating your own version while keeping it healthy and satisfying. This salad is a great dish for lunch, dinner, or gatherings. With vibrant flavors and colors, it’s sure to impress. Dive in and savor every bite!](https://dailydishly.com/wp-content/uploads/2025/06/59c4ae36-0ebd-4eac-932b-d71541cf887d-768x768.webp)
