Mango Coconut Chia Popsicles Refreshing Summer Treat

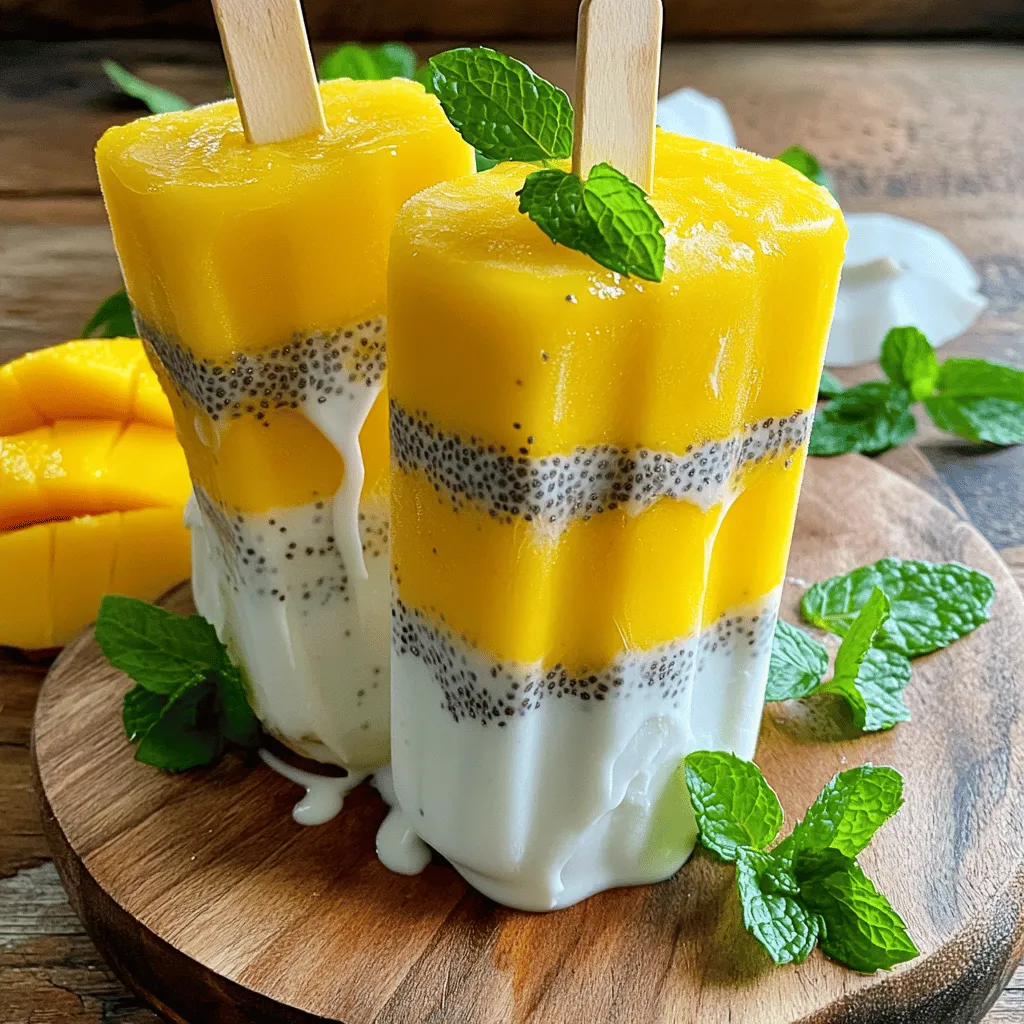
Looking for a cool treat to beat the summer heat? These Mango Coconut Chia Popsicles are perfect! With just a few easy steps, you can enjoy a bright and refreshing dessert that’s packed with flavor. I’ll guide you through the ingredients and methods needed to create this delightful treat. Let’s dive in and get started on making your summer even sweeter!
Ingredients
Fresh Ingredients Required
You need fresh and ripe mangoes for the best flavor. Choose two ripe mangoes and peel them. Dice them into small pieces. Also, grab one cup of coconut milk. You can use canned or fresh coconut milk. This gives a creamy taste. You will also need a pinch of salt to enhance the flavors.
Sweetener Options
For sweetness, you can use two tablespoons of honey or maple syrup. Adjust the amount based on your taste. Honey adds a nice floral note, while maple syrup gives a rich flavor. Both options work well in this recipe.
Equipment Needed
You will need a blender to mix everything smoothly. A mixing bowl is helpful for combining the chia seeds. Find popsicle molds to shape your treats. Lastly, popsicle sticks are needed to hold everything together while freezing.
Step-by-Step Instructions
Blending the Mango Mixture
First, gather your ripe mangoes. You need two of them, peeled and diced. Place the diced mango in a blender. Add one cup of coconut milk, honey or maple syrup, vanilla extract, and a pinch of salt. Blend all these ingredients until the mixture is smooth and creamy. This creates a rich mango base for your popsicles.
Preparing the Chia Seed Layer
Now, take about half of the mango mixture and pour it into a mixing bowl. Next, add a quarter cup of chia seeds to that bowl. Stir well to combine. Let this sit for about 10 to 15 minutes. This step helps the chia seeds absorb some liquid and swell. It will give your popsicles a nice texture.
Filling the Popsicle Molds
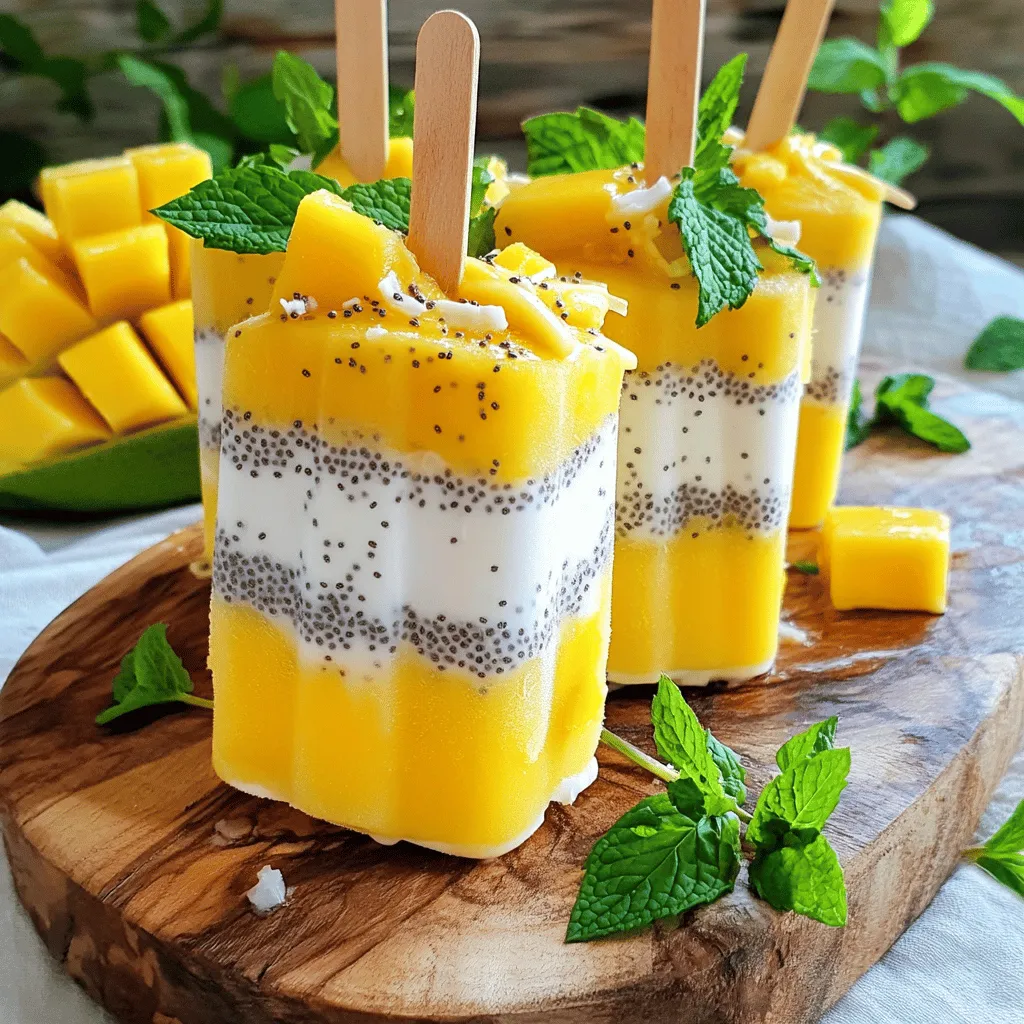
Grab your popsicle molds. First, pour the remaining mango mixture into each mold. Fill them halfway. Then, carefully spoon the chia mixture on top of the mango layer. Fill the molds to about three-quarters full. If you want, you can add more mango mixture on top for a colorful look.
Freezing Instructions
Insert the popsicle sticks into the molds. Place them in the freezer and let them freeze for at least 4 to 6 hours. This waiting time is crucial for the popsicles to become solid. When ready to serve, run warm water over the outside of the molds for a few seconds. This will help you gently pull the popsicles out without breaking them.
Tips & Tricks
Perfecting Texture and Flavor
To get the best texture, use ripe mangoes. They add sweetness and creaminess. Blend the mango well with coconut milk until it is smooth. This step ensures a rich flavor. Let the chia seeds sit in the mango mixture. This helps them soak up liquid and swell, giving a nice texture. If you like your popsicles sweeter, add more honey or maple syrup. Taste as you go to find your perfect level.
Serving Suggestions
Serve these popsicles on a hot day for a cool treat. You can enjoy them straight from the mold or place them on a plate. Pair them with fresh mango slices and mint leaves for added flavor. Drizzling a little coconut milk on top makes them look fancy. You can even chop up some nuts for a crunch. These popsicles are great for parties or family gatherings.
Presentation Tips
For an eye-catching look, use a wooden board. Place the popsicles on it and add mango slices around them. A sprinkle of fresh mint will brighten the dish. Use clear molds to show off the layers. The colors of mango and chia look great together. If you want, add a little extra mango mixture on top before freezing. This gives a nice visual effect when you serve them.

Variations
Alternative Fruits to Use
You can change up the flavor of your popsicles. Try using peaches or strawberries. They add sweetness and color. Pineapple also works well. Just adjust the amount of sweetener based on the fruit’s natural sugar. Mixing fruits can create fun combinations. Mango and pineapple can give a tropical twist. Be creative and find your favorite mix!
Dairy-Free Options
If you want a dairy-free treat, coconut milk is perfect. You can also try almond or oat milk. These milks blend well and keep the popsicles creamy. They add their own unique flavors too. The key is to choose a milk that you enjoy. This way, your popsicles will taste even better!
Sweetener Alternatives
Honey and maple syrup are great choices for sweetening. But you can use agave syrup or stevia too. Each sweetener changes the taste a bit. For a low-sugar option, try using ripe bananas. They add natural sweetness and creaminess. Just blend them into the mango mix for a tasty treat.
Storage Info
How to Store Popsicles
To store your mango coconut chia popsicles, keep them in their molds. If you have extra popsicles, wrap them in plastic wrap or place them in an airtight container. This keeps them fresh and prevents freezer burn. Make sure to label the container with the date.
Shelf Life of Popsicles
These popsicles can last up to three months in the freezer. After that, they may lose flavor and texture. For the best taste, enjoy them within this time frame.
Tips for Defrosting
When you want to eat a popsicle, run warm water over the mold for about 10 seconds. This helps loosen the popsicle from the mold. If you prefer a quicker method, leave it out at room temperature for a few minutes. This will soften it just enough to pull it out. Enjoy your refreshing treat!
FAQs
Can I use frozen mango instead of fresh?
Yes, you can use frozen mango. Frozen mango works well in this recipe. It adds a nice chill and makes blending easy. Just let it thaw a bit before blending. This will help you get a smooth mix.
How long can I freeze the popsicles?
You can freeze the popsicles for up to two months. Just keep them in a tightly sealed bag or container. This helps prevent freezer burn and keeps them fresh. When you are ready to eat, just take them out and enjoy.
Can I add other seeds or nuts?
Absolutely! You can add seeds like flaxseed or hemp seeds. If you love nuts, try crushed almonds or walnuts. Just remember not to add too much. You want to keep the popsicles smooth and tasty.
What if I don’t have popsicle molds?
No popsicle molds? No problem! You can use small cups or ice cube trays. Just pour the mixture into them and insert sticks when partially frozen. This way, you can still enjoy your mango coconut chia popsicles!
Making tasty popsicles is simple and fun. We covered fresh ingredients, sweeteners, and needed equipment. The steps—blending, layering, filling, and freezing—are easy to follow. I shared tips for great texture and fun serving ideas. You can explore fruit variations and storage tips too.
In the end, enjoy creating your own popsicle flavors. The process brings joy and a sweet treat.


. To make blueberry almond overnight oats, start by gathering all your ingredients. This recipe takes just 10 minutes to prep. You can make two servings, perfect for a quick breakfast. In a medium bowl or a mason jar, add these base ingredients: - 1 cup rolled oats - 1 cup almond milk (or any plant-based milk) - ½ cup Greek yogurt (or plant-based yogurt) - 2 tablespoons honey or maple syrup - 1 teaspoon vanilla extract - ½ teaspoon cinnamon - A pinch of salt Mix all these items well. Make sure they blend together smoothly. This mix is the heart of your oats. Now, gently fold in 1 cup of blueberries. If you want, save a few for topping later. Then, add ¼ cup of sliced almonds for crunch. Stir carefully so you don’t mash the blueberries. Cover the bowl or seal the jar, then put it in the fridge. Let it chill overnight. This helps the oats soak up the flavors. The next morning, stir the oats. If they are too thick, add a splash of almond milk. Top with the reserved blueberries and sliced almonds for extra flavor and crunch. You can find the full recipe for this delicious dish above. Enjoy your tasty and nutritious breakfast! To make great overnight oats, follow these steps: - Use rolled oats. They soak up liquid well. - Choose a container you can seal tight. A mason jar works well. - Mix all the base ingredients first. This helps flavors blend. - Refrigerate for at least six hours. This allows the oats to soften. - Stir before serving to combine everything. Add more milk if needed. Personalize your overnight oats easily. Here are some ideas: - Swap almond milk for coconut or oat milk. - Use different fruits like strawberries or bananas. - Add seeds like chia or flax for extra nutrition. - Try nut butters for creaminess and flavor. - Experiment with spices like nutmeg or cardamom. Let’s look at the benefits of the main ingredients: - Rolled oats: They provide fiber, which is good for digestion. - Almond milk: It is low in calories and rich in vitamins. - Greek yogurt: This adds protein and probiotics for gut health. - Blueberries: They are full of antioxidants and vitamins. - Almonds: They offer healthy fats and help keep you full. Each ingredient brings something special to your meal. Enjoy the great taste while knowing you are eating well. For the full recipe, check out the details above. {{image_2}} You can change the taste of your Blueberry Almond Overnight Oats easily. Here are some ideas: - Mixed Berries: Swap blueberries for strawberries, raspberries, or blackberries. - Nut Butters: Stir in a spoon of almond or peanut butter for creaminess. - Chocolate: Add cocoa powder or chocolate chips for a fun twist. - Coconut: Sprinkle in some shredded coconut for a tropical flair. These variations will make your oats more exciting and tasty. If you have special dietary needs, you can still enjoy this recipe. Here are some substitutes: - Dairy-free: Use almond milk and plant-based yogurt for a vegan option. - Sugar-free: Skip the honey or maple syrup. Use ripe bananas for sweetness. - Gluten-free: Make sure you choose certified gluten-free rolled oats. These changes let everyone enjoy this dish. Want to make more servings? Scaling the recipe is simple. Just multiply each ingredient: - For 4 servings, use 2 cups of oats and 2 cups of almond milk. - For 6 servings, use 3 cups of oats and 3 cups of almond milk. You can prepare these oats in a large bowl or several jars. This way, you have breakfast ready for days! For the full recipe, check out the Berry Delights: Blueberry Almond Overnight Oats section. To keep your blueberry almond overnight oats fresh, store them in an airtight container. A mason jar works great because it's easy to seal. Make sure the oats are covered well with the lid. This keeps out air and moisture. If you make a big batch, divide them into individual servings. This way, you grab just what you need. When stored properly in the fridge, blueberry almond overnight oats can last for up to five days. This means you can meal prep for the week! Just remember to check for any changes in smell or texture before eating. If it looks or smells off, it’s best to toss it. You can also freeze your oats for longer storage. To do this, place the oats in a freezer-safe container. Leave some space at the top, as the oats will expand when frozen. They will stay good for up to three months. When you’re ready to eat them, thaw in the fridge overnight. You can warm them up or enjoy them cold. This is a great option for quick breakfasts! For the full recipe, check out the details above. Yes, you can! Other fruits work well too. Try strawberries, raspberries, or bananas. Each fruit adds its unique flavor and texture. Just make sure to adjust the amount based on the fruit’s sweetness. For example, use less honey if your fruit is sweet. Overnight oats stay fresh for up to five days. Store them in a sealed jar or container. This makes them great for meal prep. Just keep an eye on the texture. If they get too thick, add a splash of almond milk before serving. No, sweeteners are not a must. The oats and fruit add natural sweetness. If you prefer less sugar, skip the honey or maple syrup. You can also use ripe bananas or applesauce for sweetness. Adjust it to fit your taste! Blueberry almond overnight oats are simple to make and delicious. We covered the key and optional ingredients, plus tips on choosing the best. The step-by-step instructions guide you from mixing to adding fruit. I shared tips for customizing and highlighted the nutritional benefits of oats. Don't forget the variations you can try to suit your taste. Lastly, we discussed how to store your oats safely. With these insights, you're ready to enjoy a healthy breakfast that keeps you full and satisfied.](https://dailydishly.com/wp-content/uploads/2025/07/39185b14-c6b2-4e99-b0b5-ab17b9785ad3-768x768.webp)

![- 1 ½ cups all-purpose flour - 1/2 cup unsweetened cocoa powder - 1/4 cup powdered sugar - 1/2 cup cold unsalted butter, cubed - 1 large egg yolk - 2 tablespoons ice water - 1 cup granulated sugar - 1/2 cup heavy cream - 1/4 cup unsalted butter, diced - 1 teaspoon sea salt (divided) - 8 ounces dark chocolate (60-70% cacao), chopped - 1 teaspoon vanilla extract The key to a great salted caramel chocolate tart is using high-quality ingredients. Start with flour and cocoa powder for a rich crust. The powdered sugar adds sweetness to balance the cocoa. For the tart's texture, use cold, cubed unsalted butter. This keeps the crust tender. You’ll also need an egg yolk to help bind the dough. Ice water makes it easier to form the dough without warming it too much. For the caramel, granulated sugar melts into a sweet syrup. Heavy cream and butter add richness, while sea salt enhances the flavor. For the chocolate layer, choose dark chocolate with 60-70% cacao. This gives a deep, rich taste. Finally, vanilla extract adds warmth and depth to the chocolate. For the full recipe, refer to the previous section. - Combine 1 ½ cups of flour, 1/2 cup cocoa powder, and 1/4 cup powdered sugar in a food processor. - Add 1/2 cup cold unsalted butter and pulse until it looks like crumbs. - Next, add 1 large egg yolk and 2 tablespoons of ice water. Pulse until the dough forms. - Shape the dough into a disc, cover it in plastic, and chill for 30 minutes. - Preheat your oven to 350°F (175°C). - Roll out the chilled dough to about 1/4-inch thick on a floured surface. - Place the dough in a 9-inch tart pan and trim any excess. - Prick the bottom of the crust with a fork to prevent bubbling. - Bake for 15-18 minutes, or until the crust is set. - Let the crust cool completely before adding the filling. - In a medium pan, melt 1 cup of granulated sugar over medium heat. - Watch closely as it turns a deep amber color. Swirl the pan gently. - Carefully add 1/2 cup of heavy cream; it will bubble up. - Stir in 1/4 cup diced unsalted butter and 1/2 teaspoon sea salt until smooth. - Set the salted caramel mixture aside to cool. - In a heatproof bowl, combine 8 ounces of chopped dark chocolate and 1 teaspoon of vanilla extract. - Pour the warm salted caramel over the chocolate. Let it sit for one minute. - Stir until the mixture is fully combined and smooth. - Pour the chocolate-caramel mixture into the cooled tart crust. - Sprinkle the top with the remaining 1/2 teaspoon of sea salt. - Refrigerate the tart for at least 2 hours to set before serving. For the full recipe, including all details, check out the [Full Recipe]. - Use cold ingredients and chill the dough. This keeps the crust flaky. - Roll out the dough to about 1/4 inch thick. This gives the right texture. - Avoid overworking the dough. This helps keep it tender and light. - Control the heat when melting sugar. Medium heat gives the best color. - Add cream slowly to avoid splatter. This keeps you safe and clean. - Use sea salt for flavor. It enhances the caramel's rich taste. - Drizzle extra caramel sauce on top. This adds a beautiful touch. - Add chocolate shavings for elegance. They make the tart look fancy. - Serve the tart chilled. This provides the best taste experience. For the complete recipe, check out the Full Recipe. {{image_2}} You can switch up the chocolate to suit your taste. - Use milk chocolate for a sweeter tart. - Try bittersweet chocolate for a deep flavor. - For dairy-free needs, go for dark chocolate with no milk. - Add a few drops of flavor extracts like almond or orange for extra fun. Toppings can make your tart more exciting and tasty. - Add seasonal fruits like berries or slices of pear. They add a fresh touch. - Consider using nuts like chopped pecans or walnuts for crunch. - A sprinkle of sea salt enhances the sweet flavors well. - Top with flavored whipped cream for a creamy finish. The crust can change the whole tart experience. - For a gluten-free option, use almond flour or a gluten-free blend. - Want a richer taste? Use more butter or add cocoa powder for deeper flavor. - You can make a cookie crust using crushed cookies mixed with butter. It adds a fun twist. For the full recipe, check out the details above. Enjoy creating your own tasty variations! Store your salted caramel chocolate tart in the fridge. Use an airtight container or wrap it tightly in plastic wrap. This keeps it fresh and moist. The tart stays good for about 4 to 5 days. Always check for dryness if you store it longer. A cover is a must to prevent the tart from drying out. Yes, you can freeze the salted caramel chocolate tart! To freeze, wrap it well in plastic wrap and then in foil. This protects it from freezer burn. When you want to eat it, let it thaw in the fridge overnight. Freezing may change the texture a bit, but it will still taste great. Look for a change in smell or color to spot spoilage. If it smells off or looks odd, don't eat it. Also, check for any mold. To avoid spoilage, store it properly and eat it within the recommended time. Yes, you can make this tart ahead of time. I recommend preparing it a day before serving. This allows the flavors to blend well. Store it in the refrigerator. Wrap it tightly in plastic wrap. The tart can last for about three days in the fridge. This way, you can enjoy it without stress on the day of your event. If your salted caramel is too thick, don’t worry. You can easily adjust the thickness. Before using, gently reheat the caramel on low heat. Stir in a bit of heavy cream or water. This will help thin it out. Make sure to do this slowly. You want the caramel to remain smooth and creamy. Yes, you can replace dark chocolate with other kinds. Milk chocolate or semi-sweet chocolate works well. Each type will change the taste and sweetness. Milk chocolate will make it sweeter and creamier. Semi-sweet chocolate offers a balanced flavor. If you're looking for dairy-free options, use vegan chocolate. Just remember, the overall flavor will shift with each choice. Making a salted caramel chocolate tart is a fun and rewarding process. We covered the main ingredients, step-by-step instructions, and helpful tips to perfect your tart. Remember to control the heat for your caramel and chill your dough well. Explore variations for unique flavors and toppings. With proper storage, your tart will stay fresh and delicious. I hope you enjoy making this delightful dessert as much as I do. Happy baking!](https://dailydishly.com/wp-content/uploads/2025/06/6f09bf16-2729-4506-9c92-819aec74037f-768x768.webp)


