
Are you ready to kickstart your mornings with a tasty and nutritious meal? Mango Coconut Overnight Oats are not only easy to make, but they’re also packed with flavor and health benefits. In this post, I’ll guide you through the simple steps to create this delicious breakfast. With fresh mango, creamy coconut, and wholesome oats, you’ll look forward to waking up every day. Let’s dive into making your new favorite meal!
Ingredients
Complete Ingredient List
To make mango coconut overnight oats, you need:
– 1 cup rolled oats
– 1 cup coconut milk (canned or carton)
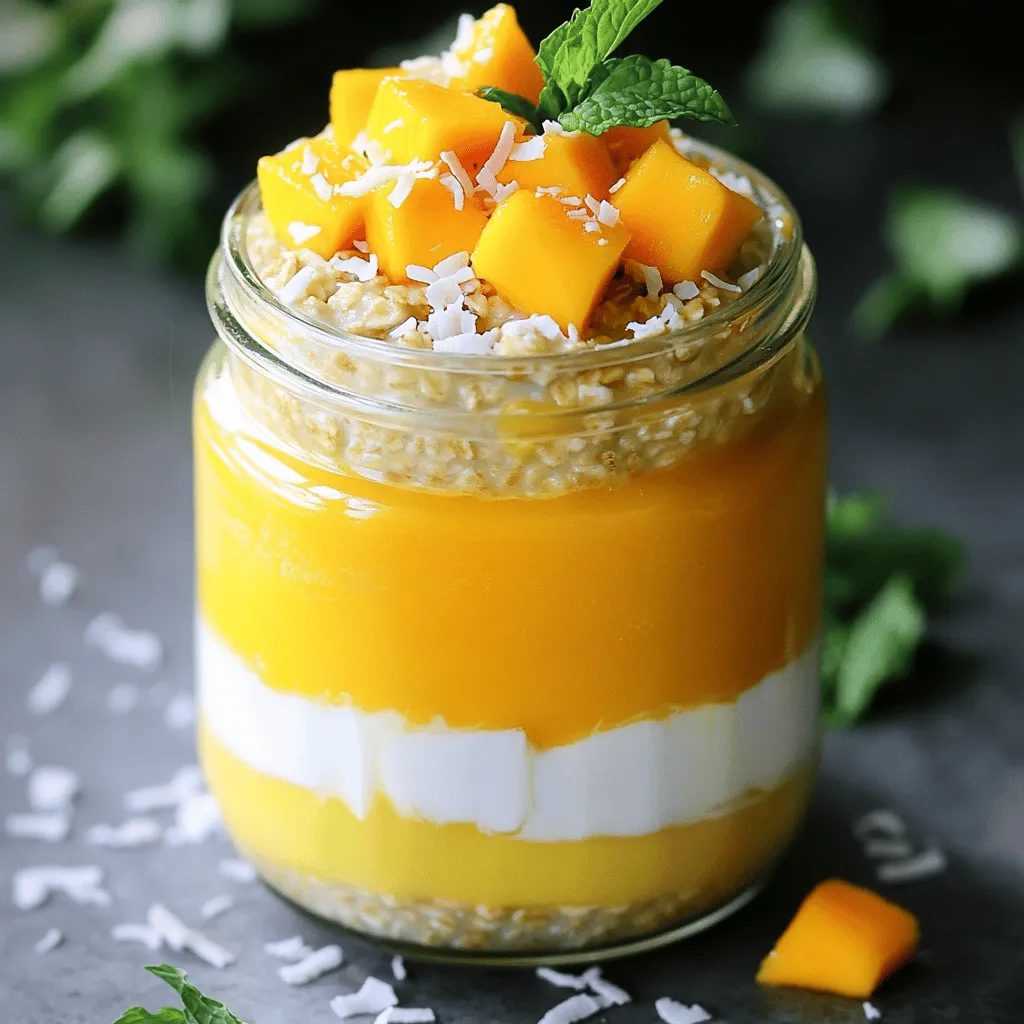
– 1 ripe mango, diced
– 1 tablespoon chia seeds
– 1 tablespoon honey or maple syrup (optional)
– 1/4 cup shredded coconut (unsweetened)
– 1/2 teaspoon vanilla extract
– Pinch of salt
– Fresh mint leaves for garnish (optional)
Ingredient Tips for Best Results
Choose ripe mangoes for the best flavor. They should feel slightly soft when you press them. For coconut milk, use canned for a creamier texture. If you prefer a lighter option, use carton coconut milk. Chia seeds help thicken the oats and add fiber. You can skip honey or maple syrup if you want less sweetness. For a fun twist, try toasted shredded coconut for extra crunch.
Health Benefits of Each Ingredient
Rolled oats are a great source of fiber. They help keep you full longer. Coconut milk adds healthy fats and a creamy taste. Mango is rich in vitamins A and C, boosting your immune system. Chia seeds are packed with omega-3 fatty acids, which are good for your heart. Honey or maple syrup can provide a quick energy boost. Unsweetened shredded coconut offers antioxidants without added sugar. Mint leaves can freshen your dish and aid digestion.
Step-by-Step Instructions
Preparation Overview
Making mango coconut overnight oats is simple and fun. You need just a few steps. First, gather all your ingredients. Then, mix them in a bowl. Finally, refrigerate the mixture overnight. In the morning, you’ll have a tasty meal ready to eat.
Detailed Cooking Steps
1. Start by taking a medium mixing bowl.
2. Add 1 cup of rolled oats to the bowl.
3. Pour in 1 cup of coconut milk. You can use canned or carton milk.
4. Sprinkle in 1 tablespoon of chia seeds. These add healthy fiber.
5. If you want, add 1 tablespoon of honey or maple syrup for sweetness.
6. Pour in 1/2 teaspoon of vanilla extract for flavor.
7. Add a pinch of salt to balance the taste.
8. Stir everything together until the oats are well coated.
9. Fold in the diced mango and half of the shredded coconut.
10. Save the rest of the coconut for later.
11. Divide the mixture into two airtight containers.
12. Seal the containers and place them in the fridge overnight.
13. In the morning, stir the oats well.
14. Top with the remaining shredded coconut and extra mango if you like.
15. Garnish with fresh mint leaves for a nice touch.
Visual Guide or Recommended Video
I recommend watching a video on making overnight oats. It helps to see each step. You can find many videos online. They show the process clearly. This makes it easier to follow along.
Tips & Tricks
How to Make Creamier Oats
To make your mango coconut overnight oats creamier, use full-fat coconut milk. It adds a rich texture. You can also blend the oats with the milk for a smoother mix. If you want an even creamier experience, add a banana. It will make the oats velvety without changing the flavor much.
Adjusting Sweetness Levels
Sweetness is a personal choice. If you like it sweeter, add more honey or maple syrup. Start with one tablespoon. Taste it, and then add more if needed. You can also use ripe fruit. The mango’s natural sugar can balance the flavors. If you prefer less sugar, skip the sweetener. The coconut milk and mango will still taste great.
Best Time to Prepare for Meal Prep
The best time to prepare these oats is the night before. This gives the oats time to soak and soften. You can also make a batch on Sunday for the week ahead. Store them in jars, and grab one each morning. This makes breakfast easy and quick, perfect for busy days.
Variations
Tropical Fruit Additions
You can boost your mango coconut overnight oats with more tropical fruits. Pineapple, kiwi, and banana make great choices. They add sweetness and flavor. Just chop the fruit and mix it in. You can use fresh or frozen fruit. If using frozen, let it thaw first. This way, your oats will taste fresh and bright every time.
Nut and Seed Modifications
Adding nuts and seeds gives your oats a tasty crunch. Almonds, cashews, or walnuts work well. Just chop them up and mix them in. You can also add seeds like pumpkin or sunflower seeds for extra nutrition. They add healthy fats and protein. Feel free to adjust the amounts to match your taste.
Vegan and Gluten-Free Options
If you follow a vegan diet, you can easily make this recipe plant-based. Use maple syrup instead of honey for sweetness. For gluten-free oats, make sure to choose certified gluten-free rolled oats. This keeps your meal safe for those with gluten sensitivities. Enjoy your nutritious breakfast worry-free while still keeping it delicious.
Storage Info
Best Practices for Refrigeration
To keep your Mango Coconut Overnight Oats fresh, store them in airtight containers. Make sure to use glass or BPA-free plastic jars. These materials help keep the oats from drying out. Place them in the fridge right after making. This will allow the oats to soak and soften properly.
Freezing Instructions and Tips
You can freeze these oats if you want to save some for later. Just pour the mixture into freezer-safe containers. Leave some space at the top for expansion. When you’re ready to eat, thaw them in the fridge overnight. You can also microwave them for a quick warm-up.
How Long Can You Store Overnight Oats?
You can keep your Mango Coconut Overnight Oats in the fridge for up to five days. If they start to look or smell off, it’s best to toss them. Freezing them can extend their life to about three months. Just remember to label your containers with the date. This helps you keep track of freshness.
FAQs
Can I use other types of milk?
Yes, you can use other types of milk. Almond milk or oat milk works well. Soy milk is another option if you like it. Each milk adds a unique flavor. Experiment to find your favorite.
Can I make overnight oats without chia seeds?
Absolutely! You can skip the chia seeds if you don’t have them. They help thicken the oats, but they are not required. You can use more oats instead. The oats will still taste great without them.
How do I adjust for larger servings?
To make larger servings, simply double or triple the recipe. Use more oats and milk for each extra serving. Make sure to use a larger bowl for mixing. It is easy to scale this recipe up or down!
In this article, we explored the world of overnight oats. We covered the best ingredients, tips for perfect prep, and health benefits for each item. I shared steps to make creamy oats, variations for flavor, and storage tips. You now have the tools to create delicious and nutritious meals. Remember, you can customize your oats to fit your taste and need. Enjoy your healthy oats and make it your own!


