Maple Cinnamon Roasted Sweet Potatoes Flavorful Dish

Welcome to the world of Maple Cinnamon Roasted Sweet Potatoes! This flavorful dish combines sweet, warm spices with tender potatoes for pure comfort food. Whether you’re prepping for a cozy dinner or looking for an easy side, this recipe checks all the boxes. I will guide you through each simple step, share tips for perfecting flavor, and show you how to store leftovers. Ready to make something delicious? Let’s dive in!
Ingredients
Complete List of Ingredients
To make Maple Cinnamon Roasted Sweet Potatoes, gather these simple items:
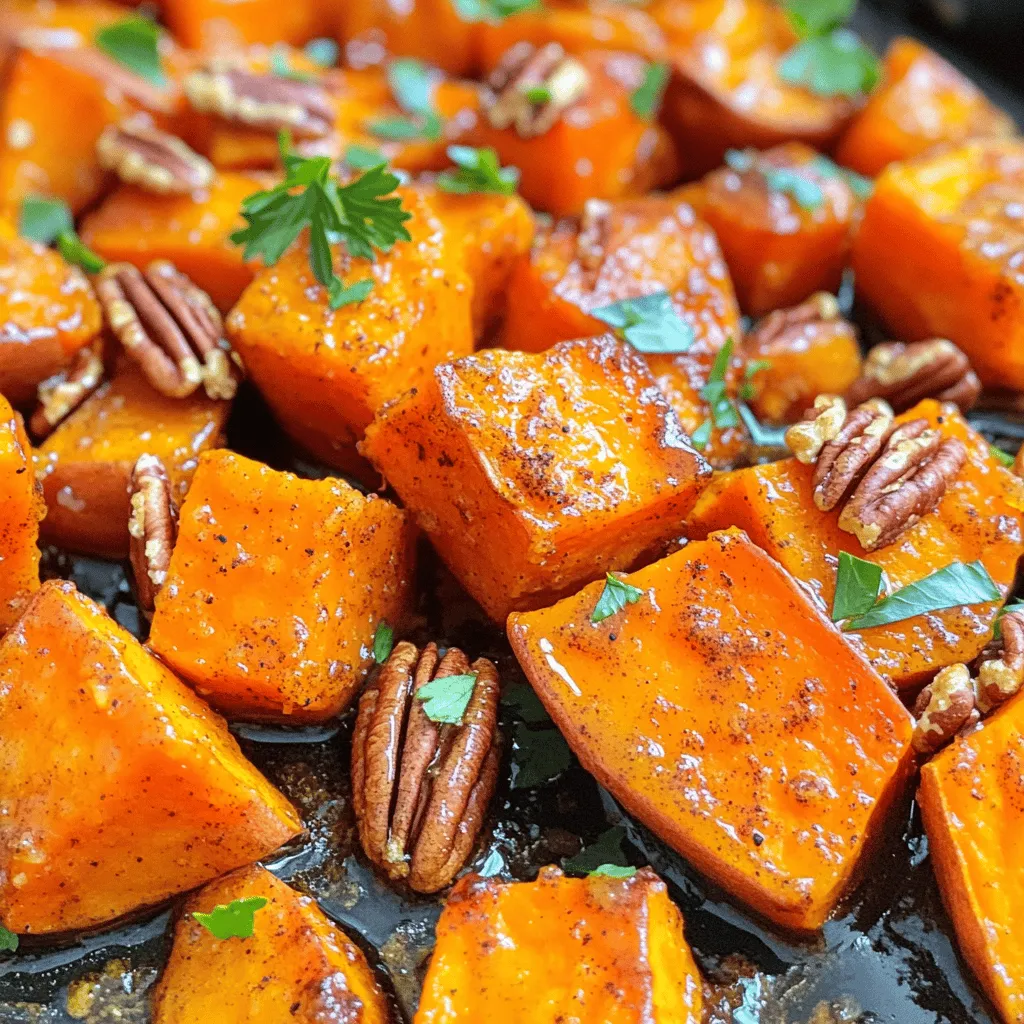
– 4 medium sweet potatoes, peeled and cut into 1-inch cubes
– 3 tablespoons olive oil
– 1/4 cup pure maple syrup
– 1 teaspoon ground cinnamon
– 1/2 teaspoon nutmeg
– Salt and pepper to taste
– 1/4 cup chopped pecans (optional)
– Fresh parsley for garnish (optional)
These ingredients create a warm dish with a sweet and spicy flavor. Sweet potatoes are the star here. They give a creamy texture and natural sweetness. Maple syrup adds more sweet notes, while cinnamon and nutmeg enhance the warmth.
Olive oil helps the sweet potatoes caramelize nicely in the oven. Salt and pepper balance the sweetness, making the dish more flavorful. If you want extra crunch, add pecans. Fresh parsley adds color and a fresh taste when serving.
Make sure you have all of these items ready before you begin. Each ingredient plays a key role in making this dish a delightful treat.
Step-by-Step Instructions
Preparation Steps
– Preheat the Oven
First, set your oven to 400°F (200°C). This heat will help the sweet potatoes cook well.
– Prepare the Baking Sheet
Next, take a baking sheet and line it with parchment paper. This makes cleanup easy.
– Combine Ingredients
In a large bowl, mix the sweet potatoes, olive oil, maple syrup, cinnamon, nutmeg, salt, and pepper. Make sure to measure each ingredient carefully for the best flavor.
– Toss and Coat Sweet Potatoes
Use your hands or a spoon to toss the sweet potatoes. Coat them well with the mixture. Every piece should be covered.
– Spread on Baking Sheet
After coating, spread the sweet potatoes in one layer on the baking sheet. This helps them roast evenly.
– Roasting Process
Place the baking sheet in the oven. Roast for 25-30 minutes. Flip the sweet potatoes halfway through for even cooking. They should be tender and caramelized when done. If using pecans, add them in the last 5 minutes for crunch.
Follow these steps, and you will enjoy a tasty dish.
Tips & Tricks
Achieving the Best Flavor
Choosing the Right Sweet Potatoes
Select firm sweet potatoes. Look for even, smooth skin. Organic options are tasty and healthy. They often have richer flavor and fewer chemicals.
Adjusting Sweetness to Preference
Taste your sweet potatoes before adding syrup. Some may be sweeter than others. You can add more maple syrup if you like it sweeter. For less sweetness, reduce the syrup.
Roasting Techniques for Perfect Texture
Cut sweet potatoes into 1-inch cubes. This size helps them cook evenly. Toss them well to coat with olive oil and spices. Flip the sweet potatoes halfway through roasting. This ensures they brown nicely.
Presentation Ideas
Garnishing with Fresh Herbs
Fresh parsley adds color and flavor. Sprinkle it on just before serving. You can also use other herbs, like thyme or chives, for a unique twist.
Serving Suggestions
Serve these sweet potatoes as a side dish. They pair well with roasted meats or salads. You can also enjoy them as a main dish with grains. Try adding a dollop of yogurt on top for creaminess!

Variations
Flavor Enhancements
Additional Spices
You can boost the flavor of your sweet potatoes by adding other spices. Try ginger for a warm kick. A pinch of cayenne pepper adds heat, too. You might also like to sprinkle some vanilla extract for a sweet touch.
Sweeteners Alternatives
While maple syrup is my favorite, you can try honey or agave syrup. Brown sugar works well, too. Each sweetener gives a unique taste, so feel free to mix it up!
Dietary Modifications
Vegan Options
This recipe is already vegan due to the natural ingredients. If you want to make it richer, try adding coconut oil instead of olive oil. It adds a nice flavor and keeps it plant-based.
Nut-Free Alternatives
If you need a nut-free option, skip the pecans. You can replace them with pumpkin seeds for crunch. They add a nice texture without nuts. Enjoy your sweet potatoes worry-free!
Storage Info
Short-Term Storage
To keep your maple cinnamon roasted sweet potatoes fresh, refrigerate them. Place them in an airtight container. They will stay good for about three to five days. If you want to reheat them, use an oven or a microwave. For the oven, set it to 350°F (175°C). Heat for about 10-15 minutes until warm. For the microwave, put them in a bowl and cover. Heat for 1-2 minutes, stirring halfway.
Long-Term Storage
If you want to store them longer, freezing is a great option. Let the sweet potatoes cool completely. Then, place them in a freezer-safe bag or container. Remove as much air as you can. They can last up to three months in the freezer.
When you are ready to eat them, thaw the sweet potatoes in the fridge overnight. You can also use the microwave to thaw them. Just set it to defrost for a few minutes. Once thawed, reheat them using the oven or microwave as described above. Enjoy your tasty sweet potatoes later!
FAQs
Common Questions About the Recipe
How long do Maple Cinnamon Roasted Sweet Potatoes last?
Maple Cinnamon Roasted Sweet Potatoes last about 3 to 5 days in the fridge. Store them in an airtight container to keep them fresh. If you want to enjoy them later, they freeze well too.
Can I use different types of potatoes?
Yes, you can use other potatoes. Regular potatoes or purple potatoes can work. However, sweet potatoes add a special flavor and sweetness that others might not offer.
What can I serve with Maple Cinnamon Roasted Sweet Potatoes?
These sweet potatoes pair well with many dishes. Try them with grilled chicken, pork, or a fresh salad. They also make a great side for holiday meals.
Nutritional Information
Caloric Content
One serving has about 180 calories. This makes it a tasty and healthy side. The calories mainly come from the sweet potatoes and maple syrup.
Health Benefits of Ingredients
Sweet potatoes are rich in vitamins A and C. They help boost your immune system. Maple syrup offers antioxidants, while olive oil provides healthy fats. Cinnamon has anti-inflammatory properties, making this dish both tasty and nutritious.
In this post, we explored how to make Maple Cinnamon Roasted Sweet Potatoes. We covered the ingredients you need, step-by-step instructions, and helpful tips for the best flavor. You learned how to store leftovers and variations to make this dish your own.
With these insights, you can create a tasty side that fits your needs. Enjoy the cooking process and have fun sharing this dish with others!


![To create this creamy delight, you need a few simple items: - 1 lb elbow macaroni - 4 cups water - 2 tablespoons unsalted butter - 1 teaspoon garlic powder - 1 teaspoon onion powder - ½ teaspoon smoked paprika - Salt and pepper to taste These ingredients form the base of the dish. The elbow macaroni cooks perfectly in the Instant Pot. The water helps to steam the pasta, making it tender and fluffy. You can boost the flavor of your mac and cheese with a few optional items: - Mustard powder - Hot sauce - Cooked bacon bits - Chopped green onions Adding mustard powder gives a nice tang. Hot sauce can add a kick, while cooked bacon bits provide a savory crunch. Green onions add freshness and brightness. For the creamiest mac and cheese, choose your cheeses wisely. I recommend: - 2 cups sharp cheddar cheese, shredded - 1 cup mozzarella cheese, shredded - ½ cup cream cheese, softened Sharp cheddar provides a bold flavor. Mozzarella makes it stretchy and creamy. Cream cheese adds richness, making every bite delightful. For the full recipe, check out the instructions above. First, gather all your ingredients. You need: - 1 lb elbow macaroni - 4 cups water - 2 tablespoons unsalted butter - 1 teaspoon garlic powder - 1 teaspoon onion powder - ½ teaspoon smoked paprika - Salt and pepper to taste - 2 cups sharp cheddar cheese, shredded - 1 cup mozzarella cheese, shredded - ½ cup cream cheese, softened - ½ cup whole milk Add the elbow macaroni and water to the Instant Pot. Then, mix in the butter, garlic powder, onion powder, smoked paprika, and a pinch of salt. Stir well to combine. This step is key for flavor. Now, close the lid of the Instant Pot. Set the valve to sealing. Select the manual setting and cook on high pressure for 4 minutes. This short cooking time works well! Once the timer goes off, do a quick release of the pressure. Be careful when you open the valve. After the pressure releases, carefully open the lid. It will smell amazing! Stir in the remaining tablespoon of butter, cheddar cheese, mozzarella cheese, cream cheese, and whole milk. Mix well until everything blends into a creamy dish. If it feels too thick, add a splash more milk to thin it out. Season with salt and pepper to your liking. Now you have a delicious, creamy mac and cheese! For the complete recipe, check out the [Full Recipe]. To make your mac and cheese super creamy, use a mix of cheeses. I suggest sharp cheddar for flavor and mozzarella for stretch. Cream cheese adds richness and smoothness. Always stir in your dairy after cooking the pasta. This keeps everything creamy and prevents lumps. One common mistake is overcooking the pasta. If you cook it too long, it can get mushy. Stick to the cooking time of four minutes. Another pitfall is not adding enough liquid. If your mac and cheese seems dry, add more milk slowly. Taste as you go to get the right creaminess. Serve your mac and cheese in fun, colorful bowls. This makes the dish pop! Top it with fresh parsley or chives for color. A sprinkle of extra cheese on top before serving also looks great. You can add crispy bacon bits or breadcrumbs for crunch. This makes your creamy mac and cheese even more delightful! {{image_2}} You can easily make your mac and cheese more filling by adding protein. Consider cooked chicken, bacon, or sausage. Just chop the meat into small pieces. Stir it into the pot with the cheese. This will make your dish hearty and flavorful. If you like some heat, try adding jalapeños or hot sauce. You can slice fresh jalapeños and mix them in. For a milder option, use pickled jalapeños. This adds a great kick to the creamy sauce. You can also drizzle hot sauce on top before serving for extra spice. For a vegetarian twist, add veggies like broccoli or spinach. Steam them first, then mix them in with the cheese. This not only adds color but also boosts nutrition. You can also use a blend of different cheeses to create unique flavors. Explore these variations to make your Instant Pot creamy mac and cheese truly your own! For the full recipe, check out the link above. To keep your mac and cheese fresh, place it in an airtight container. Make sure the container is clean and dry. You can store it in the fridge for up to three days. If you have a large batch, divide it into smaller portions. This helps it cool faster and stay fresh longer. When you are ready to enjoy your leftovers, reheating is key. Place the mac and cheese in a pot over low heat. Add a splash of milk to keep it creamy. Stir often until it is hot. You can also use the microwave. Heat it in 30-second intervals, stirring in between. This way, it warms evenly and does not dry out. If you want to save some for later, freezing works well. Let the mac and cheese cool completely before freezing. Use a freezer-safe container or bag. Remove as much air as possible to prevent freezer burn. It can last for up to three months in the freezer. When you’re ready to eat, thaw it in the fridge overnight and reheat as described above. For best results, add a bit more cheese or milk when reheating to restore its creaminess. For a full recipe of Instant Pot Creamy Mac and Cheese, check out the detailed instructions above. Yes, you can use gluten-free pasta. Just check the cooking time on the package. Gluten-free pasta may cook faster, so adjust the pressure cooking time to around 3 minutes. If you overcook it, the pasta can become mushy. To make it dairy-free, swap the cheese with plant-based options. Use dairy-free butter and cream. You can also try cashew cream for a rich texture. Nutritional yeast can add a cheesy flavor without dairy. Sharp cheddar is my favorite for its bold flavor. It melts well and adds creaminess. Mozzarella gives a nice stretch, while cream cheese adds richness. A mix of these cheeses works best for a creamy texture. Different pasta shapes need different cooking times. For example, penne or shells may need 5 minutes. Always check the pasta package for the right time. Remember, you want the pasta to be tender but not mushy. Making Instant Pot Creamy Mac and Cheese is easy. You learned about key ingredients and the best cheeses. I shared step-by-step cooking tips and ways to avoid common mistakes. You can add fun flavors and proteins for variety. Remember, store and reheat leftovers correctly for best taste. Enjoy your creamy mac and cheese journey! It’s a dish that brings joy to any meal.](https://dailydishly.com/wp-content/uploads/2025/07/aef5e05b-bf60-4c96-8d62-11668510c0c6-768x768.webp)
![To make Tomato Basil Feta Pasta, gather these items: - 400g pasta (penne or fusilli) - 300g cherry tomatoes, halved - 200g feta cheese, crumbled - 1/2 cup fresh basil leaves, chopped - 3 cloves garlic, minced - 1/4 cup olive oil - 1 teaspoon red pepper flakes (optional) - Salt and pepper to taste - Grated Parmesan cheese for serving (optional) You can swap some ingredients if needed. Here are some ideas: - Use whole wheat or gluten-free pasta instead of regular pasta. - Swap cherry tomatoes with diced regular tomatoes. - If feta is hard to find, try goat cheese for a different taste. - For a dairy-free option, use a plant-based feta cheese. - Instead of fresh basil, use dried basil, but use less since it is stronger. Fresh ingredients make a big difference in this dish. Here are some tips: - Look for firm cherry tomatoes with bright color and no bruises. - Choose basil leaves that are vibrant green and not wilted or brown. - Smell the tomatoes; they should have a sweet, fresh scent. - When buying garlic, select bulbs that are firm and dry, with no soft spots. - Always check the feta cheese for freshness; it should be creamy and not crumbly. This recipe brings vibrant flavors together, making it a real treat. For the full recipe, check out the provided link. To start, fill a large pot with water and add salt. Bring the water to a boil. Once boiling, add 400g of pasta, like penne or fusilli. Cook it for about 8-10 minutes until it’s al dente. Al dente means the pasta is firm but not hard. After cooking, save 1 cup of the pasta water. Then, drain the pasta in a colander and set it aside. In a large bowl, mix together 300g of halved cherry tomatoes and 200g of crumbled feta cheese. Add 3 cloves of minced garlic for flavor. Pour in 1/4 cup of olive oil to give it richness. If you like some heat, toss in 1 teaspoon of red pepper flakes. Season the mixture with salt and pepper to taste. This blend will create a fresh and tasty base for your pasta. Now, add the cooked pasta to the bowl with the tomato mixture. Toss everything together gently. Make sure that the pasta is well coated with the olive oil and feta. If the pasta seems dry, pour in some of the reserved pasta water, 1-2 tablespoons at a time. Stir until you reach a creamy texture. Finally, fold in 1/2 cup of chopped fresh basil leaves. This will add a bright flavor just before serving. Enjoy your Tomato Basil Feta Pasta! For the full recipe, check the details above. To get that perfect creamy texture, start by saving some pasta water. After cooking your pasta, reserve about one cup of the water before draining. This water has starch that helps bind the sauce. When you mix the pasta with the tomato and feta mixture, add the reserved water a little at a time. Keep mixing until you reach the creaminess you want. This trick makes your dish rich and smooth. Presentation matters. It can make your meal feel special. After plating your pasta, add some fresh basil leaves on top. This adds color and a fresh aroma. You can also sprinkle grated Parmesan cheese for a touch of elegance. Use a few whole cherry tomatoes for a pop of color. These small steps make a big difference in how your dish looks. One common mistake is overcooking the pasta. Always cook it al dente. This keeps the pasta firm and helps it hold the sauce better. Another mistake is not reserving enough pasta water. If you skip this step, your dish may end up dry. Finally, avoid adding all the basil too early. Fold it in just before serving. This keeps its bright flavor and fresh look. By watching these details, you will make a delicious Tomato Basil Feta Pasta every time. {{image_2}} You can easily add protein to this dish. Grilled chicken works well. Simply cook it, slice it, and mix it in. Shrimp also adds great flavor. Sauté shrimp in olive oil until pink, then toss with the pasta. Both options make the meal more filling and nutritious. For a vegetarian twist, try adding more veggies. Spinach, bell peppers, or zucchini brighten up the dish. You can also add olives for a salty kick. Capers or artichokes bring a unique taste. Each addition gives the pasta a new flavor and texture. You can change this dish with the seasons. In summer, use fresh heirloom tomatoes for sweetness. Fall calls for roasted butternut squash. In winter, add kale or Brussels sprouts for a hearty touch. Each season offers fresh produce to keep your pasta exciting and delicious. To keep your Tomato Basil Feta Pasta fresh, store it in an airtight container. Let it cool first. This helps avoid steam build-up, which can make the pasta soggy. Place the container in the fridge. It will stay good for about three days. Make sure to label it with the date. This way, you can keep track of how long it has been stored. When it's time to eat your leftovers, reheat the pasta carefully. The best way is to use a skillet. Add a splash of water or olive oil to the pan. Heat it on low to medium heat. Stir gently to mix the sauce and pasta. This keeps the dish moist and tasty. You can also use the microwave, but cover it with a damp paper towel. This traps steam and keeps the pasta from drying out. If you want to save your dish for later, freezing works well. First, let the pasta cool completely. Then, divide it into single servings. Use freezer-safe bags or containers to store it. Remember to squeeze out as much air as possible. This helps prevent freezer burn. Your pasta can last up to three months in the freezer. When you're ready to eat, thaw it in the fridge overnight before reheating. This keeps the texture nice and the flavors intact. For the full recipe, check out the details above. Yes, you can use various pasta types. Penne and fusilli work well, but you can try spaghetti or farfalle. The key is to choose a pasta that holds sauce well. Each type gives a slightly different texture, making your meal unique. To make Tomato Basil Feta Pasta gluten-free, choose gluten-free pasta. Many brands offer rice or corn-based options. Follow the cooking instructions on the package. The rest of the ingredients are naturally gluten-free, so you can enjoy this dish without worry. This dish pairs well with many options. You can serve it with a light salad or garlic bread. Roasted vegetables also complement the flavors nicely. For protein, grilled chicken or shrimp works well. You might also enjoy a glass of white wine with this meal. For the full recipe, check out the [Full Recipe]. To wrap it up, we covered key ingredients, cooking steps, and tips for your dish. I shared helpful advice on selecting fresh produce and avoiding mistakes. You also learned about variations and how to store leftovers. This dish offers great flavors and easy options. Cooking should be fun and delicious. Experiment with ingredients and enjoy your tasty creation!](https://dailydishly.com/wp-content/uploads/2025/07/0b4f4c47-66c7-4839-80f3-1b898db998c4-768x768.webp)

