Maple Glazed Carrot Cake Donuts Irresistible Treat

You’ll love these Maple Glazed Carrot Cake Donuts! They’re soft, sweet, and full of flavor. Imagine biting into a warm donut, topped with a smooth maple glaze. This recipe is a tasty twist on a classic. Perfect for breakfast or a sweet snack, they combine the goodness of carrots with maple sweetness. Let’s dive into the ingredients and get started on making these irresistible treats!
Ingredients
List of Ingredients Needed
– 2 cups all-purpose flour
– 1 cup brown sugar, packed
– 1 tablespoon baking powder
– 1 teaspoon baking soda
– 1 teaspoon ground cinnamon
– 1/2 teaspoon ground nutmeg
– 1/2 teaspoon salt
– 1 cup grated carrots (about 2 medium carrots)
– 1/2 cup unsweetened applesauce
– 1/2 cup buttermilk
– 2 large eggs
– 1 teaspoon vanilla extract
– 1/4 cup chopped walnuts (optional)
I love using fresh ingredients. They make the donuts taste great. Grated carrots add natural sweetness. Plus, they keep the donuts moist. Applesauce is a great substitute for oil. It helps reduce fat while keeping the texture perfect.
The spices, like cinnamon and nutmeg, create warmth in every bite. They blend well with the sweetness of the brown sugar. That’s what makes these donuts so special. If you like crunch, try adding walnuts. They give a nice texture contrast.
Additional Ingredients for Maple Glaze
– 1 cup powdered sugar
– 2-3 tablespoons maple syrup
– 1 tablespoon milk
The glaze makes these donuts truly shine. I use maple syrup for a rich flavor. It pairs so well with the carrot cake base. The powdered sugar creates that sweet, creamy finish. Adjust the milk for your preferred glaze thickness. A thicker glaze will coat better, while a thinner one will drizzle nicely.You’ll love how easy it is to make these treats!
Step-by-Step Instructions
Preparation Steps
1. Preheat your oven to 350°F (175°C) and grease a donut pan with cooking spray.
2. In a large bowl, mix the dry ingredients. Combine flour, brown sugar, baking powder, baking soda, cinnamon, nutmeg, and salt.
3. In another bowl, blend the wet ingredients. Mix grated carrots, applesauce, buttermilk, eggs, and vanilla extract until smooth.
Combining Ingredients
1. Gradually add the wet mixture to the dry mix. Stir gently until just combined.
2. If you want extra crunch, fold in chopped walnuts.
Baking Process
1. Spoon the batter into the prepared donut pan. Fill each cavity about 2/3 full.
2. Bake for 12-15 minutes. Check if done by inserting a toothpick into the center. It should come out clean. Let the donuts cool in the pan for 5 minutes. Then, transfer them to a wire rack.
Making the Maple Glaze
1. While the donuts cool, whisk the glaze ingredients. Combine powdered sugar, maple syrup, and milk until smooth. Adjust thickness by adding more milk or sugar.
2. Once the donuts are cool, dip the tops into the glaze. Let any extra glaze drip off. Place them back on the wire rack to set.
Now you have delicious maple glazed carrot cake donuts. Enjoy this treat with family or friends!
Tips & Tricks
Tips for Perfect Donuts
– Don’t overmix the batter. This keeps your donuts light and fluffy.
– Allow proper cooling time after baking. This helps them set and makes glazing easier.
Glazing Techniques
– To achieve a smooth glaze finish, dip only the tops of the donuts. This prevents excess from running down the sides.
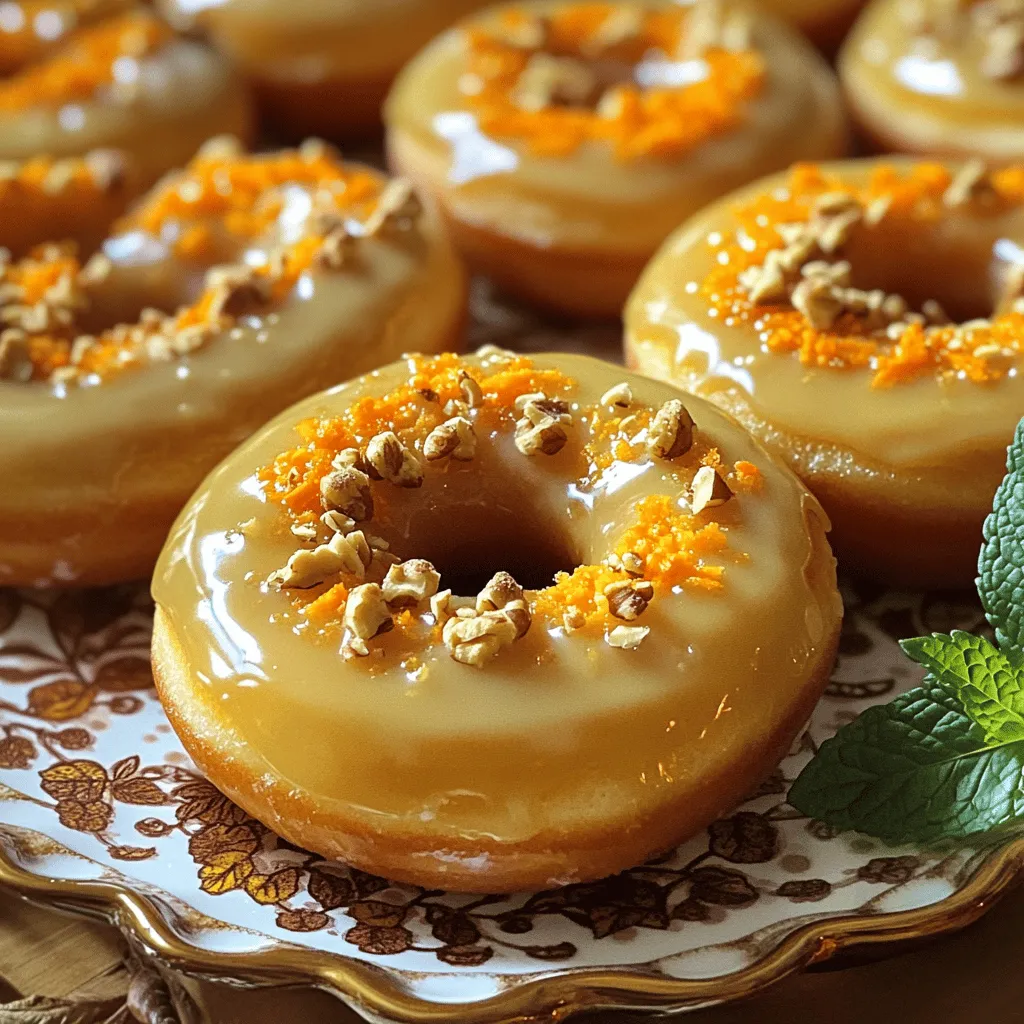
– Adding toppings like chopped walnuts or a sprinkle of cinnamon gives extra flavor and crunch.
Serving Suggestions
– Present the donuts on a decorative platter. This makes them look more appealing.
– Pair these donuts with coffee or tea for a warm treat. A glass of cold milk also works great!

Variations
Flavor Variations
You can switch up the flavor by swapping carrots with other veggies or fruits. For instance, try using zucchini or sweet potatoes. They add moisture and taste great. You can also add mashed bananas for a unique twist. Seasonal spices can enhance the flavor, too. Try nutmeg in the fall or a hint of ginger in winter.
Dietary Modifications
If you need gluten-free donuts, use almond flour or a gluten-free blend. These options work well and taste great. For a vegan version, replace eggs with flax eggs or applesauce, and use plant-based milk. These swaps keep the flavor intact while catering to your dietary needs.
Unique Glaze Ideas
Glazes can be more than just maple. Add citrus zest for a bright touch. Lemon or orange pairs well with the flavors of the donut. You can also use warm spices like ginger or cardamom in the glaze for a twist. If you’re a chocolate lover, dip the donuts in melted dark chocolate instead of maple. This gives a rich flavor that contrasts nicely with the cake-like donut.
Storage Info
Best Practices for Storing Donuts
To keep your maple glazed carrot cake donuts fresh, store them in an airtight container. This helps prevent them from drying out. Place a piece of parchment paper between layers to avoid sticking. You can also use a resealable plastic bag if you do not have a container. Make sure to squeeze out all the air before sealing the bag.
Freezing Instructions
To freeze your donuts, first, ensure they are completely cool. Place them in a single layer on a baking sheet and freeze for about 1-2 hours. After they are firm, transfer them to an airtight container or freezer bag. This method keeps them from sticking together. For the glaze, freeze it separately in a small container. When ready to eat, thaw the donuts at room temperature. For a warm treat, pop them in the oven at 350°F (175°C) for a few minutes.
Shelf Life
You can store these donuts at room temperature for 2-3 days. Make sure they are in a cool, dry place. If you notice any mold or a strange smell, throw them away. This is a sign they have gone bad. Always trust your senses when checking for freshness.
FAQs
Common Questions about Maple Glazed Carrot Cake Donuts
What’s the difference between baked and fried donuts?
Baked donuts are lighter and fluffier since they use less oil. They have a cake-like texture. Fried donuts are denser and richer, as they absorb oil during cooking. Both types are tasty, but baked donuts are easier to make at home.
Can I make the batter in advance?
Yes, you can make the batter ahead of time. Store it in the fridge for up to 24 hours. Just give it a quick stir before using. This helps save time on busy mornings.
Baking Tips
How do I know when the donuts are done baking?
To check if the donuts are done, insert a toothpick in the center. If it comes out clean, the donuts are ready. The tops should also look golden brown and spring back when touched lightly.
Is it necessary to glaze the donuts immediately?
It’s not necessary, but glazing while still warm helps the glaze stick better. If you let the donuts cool completely, the glaze may not adhere as well. Just ensure they are not too hot, or the glaze will melt.
Ingredient Substitutions
What can I use instead of buttermilk?
If you don’t have buttermilk, you can use milk mixed with vinegar or lemon juice. Just add 1 tablespoon of vinegar or lemon juice to 1 cup of milk. Let it sit for 5 minutes to thicken.
Can I replace brown sugar with white sugar?
You can use white sugar instead of brown sugar. However, brown sugar adds moisture and a richer flavor. If you use white sugar, the donuts may be less moist.
Nutrition Information
Calorie count for one donut
Each maple glazed carrot cake donut contains around 150 calories. This can vary based on portion size and ingredients used.
Nutritional benefits of carrots in the recipe
Carrots are packed with beta-carotene, which helps with vision and skin health. They also provide fiber, which aids digestion. Including carrots in these donuts makes them a bit healthier!
This blog post covers how to make delicious baked maple glazed carrot cake donuts. We explored the key ingredients, step-by-step instructions, storage tips, and variations. Remember, using fresh ingredients helps create the best flavor. Don’t rush—let your donuts cool and enjoy the glaze. Experiment with flavors and toppings for your own twist. Perfecting this recipe can lead to a treat everyone loves. Now, it’s time to roll up your sleeves and start baking! Enjoy the joy these donuts bring to your kitchen.


![- 1 cup rolled oats - 1 cup almond butter - 1/2 cup shredded unsweetened coconut These main ingredients are the heart of your Almond Joy Energy Bites. Rolled oats provide fiber, giving you energy and keeping you full. Almond butter adds healthy fats and protein, making these bites more satisfying. Shredded coconut brings a delicious tropical flavor and a nice texture. - 1/4 cup honey or maple syrup - 1 teaspoon vanilla extract - 1/2 teaspoon sea salt For sweetness, you can use honey or maple syrup. Both options add a rich flavor. Vanilla extract enhances the overall taste, making it more delightful. Sea salt balances the sweetness and adds depth to every bite. - 1/4 cup mini dark chocolate chips - 1/4 cup chopped almonds Mini dark chocolate chips make these bites even more fun. They add a sweet, chocolatey burst in every mouthful. Chopped almonds give a crunch that contrasts with the softness of the other ingredients. This mix of textures makes them exciting to eat. You can find the complete recipe [Full Recipe]. - Step 1: Combine ingredients in a large mixing bowl. Start with rolled oats, almond butter, shredded coconut, honey, and vanilla extract. Mix these until you see a smooth blend. - Step 2: Ensure all ingredients are thoroughly mixed. You want a thick, sticky mixture that holds well together. - Step 3: Scoop and roll the mixture into bite-sized balls. Aim for about one inch in diameter. This size is easy to eat and perfect for snacking. - Step 4: Place on a parchment-lined baking sheet. This helps prevent sticking and makes cleanup easier. - Step 5: Refrigerate for at least 30 minutes. This step helps the bites firm up nicely. - Step 6: Transfer to an airtight container. Store them in the fridge where they can last up to a week. Enjoy them whenever you need a tasty pick-me-up! For the full recipe, check out the complete instructions above. To get the best Almond Joy Energy Bites, use room temperature almond butter. This makes mixing much easier. You can also change the size of the bites. Make them big or small based on what you like. When you serve these bites, arrange them nicely on a plate. You can use a clear glass jar for a fun look. For extra charm, sprinkle some shredded coconut or chopped almonds on top. This makes the bites more eye-catching. These energy bites taste great with a glass of milk or nut milk. They also work well as a post-workout snack or a treat during lunch. Feel free to enjoy them any time you need a boost. If you want to make them even better, check out the Full Recipe for more tips! {{image_2}} You can easily change the taste of your Almond Joy Energy Bites. Try swapping almond butter for another nut butter, like peanut or cashew. This simple switch gives a new flavor twist. You can also add different mix-ins. Consider using dried fruits like cranberries or raisins. Seeds, like chia or pumpkin, add crunch and nutrition. The texture of these bites can be fun to play with too. Experiment with different types of chocolate. Use dark, milk, or even white chocolate for a sweet touch. If you want to boost the nutrition, add protein powder. This makes your bites more filling and adds a protein punch. You can make these bites fit various diets. To make them vegan, just use maple syrup instead of honey. This keeps them sweet and plant-based. If you need them gluten-free, check that your oats are not cross-contaminated with gluten. This way, everyone can enjoy these tasty snacks. For the full recipe, check out the complete guide to making these delicious bites. To keep your Almond Joy Energy Bites fresh, store them in an airtight container in the refrigerator. This helps maintain their texture and flavor. Always keep them away from direct sunlight and heat. This prevents them from getting too warm and losing their yummy taste. These energy bites are good for up to a week in the fridge. If you want to store them for longer, you can freeze them. They can last in the freezer for up to three months. Just make sure to keep them in an airtight container to avoid freezer burn. When you’re ready to enjoy your frozen energy bites, leave them at room temperature for a few minutes. This makes them easy to eat. For the best results, refrigerate them overnight if they are frozen. This way, they will taste fresh and delightful when you’re ready to snack. Yes, adjust honey or maple syrup to taste. If you want less sweetness, start with half. You can always add more later if you need it sweeter. This way, you control the flavor to match your liking. They are a nutritious snack that kids generally enjoy. The mix of oats, chocolate, and nuts makes them tasty. Plus, they are fun to eat! Kids love the chewy texture and the sweet bits of chocolate. Yes, they can be prepared in advance and stored for later use. Make a batch over the weekend and enjoy them all week. This saves time and gives you quick snacks ready to go. They should be firm after chilling for at least 30 minutes. Check them by pressing gently. If they hold their shape, they are ready to eat. Enjoy your Almond Joy Energy Bites as a quick treat or snack! You learned how to make Almond Joy Energy Bites with simple ingredients. Combine oats, almond butter, and coconut for a tasty mix. Sweeten with honey or maple syrup, and add chocolate chips for fun. Follow the steps to roll and chill the bites. These treats are easy to customize and store well. Enjoy them as snacks or post-workout fuel. With endless variations, you can always explore new flavors. Get ready to share these tasty bites with friends and family!](https://dailydishly.com/wp-content/uploads/2025/07/b2b32087-befa-4ffb-92e8-3f970098e72d-768x768.webp)
![To make these chocolate-covered banana bites, you will need simple, fresh ingredients. Here is the list: - 2 large bananas - 1 cup dark chocolate chips (or semi-sweet) - 1 tablespoon coconut oil - 1/4 cup chopped nuts (walnuts, almonds, or pistachios) - Sea salt for sprinkling - Optional toppings: 1/4 cup shredded coconut or mini marshmallows These ingredients work together for a tasty treat. The bananas add natural sweetness, while the dark chocolate provides rich flavor. Coconut oil helps the chocolate melt smoothly and adds a hint of tropical taste. The nuts give a nice crunch, and sea salt balances the sweetness. You can also mix in optional toppings like shredded coconut or mini marshmallows for fun twists. When choosing bananas, look for ones that are ripe but not too soft. This way, they will hold their shape when coated. For chocolate, dark chocolate chips melt well and taste great, but you can pick semi-sweet if you prefer. Once you gather your ingredients, you’re ready to make a delightful snack. For the complete process, check the Full Recipe. - Peel and slice bananas into bite-sized rounds. - Arrange banana slices on a parchment-lined baking sheet. Start with ripe bananas. They should be firm but not too soft. Slice them about one inch thick. This size helps them hold their shape when coated in chocolate. Lining the baking sheet with parchment paper keeps the bites from sticking. - Combine chocolate chips and coconut oil in a microwave-safe bowl. - Microwave in intervals, stirring, until smooth. Use dark chocolate chips for a rich taste. The coconut oil makes the chocolate smooth and shiny. Heat in short bursts of thirty seconds. Stir after each burst to prevent burning. When melted, the chocolate should be silky and easy to dip. - Use a fork or toothpick to coat banana slices in chocolate. - Allow excess chocolate to drip off. Hold the banana slice with a fork or toothpick. Dip it fully into the melted chocolate. Let any extra chocolate fall back into the bowl. This step ensures a nice, even coat. - Sprinkle nuts onto chocolate-coated banana bites. - Optionally, add shredded coconut or mini marshmallows. While the chocolate is still wet, add your favorite toppings. Nuts give a nice crunch. Coconut and marshmallows add a fun twist. Get creative with your choices! - Place the baking sheet in the freezer. - Chill for 15-20 minutes until the chocolate sets. Freezing helps the chocolate harden quickly. This step gives you a perfect bite. Keep an eye on them to make sure they don’t freeze too long. - Arrange on a serving platter. - Sprinkle with sea salt for extra flavor. Once chilled, place the banana bites on a nice platter. A light sprinkle of sea salt can enhance the flavor. These treats are perfect for sharing with friends or family. For the complete recipe, check out the [Full Recipe]. For melting, I recommend dark chocolate or semi-sweet chocolate. Both types melt well and give a rich flavor. Avoid chocolate with added ingredients, as they may not melt smoothly. To stop chocolate from seizing, add a bit of coconut oil. This helps keep the chocolate smooth and shiny while you dip your bananas. You can get creative with toppings! Try adding chopped nuts like walnuts or almonds for crunch. For a fun twist, sprinkle on shredded coconut or mini marshmallows. Bananas pair well with peanut butter too. Drizzle some on top after dipping for a tasty combo. If you're feeling adventurous, add a pinch of cinnamon for warmth. Present your chocolate-covered banana bites on a colorful platter. For a fun touch, use mini cupcake liners. They look cute and make for easy serving. Pair these bites with a glass of cold milk or a warm cup of tea. They also go well with vanilla ice cream for a sweet dessert combo. Enjoy your tasty creation! {{image_2}} You can easily make these bites vegan or dairy-free. Use plant-based chocolate chips instead of dark chocolate. Look for brands that are labeled dairy-free. You can also skip the nuts if you need a nut-free version. Simply leave them out or choose seeds like pumpkin or sunflower for crunch. You can switch up the chocolate for fun. Try white chocolate for a sweet twist. Milk chocolate is another tasty choice. If you want to get creative, add spices like cinnamon or nutmeg. Extracts like vanilla or almond also bring unique flavors. These small changes make a big impact on taste. Bananas are great, but other fruits work well too. Strawberries and apples both taste amazing with chocolate. You can even mix bananas with berries. Slice them small to make bite-sized treats. This way, you get a variety of flavors in one bite. Enjoy experimenting with different fruits! To keep your chocolate-covered banana bites fresh, store them in the fridge. Use an airtight container to prevent odors. Place parchment paper between layers if stacking them. This keeps the chocolate from sticking. If you want to store them longer, freezing works well too. Just place them on a baking sheet first. Once frozen, transfer them to a freezer-safe bag. This prevents them from clumping together. To thaw, just leave them in the fridge for a few hours before enjoying. When stored well in the fridge, these treats last about a week. If you freeze them, they can last up to two months. Check for signs of spoilage like brown spots on the bananas or a change in texture. If they look or smell off, it’s best to toss them. If you have leftover melted chocolate, don’t waste it! You can reuse it for other treats. Drizzle it on popcorn, or dip pretzels for a sweet and salty snack. You can also make chocolate-covered strawberries or marshmallows. Just be sure to reheat it gently to keep it smooth. For the best results, use the Full Recipe to make your banana bites. Enjoy the fun of creating delicious snacks while managing your storage effectively! Yes, you can use milk chocolate. It adds a sweeter taste. Dark chocolate has a richer flavor. Dark chocolate also has more health benefits, like antioxidants. It has less sugar than milk chocolate, making it a better choice for some. If you prefer sweet, go for milk chocolate. If you want a deeper flavor, stick with dark. To keep the chocolate firm, store the bites in a cool place. A fridge works great, but avoid the freezer after setting. You can also use a chocolate with a higher cocoa content. This type melts less easily. If you serve them warm, try using coconut oil. It helps the chocolate stay solid longer. Yes, you can make these bites ahead of time. They store well in the fridge for about a week. Just place them in an airtight container. If you want to keep them longer, you can freeze them. Make sure to separate layers with parchment paper to avoid sticking. Thaw them in the fridge before serving for the best taste. Chocolate-covered banana bites can be healthy in moderation. Bananas provide potassium and fiber. Dark chocolate has antioxidants, which are good for you. However, watch your portions. Eating too many can add extra sugar and calories. Pair these bites with a balanced diet for better health. Enjoy them as a treat rather than a daily snack. For the full recipe, check out the details above. You learned how to make tasty chocolate-covered banana bites. We covered the simple steps, from slicing bananas to melting chocolate. You can mix and match ingredients for fun variations. Remember, storing them well keeps them fresh and tasty for longer. Whether serving these bites at a party or enjoying them yourself, they are a delightful treat. Experiment with toppings and flavors to make them yours. Enjoy creating your own chocolate-covered banana bites!](https://dailydishly.com/wp-content/uploads/2025/06/88d9cc62-4f1a-4e00-b9c6-f86f49f25fdc-768x768.webp)


