Maple Glazed Donut Muffins Irresistible Sweet Treat

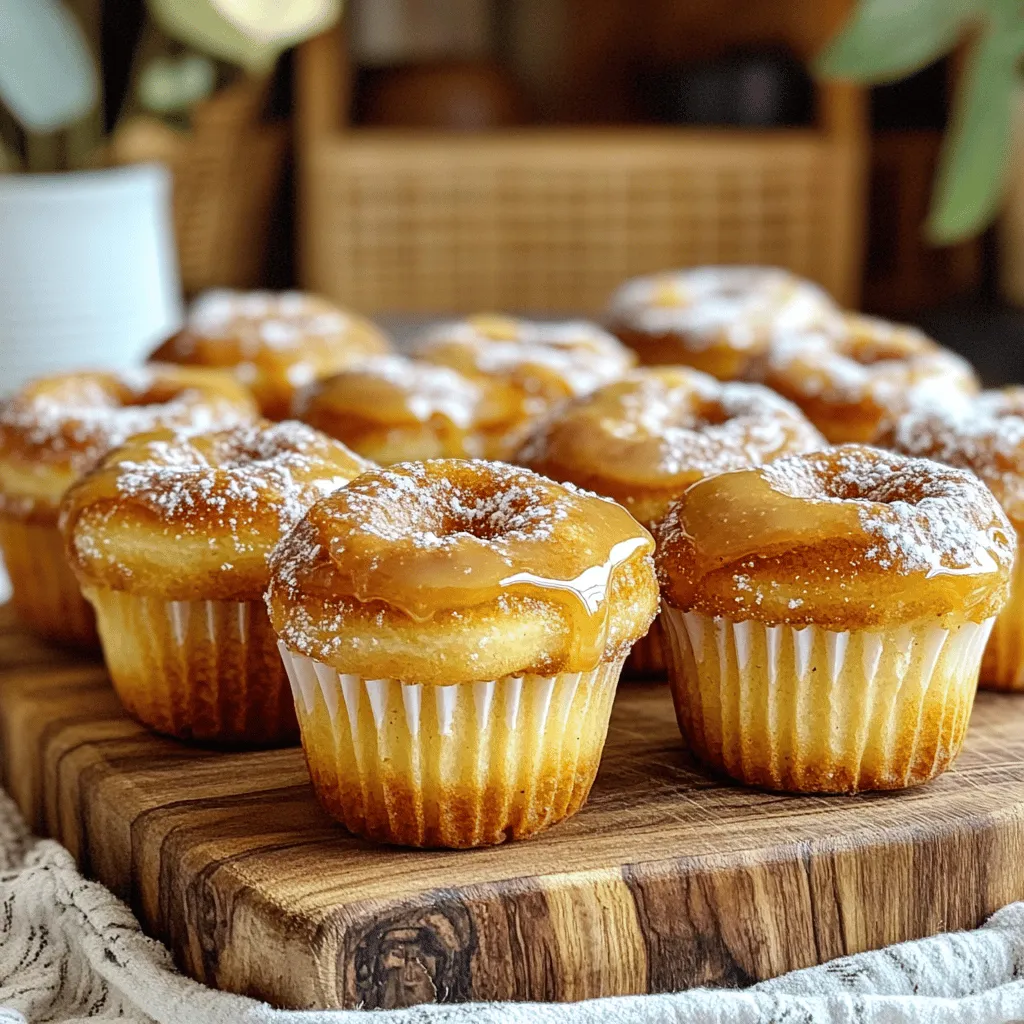
Are you craving a sweet treat that combines the best of donuts and muffins? Look no further than these Maple Glazed Donut Muffins! With a soft, fluffy texture and a sweet maple glaze, these muffins are a delight for breakfast, brunch, or anytime you need a boost. In this post, I’ll guide you through easy steps, share tips for the perfect texture, and even explore fun variations. Let’s get baking!
Ingredients
Essential Ingredients
– 1 ½ cups all-purpose flour
– ¾ cup granulated sugar
– 1 tablespoon baking powder
– ½ teaspoon salt
– 1 teaspoon ground cinnamon
– ½ teaspoon ground nutmeg
– ¾ cup milk
– ¼ cup unsalted butter, melted
– 1 large egg
– 2 teaspoons pure vanilla extract
– ½ cup maple syrup (for glaze)
– 1 tablespoon unsalted butter (for glaze)
– 1 tablespoon powdered sugar (for glaze)
The main ingredients for maple glazed donut muffins are simple. You need flour, sugar, baking powder, and spices. These give the muffins their sweet, cozy taste. Milk adds moisture, while melted butter makes them rich. The egg binds the mixture and adds fluffiness.
Optional Add-ins
– Chocolate chips
– Nuts (walnuts or pecans)
– Dried fruits
You can make these muffins even better! Add chocolate chips for a sweet twist. Nuts like walnuts or pecans give a nice crunch. Dried fruits add a chewy surprise. Feel free to mix and match!
Equipment Needed
– Muffin tin
– Mixing bowls
– Whisk
– Measuring cups and spoons
– Small saucepan
To make these muffins, gather a few tools. You will need a muffin tin to shape them. Mixing bowls help combine the ingredients. A whisk is key for mixing, while measuring cups and spoons ensure accuracy. Finally, a small saucepan is for the glaze. These tools make your baking easy and fun!
Step-by-Step Instructions
Preparing the Batter
– Preheat the oven to 350°F (180°C).
– In a large bowl, mix 1 ½ cups of flour, ¾ cup of sugar, 1 tablespoon of baking powder, ½ teaspoon of salt, 1 teaspoon of cinnamon, and ½ teaspoon of nutmeg.
– In another bowl, combine ¾ cup of milk, ¼ cup of melted butter, 1 large egg, and 2 teaspoons of vanilla extract.
Making sure to measure carefully is key. The right balance of wet and dry ingredients makes all the difference.
Baking the Muffins
– Gently fold the wet ingredients into the dry ones. Be careful not to overmix! A few lumps are fine.
– Divide the batter into muffin cups, filling each about ¾ full.
– Bake in your preheated oven for 15-18 minutes. To check if they are done, insert a toothpick into the center. If it comes out clean, they are ready.
Watching the muffins rise is a joy! The scent of warm spices fills the kitchen.
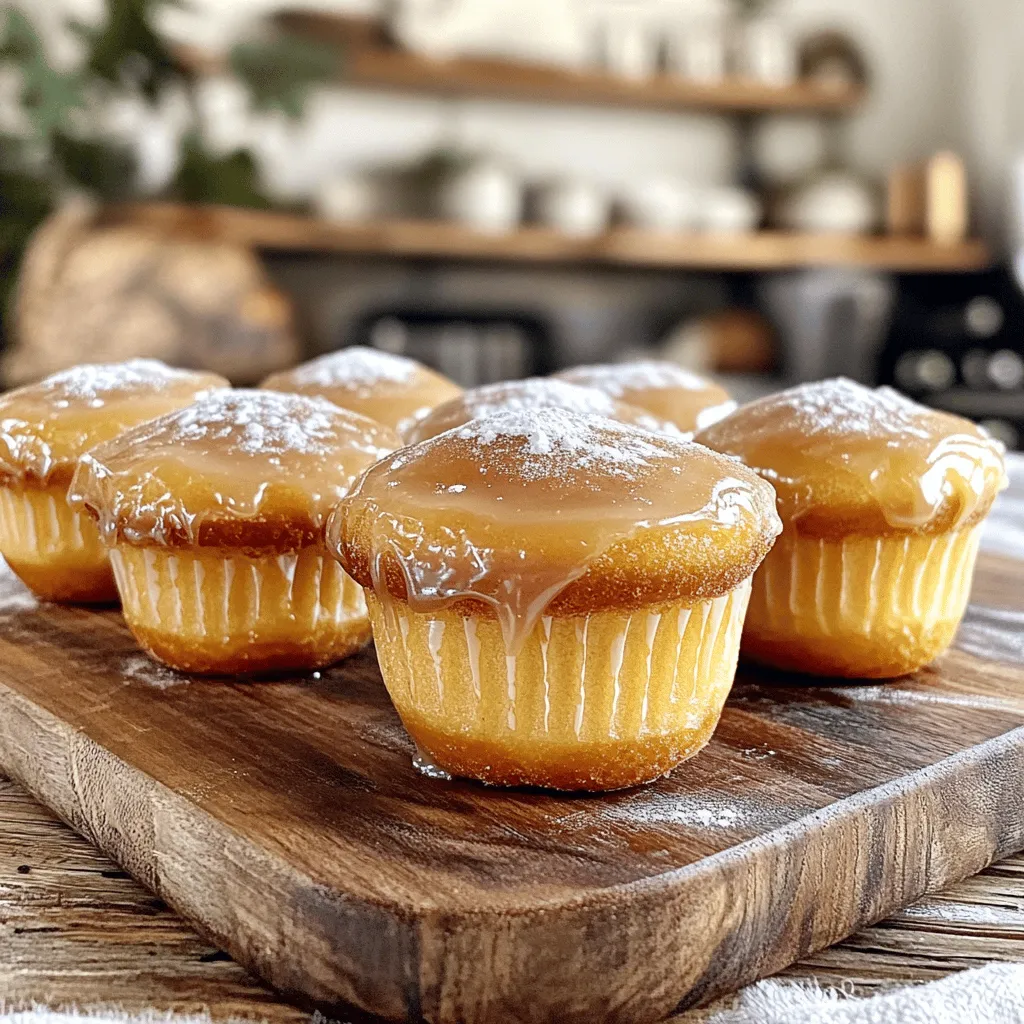
Making the Maple Glaze
– In a small saucepan, melt ½ cup of maple syrup and 1 tablespoon of butter over low heat.
– Stir in 1 tablespoon of powdered sugar to achieve a smooth glaze.
– Once the muffins cool for about 5 minutes, dip their tops into the warm glaze. Let excess glaze drip off.
The glaze adds the final touch. Its sweet, rich flavor makes these muffins hard to resist!
Tips & Tricks
Achieving the Perfect Texture
To get the best texture in your muffins, do not overmix the batter. Mixing too much makes them dense. You want to see a few lumps; that’s okay! After baking, allow the muffins to cool slightly before glazing. This step helps the glaze stick better.
Enhancing Flavor
Using high-quality pure vanilla extract makes a big difference. It adds a rich flavor that pairs well with maple. Feel free to adjust spices like cinnamon and nutmeg to fit your taste. A pinch more nutmeg can bring out a warm spice flavor.
Troubleshooting Common Issues
If your muffins are too dense, check the freshness of your baking powder. Old baking powder may not rise well. For glaze that is too runny, simply add more powdered sugar. This will thicken it up for that perfect sweet topping.

Variations
Flavor Variants
I love to switch things up with flavors. Here are two fun options you can try:
– Cinnamon Sugar Donut Muffins: After baking, roll the warm muffins in a mix of sugar and cinnamon. This gives a sweet crunch on the outside. The flavor matches the donut vibe perfectly.
– Pumpkin Spice Maple Muffins: Add ½ cup of pumpkin puree to the batter. Mix in pumpkin spice for a cozy twist. These muffins are perfect for fall or anytime you crave a warm, spiced treat.
Gluten-Free Option
If you need a gluten-free choice, it’s easy to adapt. Just swap out all-purpose flour with almond or coconut flour. Make sure to adjust the liquid. Almond flour may need a bit more moisture, so add extra milk if needed.
Vegan Adaptation
Going vegan? I’ve got you covered! Here’s how to make these muffins without eggs or dairy:
– Replace the egg with flaxseed meal: Mix 1 tablespoon of flaxseed meal with 2.5 tablespoons of water. Let it sit for a few minutes until it thickens.
– Use plant-based milk and butter: Almond or oat milk works well here. For butter, try coconut oil or a vegan butter spread. These swaps keep the muffins moist and tasty.
Feel free to experiment with these variations. Each one brings a new and exciting taste to your maple glazed donut muffins!
Storage Info
Storing Muffins
To keep your maple glazed donut muffins fresh, store them in an airtight container. Place them at room temperature for up to three days. If you want them to last longer, move them to the fridge. This helps keep them moist and tasty.
Freezing Muffins
If you want to freeze your muffins, wrap them well. Use plastic wrap or aluminum foil to cover each muffin. Place them in a freezer bag and remove as much air as you can. For best results, eat them within three months. When you want a muffin, take it out and let it thaw overnight in the fridge.
Reheating Suggestions
To enjoy warm muffins again, you can use a microwave. Heat them for about 10-15 seconds. This warms them up quickly. If you prefer, you can also use an oven. Preheat it to 350°F (175°C) and place the muffins on a baking sheet. Heat them for about 5-7 minutes. This keeps the texture nice and fresh.
FAQs
How long do Maple Glazed Donut Muffins last?
Maple glazed donut muffins last about 2 to 3 days at room temperature. Keep them in an airtight container to stay fresh. If you store them in the fridge, they can last up to a week. Make sure to wrap them well to avoid drying out.
Can I make these muffins in advance?
Yes, you can make these muffins in advance. Bake them and let them cool completely. Then, store them in an airtight container at room temperature. If you want to keep them longer, freeze them. Wrap each muffin in plastic wrap, then place them in a freezer bag. They can stay fresh for up to 3 months this way.
What can I serve with these muffins?
These muffins pair well with coffee or tea. A warm cup of coffee enhances their sweet flavor. For tea lovers, a light herbal tea brings out the spices. These muffins are perfect for breakfast or brunch. Serve them at cozy gatherings or special occasions, like birthdays or holidays.
In this post, we covered how to make delicious maple glazed donut muffins. You learned about essential ingredients, optional add-ins, and equipment needed. We had step-by-step instructions on preparing the batter, baking, and making the glaze. Additionally, tips for perfect texture and flavor enhancements were shared.
These muffins are great for breakfast or snacks. Remember, you can also customize them to suit your taste. Enjoy your baking!


. Yes, you can use butternut squash or regular potatoes, but the flavor will change. Sweet potatoes add a nice sweetness and texture that other potatoes may lack. Use a flax egg or applesauce as a vegan alternative. A flax egg is made by mixing one tablespoon of ground flaxseed with two and a half tablespoons of water. Let it sit until it thickens. Swap half the flour for whole wheat flour or reduce sugar for a lighter option. You can also add mashed bananas or applesauce to cut down on sugar and add moisture. You can use a muffin tin; adjust the baking time accordingly. Muffins will take a little longer to bake than donuts, so check them after 15 minutes. Ensure donuts are completely cool before coating to avoid melting the sugar. Brush them with melted butter first. This helps the sugar stick well and gives a nice finish. For the full recipe, check the complete list of ingredients and steps to make these delightful treats! These sweet potato donuts are easy and fun to make. You need simple ingredients and a few steps. Start with mixing dry and wet ingredients, then bake your treats. Remember to experiment with flavors and toppings to find your favorite combo. Store any extras to enjoy later. Whether for breakfast or a snack, these donuts are a tasty choice. Have fun baking and sharing them!](https://dailydishly.com/wp-content/uploads/2025/07/04b40064-aac7-4876-84c8-c93335adf97c-768x768.webp)

![To make a tasty no-bake strawberry cheesecake, you need a few key ingredients: - 200g digestive biscuits, crushed - 100g unsalted butter, melted - 400g cream cheese, softened - 100g powdered sugar - 1 teaspoon vanilla extract - 250ml heavy cream - 300g fresh strawberries, hulled and sliced - 100g strawberry jam These ingredients work together to create a rich and creamy dessert. The digestive biscuits form a crunchy base, while the cream cheese and heavy cream give it a smooth texture. You can customize your cheesecake with a few optional ingredients: - Fresh mint leaves for garnish - Additional fruit toppings like blueberries or raspberries - A splash of lemon juice for a tangy flavor - Chocolate shavings for a sweet touch These extras allow you to add your personal flair to the cheesecake. If you need substitutions, here are some ideas: - Use graham crackers instead of digestive biscuits for the base. - Swap cream cheese with Greek yogurt for a lighter option. - Try coconut cream instead of heavy cream for a dairy-free version. - Use honey instead of powdered sugar for a natural sweetener. These alternatives can make the recipe fit your needs while still tasting great. For the full recipe, check the detailed steps to create this delightful dessert. To start, gather your ingredients. You need crushed digestive biscuits and melted butter. In a mixing bowl, combine these two. Mix until you see a texture that looks like wet sand. Next, take a 9-inch springform pan. Press the biscuit mixture firmly into the bottom. Make sure it is even. This will be the base of your cheesecake. After that, refrigerate the pan for about 10 minutes. This helps the base to set nicely. Now, let’s make that creamy filling. In a new bowl, add softened cream cheese, powdered sugar, and vanilla extract. Beat these together until they become smooth and creamy. In another bowl, whip the heavy cream. Keep whipping until stiff peaks form. This means it will hold its shape well. Now, gently fold the whipped cream into the cream cheese mixture. Do this carefully so the filling stays light and airy. Once your filling is ready, pour it over the chilled biscuit base. Spread it evenly with a spatula. Now, let’s add some color. Arrange the sliced strawberries on top of the cheesecake. You can be creative with this step! In a small saucepan, melt the strawberry jam over low heat. Once it is runny, let it cool a little. Drizzle the jam over the strawberries for a shiny finish. Finally, cover your cheesecake with plastic wrap. Refrigerate it for at least 4 hours, or even overnight. This waiting time helps it set perfectly. For the full recipe, check the earlier section. When making a no-bake strawberry cheesecake, a few common mistakes can spoil your treat. First, don’t skip chilling the biscuit base. It needs to set before adding the filling. Second, make sure your cream cheese is fully softened. Cold cream cheese can create lumps in your mixture. Lastly, don’t rush the whipping of the heavy cream. Whip it until stiff peaks form for the best texture. To get a creamy and smooth texture, follow these steps. Mix the cream cheese, powdered sugar, and vanilla extract until it’s really smooth. Then, whip the heavy cream separately until it’s nice and fluffy. When you fold the whipped cream into the cream cheese mix, do it gently. This keeps air in the mixture, making it light and fluffy. Serving your cheesecake can be fun and creative. Cut slices and place them on pretty dessert plates. You can add fresh mint leaves on top for a pop of color. For extra sweetness, drizzle more strawberry jam over the slices. You can also serve it with a side of fresh strawberries. This adds a nice touch and makes the dessert look even better. For the full recipe, refer to the earlier sections. {{image_2}} You can change up the fruity flavor of your cheesecake. Swap strawberries for other berries like blueberries or raspberries. You can also use peaches, mangoes, or even kiwi. Just chop the fruit and layer it on top or mix it into the filling. This makes your dessert colorful and fun. Want a richer taste? Try adding chocolate or caramel. For chocolate, mix in cocoa powder or melted chocolate into the cream cheese. Drizzle caramel sauce on top for a sweet touch. Both options give your cheesecake a new twist that chocolate lovers will adore. If you need a gluten-free option, use gluten-free cookies for the base. Many brands offer tasty gluten-free biscuits. Check the label to be sure. This way, everyone can enjoy this delicious treat without worry. Make sure to use gluten-free cream cheese and whipped cream too. For the full recipe, check out the [Full Recipe]. To keep your No-Bake Strawberry Cheesecake fresh, store it in the fridge. Use an airtight container to prevent any odors from mixing in. If you don’t have one, cover the cheesecake tightly with plastic wrap. This keeps it safe and tasty. Your cheesecake stays fresh in the fridge for about 3 to 5 days. After that, the texture may change, and the flavor might fade. Keep an eye on any signs of spoilage, like a sour smell or discoloration. Yes, you can freeze No-Bake Strawberry Cheesecake. Wrap it well in plastic wrap and then foil. This keeps out air and prevents freezer burn. It can last up to 3 months in the freezer. When ready to eat, thaw it in the fridge for a few hours. Enjoy the creamy goodness! For the full recipe, check out the details above. Baked cheesecakes use heat to set the filling. This process gives a dense, rich texture. No-bake cheesecakes rely on cold temperatures to firm up. They often taste lighter and creamier. Baked cheesecakes need time in the oven, while no-bake ones chill in the fridge. This makes no-bake cheesecakes quicker to prepare. To make your cheesecake firmer, try these tips: - Use full-fat cream cheese. This adds richness and firmness. - Add gelatin to the filling. Dissolve it in water and mix it in. - Chill the cheesecake longer. Let it set overnight for the best results. - Avoid overmixing the cream cheese. This keeps air out and helps it firm up. Yes, you can use frozen strawberries. Just thaw them first and drain excess liquid. The flavor will still be great, but the texture may change slightly. Fresh strawberries give a firmer bite and vibrant look. For best results, try to use fresh strawberries in the recipe. For the full recipe, check the main article. No-bake strawberry cheesecake is easy and fun to make. We explored key ingredients, like strawberries and cream cheese, and even how to customize them. I shared step-by-step instructions to help you prepare the base, filling, and assembly. Tips on avoiding common mistakes will guide you to the perfect texture. With various topping options, you can get creative. Finally, proper storage keeps your cheesecake fresh longer. Remember, this dessert is versatile, so don't hesitate to experiment. Enjoy every bite of your delicious creation!](https://dailydishly.com/wp-content/uploads/2025/06/5274bd3f-8d96-4968-97f1-1841490db53b-768x768.webp)
