Get ready to elevate your side dish game with Maple Mustard Brussels Sprouts! This simple yet flavor-packed recipe will delight your taste buds and impress your guests. With just a few essential ingredients like Brussels sprouts, maple syrup, and Dijon mustard, you can create a dish that’s both sweet and savory. Join me as I guide you through easy steps to roast these green gems and transform them into a mouthwatering delight!
Ingredients
List of Essential Ingredients
– Brussels sprouts
– Maple syrup
– Dijon mustard
To make Maple Mustard Brussels Sprouts, you need some key ingredients. First, you will want fresh Brussels sprouts. Look for ones that are firm and bright green. Next, get pure maple syrup. It adds a nice sweetness. Lastly, grab Dijon mustard. This gives the dish a tangy kick.
Optional Ingredients for Added Flavor
– Garlic powder
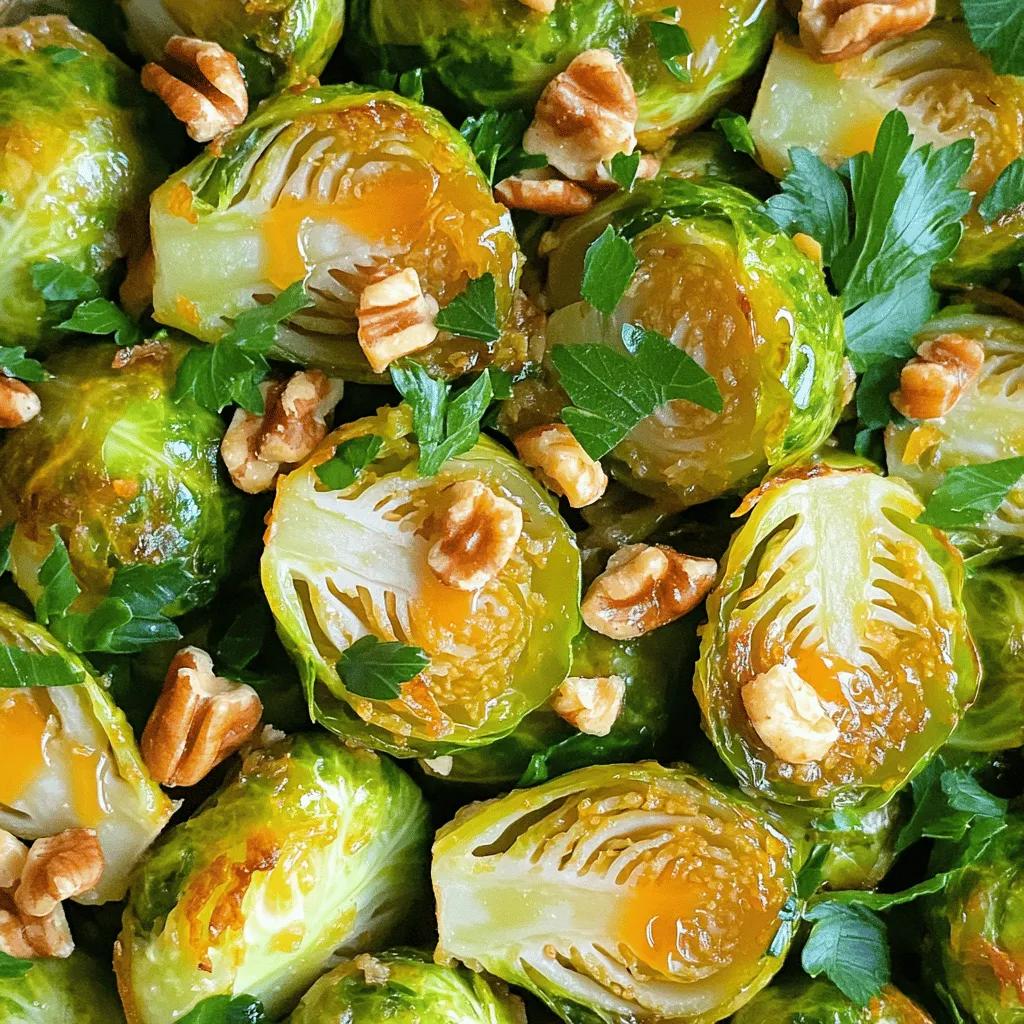
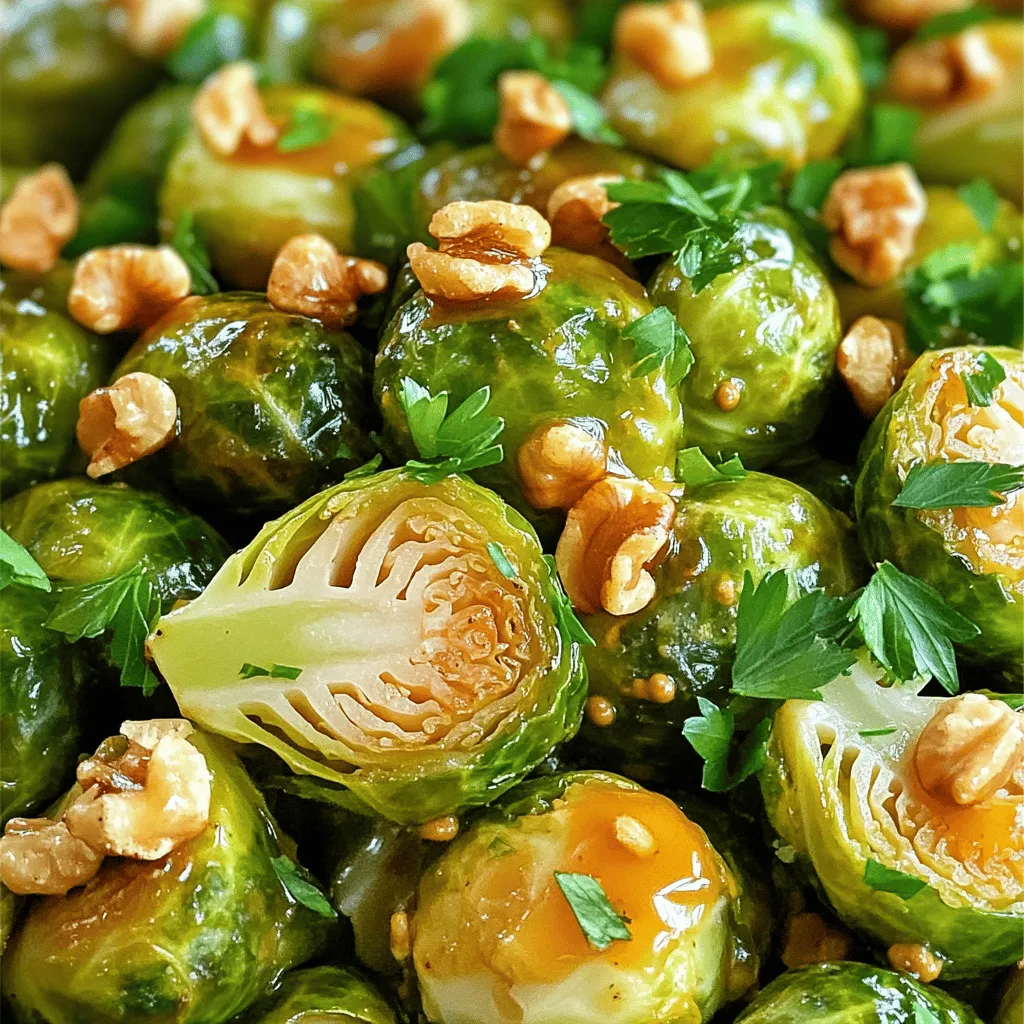
– Chopped walnuts
– Fresh parsley
You can also add some optional ingredients for more flavor. Garlic powder enhances the taste and adds a lovely aroma. Chopped walnuts give a nice crunch and extra nutrition. Fresh parsley makes your dish look pretty and adds freshness.
Alternative Ingredient Suggestions
– Different mustard types
– Sweetener substitutes
If you want to switch things up, try different types of mustard. Whole grain mustard can add a nice texture. For sweeteners, you can use honey or agave syrup instead of maple syrup. Each option offers a unique twist to your dish.
Step-by-Step Instructions
Preparation Steps
First, preheat your oven to 400°F (200°C). This temperature gives your Brussels sprouts a nice roast. Line a baking sheet with parchment paper. This makes cleanup easier later.
Next, take your Brussels sprouts. Trim the ends and cut them in half. This helps them cook evenly. You want them to be about the same size for best results.
Mixing the Maple Mustard Sauce
Now, grab a large bowl. In that bowl, pour in three tablespoons of olive oil. Add two tablespoons of pure maple syrup and one tablespoon of Dijon mustard. Toss in a teaspoon of garlic powder, along with salt and pepper to taste.
Whisk all these ingredients together. You want a smooth consistency. This sauce will coat your Brussels sprouts perfectly.
Roasting Process
Take your halved Brussels sprouts and add them to the bowl. Toss them in the maple-mustard sauce until they are well coated. Then, spread the Brussels sprouts on the prepared baking sheet in a single layer. If you like, sprinkle some chopped walnuts on top for an added crunch.
Now it’s time to roast! Place the baking sheet in the oven. Roast the Brussels sprouts for about 25-30 minutes. Stir them halfway through to ensure even cooking. They should be tender and caramelized when done.
Once ready, take them out and let them cool for a couple of minutes. Enjoy your delicious, flavorful Maple Mustard Brussels Sprouts!
Tips & Tricks
How to Achieve Perfectly Roasted Brussels Sprouts
To get crispy Brussels sprouts, start by trimming and halving them. This helps them roast evenly. Use a large bowl for mixing. Here are some tips to avoid sogginess:
– Don’t overcrowd the pan. If they are too close, they will steam instead of roast.
– Use a hot oven. Preheat to 400°F (200°C) to get that nice caramelization.
For even caramelization, stir the Brussels sprouts halfway through cooking. This helps them brown on all sides.
Flavor Enhancement Tips
You can adjust sweetness and tanginess to suit your taste. If you want more sweetness, add extra maple syrup. For more tang, increase the Dijon mustard.
Using herbs and spices can also enhance the flavor. Consider adding thyme or rosemary for a fresh taste. A sprinkle of chili flakes adds a nice kick too.
Serving Suggestions
Maple mustard Brussels sprouts pair well with many main courses. They work great alongside roasted chicken or grilled fish.
For creative plating, arrange the sprouts in a circle on the plate. Drizzle a little extra maple syrup on top for a glossy finish.
Variations
Ingredient Swaps for Different Flavors
You can make this dish fit your taste. If you’re looking for vegetarian-friendly options, try using maple syrup with a vegan mustard. This way, you keep it plant-based without losing flavor.
Feel free to mix in other vegetables too. Carrots, sweet potatoes, or even parsnips add color and taste. Just cut them to match the size of the Brussels sprouts for even cooking.
Different Cooking Methods
Want to switch things up? The air fryer works great for this recipe. Preheat it to 375°F (190°C). Toss the Brussels sprouts in the sauce as usual, then place them in the air fryer basket. Cook for 15-20 minutes, shaking halfway through. They turn crispy and delicious!
You can also try stovetop sautéing. Heat olive oil in a large pan over medium heat. Add the Brussels sprouts and the maple-mustard sauce. Stir often until they’re tender and brown. This method takes about 10-15 minutes.
Seasonal Additions
Using seasonal produce can elevate your dish. In the fall, add roasted apples or pears for sweetness. In spring, consider fresh peas or asparagus for a pop of color and crunch.
For festive occasions, you can adapt the recipe easily. Add dried cranberries or pomegranate seeds for a holiday twist. They bring a burst of flavor and make the dish look beautiful.
Storage Info
Storing Leftovers
To store your Maple Mustard Brussels Sprouts, let them cool first. Place them in an airtight container. Store them in the fridge. They stay fresh for up to three days. After that, the texture may change, and the taste may fade.
Freezing Tips
You can freeze Brussels sprouts for later use. Start by cooling them completely. Next, spread them out on a baking sheet. Freeze them for about an hour. Once frozen, transfer them to a freezer bag. They will last for up to three months. When you are ready to use them, thaw overnight in the fridge.
Reheating Methods
To reheat your Brussels sprouts, use the oven for best results. Preheat the oven to 350°F (175°C). Spread the sprouts on a baking sheet. Heat for about 10-15 minutes until they are warm. This method helps keep their crunch.
Avoid reheating in the microwave. This can make them soggy. If you must use the microwave, heat in short bursts. This way, you can check the texture often.
FAQs
Common Questions About Maple Mustard Brussels Sprouts
Can I use frozen Brussels sprouts?
Yes, you can use frozen Brussels sprouts. However, fresh Brussels sprouts taste better. If you use frozen, thaw them first. This helps them roast evenly and get crispy.
How do I know when the Brussels sprouts are done?
You know they are done when they are tender and golden brown. They should be soft on the inside, with a slight crunch on the outside. Stir them halfway through roasting for even cooking.
Dietary Considerations
Is this recipe gluten-free?
Yes, this recipe is gluten-free. All the ingredients are safe for a gluten-free diet. Just make sure the Dijon mustard is gluten-free.
Can it be made vegan-friendly?
Yes, you can make this recipe vegan. The ingredients are already plant-based. Just ensure your maple syrup is pure and not mixed with animal products.
Nutritional Information
Caloric content
One serving of Maple Mustard Brussels Sprouts has about 150 calories. This can vary based on added ingredients like walnuts.
Health benefits of Brussels sprouts and maple syrup
Brussels sprouts are packed with vitamins C and K. They are also high in fiber, which helps digestion. Maple syrup offers antioxidants and can provide energy. Together, they create a tasty and nutritious dish.
This blog post shared a simple way to make tasty Maple Mustard Brussels sprouts. You learned about key ingredients and some optional ones to boost flavor. I provided step-by-step instructions and tips for perfecting your dish. You can also explore variations and storage advice to keep leftovers fresh.
Remember, the right cooking method can make your Brussels sprouts shine. Enjoy trying new tastes and serving ideas that fit your style!


