Looking for a tasty and healthy snack? You’ll love my easy Maple Pecan Granola recipe! It’s packed with flavor and good-for-you ingredients. I’ll guide you through each step, from prepping to baking. Plus, you’ll find helpful tips, tweaks, and storage ideas to make it just right. Say goodbye to store-bought granola and hello to your new favorite treat! Let’s dive into this delicious journey together!
Ingredients
Main Ingredients for Maple Pecan Granola
To make your Maple Pecan Granola, gather these key items:
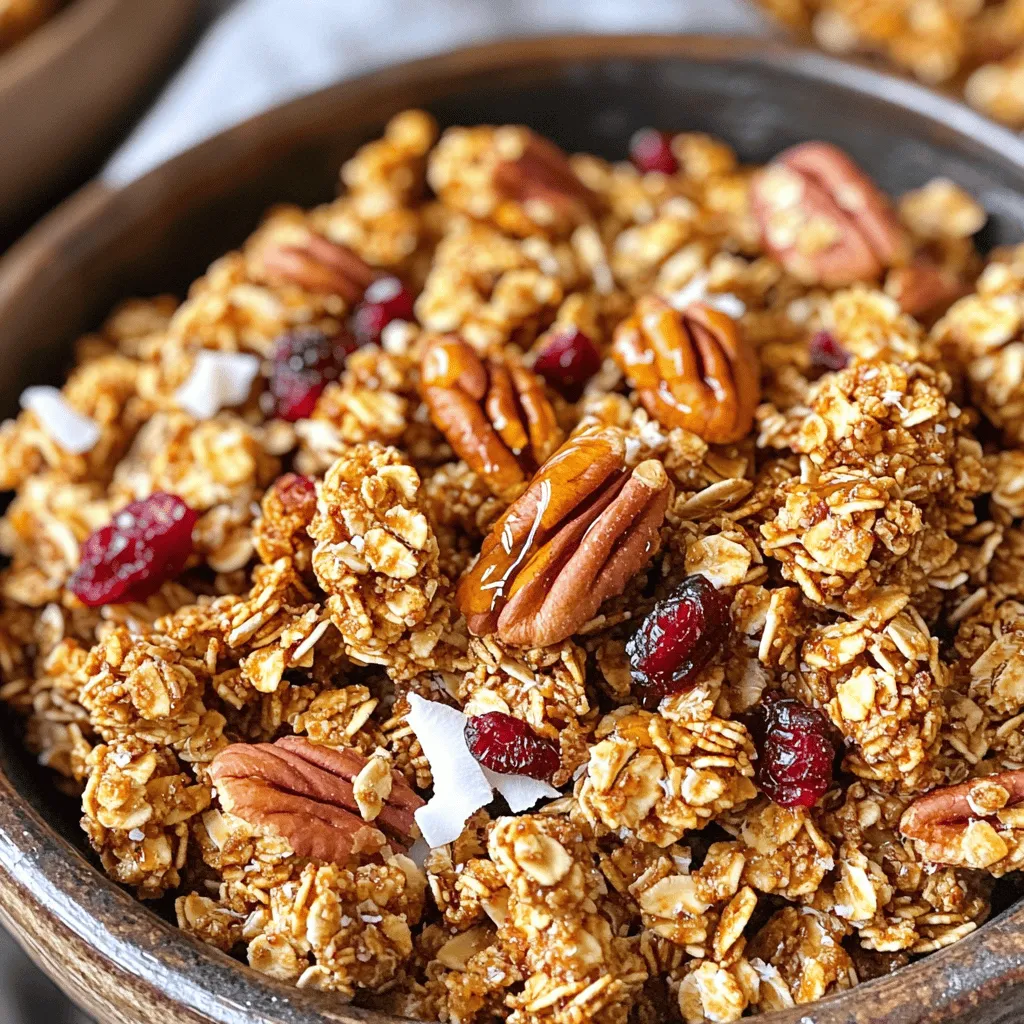
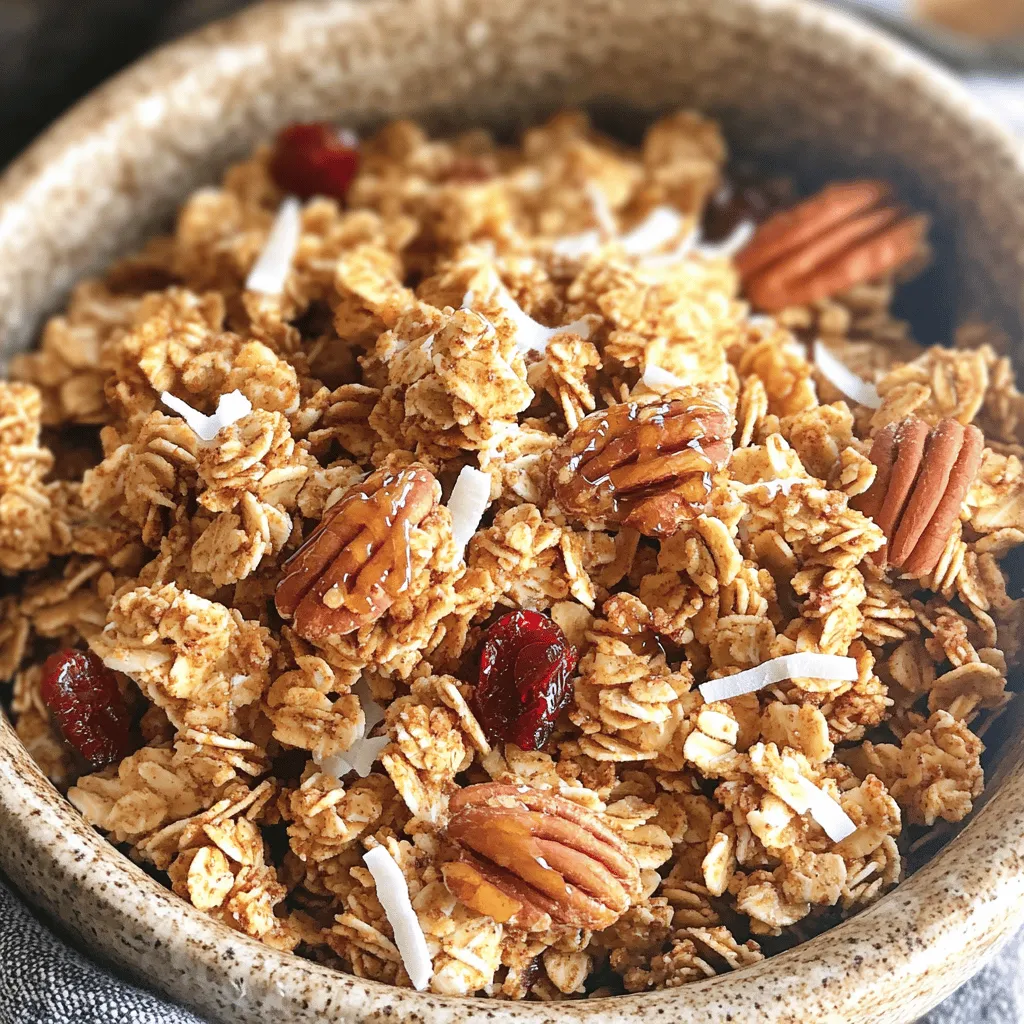
– 2 cups rolled oats
– 1 cup pecans, roughly chopped
– 1/2 cup unsweetened shredded coconut
– 1/2 cup maple syrup
– 1/4 cup coconut oil, melted
– 1/2 teaspoon vanilla extract
– 1/2 teaspoon cinnamon
– 1/4 teaspoon salt
– 1/2 cup dried cranberries (or any preferred dried fruit)
These ingredients create a tasty mix. The oats serve as the base. Pecans add crunch and flavor. Coconut gives a subtle sweetness, while maple syrup ties it all together.
Optional Add-Ins
You can customize your granola with some fun extras! Here are some ideas:
– 1/2 cup chopped nuts (like almonds or walnuts)
– 1/2 cup seeds (like pumpkin or sunflower)
– 1/2 cup chocolate chips for a sweet twist
– Spices like nutmeg for extra flavor
Feel free to mix and match these add-ins. They will make your granola unique and special.
Suggested Substitutions
If you need to swap out some ingredients, try these ideas:
– Use honey instead of maple syrup for a different taste.
– Swap coconut oil with olive oil or butter if needed.
– Use any nut or seed instead of pecans for a personal touch.
– Replace dried cranberries with raisins or apricots for variety.
These swaps keep the recipe flexible and fun. You can create a version that fits your taste!
Step-by-Step Instructions
Prepping the Ingredients
First, gather all your ingredients. You will need:
– 2 cups rolled oats
– 1 cup pecans, roughly chopped
– 1/2 cup unsweetened shredded coconut
– 1/2 cup maple syrup
– 1/4 cup coconut oil, melted
– 1/2 teaspoon vanilla extract
– 1/2 teaspoon cinnamon
– 1/4 teaspoon salt
– 1/2 cup dried cranberries (or any preferred dried fruit)
Next, preheat your oven to 350°F (175°C). Line a large baking sheet with parchment paper. This helps with easy cleanup.
Mixing Dry Ingredients
In a large mixing bowl, add the rolled oats, chopped pecans, and shredded coconut. Stir these together. Make sure they mix well. This step creates a base for your granola.
Combining Wet Ingredients
In a separate bowl, whisk together the maple syrup, melted coconut oil, vanilla extract, cinnamon, and salt. Mix until smooth. This blend adds flavor and sweetness to your granola.
Baking and Cooling Instructions
Now, pour the wet mixture over the dry ingredients. Stir well so that everything gets coated. Spread this mixture evenly on your baking sheet.
Bake in the preheated oven for 20-25 minutes. Stir halfway through to ensure even cooking. Watch closely until it turns golden brown. When done, remove it from the oven and let it cool completely on the baking sheet. After it cools, stir in the dried cranberries. Break the granola into clusters and store it in an airtight container. Enjoy your tasty and healthy homemade treat!
Tips & Tricks
How to Achieve Perfect Clusters
To get those perfect clusters in your granola, first, don’t rush the mixing. When you combine the wet and dry ingredients, make sure every oat and nut gets coated. Use your hands for the best results. After spreading the mixture on the baking sheet, press it down firmly. This helps the granola stick together. Then, when it’s baking, don’t stir too much. Stirring breaks up the clusters you worked hard to form.
Storing Your Granola
Proper storage keeps your granola fresh and crunchy. Once your granola cools, break it into clusters and transfer it to an airtight container. This helps keep moisture out. Store it in a cool, dry place, like a pantry. If you store it right, it can last up to two weeks. You can also use glass jars or resealable bags for easy access.
Adjusting Sweetness Levels
If you like your granola sweeter, add more maple syrup. Start with an extra tablespoon and mix well. Taste the mixture before baking. If you prefer less sweetness, reduce the syrup by a tablespoon. You can swap maple syrup for honey or agave nectar as well. Adjusting the sweetness helps you find the perfect flavor for your taste buds.
Variations
Nut-Free Version
To make a nut-free version of Maple Pecan Granola, swap the pecans. You can use seeds instead. Sunflower seeds or pumpkin seeds both work well. They add crunch and flavor without nuts. Follow the same recipe, just replace the nuts with seeds. This keeps the granola tasty for everyone.
Flavor Variations (spices, dried fruits)
You can play with flavors in your granola. Try adding spices like nutmeg or ginger. They give a warm taste that pairs well with maple. For dried fruits, cranberries are great, but you can use raisins or apricots too. Just chop them up small before mixing in. Adjusting flavors makes each batch unique!
Chocolate Addition
If you love chocolate, add cocoa powder or chocolate chips. Stir in 1/4 cup of cocoa powder with the dry ingredients. For chips, mix in 1/2 cup after baking. Let the granola cool first so the chips don’t melt. This gives your granola a sweet and rich twist.
Storage Info
Best Ways to Store Maple Pecan Granola
To keep your Maple Pecan Granola fresh, use an airtight container. Glass jars work well. You can also use plastic containers. Make sure to store it in a cool, dry place. Avoid areas with heat or moisture. This helps maintain the crunchy texture and flavor.
Shelf Life
When stored properly, your granola lasts about 2 weeks. It tastes best within the first week. If you notice any off smells or changes in texture, it’s time to toss it. Always check for freshness before enjoying your homemade treat.
Freezing Granola for Long-Term Storage
Freezing granola is a great option for long-term storage. Place it in a freezer-safe bag or container. Squeeze out as much air as possible before sealing. Granola can stay fresh in the freezer for up to 3 months. When you’re ready to eat, just thaw it at room temperature. Enjoy your crunchy snack anytime!
FAQs
What is the nutritional value of Maple Pecan Granola?
Maple Pecan Granola is a healthy choice. It has fiber, healthy fats, and protein. Each serving gives you energy to start your day. The oats provide whole grains, while pecans add crunch and nutrients. Dried fruit adds natural sweetness. A typical serving has around 200-250 calories. This can vary based on added ingredients like oils or sweeteners.
Can I make this granola vegan?
Yes, you can make the granola vegan. Just use plant-based oil in place of coconut oil. Also, ensure that the maple syrup is pure and vegan-friendly. You’ll keep all the flavor without using any animal products. This makes it a great choice for everyone.
How is Maple Pecan Granola best served?
I love serving Maple Pecan Granola with yogurt or milk. You can also enjoy it as a snack on its own. Top it with fresh fruit for added flavor and nutrition. It’s great for breakfast, a snack, or even dessert. You can eat it right out of the jar too!
Where can I buy pre-made Maple Pecan Granola?
You can find pre-made Maple Pecan Granola at many grocery stores. Look in the cereal or snack aisle. Health food stores often carry organic brands as well. You can also check online for a variety of options. Just read the label to see the ingredients and nutrition info!
This blog post covers how to make delicious Maple Pecan Granola. We discussed key ingredients, including optional add-ins and substitutions. I shared step-by-step instructions to guide you through the process. Tips for perfect clusters and granola storage were also provided. You can even try nut-free and flavored versions to suit your taste.
Enjoy crafting your own granola! With these tips, it’s easy and fun. Now, you can savor a homemade treat that you and your loved ones will enjoy. Happy cooking!


