Margherita Tortilla Pizza Flavorful and Easy Recipe

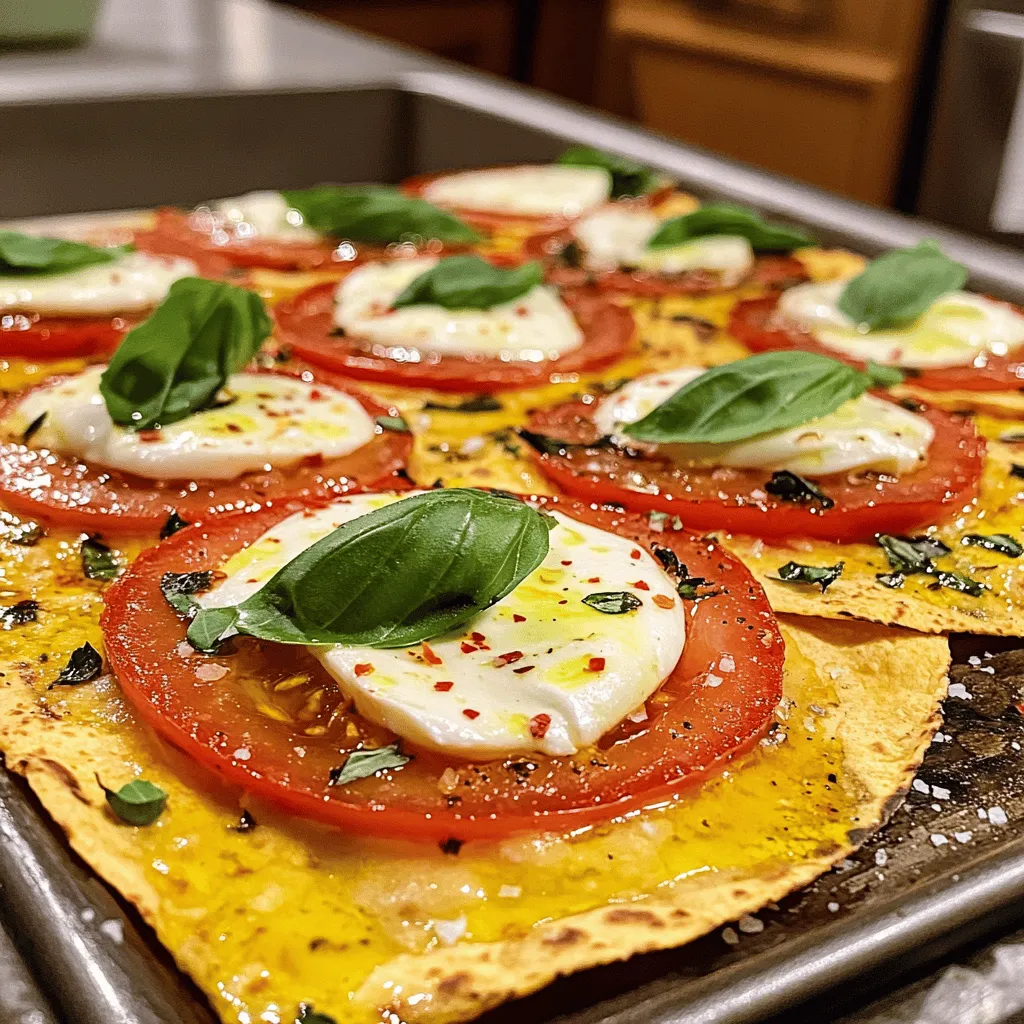
If you’re craving pizza but short on time, try my Margherita Tortilla Pizza! This quick and tasty recipe uses flat tortillas instead of dough for a flavorful twist. With just a few fresh ingredients like mozzarella, tomatoes, and basil, you’ll have a delicious meal in under 30 minutes. Don’t worry if you’re new to cooking; this guide makes it easy. Ready to impress your taste buds? Let’s dive into the recipe!
Ingredients
Required Ingredients
– 4 large flour tortillas
– 1 cup marinara sauce
– 2 cups fresh mozzarella cheese, sliced
– 1 large ripe tomato, sliced
– 1/4 cup fresh basil leaves
– 2 tablespoons olive oil
– Salt and pepper, to taste
– Red pepper flakes (optional, for spice)
To make a great Margherita Tortilla Pizza, you need fresh and simple ingredients. The flour tortillas serve as a nice base. I love using large ones to give you more pizza per slice. Next, the marinara sauce adds a flavorful touch. Choose a good quality sauce for the best taste.
Fresh mozzarella is key to this dish. It melts beautifully and gives that classic pizza flavor. I always slice my mozzarella thickly to keep it cheesy and gooey. The ripe tomato adds freshness. Slice it thin for even coverage.
Basil is a must for that authentic Margherita taste. I use fresh leaves for a burst of flavor. Olive oil helps crisp up the tortillas. Seasoning is essential; I like using salt, pepper, and red pepper flakes for a little kick.
Optional Toppings
– Additional vegetables (e.g., bell peppers, onions)
– Protein options (e.g., grilled chicken, prosciutto)
Feel free to get creative! You can add more vegetables like bell peppers or onions for extra flavor. If you want protein, try grilled chicken or prosciutto. These options make your pizza even more filling.
Recommended Equipment
– Baking sheet
– Parchment paper
– Brush for olive oil
For equipment, you need a baking sheet to hold your pizzas. Using parchment paper makes cleanup easy. A brush for olive oil is a handy tool to ensure each tortilla has that golden touch.
With these ingredients and tools, you’re ready to make a delicious Margherita Tortilla Pizza.
Step-by-Step Instructions
Preparation Steps
– Preheat your oven to 400°F (200°C).
– Line a baking sheet with parchment paper.
Assembling the Pizza
– Brush each tortilla lightly with olive oil.
– Spread marinara sauce on each tortilla.
– Layer mozzarella and tomato slices.
Baking the Pizza
– Season with salt, pepper, and red pepper flakes.
– Bake for 10-12 minutes until cheese is bubbly.
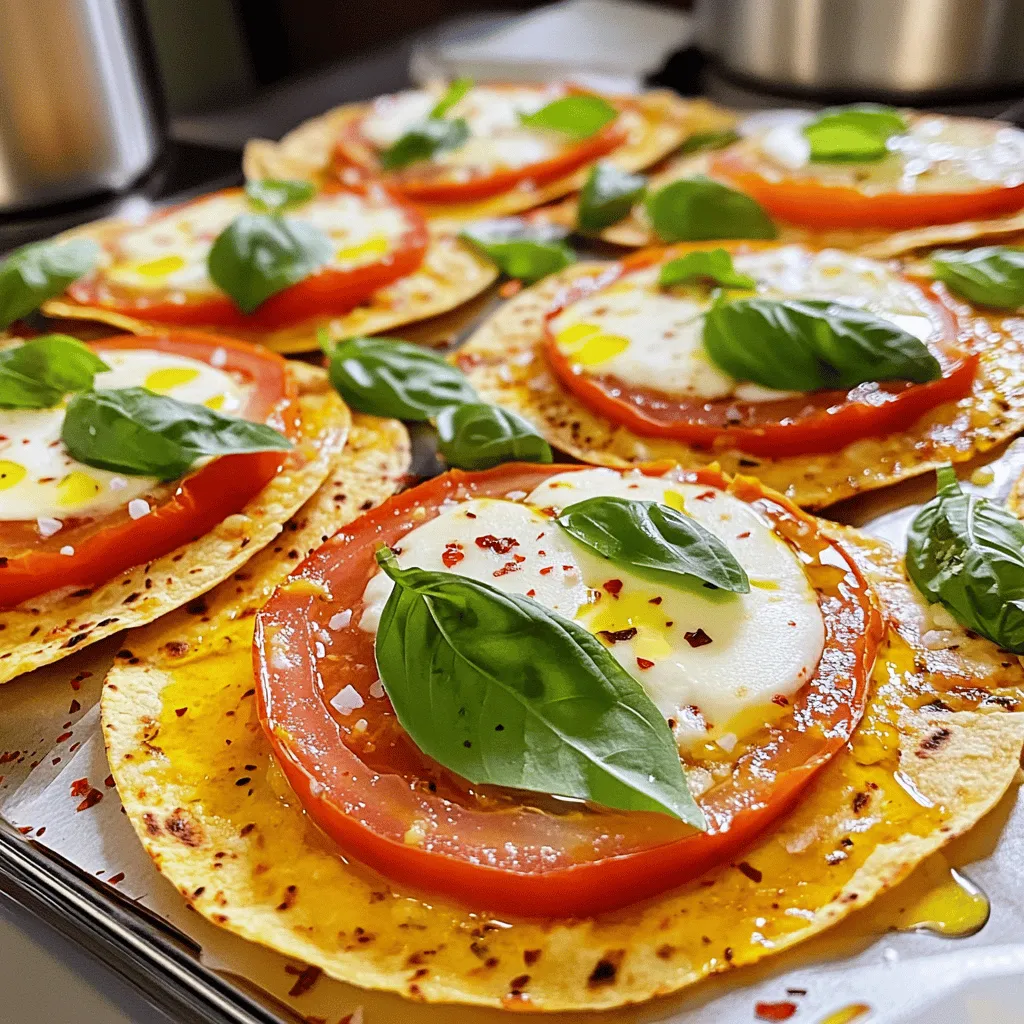
This method is simple and quick. You can enjoy a delicious meal in just about 20 minutes. Each step builds flavor and texture. The tortillas get crispy while the cheese melts beautifully. It’s a great way to bring a fun twist to pizza night.
Tips & Tricks
Perfecting the Tortilla Pizza
– Use fresh ingredients for the best flavor. Fresh mozzarella, ripe tomatoes, and basil shine.
– Don’t overload the toppings for crispy edges. A light hand keeps the tortillas crunchy.
Common Mistakes to Avoid
– Skipping the olive oil step is a big no. Olive oil adds flavor and helps with browning.
– Not preheating the oven properly can ruin the pizza. A hot oven ensures the cheese melts and the edges crisp up.
Serving Suggestions
– Pair with a side salad or garlic bread for a complete meal. A fresh salad adds crunch and balance.
– Drizzle with balsamic glaze for added tang. This sweet and sour touch elevates the flavors.

Variations
Different Cheese Options
You can change the cheese to make this pizza special. Try using goat cheese or feta for a unique flavor. These cheeses add a tangy kick that pairs well with the tomatoes and basil. If you want a dairy-free option, use vegan cheese. Many brands offer tasty vegan cheese that melts well.
Flavor Profile Modifications
Feel free to switch up the sauce. Instead of marinara, add pesto for a twist. Pesto brings a fresh, herby flavor that transforms your pizza. You can also add herbs like oregano or thyme. These herbs enhance the taste and make the pizza smell amazing while it bakes.
Alternative Bases
You don’t have to stick to flour tortillas. Try whole wheat or gluten-free tortillas for a healthier choice. They offer a different texture and flavor. You can also use flatbreads or naan. These options give you a thicker base, which holds more toppings and adds a fun twist to your pizza.
Storage Info
Storing Leftovers
To keep your Margherita Tortilla Pizza fresh, store it in the fridge. First, let the pizza cool to room temperature. Next, place the slices in an airtight container. You can also use plastic wrap to cover the pizza directly. This helps keep moisture in and prevents drying out.
The best containers for preserving freshness are glass or BPA-free plastic. These containers seal well and prevent smell transfer. If you use plastic wrap, ensure it covers the pizza completely. This will keep it fresh for about three days.
Reheating Tips
When reheating your pizza, I recommend using the oven for the best results. Preheat your oven to 350°F (175°C). Place the pizza on a baking sheet and reheat for about 8-10 minutes. This method helps keep the crust crispy.
If you prefer the microwave, place a slice on a microwave-safe plate. Add a cup of water in the microwave to prevent it from getting tough. Heat for about 30 seconds. This method is quicker but may leave the crust softer.
Freezing Instructions
Yes, you can freeze the assembled tortilla pizza! To do this, wrap it tightly in plastic wrap. Then, place it in a freezer-safe bag. This helps prevent freezer burn. You can freeze the pizza for up to two months.
When you’re ready to eat it, remove it from the freezer and let it thaw in the fridge overnight. Then, reheat it as mentioned above. This method keeps the flavors intact and makes for a quick meal.
FAQs
How long do you bake Margherita Tortilla Pizza?
You bake Margherita Tortilla Pizza for about 10-12 minutes. Keep an eye on it. The cheese should be bubbly and the edges crispy. If you see golden brown edges, it’s done!
Can I make Margherita Tortilla Pizza ahead of time?
Yes, you can prep it ahead. Assemble the pizzas, then cover them with plastic wrap. Store them in the fridge for up to a day. When ready to eat, just bake as normal. For best results, do not add basil until after baking.
What are some good salad pairings for Margherita Tortilla Pizza?
A fresh arugula salad pairs well with Margherita Tortilla Pizza. Toss arugula with cherry tomatoes and a light vinaigrette. A classic Caesar salad also makes a great match. Adding a simple mixed greens salad works nicely too. These salads balance the pizza’s rich flavors perfectly.
Making Margherita Tortilla Pizza is easy and fun. You learned all the key steps. From required ingredients to tasty variations, this dish has it all. Remember to keep it simple for the best taste. Fresh ingredients make a big difference, so use them wisely. Avoid common mistakes for the best results. Your kitchen will smell great, and everyone will enjoy the flavors. Now, unleash your creativity and make this pizza your own!


![To make this easy chicken tortilla soup, gather these simple items: - 2 cups cooked chicken, shredded - 1 medium onion, chopped - 2 cloves garlic, minced - 1 can (14 oz) diced tomatoes with green chilies - 4 cups chicken broth - 1 can (15 oz) black beans, rinsed and drained - 1 cup corn (frozen or canned) - 1 teaspoon ground cumin - 1 teaspoon chili powder - Salt and pepper to taste - 1 tablespoon olive oil - Tortilla strips (for garnish) - Fresh cilantro, chopped (for garnish) - Sliced avocado (for serving) - Lime wedges (for serving) Choose fresh ingredients for the best flavor. Here are my tips: - Chicken: Look for plump and juicy chicken. Cooked rotisserie chicken works well too. - Onion: Select firm onions with dry skin. Avoid any soft spots or sprouting. - Garlic: Pick garlic bulbs that feel heavy and firm. The cloves should be tight. - Corn: If using fresh corn, choose bright yellow ears with no brown patches. - Tomatoes: For canned tomatoes, check the can for dents or rust. Always opt for quality brands. If you lack an ingredient, here are some easy swaps: - Chicken: Use turkey or even canned chicken if needed. - Black beans: Swap with pinto beans or kidney beans. - Corn: Try using bell peppers or zucchini for a different texture. - Chicken broth: Vegetable broth can replace chicken broth for a lighter soup. - Spices: If you don’t have cumin, use paprika or a taco seasoning mix. This soup is flexible, so feel free to adjust based on what you have at home. For the full recipe, check out the link. Making Easy Chicken Tortilla Soup is simple. You start by cooking the onion and garlic. Then, you add the other ingredients and let them simmer. This lets all the flavors mix well. Finally, you serve it hot with tasty toppings. 1. Heat olive oil (5 minutes): In a large pot, heat 1 tablespoon of olive oil over medium heat. Add 1 chopped onion. Cook until the onion is soft and clear. This takes about 5 minutes. 2. Add garlic (1 minute): Stir in 2 minced garlic cloves. Cook for 1 minute until your kitchen smells great. 3. Combine ingredients (5 minutes): Add 1 can of diced tomatoes, 4 cups of chicken broth, 1 can of black beans, and 1 cup of corn. Mix well. 4. Season the soup (20 minutes): Bring the mix to a simmer. Add 2 cups of shredded chicken, 1 teaspoon of ground cumin, and 1 teaspoon of chili powder. Season with salt and pepper. Let it simmer for 15-20 minutes. 5. Prepare tortilla strips (12 minutes): While the soup simmers, cut tortillas into thin strips. Bake them at 375°F for 10-12 minutes until they are crispy. 6. Taste and adjust (3 minutes): After 20 minutes, taste the soup. Adjust the seasoning if needed. 7. Serve (5 minutes): Serve the soup hot. Top with crispy tortilla strips, chopped cilantro, and avocado slices. Don’t forget a lime wedge for extra flavor! - Sautéing: Sautéing the onion and garlic first brings out their flavors. This step is key for a rich taste. - Simmering: Allow the soup to simmer for enough time. This helps the flavors blend perfectly. - Baking tortilla strips: Baking instead of frying gives you a crunchy topping without added oil. This makes your soup lighter and healthier. For the full recipe, check the [Full Recipe]. To make your chicken tortilla soup pop, focus on layers of flavor. Start with fresh herbs like cilantro and lime. These add brightness. You can also add a pinch of smoked paprika for depth. If you like heat, toss in some diced jalapeños or a few dashes of hot sauce. Finally, finish each bowl with crispy tortilla strips. They add crunch and texture. One common mistake is overcooking the soup. If you simmer too long, the chicken can become dry. Another mistake is skipping the seasoning. Make sure to taste as you go. Adjust salt and pepper to bring out the flavors. Lastly, don’t forget the toppings! They make the soup fun and flavorful. Missing them can dull the dish. Use a large pot or Dutch oven for even cooking. A wooden spoon is great for stirring. Make sure you have a sharp knife for chopping. You’ll also need a cutting board and measuring spoons. If you want crispy tortilla strips, a baking sheet is a must. With these tools, you'll make the whole process easier and more enjoyable. For more details on the recipe, check out the [Full Recipe]. {{image_2}} When making chicken tortilla soup, you can mix things up. Here are some fun options. To make a vegetarian version, skip the chicken. Use more beans instead. Black beans work great. Chickpeas add a nice twist too. You can add more veggies like bell peppers, zucchini, or carrots. Use vegetable broth instead of chicken broth. This keeps all the flavors without meat. If you love spicy food, add jalapeños or serrano peppers. Chop them finely and cook with the onion. You can also add a dash of hot sauce. For more heat, sprinkle in cayenne pepper or chipotle powder. This gives the soup a smoky taste. Just remember to taste as you go! For a creamy twist, stir in some cream or sour cream. You can use half-and-half for a lighter version. Add it in right before serving. This makes the soup rich and smooth. You can also blend some soup to make it thicker. This way, you still have some chunky bits. For the full recipe, check out the Zesty Chicken Tortilla Soup! Storing your chicken tortilla soup is easy. First, let it cool down. Then, put the soup in an airtight container. Make sure to leave some space at the top. This helps the soup expand when frozen. Store it in the fridge if you plan to eat it in a few days. It can last about 3 to 4 days. If you want to keep it longer, freezing is best. When you are ready to enjoy your soup, reheating is simple. Pour the soup into a pot. Heat it on medium until it bubbles. Stir it often to avoid sticking. You can also use a microwave. Put the soup in a microwave-safe bowl. Heat it in short bursts, stirring in between. This keeps the soup from getting too hot in some spots. Always check the temperature before serving. To freeze your soup, use a freezer-safe container. Leave some space at the top, just like before. You can also use freezer bags. Lay them flat in the freezer to save space. This way, they stack nicely. When you want to eat it, thaw the soup overnight in the fridge. You can also use the microwave to defrost it quickly. Make sure to reheat it well before serving. For the best taste, use frozen soup within 2 to 3 months. For the full recipe, check out the detailed steps above. To make chicken tortilla soup gluten-free, skip the tortilla strips or use gluten-free tortillas. You can find corn tortillas that are safe for gluten-free diets. Check labels to be sure. Use gluten-free chicken broth too. This keeps your soup tasty and safe to eat. Yes, you can use shredded rotisserie chicken. It saves time and adds great flavor. Just shred it and add it to the pot when the soup simmers. This makes weeknight cooking easy and quick. Your soup will still taste fresh and delicious! Chicken tortilla soup has many health benefits. It is high in protein from the chicken. The beans and corn add fiber, which is good for digestion. Plus, the tomatoes give vitamins that help your body. This soup is also low in fat, making it a smart choice for dinner. Yes, you can prepare this soup in a slow cooker. Start by adding all the ingredients, except the tortilla strips, to the slow cooker. Set it on low for 6-7 hours or high for 3-4 hours. When it’s done, stir in the shredded chicken and let it heat through. This method is great for busy days! For the full recipe, check the link above. This blog post covered everything you need for delicious chicken tortilla soup. We discussed the best ingredients, tips for selection, and substitutes. I shared step-by-step instructions and key techniques for cooking. You learned how to enhance flavors and avoid common mistakes. We explored variations for different tastes and shared storage tips. Embrace your cooking journey and enjoy the soup! With these insights, you're ready to impress everyone.](https://dailydishly.com/wp-content/uploads/2025/06/4c837e08-7a40-4cb5-8eb2-23b66dcc18ae-768x768.webp)
![One Pan Honey Garlic Chicken is a simple dish that packs a big flavor punch. It combines juicy chicken thighs with sweet honey and rich garlic. The colorful veggies add crunch and nutrition. This dish is quick to make and perfect for busy nights. You can find the Full Recipe at the end. - 4 boneless, skinless chicken thighs - 3 tablespoons honey - 3 tablespoons soy sauce - 4 cloves garlic, minced - 1 tablespoon fresh ginger, grated - 2 tablespoons olive oil - 1 teaspoon sesame oil - 1 red bell pepper, sliced - 1 green bell pepper, sliced - 1 cup snap peas - Salt and pepper to taste - Sesame seeds for garnish - Chopped green onions for garnish To make this recipe, you need a few basic tools: - A large skillet for cooking - A mixing bowl for marinating - A cutting board and knife for chopping - A measuring spoon for accuracy - A meat thermometer to check chicken doneness With these ingredients and tools, you can create a meal that delights your taste buds and impresses your friends and family! To start, you need to marinate the chicken. In a bowl, mix honey, soy sauce, minced garlic, and grated ginger. This mix gives the chicken a sweet and savory taste. Take your chicken thighs and add them to the bowl. Make sure they are well coated. Let the chicken marinate for at least 20 minutes. This step helps the flavors soak in. Next, it’s time to prepare the pan. Heat olive oil and sesame oil in a large skillet. Set the heat to medium-high. The oils will help the chicken cook nicely and add flavor. Once the pan is hot, take the chicken out of the marinade. Reserve the marinade for later. Add the chicken thighs to the pan. Sear each side for about 5-6 minutes. You want them to be golden brown. After that, add the sliced red and green bell peppers and snap peas. Sauté the vegetables for 3-4 minutes. They should be tender but still crisp. Pour the reserved marinade over the chicken and vegetables in the skillet. Lower the heat to medium. Let it simmer for about 5 minutes. This will thicken the sauce a bit. Check the chicken’s internal temperature. It should reach 165°F (74°C). Don’t forget to season with salt and pepper to taste. Once done, remove from heat and let it rest for a couple of minutes. Finally, sprinkle sesame seeds and chopped green onions on top before serving. Enjoy your One Pan Honey Garlic Chicken! To make the best marinade, use fresh ingredients. Combine honey, soy sauce, garlic, and ginger. This mix gives a sweet and savory taste. Let the chicken soak in the marinade for at least 20 minutes. If you have more time, an hour is even better. This helps the chicken absorb all the flavors. For juicy chicken, avoid overcooking. Use a meat thermometer to check the temperature. Aim for 165°F (74°C) for safe eating. Searing the chicken first locks in the juices. Cook each side for about 5-6 minutes until golden brown. Let the chicken rest after cooking to keep it moist. Cook vegetables until they are tender-crisp. You want them to stay bright and colorful. Add them to the pan after the chicken has browned. This keeps them from getting too soft. Sauté the sliced bell peppers and snap peas for 3-4 minutes. This way, they retain their crunch and freshness. Remember, for the full recipe, check out the [Full Recipe]. Enjoy creating this quick and yummy meal! {{image_2}} You can switch up the protein in this recipe for quick meals. Chicken thighs are great, but you can use chicken breasts, shrimp, or tofu. Each choice adds a unique taste. If you use shrimp, cook them just until they turn pink. For tofu, press it to remove extra water and cube it. Marinate as you would the chicken for the same sweet and savory flavor. Feel free to swap vegetables based on your taste or what you have. Broccoli, carrots, and zucchini work well. Use any crunchy vegetable you like. Just cut them into similar sizes so they cook evenly. Remember to sauté until they are tender yet crisp. This keeps them vibrant and full of flavor! For those who enjoy heat, add crushed red pepper flakes or sliced jalapeños. This gives your dish a nice kick. You can also mix in lime juice or rice vinegar for a tangy twist. Both will enhance the honey garlic sauce. Experiment with these ideas to find your favorite taste! Check out the Full Recipe for more details! After enjoying your One Pan Honey Garlic Chicken, let the leftovers cool. Place the chicken and vegetables in an airtight container. This keeps them fresh and tasty. Store in the fridge for up to three days. Always label your container with the date. To reheat, use a microwave or a skillet. If using the microwave, warm on medium for about 2-3 minutes. Stir halfway through for even heating. If you prefer a skillet, heat a small amount of oil over medium heat. Add the chicken and vegetables, stirring for about 5 minutes until warm. If you want to save some for later, freezing works great. First, let the dish cool completely. Then, transfer it to a freezer-safe container. Make sure to remove as much air as possible. You can freeze it for up to three months. When ready to eat, thaw it overnight in the fridge before reheating. For the best taste, marinate the chicken for at least 20 minutes. This allows the flavors to soak in. If you have more time, marinating for up to 2 hours gives even better results. Just remember, don’t marinate too long, as it can make the chicken mushy. Yes, you can use chicken breasts. They will work fine in this recipe. However, chicken thighs have more fat, which keeps them juicy and tasty. If you use breasts, be sure to watch the cooking time. They cook faster than thighs. You can serve this dish with rice or quinoa. Both soak up the sweet sauce well. Steamed veggies or a fresh salad also make great sides. They add color and balance to your meal. You can even serve it with noodles for a fun twist. Yes, this dish is perfect for meal prep. It stores well in the fridge for up to four days. Just keep the chicken and veggies in an airtight container. You can heat it up easily for quick lunches or dinners. Enjoy your yummy meal without the fuss! For the full recipe, check out the details above. We covered the key steps for making One Pan Honey Garlic Chicken. You learned about the ingredients, kitchen tools, and the cooking process. I shared tips to perfect your dish, including marination and vegetable cooking. You also saw fun variations to try and how to store your leftovers. This dish is simple and tasty for any meal. Enjoy making it your own!](https://dailydishly.com/wp-content/uploads/2025/06/cad806aa-ae3a-4121-b5f5-07eae0f4869e-768x768.webp)

![To create this creamy delight, you need a few simple items: - 1 lb elbow macaroni - 4 cups water - 2 tablespoons unsalted butter - 1 teaspoon garlic powder - 1 teaspoon onion powder - ½ teaspoon smoked paprika - Salt and pepper to taste These ingredients form the base of the dish. The elbow macaroni cooks perfectly in the Instant Pot. The water helps to steam the pasta, making it tender and fluffy. You can boost the flavor of your mac and cheese with a few optional items: - Mustard powder - Hot sauce - Cooked bacon bits - Chopped green onions Adding mustard powder gives a nice tang. Hot sauce can add a kick, while cooked bacon bits provide a savory crunch. Green onions add freshness and brightness. For the creamiest mac and cheese, choose your cheeses wisely. I recommend: - 2 cups sharp cheddar cheese, shredded - 1 cup mozzarella cheese, shredded - ½ cup cream cheese, softened Sharp cheddar provides a bold flavor. Mozzarella makes it stretchy and creamy. Cream cheese adds richness, making every bite delightful. For the full recipe, check out the instructions above. First, gather all your ingredients. You need: - 1 lb elbow macaroni - 4 cups water - 2 tablespoons unsalted butter - 1 teaspoon garlic powder - 1 teaspoon onion powder - ½ teaspoon smoked paprika - Salt and pepper to taste - 2 cups sharp cheddar cheese, shredded - 1 cup mozzarella cheese, shredded - ½ cup cream cheese, softened - ½ cup whole milk Add the elbow macaroni and water to the Instant Pot. Then, mix in the butter, garlic powder, onion powder, smoked paprika, and a pinch of salt. Stir well to combine. This step is key for flavor. Now, close the lid of the Instant Pot. Set the valve to sealing. Select the manual setting and cook on high pressure for 4 minutes. This short cooking time works well! Once the timer goes off, do a quick release of the pressure. Be careful when you open the valve. After the pressure releases, carefully open the lid. It will smell amazing! Stir in the remaining tablespoon of butter, cheddar cheese, mozzarella cheese, cream cheese, and whole milk. Mix well until everything blends into a creamy dish. If it feels too thick, add a splash more milk to thin it out. Season with salt and pepper to your liking. Now you have a delicious, creamy mac and cheese! For the complete recipe, check out the [Full Recipe]. To make your mac and cheese super creamy, use a mix of cheeses. I suggest sharp cheddar for flavor and mozzarella for stretch. Cream cheese adds richness and smoothness. Always stir in your dairy after cooking the pasta. This keeps everything creamy and prevents lumps. One common mistake is overcooking the pasta. If you cook it too long, it can get mushy. Stick to the cooking time of four minutes. Another pitfall is not adding enough liquid. If your mac and cheese seems dry, add more milk slowly. Taste as you go to get the right creaminess. Serve your mac and cheese in fun, colorful bowls. This makes the dish pop! Top it with fresh parsley or chives for color. A sprinkle of extra cheese on top before serving also looks great. You can add crispy bacon bits or breadcrumbs for crunch. This makes your creamy mac and cheese even more delightful! {{image_2}} You can easily make your mac and cheese more filling by adding protein. Consider cooked chicken, bacon, or sausage. Just chop the meat into small pieces. Stir it into the pot with the cheese. This will make your dish hearty and flavorful. If you like some heat, try adding jalapeños or hot sauce. You can slice fresh jalapeños and mix them in. For a milder option, use pickled jalapeños. This adds a great kick to the creamy sauce. You can also drizzle hot sauce on top before serving for extra spice. For a vegetarian twist, add veggies like broccoli or spinach. Steam them first, then mix them in with the cheese. This not only adds color but also boosts nutrition. You can also use a blend of different cheeses to create unique flavors. Explore these variations to make your Instant Pot creamy mac and cheese truly your own! For the full recipe, check out the link above. To keep your mac and cheese fresh, place it in an airtight container. Make sure the container is clean and dry. You can store it in the fridge for up to three days. If you have a large batch, divide it into smaller portions. This helps it cool faster and stay fresh longer. When you are ready to enjoy your leftovers, reheating is key. Place the mac and cheese in a pot over low heat. Add a splash of milk to keep it creamy. Stir often until it is hot. You can also use the microwave. Heat it in 30-second intervals, stirring in between. This way, it warms evenly and does not dry out. If you want to save some for later, freezing works well. Let the mac and cheese cool completely before freezing. Use a freezer-safe container or bag. Remove as much air as possible to prevent freezer burn. It can last for up to three months in the freezer. When you’re ready to eat, thaw it in the fridge overnight and reheat as described above. For best results, add a bit more cheese or milk when reheating to restore its creaminess. For a full recipe of Instant Pot Creamy Mac and Cheese, check out the detailed instructions above. Yes, you can use gluten-free pasta. Just check the cooking time on the package. Gluten-free pasta may cook faster, so adjust the pressure cooking time to around 3 minutes. If you overcook it, the pasta can become mushy. To make it dairy-free, swap the cheese with plant-based options. Use dairy-free butter and cream. You can also try cashew cream for a rich texture. Nutritional yeast can add a cheesy flavor without dairy. Sharp cheddar is my favorite for its bold flavor. It melts well and adds creaminess. Mozzarella gives a nice stretch, while cream cheese adds richness. A mix of these cheeses works best for a creamy texture. Different pasta shapes need different cooking times. For example, penne or shells may need 5 minutes. Always check the pasta package for the right time. Remember, you want the pasta to be tender but not mushy. Making Instant Pot Creamy Mac and Cheese is easy. You learned about key ingredients and the best cheeses. I shared step-by-step cooking tips and ways to avoid common mistakes. You can add fun flavors and proteins for variety. Remember, store and reheat leftovers correctly for best taste. Enjoy your creamy mac and cheese journey! It’s a dish that brings joy to any meal.](https://dailydishly.com/wp-content/uploads/2025/07/aef5e05b-bf60-4c96-8d62-11668510c0c6-768x768.webp)