Mexican Street Corn Pasta Salad Flavorful Side Dish

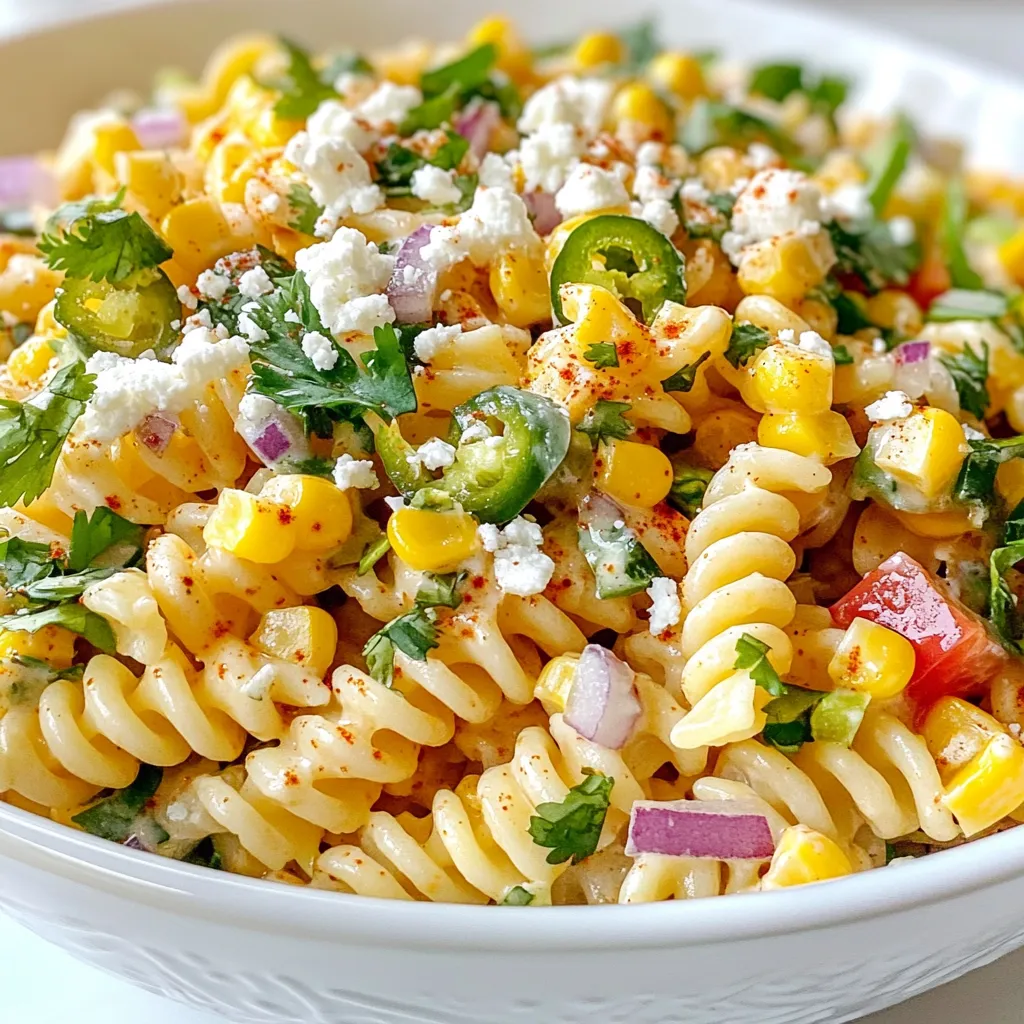
Craving a side dish that bursts with flavor? You’ve come to the right place! My Mexican Street Corn Pasta Salad combines vibrant ingredients and a zesty touch. It’s perfect for barbecues, potlucks, or family dinners. In just a few simple steps, you’ll create a dish that impresses everyone. Ready to learn how to make this tasty pasta salad? Let’s dive in!
Why I Love This Recipe
- Bold Flavors: This pasta salad combines the sweetness of corn with the heat of jalapeño, creating a vibrant and flavorful dish that’s perfect for any occasion.
- Easy to Make: With minimal cooking involved, this recipe comes together quickly, making it an ideal choice for busy weeknights or last-minute gatherings.
- Fresh Ingredients: The use of fresh vegetables and herbs adds a bright and refreshing twist, ensuring every bite is packed with deliciousness.
- Customizable: This pasta salad can easily be adapted to suit your taste preferences, whether you want to add protein, swap out vegetables, or adjust the spice level.
Ingredients
List of Required Ingredients
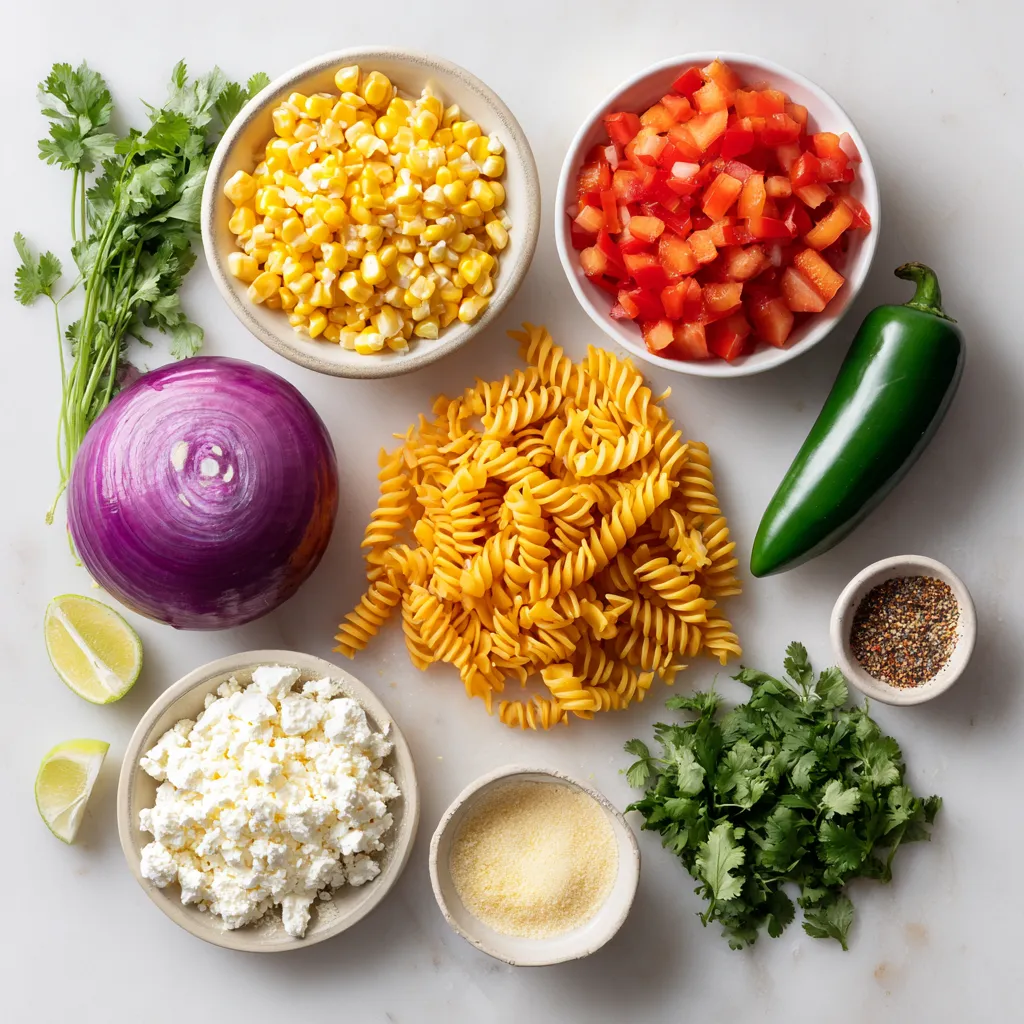
To make Mexican street corn pasta salad, gather these ingredients:
– 8 oz fusilli pasta
– 2 cups corn kernels (fresh or frozen)
– 1 red bell pepper, diced
– 1/2 red onion, finely chopped
– 1 jalapeño, deseeded and minced
– 1/2 cup crumbled cotija cheese
– 1/4 cup fresh cilantro, chopped
– 3 tablespoons mayonnaise
– 2 tablespoons lime juice
– 1 teaspoon chili powder
– Salt and pepper to taste
Optional Ingredients for Extra Flavor
You can add more fun to your salad with these options:
– Avocado for creaminess
– Black beans for protein
– Chopped green onions for freshness
– A sprinkle of smoked paprika for depth
Recommended Tools and Utensils
Here are the tools you’ll need:
– Large pot for cooking pasta
– Skillet for sautéing corn
– Mixing bowl for salad
– Small bowl for dressing
– Whisk for mixing
– Measuring cups and spoons
– Knife and cutting board for chopping
Each ingredient and tool helps create a tasty and colorful dish that everyone will enjoy!

Step-by-Step Instructions
Cooking the Pasta
First, bring a big pot of salted water to a boil. Add 8 oz of fusilli pasta to the pot. Cook the pasta according to the package directions. It usually takes about 8 to 10 minutes. Once cooked, drain the pasta and rinse it under cold water. This helps cool it down and stops the cooking.
Sautéing the Corn
Next, grab a large skillet and heat it over medium heat. Add 2 cups of corn kernels, fresh or frozen. Sauté the corn for about 5 to 7 minutes. Stir it often until it gets a little charred and tender. This gives it a nice flavor. Once done, remove the skillet from heat and let the corn cool.
Mixing the Salad Ingredients
Now, take a large mixing bowl and add the cooled pasta. Then, mix in the sautéed corn, diced red bell pepper, finely chopped red onion, and minced jalapeño. In a small bowl, whisk together 3 tablespoons of mayonnaise, 2 tablespoons of lime juice, 1 teaspoon of chili powder, and some salt and pepper. Pour this dressing over the pasta salad mixture. Toss everything gently to combine. Finally, fold in 1/2 cup of crumbled cotija cheese and 1/4 cup of chopped cilantro. Mix until everything is well combined. Adjust the seasoning if needed. Chill the salad in the fridge for at least 30 minutes before serving.
Tips & Tricks
How to Perfectly Cook Pasta
To cook pasta well, start with a big pot of salted water. Use about one tablespoon of salt for every four quarts. Bring the water to a rolling boil before adding the pasta. Stir the pasta to keep it from sticking. Cook fusilli for about 8-10 minutes or until it’s al dente. This means it should be firm but not hard. Drain the pasta and rinse it with cold water. This stops the cooking and cools it down.
Suggestions for Customizing Your Salad
You can add many tasty things to your Mexican Street Corn Pasta Salad. Try adding black beans for protein or avocado for creaminess. You could also toss in diced tomatoes for extra color and flavor. Want more heat? Add more jalapeño or some cayenne pepper. If you’re a fan of herbs, try adding fresh basil or mint for a twist. The best part? You can mix and match based on what you like!
Best Techniques for Sautéing Corn
To sauté corn, heat a skillet over medium heat. Add a little oil or butter for flavor. Once hot, add the corn kernels. Let them cook without stirring for a few minutes. This helps them get a nice char. Stir them occasionally for about 5-7 minutes. When they become golden brown, they are ready. Remove from heat and let them cool before adding to your salad. This gives your salad a lovely smoky taste.
Pro Tips
- Fresh Corn is Best: If possible, use fresh corn on the cob for the best flavor and texture. Simply grill or boil it, then cut off the kernels for your salad.
- Customize the Heat: Adjust the amount of jalapeño based on your spice preference. For a milder salad, remove all the seeds and membranes.
- Chill for Flavor: Letting the salad chill in the refrigerator for at least 30 minutes allows the flavors to meld beautifully, enhancing the overall taste.
- Garnish with Lime: For an extra zing, serve with lime wedges on the side. This adds a fresh burst of citrus when squeezed over the salad just before eating.

Variations
Vegetarian Additions
You can make this dish even better with vegetarian additions. Try adding black beans for protein. They add creaminess and a nice texture. You can also use diced avocado, which gives a rich flavor. Fresh cherry tomatoes brighten the salad, adding color and taste.
Vegan Adaptations
To make this salad vegan, swap the mayonnaise for vegan mayo. It keeps the creaminess without the eggs. For cheese, use a vegan alternative like cashew cheese or omit it altogether. This still keeps the dish tasty and satisfying.
Spicy Modifications
If you love heat, add more jalapeños or a splash of hot sauce. You can also use a spicier chili powder. For an extra kick, mix in some diced serrano peppers. These spicy changes will thrill your taste buds and make the salad pop!
Storage Info
How to Store Leftovers
To keep your Mexican Street Corn Pasta Salad fresh, store it in an airtight container. Make sure to cool it to room temperature before sealing it. This method helps keep the flavors intact. You can also separate the dressing and salad if you want to keep it extra fresh. This way, you avoid soggy pasta.
Best Practices for Meal Prep
For meal prep, you can make this salad ahead of time. Just prepare all ingredients and store them separately. Cook the pasta and corn, then mix them just before serving. This keeps everything fresh. You can also chop veggies and store them in the fridge. This method saves time during busy days.
Shelf Life and Reheating Tips
The salad stays good in the fridge for up to three days. If you want to reheat it, do so gently. Use a microwave on low power to avoid overcooking. If you prefer it cold, enjoy it straight from the fridge. The flavors will still be tasty!
FAQs
What is Mexican Street Corn Pasta Salad?
Mexican Street Corn Pasta Salad is a fresh and tasty dish. It blends pasta with sweet corn, peppers, and spices. You get a burst of flavors in every bite. The salad has a creamy dressing made with mayonnaise and lime juice. Cotija cheese adds a salty twist, while cilantro brings freshness. This dish is perfect for BBQs or potlucks.
Can I use different types of pasta?
Yes, you can use different types of pasta! Fusilli is great, but you can try penne or rotini. These shapes hold the dressing well. Just make sure to cook the pasta to a firm texture. This keeps it from getting mushy in the salad.
How can I make this salad gluten-free?
To make this salad gluten-free, swap regular pasta for gluten-free pasta. Many brands offer tasty options made from rice or corn. Just follow the package instructions for cooking. The rest of the ingredients are naturally gluten-free, so you’re all set!
Is it possible to prepare the salad a day in advance?
Yes, you can make this salad a day ahead. Just prepare it, then chill it in the fridge. This allows the flavors to blend better. When you serve it, give it a good stir. You might need to add a touch more lime juice or salt to boost the flavor.
What can I serve with Mexican Street Corn Pasta Salad?
This pasta salad pairs well with many dishes. Try it with grilled chicken or shrimp for protein. Tacos or fajitas make a great side too. If you want something lighter, serve it with a fresh green salad. The options are endless!
This blog covered how to make Mexican Street Corn Pasta Salad. We started with the needed ingredients and tools. Then, we walked through the steps to prepare the dish. I shared tips for perfect pasta and ways to customize your salad. Variations include vegetarian and vegan options.
You can store leftovers easily to enjoy later. This salad is fun to make and taste. Use these ideas to create your perfect dish. You will impress your friends and famil

Mexican Street Corn Pasta Salad
Ingredients
- 8 oz fusilli pasta
- 2 cups corn kernels (fresh or frozen)
- 1 red bell pepper, diced
- 0.5 red onion, finely chopped
- 1 jalapeño, deseeded and minced
- 0.5 cup crumbled cotija cheese
- 0.25 cup fresh cilantro, chopped
- 3 tablespoons mayonnaise
- 2 tablespoons lime juice
- 1 teaspoon chili powder
- Salt and pepper to taste
Instructions
- Cook the fusilli pasta in a large pot of salted boiling water according to package directions. Drain and rinse under cold water to cool.
- In a large skillet over medium heat, add the corn kernels. Sauté for about 5-7 minutes, stirring occasionally until slightly charred and tender. Remove from heat and let cool.
- In a large mixing bowl, combine the cooled pasta, sautéed corn, diced red bell pepper, finely chopped red onion, and minced jalapeño.
- In a small bowl, whisk together the mayonnaise, lime juice, chili powder, salt, and pepper. Pour this dressing over the pasta salad mixture and toss gently to combine.
- Fold in the crumbled cotija cheese and chopped cilantro, mixing until evenly distributed.
- Adjust seasoning with more salt and pepper if needed. Chill in the refrigerator for at least 30 minutes before serving to allow flavors to meld.


![- 1 pound large shrimp, peeled and deveined - 3 tablespoons unsalted butter - 4 cloves garlic, minced - 1/4 cup honey - 2 tablespoons soy sauce - 1 tablespoon freshly squeezed lemon juice - Salt and pepper to taste - Chopped fresh parsley for garnish Accurate measurements are key for this dish. They ensure a tasty balance of flavors. For shrimp, look for large ones that are firm and bright in color. Fresh shrimp should smell like the ocean, not fishy. If you can, buy shrimp from a trusted source. This will give you the best taste and quality. Start by melting the butter in a large skillet over medium heat. Once the butter is melted, add the minced garlic. Sauté the garlic for about one minute. Keep an eye on it to avoid burning. Next, add the honey, soy sauce, and lemon juice to the skillet. Stir everything well to mix the flavors. Increase the heat slightly and let the sauce simmer for about two minutes. This will help it thicken and enhance the taste. Now, it’s time to cook the shrimp. Add the peeled and deveined shrimp to the skillet. Season them with salt and pepper for some flavor. Cook the shrimp for two to three minutes on one side. You’ll know they're ready to flip when they turn pink. Carefully flip the shrimp and cook the other side for another two to three minutes. The shrimp should be fully cooked and opaque. Once your shrimp are cooked, remove the skillet from the heat. For a fresh touch, garnish with chopped parsley. This adds color and flavor. Serve the honey garlic butter shrimp over a bed of rice or quinoa. Drizzle some of the remaining sauce on top for extra taste. Adding lemon wedges on the side can brighten the dish. Enjoy your meal! For the complete recipe, check the [Full Recipe]. To tell when shrimp are perfectly cooked, look for a few signs. First, they should turn pink and opaque. This usually takes 2-3 minutes per side. If they curl into a C shape, that means they're done. Be careful not to overcook them, as they can become tough. Prevent garlic from burning during cooking by following a simple trick. Cook it over medium heat and watch it closely. Once it’s fragrant, add the honey and soy sauce quickly. This helps keep the garlic sweet and tasty. You can add spices or herbs for extra flavor in this dish. A pinch of red pepper flakes can add heat. Fresh thyme or basil can brighten the taste. Don’t be afraid to experiment and find what you love. For complementary sides, I suggest serving the shrimp with rice or quinoa. These grains soak up the sauce well. A crisp salad or steamed veggies also pairs nicely with the dish. The best skillet for cooking shrimp is a non-stick one. It helps prevent sticking and makes cleaning easy. I recommend a large skillet that allows enough space for shrimp to cook evenly. For peeling and deveining shrimp, use a small but sharp paring knife. This tool gives you control and precision. You can also use kitchen scissors for quick work. These tools make prep simple, so you can enjoy cooking. Explore the [Full Recipe] for more details on making honey garlic butter shrimp! {{image_2}} You can change the sweetener in honey garlic butter shrimp. Try maple syrup or agave nectar. They add a nice twist while keeping the dish sweet. If you don’t have fresh garlic, you can use garlic powder. This works well if you’re in a hurry. Just use 1/8 teaspoon of garlic powder for each clove. For a gluten-free version, swap soy sauce with tamari. This keeps the flavor while meeting gluten-free needs. If you want it low-carb, use cauliflower rice instead of regular rice. This makes your meal lighter but still tasty. You can make this dish with Asian-inspired flavors. Try adding sesame oil or sriracha for a kick. These ingredients bring a zesty heat to your meal. For a Mediterranean touch, mix in olives or feta cheese. This gives a whole new flavor profile that pairs well with shrimp. For the full recipe, check out the Honey Garlic Butter Shrimp section. After making honey garlic butter shrimp, let it cool to room temperature. Store leftovers in an airtight container. This keeps the shrimp fresh and tasty. In the fridge, honey garlic butter shrimp lasts for about 3 days. To reheat shrimp, use a pan over low heat. This method warms them gently and keeps them juicy. Avoid the microwave; it can make shrimp rubbery. You can also mix leftover shrimp into pasta or salad for a quick meal. To freeze honey garlic butter shrimp, place it in a freezer-safe bag. Remove as much air as possible to prevent freezer burn. It can stay in the freezer for up to 3 months. When ready to eat, thaw it overnight in the fridge. Cook from frozen in a skillet over low heat until warm. For the full recipe, check out the Honey Garlic Butter Shrimp 🦐 section. Yes, you can use frozen shrimp. First, thaw them under cold water. This takes about 10-15 minutes. After thawing, dry the shrimp with a paper towel. Frozen shrimp may need a minute more to cook. Always check if they turn pink and opaque. If you can't use honey, consider these options: - Maple syrup - Agave nectar - Brown sugar These sweeteners provide a similar taste. Adjust the amount to your liking. Look for these signs: - The shrimp turn bright pink. - They curl into a C shape. - The flesh becomes opaque. Cooked shrimp should feel firm, not rubbery. Yes, you can prepare the shrimp a few hours in advance. Cook the shrimp and let them cool. Store them in a container in the fridge. Reheat gently before serving to keep them tender. Absolutely! Portion the shrimp into meal prep containers. They can last in the fridge for 2-3 days. To reheat, use low heat to avoid overcooking. You can serve them with rice or veggies for a quick meal. For the complete recipe, check out the Full Recipe section. This blog post covered a delicious honey garlic butter shrimp recipe. You learned about the necessary ingredients, including shrimp, butter, and garlic. I shared tips for preparing the sauce and cooking the shrimp perfectly. We looked at variations, storage info, and answered common questions. Now, you can cook this dish with confidence. Enjoy the great flavor and flexibility of this recipe. Don't hesitate to experiment and make it your own. Happy cooking!](https://dailydishly.com/wp-content/uploads/2025/07/4796c05b-30f7-4441-b7cb-ba0299151dfe-768x768.webp)
![To make a great Classic Chicken Alfredo, you need a few key items. Here’s what you will need: - 2 boneless, skinless chicken breasts, sliced into strips - 8 oz fettuccine pasta - 2 tablespoons olive oil - 3 cloves garlic, minced - 1 cup heavy cream - 1 cup grated Parmesan cheese - 1 teaspoon Italian seasoning - Salt and black pepper to taste - Fresh parsley, chopped (for garnish) - Freshly cracked black pepper (for finishing) Each ingredient plays a vital role in creating this creamy dish. The chicken gives protein, while the pasta adds substance. Olive oil adds flavor and helps cook the chicken. Garlic gives a nice aroma and taste. Heavy cream makes the sauce rich and smooth. Parmesan cheese adds saltiness and depth. Italian seasoning brings in herbs for a fresh touch. Salt and black pepper enhance all the flavors. Lastly, parsley adds color and brightness to your plate. These ingredients come together to create a comforting meal. You can find the full recipe in the recipe section. Enjoy cooking! Let’s dive into the steps to make Classic Chicken Alfredo. This creamy dish is perfect for dinner. First, fill a large pot with water. Add enough salt to make it taste like the sea. Bring the water to a boil. Add 8 oz of fettuccine pasta. Cook it according to the package instructions until it is al dente. This usually takes about 8-10 minutes. Reserve ½ cup of the pasta water, then drain the pasta and set it aside. Next, heat 2 tablespoons of olive oil in a large skillet over medium heat. When the oil is hot, add the sliced chicken breasts. Season the chicken with salt and black pepper. Cook it for 5-7 minutes, or until it is browned and cooked through. Make sure to stir often. Once done, remove the chicken from the skillet and set it aside. In the same skillet, add 3 cloves of minced garlic. Sauté the garlic for about 1 minute. You want it to be fragrant but not burnt. This step adds a lovely flavor to your sauce. Now, pour in 1 cup of heavy cream and bring it to a gentle simmer. Stir in 1 cup of grated Parmesan cheese and 1 teaspoon of Italian seasoning. Let the sauce thicken for about 2-3 minutes. If it gets too thick, add some reserved pasta water until you reach your desired consistency. Add the cooked fettuccine and browned chicken back into the skillet. Toss everything together gently. Make sure all the pasta and chicken are coated in the creamy sauce. Taste and adjust the seasoning with more salt and pepper if needed. Finally, plate your creamy Chicken Alfredo. Garnish it with freshly chopped parsley and a sprinkle of cracked black pepper. This adds a nice touch and a little kick to the dish. Enjoy your meal! For the full recipe, check out Creamy Dreamy Chicken Alfredo. Avoiding a Lumpy Sauce To stop lumps, stir well as you cook. Use low heat to keep the sauce smooth. Start with warm cream, and add cheese slowly while stirring. This helps the cheese melt better and mix in nicely. Achieving the Right Consistency You want your sauce creamy but not too thick. If it gets thick, add some reserved pasta water. This water helps blend and thin the sauce to the right texture. The sauce should coat the pasta well but still flow easily. Seasoning to Taste Taste your sauce as you cook. Add salt and black pepper as needed. Don’t forget the Italian seasoning for extra flavor. A little fresh parsley on top adds brightness, too. Optimal Chicken Cooking Methods For the best chicken, cook it in a hot skillet with olive oil. This gives you a nice golden crust. Cook until the chicken is no longer pink inside. It takes about 5-7 minutes. Best Pasta Cooking Practices Use plenty of salted water to boil your pasta. This helps the pasta flavor. Cook it just until it’s al dente, so it has a slight bite. Always reserve some pasta water before draining. This water is great for adjusting the sauce later. Explore the [Full Recipe] for step-by-step details! {{image_2}} You can make Chicken Alfredo even better by changing a few things. - Adding Vegetables: Broccoli or spinach adds great color and nutrition. Broccoli cooks well in the pasta water. Just add it for the last 2-3 minutes. Spinach wilts quickly and can go in right before serving. Both make the dish healthier. - Using Different Types of Pasta: Fettuccine is classic, but you can try other pasta. Penne or rigatoni work well too. They hold the sauce just right, giving you a tasty bite every time. - Cheese Alternatives for Flavor Variations: Parmesan is great, but don’t stop there. You can mix in Romano or Asiago for a different taste. A blend of cheeses can add depth and a unique flavor to your sauce. You can easily adapt Chicken Alfredo for diets. - Gluten-Free Options: If you need gluten-free, use gluten-free pasta. Many brands offer good options that cook well and taste great. Always check the package to ensure it's safe for your needs. - Dairy-Free Modifications: For a dairy-free version, swap heavy cream for coconut milk or a nut milk. Nutritional yeast can replace Parmesan for a cheesy flavor without dairy. These swaps keep the dish creamy and delicious. Use these variations and adjustments to make this dish your own. You can enjoy a tasty meal that fits your needs and preferences! Don't forget to check the Full Recipe for detailed steps. Storing your Chicken Alfredo can keep it fresh for later. Here are simple steps: - Refrigerating Alfredo Pasta: Place leftover Chicken Alfredo in an airtight container. This keeps the dish moist. Store it in the fridge. It lasts about 3-4 days. - Freezing Suggestions: If you want to save it longer, use a freezer-safe container. Leave some space at the top for expansion. Chicken Alfredo can freeze well for about 2-3 months. When ready to eat, thaw it in the fridge overnight. To enjoy your Chicken Alfredo again, follow these steps: - Best Methods for Reheating: Use a skillet over low heat. Add a splash of milk or cream to help the sauce. Stir until warmed through. You can also use the microwave. Heat in short bursts, stirring often. - Avoiding a Dry Sauce: Adding a little liquid is key. It helps keep the sauce creamy. If it seems too thick, add more milk or reserved pasta water. This way, your Chicken Alfredo stays delicious. Can I make Chicken Alfredo ahead of time? Yes, you can make Chicken Alfredo ahead. Cook it and let it cool. Store it in the fridge for up to three days. Just reheat gently when you are ready to serve. What kind of chicken is best for Alfredo? Boneless, skinless chicken breasts work best. They cook quickly and stay tender. You can also use chicken thighs for more flavor. How long does Chicken Alfredo last in the fridge? Chicken Alfredo lasts about three days in the fridge. Make sure to store it in an airtight container. Can I use milk instead of heavy cream? You can use milk, but the sauce will be thinner. For creaminess, consider mixing milk with some butter. What's the history behind Chicken Alfredo? Alfredo sauce comes from Italy. It was created by Alfredo di Lelio in the early 1900s. He made it for his wife, who had trouble eating. It became popular in America later. Is it possible to make Alfredo sauce without butter? Yes, you can make Alfredo sauce without butter. You can use olive oil instead. It will still taste great! How can I make Chicken Alfredo spicier? To spice up Chicken Alfredo, add red pepper flakes. You can also use spicy Italian sausage in place of chicken. Both add a nice kick! Classic Chicken Alfredo is easy to make with simple ingredients. You need chicken, fettuccine pasta, garlic, and heavy cream. I shared step-by-step instructions to guide you through cooking this dish. I also included tips to improve your sauce and cooking techniques to enhance flavor. If you want to mix things up, consider adding veggies or adjusting for dietary needs. Enjoy your Alfredo dish and share your thoughts. Cooking can be fun and rewarding!](https://dailydishly.com/wp-content/uploads/2025/06/21a9bb47-f2dd-4716-bed4-2c8161470a16-768x768.webp)
