Get ready for a burst of flavor with my Minute Thai Basil Beef Lettuce Wraps! This dish is quick to make and packed with fresh ingredients. You’ll love the mix of ground meat, aromatic herbs, and savory sauces all wrapped in crisp lettuce. Whether it’s for a busy weeknight or a fun gathering, these wraps are sure to please. Let’s dive into this delicious recipe that’ll make your taste buds sing!
Ingredients
Main Ingredients
– 1 lb ground beef or ground chicken
– 1 cup fresh Thai basil leaves
– 1 head of butter lettuce or romaine lettuce
Flavor Enhancers
– 3 cloves garlic, minced
– 2 tablespoons ginger, minced
– 1 tablespoon soy sauce
– 1 tablespoon oyster sauce
– 1 tablespoon fish sauce
– 1 tablespoon brown sugar
– 1-2 Thai bird chilies, finely chopped
Garnishes
– Sliced cucumbers
– 1/4 cup chopped green onions
– Crushed peanuts
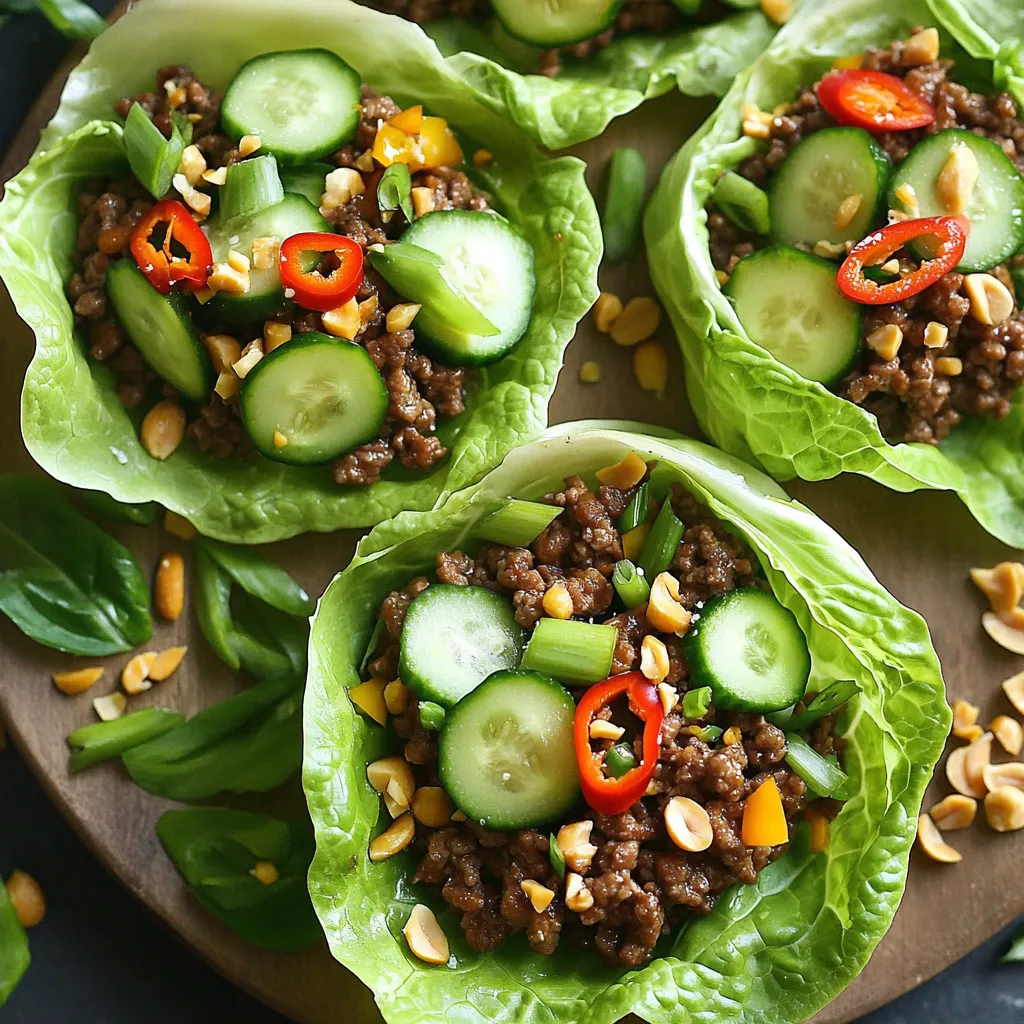
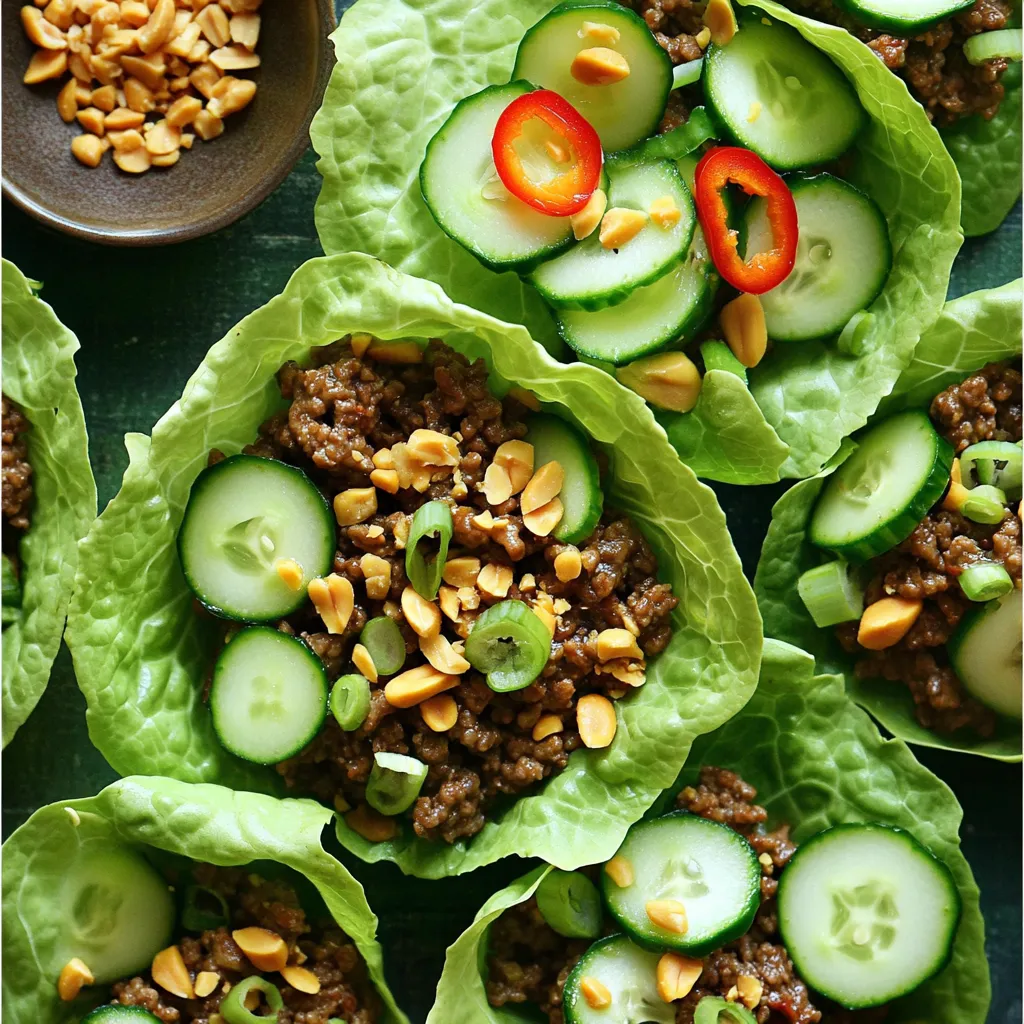
The main ingredients in this dish are simple yet packed with flavor. Ground beef gives a hearty base. You can switch to ground chicken for a lighter bite. Fresh Thai basil adds a fragrant touch that brightens the dish. Butter lettuce or romaine lettuce serves as the perfect wrap, holding the tasty filling.
For flavor enhancers, garlic and ginger bring depth. A mix of soy sauce, oyster sauce, and fish sauce adds umami. Brown sugar balances the flavors, while Thai bird chilies bring heat. Adjust the chilies according to your spice level.
Finally, garnishes like sliced cucumbers add crunch, while chopped green onions offer freshness. Crushed peanuts add a nutty finish. Each ingredient plays a role in making these wraps a flavorful delight.
Step-by-Step Instructions
Preparing the Beef
First, heat a large skillet over medium-high heat. Add 1 pound of ground beef. Cook it for about 5 minutes. Use a spatula to break it apart as it cooks. You want it browned and crumbly. Once browned, check for excess fat. If there is too much, carefully drain it out. This keeps your wraps light and fresh.
Adding Aromatics
Next, add 3 minced cloves of garlic and 2 tablespoons of minced ginger to the skillet. Stir-fry them for about 1 to 2 minutes. You want the kitchen to smell fantastic! Then, reduce the heat to medium. Now, mix in 1 tablespoon each of soy sauce, oyster sauce, and fish sauce. Add 1 tablespoon of brown sugar and 1-2 finely chopped Thai bird chilies. Cook this mixture for another 2 minutes. The flavors will blend beautifully.
Final Assembly
Now it’s time to add the star of the show: 1 cup of chopped Thai basil leaves. Stir them in gently. Cook for just about 1 minute. The basil will wilt and add a great taste. Once done, remove the skillet from heat and let the mixture cool slightly.
To serve, take a clean lettuce leaf, like butter or romaine. Spoon a generous amount of the beef mixture into the center. Garnish your wrap with sliced cucumbers, chopped green onions, and crushed peanuts. These toppings add crunch and flavor. Enjoy your wraps by folding the lettuce around the filling. Each bite is a tasty delight!
Tips & Tricks
Cooking Techniques
To brown meat well, heat your skillet before adding ground beef. This helps get that nice, crispy edge. Stir the meat often, breaking it apart with a spatula. Aim for about five minutes. If the meat has too much fat, drain it after browning. This keeps the dish from being greasy.
Adjust spice levels by starting with one Thai bird chili. You can always add more later. Taste the mixture as you go. This way, you can find the right heat for you.
Freshness Matters
Choose quality basil for the best flavor. Look for vibrant green leaves with no brown spots. Fresh basil makes a big difference in taste. It adds that signature aroma to your wraps.
Fresh vegetables are key too. Use crisp lettuce for the wraps. You want a nice crunch when you bite into them. Also, add fresh cucumbers for a cool, refreshing touch.
Serving Suggestions
Pair these wraps with dipping sauces like sweet chili or soy sauce. This adds more flavor and fun to each bite. You can have a small bowl for each person.
For drinks, try iced tea or a light beer. Both choices complement the flavors well. They balance the spice and make for a complete meal. Enjoy your wraps with friends and family!
Variations
Protein Options
You can easily switch the protein in these wraps. Ground chicken or turkey works great. They offer a lighter taste while still keeping the dish full of flavor.
If you want a meat-free option, try using mushrooms or tofu. Both can absorb flavors well. This way, you can enjoy a vegetarian or vegan version of these wraps.
Flavor Customizations
Feel free to customize the flavor. You can change the sauces or add your own spices. For a sweeter taste, add more brown sugar. If you enjoy heat, toss in extra Thai bird chilies.
You can also add different vegetables. Try bell peppers, carrots, or snap peas for extra crunch. They will add color and nutrition to your wraps.
Different Wrap Options
Lettuce is the main wrap, but you can explore different options. Romaine or butter lettuce works best. They provide a nice, crisp texture.
You can also try rice paper or other wraps. Rice paper gives a chewy texture, making it fun to eat. These options allow you to mix it up and enjoy your meal in many ways.
Storage Info
Refrigeration Guidelines
To store unassembled wraps, keep the beef mixture in an airtight container. Place the lettuce leaves in a separate bag. This helps them stay crisp and fresh. When stored properly, the beef mixture lasts about three days in the fridge.
To keep leftovers fresh, let the beef cool before sealing it. This prevents moisture buildup. Store any extra garnishes, like cucumbers and peanuts, in separate containers.
Freezing and Reheating
Freezing the beef mixture is a great option for meal prep. Allow it to cool fully, then transfer it to a freezer-safe bag. Remove as much air as possible to avoid freezer burn. It can last up to three months in the freezer.
For the best reheating methods, thaw the mixture in the fridge overnight. Heat it in a skillet over medium heat until warmed through. Add a splash of water to keep it moist. You can also microwave it, but check every minute to prevent drying out.
Shelf Life
Ground beef lasts in the fridge for 1-2 days after you buy it. After you cook it, it stays good for 3-4 days. Fresh Thai basil lasts about a week in the fridge. Look for vibrant green leaves without brown spots.
Signs of spoilage include a sour smell or off-color. If you notice any slimy textures, it’s best to throw it away. Always trust your senses to ensure your meal is safe to eat.
FAQs
Can I make Minute Thai Basil Beef Lettuce Wraps ahead of time?
Yes, you can make these wraps ahead of time. Prepare the beef mixture and store it in an airtight container in the fridge. It will stay fresh for up to three days. You can also wash and separate the lettuce leaves. Keep them in a damp paper towel inside a plastic bag. This keeps them crisp. When you’re ready to serve, just reheat the beef mixture in a pan. Then, fill the lettuce leaves and add your garnishes. This method saves time and keeps your meal fresh.
What side dishes pair well with these wraps?
These wraps are tasty on their own, but sides enhance the meal. Here are some great pairings:
– Thai jasmine rice: It’s light and fluffy, perfect for soaking up flavors.
– Spring rolls: Fresh or fried, they add a nice crunch.
– Coconut soup: A warm soup adds warmth to your meal.
– Edamame: These provide protein and are fun to eat.
– Pickled vegetables: They add tang and balance the flavors.
These sides make the meal complete and satisfying.
What’s the best way to substitute fresh herbs?
If you can’t find fresh Thai basil, there are good alternatives. Sweet basil works well for a milder taste. Cilantro adds a fresh note, though it has a different flavor. If you want a spicier kick, try mint. You can also use dried herbs, but they are less fragrant. Use one-third of the amount when using dried herbs. Fresh herbs make a big difference in taste, so choose wisely!
Making Minute Thai Basil Beef Lettuce Wraps is simple and delicious. We went through the main ingredients and learned how to prepare them perfectly. You can adjust flavors to suit your taste and try different proteins for variety. Storing tips ensure your wraps stay fresh.
Enjoying these wraps can bring a burst of flavor to any meal. You have all the tools to create a tasty dish that friends and family will love. Embrace the flavors and make it your own!


