Mongolian Shrimp Better Than Takeout Delightful Dish

Craving takeout shrimp? You’re in for a treat! This Mongolian Shrimp recipe is easy and way better than any restaurant version. With fresh ingredients, detailed steps, and handy tips, you’ll impress your family with a dish that bursts with flavor. Forget the long wait times—grab your apron and let’s dive into the world of homemade Mongolian Shrimp. You’ll love how simple cooking can be!
Ingredients
List of Essential Ingredients
To make this Mongolian shrimp dish, you need a few key ingredients:
– 1 lb large shrimp, peeled and deveined
– 2 tablespoons vegetable oil
– 1 medium onion, sliced
– 3 cloves garlic, minced
– 1 inch piece ginger, grated
– 1 red bell pepper, sliced
– 1 cup snow peas, trimmed
– 1/4 cup green onions, chopped
– 1/4 cup soy sauce
– 2 tablespoons brown sugar
– 1 tablespoon cornstarch
– 1 teaspoon sesame oil
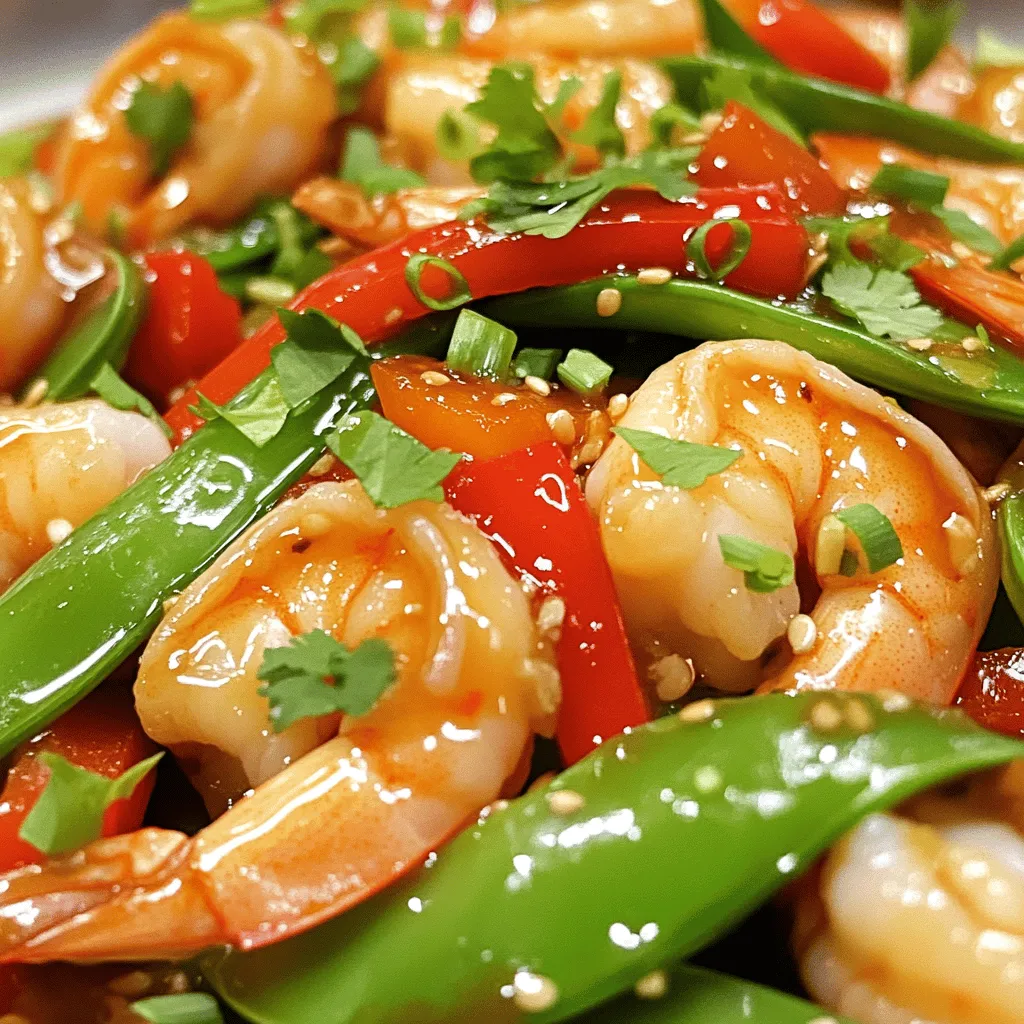
Each ingredient plays a role in building flavor. The shrimp brings protein and a sweet taste. The soy sauce adds saltiness and depth. Garlic and ginger give a nice zest, while the veggies add crunch and color.
Optional Garnishes
To make your dish even better, you can add some garnishes:
– Fresh cilantro
Cilantro adds brightness and freshness. You can sprinkle it on top right before serving. This little touch makes your plate look lovely and inviting.
Substitutions for Key Ingredients
Sometimes you may not have all the ingredients. Here are some easy swaps you can make:
– Use chicken or tofu in place of shrimp for different protein.
– Swap soy sauce for tamari to make it gluten-free.
– If you don’t have brown sugar, white sugar works too.
These substitutions keep the recipe flexible. You can still enjoy a great meal even if you’re missing something.
Step-by-Step Instructions
Preparation of Ingredients
Start by gathering your ingredients. You will need:
– 1 lb large shrimp, peeled and deveined
– 2 tablespoons vegetable oil
– 1 medium onion, sliced
– 3 cloves garlic, minced
– 1 inch piece ginger, grated
– 1 red bell pepper, sliced
– 1 cup snow peas, trimmed
– 1/4 cup green onions, chopped
– 1/4 cup soy sauce
– 2 tablespoons brown sugar
– 1 tablespoon cornstarch
– 1 teaspoon sesame oil
– Fresh cilantro for garnish (optional)
Now, prepare your sauce. In a small bowl, mix the soy sauce, brown sugar, and cornstarch. Stir well until combined. Set this bowl aside for later.
Cooking Process in Detail
Heat the vegetable oil in a large skillet or wok over medium-high heat. Add the sliced onions and sauté them for 2-3 minutes. You want them to become soft and translucent. Next, stir in the minced garlic and grated ginger. Cook for about 30 seconds until the aroma fills your kitchen.
Now, it’s time to add the shrimp. Cook them for 2-3 minutes. They should turn pink and opaque. After that, toss in the red bell pepper and snow peas. Stir constantly for another 2 minutes. You want the veggies to stay tender-crisp.
Pour your sauce mixture into the skillet. Stir well to coat all the shrimp and veggies. Let it cook for 1-2 minutes. This helps the sauce thicken and cling to everything.
Finalizing the Dish
Drizzle the sesame oil over your shrimp and veggies. Then add the chopped green onions. Toss everything together to mix well. Once combined, remove from heat and let it cool slightly.
Now your Mongolian shrimp is ready to serve! You can plate it beautifully and add cilantro on top if you like. Enjoy your homemade dish that tastes even better than takeout!
Tips & Tricks
How to Achieve Perfectly Cooked Shrimp
To get shrimp just right, pay attention to timing. Cook them for 2-3 minutes. They should turn pink and opaque. If you overcook them, they become rubbery. To check, cut one open. It should look white and firm.
Enhancing the Flavor Profile
To boost the taste, use fresh garlic and ginger. They add a nice kick. The soy sauce and brown sugar mix brings sweet and salty notes. Drizzle sesame oil at the end. It gives a nutty flavor that rounds out the dish. You can also add a splash of lime juice for brightness.
Common Mistakes to Avoid
One common mistake is overcrowding the pan. This can steam the shrimp instead of frying them. Cook in batches if needed. Another mistake is not letting the sauce thicken. Give it time to bubble for a few minutes. This helps it cling to the shrimp and veggies. Lastly, don’t skip garnishing with green onions or cilantro. It adds color and freshness.

Variations
Vegetarian Alternatives
You can easily make a vegetarian version of Mongolian shrimp. Instead of shrimp, try using tofu or tempeh. Both options soak up flavor well. Firm tofu works best, as it holds its shape. Just cube it and follow the same cooking steps. You will still enjoy that savory sauce.
Adding More Vegetables
Feel free to add more vegetables to your dish. Broccoli, carrots, or baby corn work great. You can also toss in mushrooms for an umami boost. Just cut them into bite-sized pieces. Add them when you cook the other veggies. This makes your meal colorful and healthy.
Spice Level Adjustments
If you like heat, add some chili flakes or sriracha. Start with a pinch and taste. You can always add more. For a milder dish, skip the spices. Adjust the heat to fit your taste. This way, everyone at the table will enjoy the meal.
Storage Info
Best Practices for Refrigeration
Store your Mongolian shrimp in an airtight container. This keeps it fresh and tasty. It’s best to refrigerate it within two hours of cooking. The shrimp stays good for up to three days. Enjoy it within this time for the best taste.
Freezing Guidelines
If you want to save some for later, freezing works well. Place the shrimp in a freezer-safe container. Make sure to leave some space for expansion. It is safe to freeze for up to three months. Label the container with the date. Thaw it in the fridge overnight before using.
Reheating Instructions
To reheat, use a skillet over medium heat. Add a splash of water or oil to keep it moist. Stir often until heated through, about 5 minutes. You can also use a microwave. Heat for 1-2 minutes, stirring halfway. Enjoy your delicious meal again!
FAQs
Can I make this recipe gluten-free?
Yes, you can make this recipe gluten-free. Just swap regular soy sauce for gluten-free soy sauce. This way, you keep all the great flavor without the gluten.
What types of shrimp are best for this recipe?
Large shrimp work best for this dish. They have a nice size and hold up well during cooking. Look for shrimp that are peeled and deveined to save time.
How do I make this dish spicier?
To add spice, use red pepper flakes or sliced fresh chili. You can also add sriracha to the sauce for a nice kick. Start small, then add more if you want it hotter.
Can I use frozen shrimp?
Yes, you can use frozen shrimp. Just make sure to thaw them completely before cooking. This will help them cook evenly. You can run them under cold water to speed up the thawing process.
This blog post covered essential ingredients, step-by-step cooking, and helpful tips. You learned how to prepare shrimp perfectly and avoid common mistakes. We also explored delicious variations, best storage methods, and answered your FAQs.
In closing, cooking is fun and rewarding. Experiment with flavors and find what you love. Happy cooking!


![- 1 lb (450g) flank steak, sliced thinly against the grain - 2 cups broccoli florets - 1 red bell pepper, thinly sliced - 3 cloves garlic, minced - 1 inch ginger, grated - 3 tablespoons soy sauce - 2 tablespoons oyster sauce (optional) - 1 tablespoon cornstarch - 1 tablespoon sesame oil - 2 tablespoons vegetable oil - Cooked jasmine rice, for serving - Sesame seeds, for garnish - Green onions, sliced, for garnish The flank steak is key to this dish. It cooks fast and stays tender. When you slice it against the grain, you get a nice, soft bite. Broccoli adds crunch and bright green color. The red bell pepper brings sweetness and color, making it look great. Garlic and ginger provide a warm, aromatic flavor that makes your dish shine. Soy sauce adds saltiness and umami. Oyster sauce, if you choose to use it, gives a rich depth. Cornstarch helps thicken the sauce. Sesame oil adds a nutty flavor to finish it off. For the best flavor, choose fresh, high-quality flank steak. Look for a nice, bright red color with good marbling. Fresh broccoli should be bright green, firm, and not wilted. When choosing bell peppers, look for ones that are firm and shiny. Fresh garlic and ginger can make a big difference in taste. Use low-sodium soy sauce for a healthier option. If you can, find a good-quality oyster sauce. Finally, use pure sesame oil for the best flavor. Each ingredient plays a role in making your Beef and Broccoli Stir-Fry delicious. Check the [Full Recipe] for more detailed cooking steps. To start, you want to make the beef tender and tasty. Take 1 pound of flank steak and slice it thinly. Slice against the grain for the best texture. In a medium bowl, mix the sliced beef with 3 tablespoons of soy sauce, 2 tablespoons of oyster sauce (if you like), and 1 tablespoon of cornstarch. Make sure all the beef is coated well. Let it sit for 15 minutes. This step makes a big difference in flavor. While the beef marinates, it’s time to prep the broccoli. Grab 2 cups of broccoli florets. Bring a pot of water to a boil. Once boiling, add the broccoli and blanch it for 2 minutes. This keeps the broccoli bright and crisp. After 2 minutes, put the florets in an ice bath to stop cooking. Drain the broccoli and set it aside. This step ensures the broccoli stays green and crunchy. Now, let’s get cooking! Heat a large pan or wok over medium-high heat. Add 2 tablespoons of vegetable oil once it's hot. Next, add the marinated beef in a single layer. Cook for about 2 to 3 minutes until it turns brown. Remove the beef and set it aside. In the same pan, add 3 cloves of minced garlic and 1 inch of grated ginger. Sauté for 30 seconds until it smells great. Then, add the red bell pepper and your blanched broccoli. Stir for another 2 to 3 minutes. Finally, return the beef to the pan. Pour in 1 tablespoon of sesame oil. Stir everything together and cook for 2 more minutes. This helps the flavors mix well. Taste your stir-fry and add more soy sauce if you want. Serve it hot over jasmine rice. Don’t forget to garnish with sesame seeds and sliced green onions for an extra touch. For the full recipe, check the details above. To get tender beef, choose flank steak. Slice it thinly against the grain. This helps break down tough fibers. Marinate the beef for at least 15 minutes. Use soy sauce and cornstarch for extra tenderness. The cornstarch creates a nice coating that locks in juices. Don't cook the beef too long. Just 2-3 minutes in a hot pan will do. Remove it quickly to keep it tender. For bright green, crisp broccoli, blanch it first. Boil water and add the florets for 2 minutes. This softens them but keeps their color. After boiling, quickly transfer them to an ice bath. This stops the cooking and keeps the crunch. Stir-fry the blanched broccoli for just a few minutes. This will make it hot without losing its color or texture. To boost flavor, add garlic and ginger when cooking. These ingredients bring a strong, fresh taste. You can also add red bell pepper for sweetness. If you want a richer taste, use oyster sauce. Just a tablespoon can add depth. Taste your dish before serving. If it needs more saltiness, add extra soy sauce. A sprinkle of sesame seeds and green onions on top adds a nice touch. For the detailed recipe, check the Full Recipe. {{image_2}} You can switch beef for other proteins. Chicken works great in this dish. You can also use shrimp or tofu for a different taste. Each choice brings its own flavor and texture. Try marinating them the same way. This keeps the dish simple and tasty, just like the Full Recipe. Feel free to add more veggies for color and taste. Carrots, snap peas, or mushrooms can enhance the dish. Just chop them up and toss them in with the broccoli. They will cook quickly, adding crunch and nutrition. If you need a gluten-free version, use tamari instead of soy sauce. For a vegan meal, replace the beef with tofu or seitan. You can also skip the oyster sauce or use a vegan version. This way, you can enjoy a delicious meal while meeting your dietary needs. To keep your beef and broccoli stir-fry fresh, store it in an airtight container. Let the dish cool down to room temperature before sealing it. Place the container in the fridge and eat the leftovers within three days. This helps maintain flavor and quality. When you're ready to enjoy your leftovers, reheat them in a pan. Add a splash of water or broth to avoid drying out the meal. Heat on medium until warm, stirring often. You can also use the microwave. Cover the dish and heat in short bursts, stirring in between. This ensures even heating. If you want to freeze your stir-fry, first let it cool completely. Portion it into freezer bags or containers. Remove as much air as possible before sealing. Label the bags with the date. You can freeze it for up to three months. When you’re ready to eat, thaw it overnight in the fridge before reheating. This method preserves taste and texture well. For the full recipe, check out the Beefy Broccoli Bonanza. Making Beef and Broccoli Stir-Fry takes about 30 minutes. This time includes prep and cooking. You will spend 15 minutes prepping the ingredients and marinating the beef. The cooking process will take about 15 minutes. This quick time makes it perfect for busy weeknights. Yes, you can use frozen broccoli. Frozen broccoli is convenient and saves time. It also cooks quickly, which fits well with stir-frying. Just make sure to thaw it before use. Drain any excess water to avoid sogginess in your dish. Beef and Broccoli Stir-Fry pairs well with jasmine rice. This rice soaks up the savory sauce nicely. You can also serve it with noodles for a different twist. Adding spring rolls or dumplings makes it a complete meal. For a fresh touch, include a side salad with crisp greens. Check out the Full Recipe for more ideas! Beef and broccoli stir-fry is simple and fun to make. You learned about key ingredients and best cooking practices. I offered tips for tender beef and tasty broccoli. You can also try different proteins and some easy swaps. Lastly, I explained how to store leftovers well. Enjoy this dish tonight or any night. It fits any table and delights many tastes. Your kitchen will shine with this easy recipe!](https://dailydishly.com/wp-content/uploads/2025/06/c1b8a640-846d-4588-a3be-4e7860c53d8e-768x768.webp)


