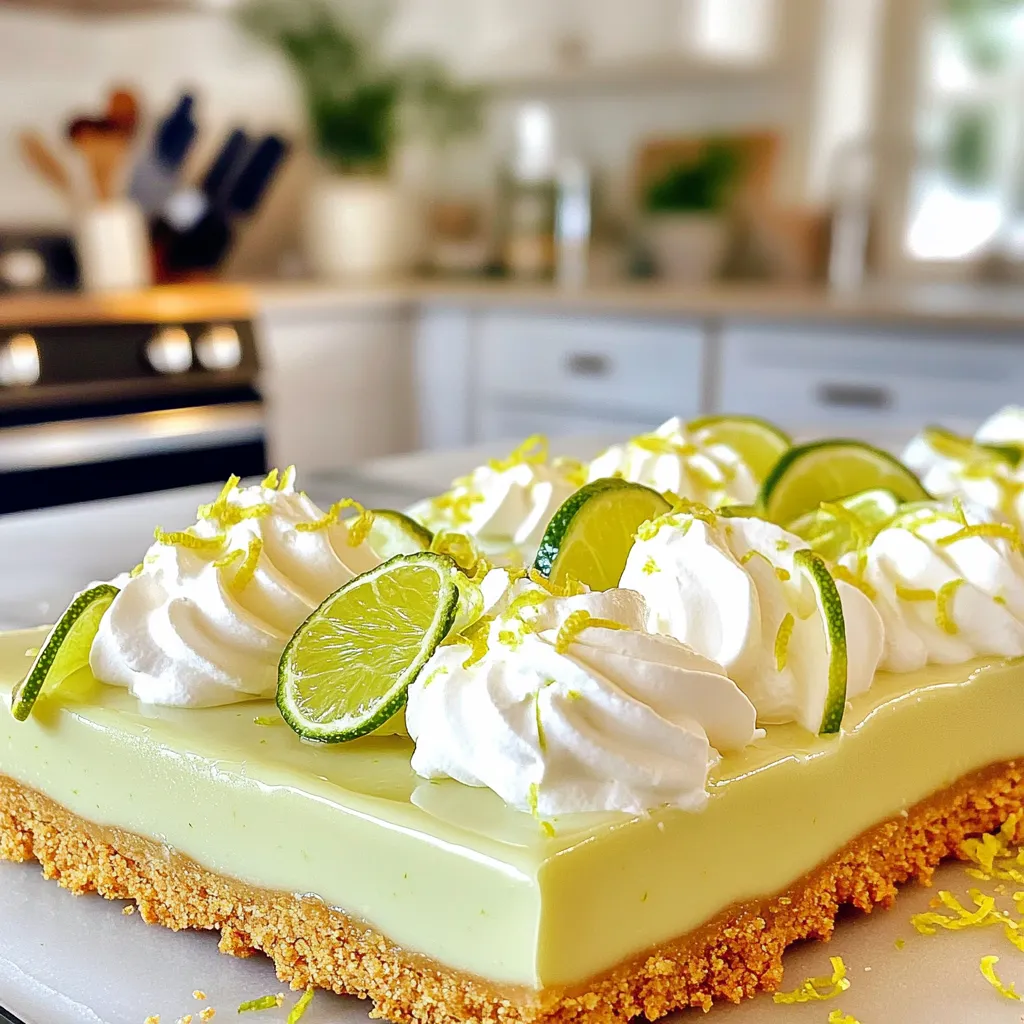
Craving a simple treat that bursts with flavor? You’ll love these No-Bake Key Lime Pie Bars! They are easy to make and perfect for any occasion. With a creamy filling and a crunchy crust, these bars will impress your friends and family. Plus, you can customize them to fit your taste. Let’s dive into the ingredients and get started on this delightful dessert!
Ingredients
Required Ingredients List
To make these no-bake key lime pie bars, gather the following ingredients:
– 1 ½ cups graham cracker crumbs
– ½ cup unsweetened shredded coconut
– ½ cup unsalted butter, melted
– 1/3 cup granulated sugar
– 2 (8 oz) packages cream cheese, softened
– 1 cup powdered sugar
– ½ cup fresh key lime juice (about 5-6 limes)
– Zest of 2 limes
– 1 teaspoon vanilla extract
– Whipped cream (for topping)
– Lime slices and zest for garnishing
Ingredient Substitutions
You can make some swaps if you need to. Try these options:
– Use digestive biscuits instead of graham crackers for a different flavor.
– Swap the unsweetened coconut with crushed nuts for a crunch.
– If you don’t have key limes, regular limes work too. Just know they are less tart!
– For a lighter version, use reduced-fat cream cheese.
Recommended Tools for Preparation
Having the right tools makes cooking easier. Here’s what you need:
– 9×9-inch square baking dish for the bars.
– Large mixing bowl for combining crust ingredients.
– Electric mixer for creamy filling.
– Measuring cups and spoons for precise amounts.
– Spatula for spreading the filling evenly.
– Plastic wrap to cover and chill the bars.
These tools help you create your delicious no-bake key lime pie bars with ease!
Step-by-Step Instructions
Preparing the Crust
First, gather your ingredients for the crust. You will need graham cracker crumbs, shredded coconut, melted butter, and granulated sugar.
1. In a large mixing bowl, combine:
– 1 ½ cups graham cracker crumbs
– ½ cup unsweetened shredded coconut
– ½ cup unsalted butter, melted
– 1/3 cup granulated sugar
2. Mix these ingredients well until you have a crumbly mixture.
3. Next, take a 9×9-inch baking dish. Press the crumb mixture evenly into the bottom.
4. Use the back of a measuring cup to compact it firmly.
5. Refrigerate the crust while you make the filling. This helps it set up nicely.
Making the Key Lime Filling
Now, let’s make the key lime filling. You will need softened cream cheese, powdered sugar, fresh key lime juice, lime zest, and vanilla extract.
1. In another bowl, beat 2 (8 oz) packages of softened cream cheese with an electric mixer. Mix for about 2 minutes until smooth and creamy.
2. Gradually add in 1 cup of powdered sugar. Continue to beat until well combined.
3. Now, add ½ cup of fresh key lime juice, the zest of 2 limes, and 1 teaspoon of vanilla extract.
4. Mix everything until it is fully combined and creamy.
Assembling and Chilling the Pie Bars
It’s time to assemble your delicious bars!
1. Pour the key lime filling over the prepared crust.
2. Spread it evenly using a spatula.
3. Cover the baking dish with plastic wrap.
4. Refrigerate for at least 4 hours or until set.
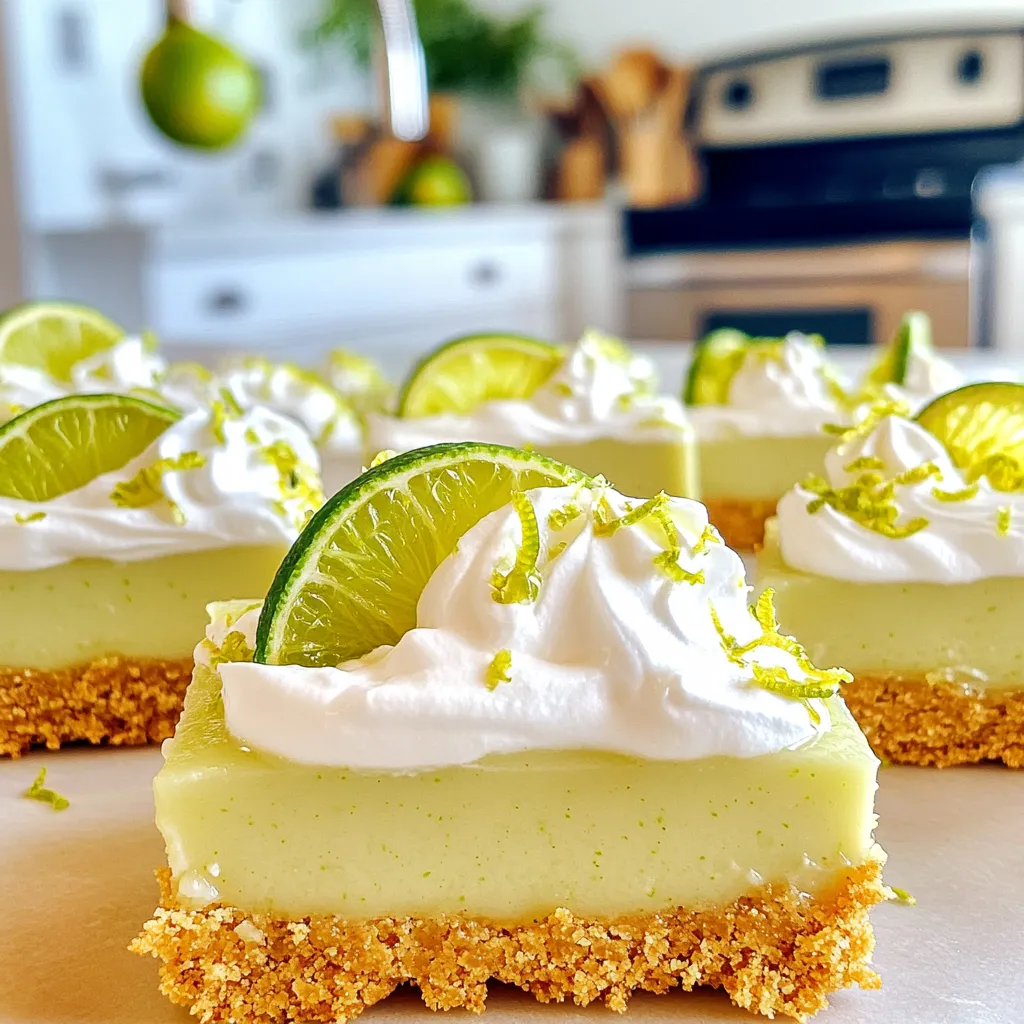
5. When ready, remove from the fridge and cut into bars.
6. Top each bar with whipped cream and garnish with lime slices and additional zest.
This process is simple and leads to a tasty treat. Enjoy your no-bake key lime pie bars!
Tips & Tricks
Best Practices for a Creamy Filling
To get a smooth filling, use softened cream cheese. Leave it out for an hour before mixing. This helps it blend well. Use a mixer on medium speed for about two minutes. This makes it light and fluffy. Slowly add powdered sugar to avoid lumps. Mix until it’s creamy and smooth. Finally, add fresh key lime juice and zest. This adds a bright flavor.
How to Achieve the Perfect Crust
For a tasty crust, use fresh graham cracker crumbs. You can crush them by hand or in a food processor. Mix these crumbs with melted butter and sugar. This mix should feel like wet sand. Press it firmly into your baking dish. Use the back of a measuring cup to pack it tight. This helps the crust hold together. Don’t forget to chill the crust before adding the filling. This helps keep it firm.
Serving Suggestions and Presentation Ideas
When serving, cut the bars into even squares. This makes them easy to grab. Top each bar with a dollop of whipped cream. A sprinkle of lime zest adds color and flavor. You can also add a lime slice on top. This looks pretty and fresh. Serve these bars cold for the best taste. Enjoy them at parties or casual get-togethers. They are sure to impress your guests!
Variations
Different Flavor Options (e.g., Mango, Coconut)
You can switch up the flavor of your key lime pie bars. Mango adds a tropical twist. Use fresh mango puree in place of key lime juice. This makes a sweet and fruity treat. Coconut is another great option. Just add more shredded coconut to the filling. You can also use coconut cream for a richer taste. Get creative! Mix and match flavors to find your favorite.
Gluten-Free Version
Making gluten-free key lime pie bars is easy. Simply swap graham cracker crumbs for gluten-free ones. You can find gluten-free graham crackers in stores. If you can’t find them, use almond flour or crushed gluten-free cookies. These options work well and taste great. Your friends and family will love these bars, and they will never know they are gluten-free!
Vegan Adaptations
If you want a vegan version, I have you covered. Replace cream cheese with vegan cream cheese. Use coconut cream or cashew cream for a plant-based filling. For the crust, use vegan butter or coconut oil instead of regular butter. These swaps make the recipe completely dairy-free. You still get that creamy texture and zesty flavor. Enjoy your vegan key lime pie bars guilt-free!
Storage Info
How to Store Leftovers
To store your leftover no-bake key lime pie bars, keep them in the fridge. Place the bars in an airtight container. If you don’t have one, cover the dish tightly with plastic wrap. This keeps the bars fresh and tasty. They will stay good for about 3 to 5 days. Always ensure they are cool before covering to prevent condensation.
Freezing Instructions
You can freeze these key lime pie bars for later. Cut them into individual pieces first. Wrap each bar in plastic wrap and place them in a freezer-safe bag. Make sure to remove as much air as possible. They can last for up to 2 months in the freezer. When you’re ready to eat, thaw them in the fridge overnight.
Shelf Life Tips
For the best taste, eat the bars within 5 days if stored in the fridge. If you freeze them, eat within 2 months for the best flavor. Always check for any signs of spoilage before serving. If they smell off or have an unusual texture, it’s best to toss them. Enjoy these bars while they are fresh for the best key lime flavor!
FAQs
Can I use regular limes instead of key limes?
Yes, you can use regular limes. Key limes are smaller and have a unique taste. They bring a tart and sweet flavor. Regular limes will work but may change the taste slightly. If you want a true key lime flavor, stick with key limes.
How long do these bars last in the fridge?
These bars last about five days in the fridge. Keep them covered to prevent drying out. The longer they sit, the more the flavors blend. This can make them even better!
Can I make these bars ahead of time?
Absolutely! These bars are great for making ahead. You can prepare them a day or two before serving. Just keep them in the fridge. They will be ready when you are!
In this article, we explored key lime pie bars, covering all the essential ingredients and tools. You learned step-by-step how to prepare the crust and filling, along with tips for the perfect texture and presentation. We also discussed tasty variations and proper storage methods to keep your bars fresh. Remember, you can always switch flavors or adapt for dietary needs. Enjoy making these delicious treats and sharing them with family and friends. Your baking journey can be fun and rewarding!