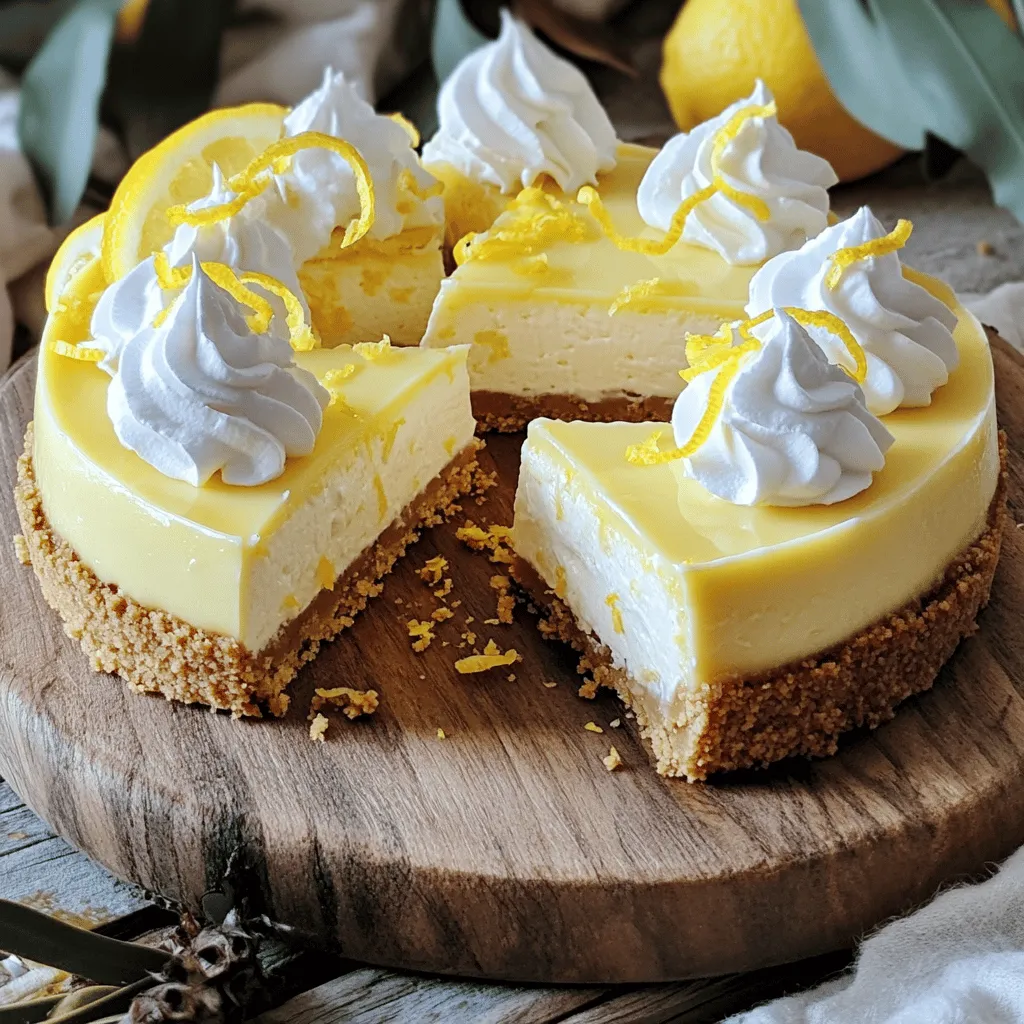
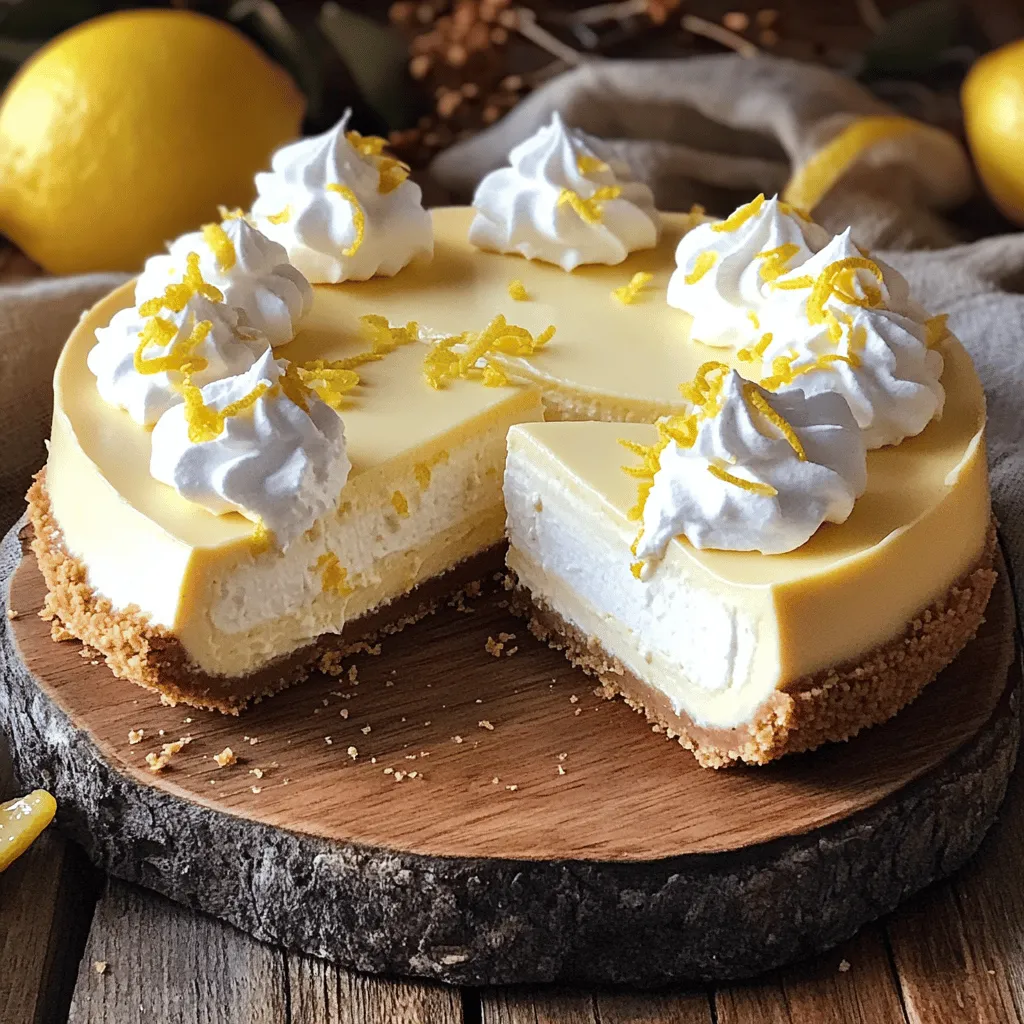
Welcome to your next favorite dessert: No Bake Lemon Cheesecake! This simple and delightful treat is perfect for any occasion. You won’t need to turn on the oven, making it a breeze to prepare. With bright lemon flavor and a creamy texture, your taste buds will thank you. Ready to impress your friends and family? Let’s dive into the easy steps and essential tips to create this tasty cheesecake!
Ingredients
Essential Ingredients for No Bake Lemon Cheesecake
To make a delicious no bake lemon cheesecake, you will need the following ingredients:
– 1 ½ cups graham cracker crumbs
– ½ cup unsalted butter, melted
– 2 cups cream cheese, softened
– 1 cup powdered sugar
– 1 cup heavy whipping cream
– 1/4 cup fresh lemon juice
– Zest of 2 lemons
– 1 teaspoon vanilla extract
– Pinch of salt
These ingredients create a creamy, tangy filling with a crunchy crust. The graham cracker crumbs give the cheesecake its base, while the cream cheese adds richness. Fresh lemon juice and zest bring bright flavor to each bite.
Recommended Tools and Equipment
You will need a few simple tools to make this cheesecake. Here’s what I recommend:
– 9-inch springform pan
– Mixing bowls
– Electric mixer
– Rubber spatula
– Measuring cups and spoons
– Plastic wrap
These tools help you mix, whip, and assemble your cheesecake easily. A springform pan is key because it allows you to remove the cheesecake without breaking it.
Substitutions and Alternatives
If you want to tweak the recipe, you can try these substitutions:
– Use gluten-free graham crackers for a gluten-free crust.
– Swap cream cheese for vegan cream cheese for a dairy-free option.
– Substitute fresh lemon juice with lime juice for a different citrus flavor.
– Use granulated sugar instead of powdered sugar if that’s what you have on hand.
These alternatives let you customize your cheesecake to fit your taste or dietary needs.
Step-by-Step Instructions
Preparing the Crust: Mixing and Pressing
To start, get a mixing bowl. In it, combine 1 ½ cups of graham cracker crumbs with ½ cup of melted butter. Mix well until the crumbs look wet and sticky. This step is key for a tasty crust.
Next, grab a 9-inch springform pan. Pour the graham mixture into the pan. Press the crumbs down firmly using your hands or the bottom of a glass. This will help form a nice, even layer. Once you finish, put the pan in the fridge while you prepare the filling.
Making the Filling: Creaming and Flavors
For the filling, take a large bowl and add 2 cups of softened cream cheese. Using an electric mixer, beat it until smooth and creamy. This will take about 2 minutes.
Now, slowly add 1 cup of powdered sugar. Keep mixing until it is well combined. You want it to be sweet but not too sweet.
Next, add 1/4 cup of fresh lemon juice, the zest of 2 lemons, 1 teaspoon of vanilla extract, and a pinch of salt. Mix again until everything is blended well. The lemon will give it that bright flavor we love!
Assembling and Chilling the Cheesecake
In a separate bowl, whip 1 cup of heavy cream until you see stiff peaks. This will make the cheesecake light and fluffy.
Now, gently fold the whipped cream into the lemon cream cheese mixture. Make sure there are no streaks left. This step is important for a smooth filling.
Once combined, pour the filling over the crust in the springform pan. Use a spatula to smooth the top. Cover the cheesecake with plastic wrap and place it in the fridge. Let it chill for at least 4 hours or until it sets.
When it’s ready, carefully remove the cheesecake from the pan. Slice it up and enjoy your no bake lemon cheesecake delight!
Tips & Tricks
Achieving the Perfect Consistency
To get the best texture for your no bake lemon cheesecake, use room-temperature cream cheese. Cold cream cheese can make lumps in your filling. Beat it until it’s smooth before adding other ingredients. When you whip the cream, stop once you see stiff peaks. This makes the filling light and fluffy. Gently fold the whipped cream into the cream cheese mix. This keeps air in the filling, making it creamy.
Common Mistakes to Avoid
One common mistake is overmixing the filling. If you mix too much after adding the whipped cream, it can deflate. Another mistake is not chilling the cheesecake long enough. It needs at least four hours to set properly. Skipping the step of pressing the crust firmly can lead to a crumbly base. Always ensure the crust is compact for a good slice.
Serving Suggestions to Impress Guests
To impress your guests, garnish each slice with whipped cream and a sprinkle of lemon zest. You can also add fresh berries on top for color. Serve with a side of lemon curd for extra flavor. A nice touch is to place slices on decorative plates. This makes serving feel special. For a fun twist, pair each slice with a sparkling lemon drink. It adds a refreshing touch to your dessert table.
Variations
Flavor Variations: Try Different Citrus Fruits
You can easily switch up the flavor of your no bake lemon cheesecake. Instead of lemon, try lime or orange. Each fruit brings a unique taste. Lime gives a sharp twist, while orange offers a sweet note. Use the same amount of juice and zest as in the original recipe. This small change can create a whole new dessert.
Dietary Options: Vegan and Gluten-Free Adaptations
If you need vegan options, swap the cream cheese for a dairy-free alternative. Use cashew cream or coconut cream instead. For the crust, choose gluten-free graham crackers or crushed nuts. These simple swaps keep the flavor while fitting your diet. You can still enjoy a creamy, delicious treat without dairy.
Toppings and Garnishes to Enhance Flavor
Toppings can make your cheesecake even more delightful. Consider adding fresh berries on top. Strawberries or blueberries look beautiful and taste great. You can also drizzle a bit of honey or maple syrup for extra sweetness. A sprinkle of toasted coconut adds a nice crunch. These toppings not only enhance the taste but also make your cheesecake look stunning.
Storage Info
How to Store Leftover Cheesecake
To keep your No Bake Lemon Cheesecake fresh, wrap it well. Use plastic wrap or foil. Store it in the fridge for up to five days. Make sure to keep it covered to avoid drying out. If you have leftovers, slice them for easy serving. This way, you can grab a piece whenever you want.
Freezing Tips for Long-Term Storage
If you want to save your cheesecake for later, freezing is a great option. First, let the cheesecake chill completely in the fridge. Once set, wrap it tightly in plastic wrap. Then, add a layer of aluminum foil. This keeps the air out and prevents freezer burn. You can freeze it for up to three months.
Best Practices for Thawing
When you’re ready to enjoy your frozen cheesecake, move it to the fridge. Let it thaw overnight for the best texture. Avoid thawing at room temperature, as this can make it runny. Once fully thawed, you can slice and serve. For an added touch, top each slice with whipped cream and lemon zest. Enjoy your delightful treat!
FAQs
Can I make No Bake Lemon Cheesecake ahead of time?
Yes, you can make this cheesecake a day in advance. In fact, it tastes even better after chilling overnight. Just prepare it as usual and let it set in the fridge. This makes it a great option for parties or special meals. The flavors will mix well, and the texture will be perfect when you serve it.
How do I know when the cheesecake is set?
Check the cheesecake after four hours of chilling. It should feel firm to the touch. Gently press the center with your finger. If it holds its shape, it is ready. If it feels soft, give it a little more time in the fridge. The outer edges may set faster than the middle, so let it chill longer if needed.
What can I serve with No Bake Lemon Cheesecake?
You can serve many tasty things with this cheesecake. Fresh berries like strawberries or blueberries add color and flavor. You can also use a drizzle of berry sauce for a sweet touch. Whipped cream is another great option. A sprig of mint can give a nice finish too. Each of these choices will enhance the dessert’s lemony taste.
You learned how to make a no-bake lemon cheesecake with essential ingredients and tools. Following the steps for crust, filling, and assembly ensures success. Remember tips like achieving the right consistency and avoiding common mistakes. Variations allow you to explore new flavors and dietary options. Store leftovers properly and know when it’s time to freeze. With these insights, you can impress with your cheesecake skills. Enjoy every bite and share your tasty creation!


