No Bake Maple Pumpkin Pie Cups Delicious Fall Treat

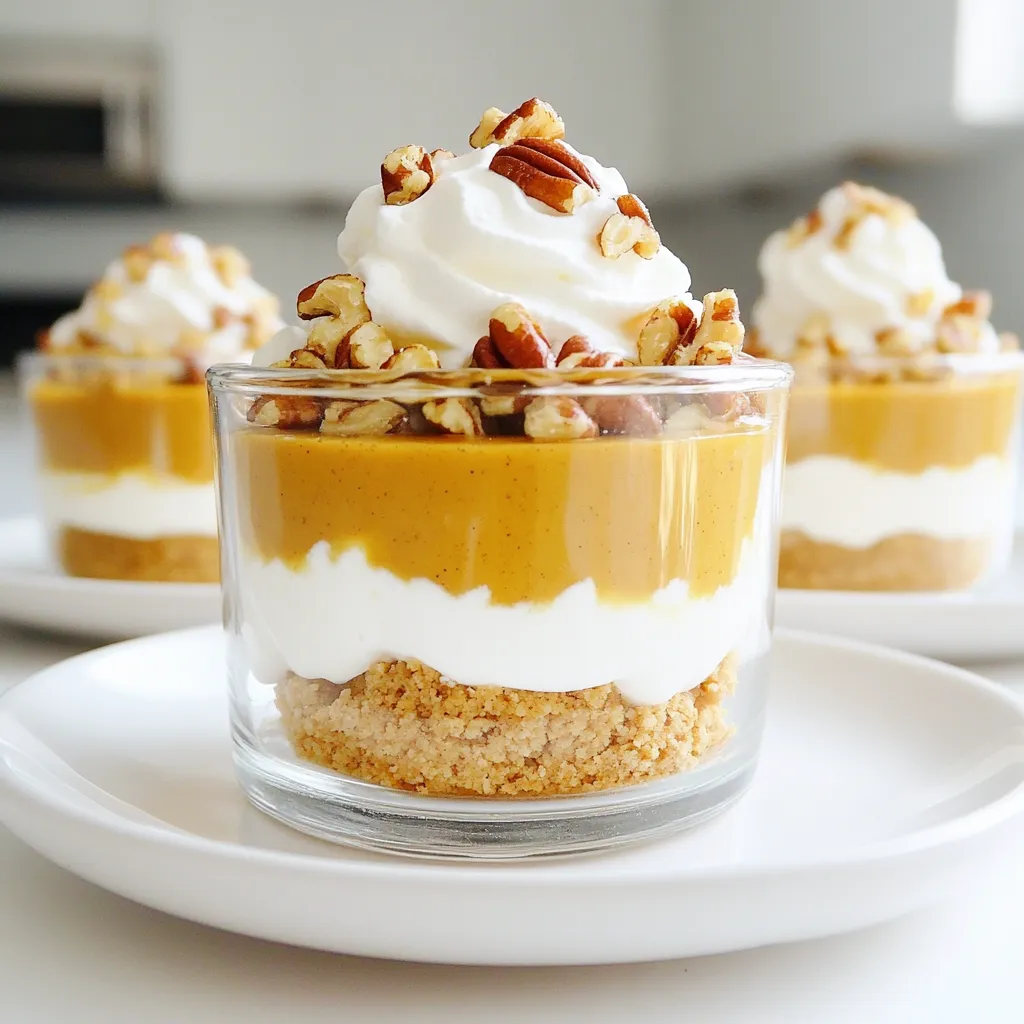
Fall is here, and that means it’s time for pumpkin treats! Today, I’ll show you how to make No Bake Maple Pumpkin Pie Cups. This quick and easy recipe combines creamy pumpkin filling with a crumbly graham cracker crust. You won’t even need to turn on the oven! Perfect for a sweet snack or a special dessert, these cups will impress everyone. Let’s dive into the delicious details!
Ingredients
To make No Bake Maple Pumpkin Pie Cups, you need the following ingredients:
– 1 cup pumpkin puree
– 1/2 cup Greek yogurt
– 1/4 cup maple syrup
– 1 teaspoon vanilla extract
– 1 teaspoon ground cinnamon
– 1/2 teaspoon ground ginger
– 1/4 teaspoon ground nutmeg
– 1/4 teaspoon salt
– 1 cup crushed graham crackers
– 1/4 cup unsalted butter, melted
– Whipped cream, for topping
– Chopped pecans or walnuts, for garnish
These simple ingredients come together to create a delicious fall treat. Pumpkin puree gives a smooth texture and rich flavor. Greek yogurt adds creaminess and a bit of tang. Maple syrup brings sweetness that perfectly matches the spices. Vanilla extract adds depth to the filling.
I use ground spices like cinnamon, ginger, and nutmeg for warmth. They remind me of cozy fall days. The crushed graham crackers mixed with melted butter form a tasty crust. This base gives a nice crunch to each bite.
Whipped cream on top makes it feel like a special dessert. A sprinkle of chopped nuts adds a little crunch and a nutty flavor. These ingredients work together to create a delightful treat you can enjoy anytime in the fall!
Step-by-Step Instructions
Preparation of the Crust
To start, gather your graham crackers and unsalted butter.
– In a medium bowl, mix 1 cup of crushed graham crackers with 1/4 cup of melted butter.
– Stir until all crumbs are coated with butter.
Next, take your small dessert cups or mason jars.
– Spoon the graham cracker mixture into the bottom of each cup.
– Press down firmly to form a solid crust. This step gives your cups a nice base.
Making the Pumpkin Filling
Now, we move to the filling.
– In another bowl, whisk together 1 cup of pumpkin puree and 1/2 cup of Greek yogurt.
– Add 1/4 cup of maple syrup, 1 teaspoon of vanilla extract, 1 teaspoon of ground cinnamon, 1/2 teaspoon of ground ginger, 1/4 teaspoon of ground nutmeg, and 1/4 teaspoon of salt.
Mix it well until it’s smooth and creamy. The spices and maple syrup will add great flavor.
Assembling the Cups
With your crust and filling ready, it’s time to assemble.
– Spoon the pumpkin filling over the graham cracker crust in each cup.
– Use the back of a spoon to smooth the top. This makes it look nice and neat.
Chilling the Cups
Now, cover your cups with plastic wrap.
– Place them in the fridge for at least 2 hours.
– This time lets the flavors blend and the filling firm up.
Chilling is key for a great texture.
Final Presentation
When you’re ready to serve, take the cups out of the fridge.
– Top each cup with a dollop of whipped cream.
– Finish with a sprinkle of chopped pecans or walnuts for crunch.
This adds a lovely touch and makes your cups even more delicious. Enjoy the fall flavors!
Tips & Tricks
Using Fresh vs. Canned Pumpkin
Using fresh pumpkin gives a rich taste. It has bright color and flavor. Canned pumpkin is easy and quick. It is also very consistent.
To make homemade pumpkin puree, start with a sugar pumpkin. Cut it in half and scoop out the seeds. Bake the halves at 350°F for about 45 minutes. When soft, scoop the flesh into a bowl and mash it. This puree works great in your pie cups.
Achieving the Perfect Texture
Mix the filling well but don’t overbeat. A smooth blend is key. If you beat too hard, it can become too airy.
For a crumbly crust, make sure the butter fully coats the graham crumbs. Press down firmly in the cups. This helps it hold shape when you spoon in the filling.
Presentation Tips
Serve these cups in clear jars or small glasses. It shows off the pretty layers. You can use dessert cups too.
For topping, add a swirl of whipped cream. Chopped pecans or walnuts give nice crunch. Try a sprinkle of cinnamon for extra flair.

Variations
Adding Flavor Variations
You can tweak this recipe to fit your taste. For sweeteners, try using honey or agave syrup instead of maple syrup. Both options add a unique twist. You can also change the flavor profile with vanilla bean or chocolate. Adding these will make the cups even more special.
Dietary Adjustments
If you need gluten-free options, swap graham crackers for almond flour or gluten-free cookies. This keeps the crust tasty and safe for all. For those who want dairy-free cups, use coconut yogurt instead of Greek yogurt. This keeps the creamy texture while fitting dietary needs.
Serving Suggestions
These pumpkin pie cups shine at any gathering. They pair well with apple crisp or vanilla ice cream. Serve them at Thanksgiving or fall parties for a festive touch. For a fun presentation, use mason jars and decorate them with twine or ribbons.
Storage Info
How to Store Leftovers
To keep your No Bake Maple Pumpkin Pie Cups fresh, use airtight containers. Glass or plastic containers work well. Make sure to seal them tightly. This helps keep the flavors intact and prevents any drying out. Store the cups in the fridge for up to three days. Before serving, check for freshness.
Freezing Options
You can freeze these cups before or after chilling. If freezing before chilling, layer the filling over the crust and cover well. If you freeze after chilling, let them sit at room temp for 10 minutes before serving. To thaw, place the cups in the fridge overnight. This keeps the texture smooth and tasty. Enjoy them later without losing flavor!
FAQs
Can I use fresh pumpkin instead of canned?
Yes, you can use fresh pumpkin. Fresh pumpkin gives a lovely taste. However, it takes more time to prepare. Canned pumpkin is quick and easy. It also has a consistent flavor. If you choose fresh, cook the pumpkin until soft. Then, blend it until smooth.
How long can I keep these cups in the fridge?
You can keep these cups in the fridge for up to 4 days. Make sure to cover them tightly. This keeps them fresh and tasty. The flavors will blend more over time. Just remember, the whipped cream is best added right before serving.
What can I substitute for Greek yogurt?
If you need a substitute for Greek yogurt, try these options:
– Regular yogurt
– Sour cream
– Silken tofu for a dairy-free option
– Unsweetened coconut yogurt for a vegan choice
Each option has a different taste and texture, so choose based on your needs.
How can I make this recipe healthier?
To make this recipe healthier, you can:
– Use less maple syrup or replace it with a natural sweetener like stevia.
– Swap Greek yogurt with a low-fat or non-fat version.
– Use whole grain graham crackers for extra fiber.
– Add more spices, like nutmeg or cloves, for flavor without extra sugar.
These small changes can help reduce sugar and fat content while keeping it delicious.
In this post, we explored a tasty dessert: pumpkin cups. We covered the ingredients, including pumpkin puree and Greek yogurt. Then, we outlined easy steps to prepare the crust and filling. We shared tips on using fresh or canned pumpkin and how to present your dessert.
Remember, you can customize flavors and adjust for dietary needs. With the right storage, enjoy these treats for days. Now, you have all you need to impress at your next gathering with this delightful dessert!


![To make these vegan chocolate chip cookies, you will need a few key ingredients. Each one plays a special role in creating the perfect texture and flavor. Here’s the list of ingredients: - 1 cup almond flour - 1 cup all-purpose flour - 1/2 teaspoon baking soda - 1/2 teaspoon baking powder - 1/4 teaspoon salt - 1/2 cup coconut sugar - 1/2 cup maple syrup - 1/3 cup coconut oil, melted - 1 teaspoon vanilla extract - 1/2 cup vegan chocolate chips - 1/4 cup chopped walnuts (optional) Almond flour adds a nice, nutty flavor and keeps the cookies soft. All-purpose flour gives the cookies structure. Baking soda and baking powder help them rise. Coconut sugar sweetens the cookies while adding a hint of caramel flavor. Maple syrup adds moisture and sweetness. Coconut oil gives a lovely richness and helps with texture. Vanilla extract enhances the flavor of the chocolate chips. Vegan chocolate chips are a must for that classic taste. If you like nuts, walnuts add a crunchy touch. For the full recipe, follow the instructions carefully, and you’ll create cookies that everyone will love! 1. Preheating the oven First, set your oven to 350°F (175°C). This step helps the cookies bake evenly. While the oven heats, get your baking sheet ready by lining it with parchment paper. 2. Mixing dry ingredients In a big bowl, combine the almond flour, all-purpose flour, baking soda, baking powder, and salt. Use a whisk to blend them well. This ensures the leavening agents work when baking. 3. Combining wet ingredients In another bowl, mix the melted coconut oil, coconut sugar, maple syrup, and vanilla extract. Stir until it looks smooth. This mixture brings sweetness and flavor to your cookies. 1. Mixing wet and dry ingredients Pour the wet mix into the dry mix. Stir until no flour streaks show. The dough should be slightly sticky. This texture helps the cookies hold together. 2. Folding in chocolate chips and walnuts Gently fold in the vegan chocolate chips and walnuts if you choose to use them. Make sure they are evenly spread throughout the dough. This adds a delightful crunch and flavor. 1. Shaping the cookies Scoop tablespoon-sized portions of the dough. Roll them into balls and place them on your prepared baking sheet, leaving space between each ball. They will spread as they bake. 2. Baking time and tips for doneness Press each ball down gently with your palm to flatten it a bit. Bake for 10 to 12 minutes. Look for lightly golden edges. The cookies will seem soft but will firm up as they cool. Enjoy the aroma wafting through your kitchen! For the complete recipe, check out the Full Recipe. To get the best texture, start with room-temperature ingredients. When your coconut oil is melted but not hot, it blends well. Cold ingredients can lead to uneven mixing and odd textures. Use baking soda for a nice spread and chewiness. Baking powder adds lift but may make cookies puffier. You want a balance, so stick with 1/2 teaspoon of each, as this recipe suggests. To make your cookies pop, think about adding extracts or spices. A little cinnamon or a dash of nutmeg can elevate the flavor. You can also try almond or orange extract for a fun twist! If you're feeling adventurous, swap out chocolate chips. Try peanut butter chips, white chocolate, or even dried fruit. Each choice brings a new taste to the classic cookie. If your cookies spread too much, check your oven temperature. An oven that runs hot can cause this problem. You can also chill the dough for about 30 minutes before baking. This helps the dough hold its shape better. For cookies that are too crumbly, make sure to measure your flour correctly. Too much flour can lead to a dry texture. Add a small splash of almond milk to bring the dough together if needed. {{image_2}} If you want a gluten-free version of these cookies, you can use different flours. Try using all almond flour or a mix of almond and oat flour. You can also use a gluten-free flour blend. This keeps the texture nice and soft while making it safe for those with gluten sensitivities. Switching up the chocolate chips can bring new life to your cookies. You can use dark chocolate chips, white chocolate chips, or even peanut butter chips. You can also add fruits like dried cranberries or chopped bananas for a twist. If you enjoy nuts, consider adding chopped pecans or hazelnuts for a crunchy bite. Get creative with seasonal flavors! For fall, try adding pumpkin spice to the dough. This gives your cookies a warm and cozy taste. During the holidays, consider using peppermint extract or festive sprinkles. You can even shape the cookies into fun holiday designs. This makes them a perfect treat for any celebration! For the full recipe, check out the [Full Recipe]. To keep your vegan chocolate chip cookies fresh, store them in an airtight container. This method helps retain moisture and keeps them soft. You can place a slice of bread in the container to absorb any excess air. This trick works wonders for keeping cookies fresh longer. If you plan to eat them in a few days, simply store them at room temperature. For longer storage, freezing cookies is a great choice. Let the cookies cool completely before freezing. Place them in a single layer on a baking sheet. Once frozen solid, transfer them to a freezer-safe bag or container. Label the bag with the date. Frozen cookies can last up to three months. When you crave a treat, just pull one out and let it thaw. To enjoy leftover cookies, reheating is key. Preheat your oven to 350°F (175°C). Place the cookies on a baking sheet and warm for about 5 to 8 minutes. This will restore their soft, gooey texture. Alternatively, you can microwave them for 10-15 seconds. Just be careful not to overheat, or they may get tough. Enjoy every bite of those delicious cookies! Can I use regular flour instead of almond flour? Yes, you can use regular flour. However, almond flour adds a nice nutty taste. It also makes the cookies moist. If you swap it out, use a little less all-purpose flour. How long do these cookies last? These cookies can last up to a week in an airtight container. If you want them fresher, store them in the fridge. You can also freeze them for up to three months. Can I substitute maple syrup with another sweetener? Yes, you can use agave syrup or brown sugar. Both will work well. Just remember, each sweetener has its own taste and may change the cookie's texture a bit. What can I use instead of coconut sugar? You can use brown sugar or cane sugar as a substitute. Coconut sugar has a rich flavor, but the others will work in a pinch. Just keep in mind the sweetness level might change slightly. Do I need to chill the dough before baking? No, chilling the dough is not necessary. Chilling can help if you want thicker cookies. But for these cookies, you can bake them right after mixing. Can I add additional toppings to these cookies? Absolutely! You can add nuts, dried fruit, or even more chocolate chips. Feel free to get creative and experiment with flavors. You can create delicious vegan chocolate chip cookies with simple steps and great ingredients. We covered how to mix your dry and wet items, shape your cookies, and bake them perfectly. I shared tips for the best texture and flavor, along with common issues you might face. You now have options for gluten-free variations and how to store your cookies. Bake these cookies and enjoy every bite!](https://dailydishly.com/wp-content/uploads/2025/07/ef525e3c-3cc1-498f-b5ee-30e7bbeeb1ea-768x768.webp)


