No-Bake Peanut Butter Cup Pie Easy and Delicious Dessert

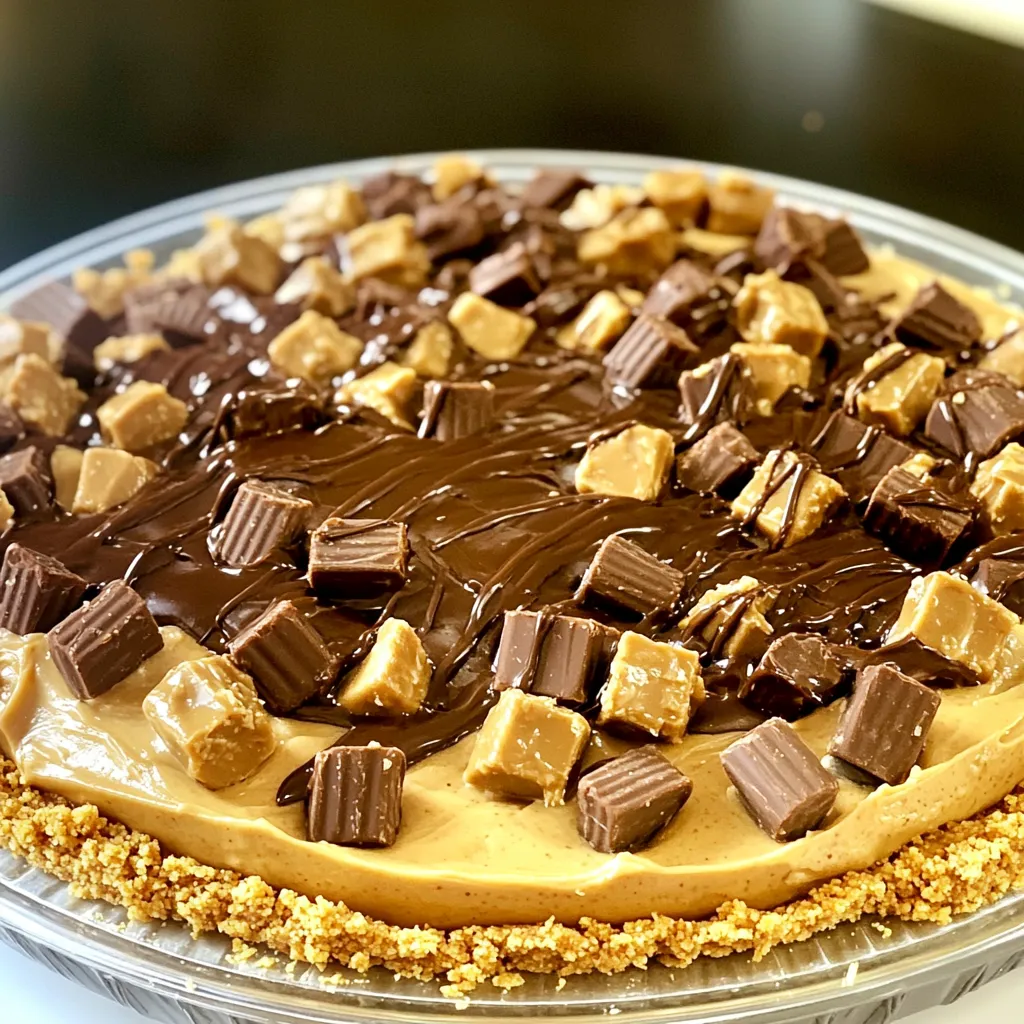
Looking for a quick and tasty dessert? This No-Bake Peanut Butter Cup Pie is your answer! With just a few simple ingredients like creamy peanut butter, graham cracker crumbs, and whipped cream, you can whip up a crowd-pleasing treat in no time. Say goodbye to ovens and complicated recipes. Join me as I share easy steps, helpful tips, and fun variations for this delicious pie that everyone will love!
Ingredients
To make the No-Bake Peanut Butter Cup Pie, you will need the following ingredients:
– 1 ½ cups graham cracker crumbs
– ½ cup unsalted butter, melted
– 1 cup creamy peanut butter
– 1 cup powdered sugar
– 8 oz cream cheese, softened
– 1 tsp vanilla extract
– 1 cup whipped cream (or whipped topping)
– 6-8 mini peanut butter cups, chopped (plus extra for garnish)
– Chocolate sauce for drizzling
Each ingredient plays a key role in crafting a rich and creamy pie. The graham cracker crumbs create a crunchy base. Unsalted butter helps bind the crumbs together. Creamy peanut butter gives the pie its signature flavor. Powdered sugar adds sweetness and smoothness to the filling. Cream cheese makes the filling rich and creamy. Vanilla extract enhances the overall taste. Whipped cream lightens the texture. Mini peanut butter cups add fun bites of chocolate. Finally, chocolate sauce gives a beautiful finish.
Gather your ingredients before starting. This makes the process smooth and fun.
Step-by-Step Instructions
Preparing the Crust
To start, gather your ingredients. In a medium bowl, combine 1 ½ cups of graham cracker crumbs with ½ cup of melted butter. Mix until it looks like wet sand. Next, press this mixture tightly into the bottom and sides of a 9-inch pie plate. Make sure it’s even. Now, chill the crust in the fridge for at least 15 minutes. This helps it set and hold its shape.
Making the Filling
Now, let’s make the filling. In a large mixing bowl, beat together 1 cup of creamy peanut butter, 1 cup of powdered sugar, 8 oz of softened cream cheese, and 1 tsp of vanilla extract. Mix until you achieve a smooth texture with no lumps. This step is key for a creamy pie.
Assembling the Pie
It’s time to assemble the pie! Gently fold in 1 cup of whipped cream into the peanut butter mixture. Be careful not to deflate the whipped cream; we want a light texture. After that, fold in 6-8 chopped mini peanut butter cups. This adds a nice crunch and flavor.
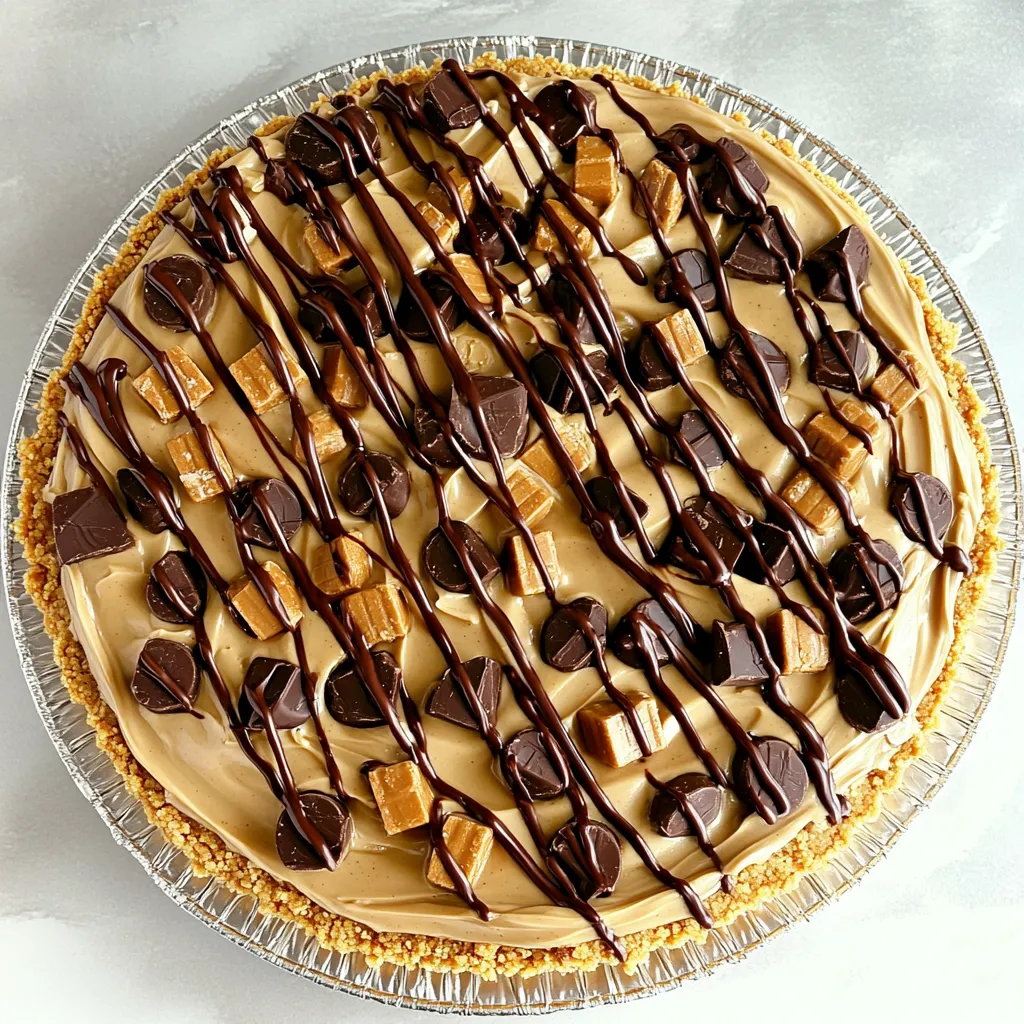
Next, pour the peanut butter filling into the chilled crust. Smooth the top with a spatula for a nice finish. Now, cover the pie with plastic wrap and place it in the fridge. Chill for at least 4 hours or overnight for the best results. Before serving, drizzle chocolate sauce over the top and add extra chopped peanut butter cups for garnish. Enjoy your delicious creation!
Tips & Tricks
Techniques for a Perfect Crust
To avoid a crumbly crust, mix the graham cracker crumbs and melted butter well. You want it to feel like wet sand. Press this mixture tightly into your pie plate. This helps it hold together when you slice it. Chill the crust for at least 15 minutes. This step makes it firm and ready for filling.
For even butter distribution, drizzle the melted butter slowly into the crumbs. Use a fork to mix it in. This ensures every crumb gets coated. If you skip this, some areas may crumble when you cut the pie.
Achieving the Best Texture
Folding in whipped cream is key to a light pie. Gently add the whipped cream to the peanut butter mix. Use a spatula and make slow, sweeping motions. This keeps the air in the whipped cream and gives your pie a nice lift.
Avoid overmixing after you fold in the whipped cream. Overmixing can make the pie dense. You want a fluffy texture, so mix just until you see no streaks.
Serving Suggestions
For a stunning presentation, smooth the top of the pie with a spatula. Drizzle chocolate sauce over the top for a nice finish. You can also sprinkle extra chopped peanut butter cups for a fun look.
Pair the pie with toppings like whipped cream or chocolate shavings. These add more flavor and make it look extra special. Enjoy your pie with a side of fresh fruit for a refreshing touch.

Variations
Flavor Variations
You can easily change the flavor of your pie. Adding chocolate pudding makes it richer. Simply layer it under the peanut butter filling. Another fun twist is using different nut butters. Almond or cashew butter gives a unique taste. Each nut butter adds its own fun twist. Try them all and find your favorite!
Crust Alternatives
If you want to make this pie gluten-free, use gluten-free graham crackers. They work just like regular ones. You can also use cookie crusts, like Oreos. Crush them and mix with melted butter. This gives the pie an extra chocolatey kick. It’s a great way to switch it up!
Seasonal Variations
You can make this pie special for the seasons. In fall, add a hint of pumpkin spice. In summer, top it with fresh berries. For the holidays, use festive garnishes like crushed candy canes or seasonal sprinkles. These little changes keep the pie fun and fresh all year round!
Storage Info
Best Practices for Refrigeration
To keep your no-bake peanut butter cup pie fresh, you need to cover it well. Use plastic wrap to cover the pie tightly. This helps to keep it from drying out. You can also use a pie keeper if you have one. Store it in the fridge, where it will stay good for 3 to 5 days.
Chilling time is key for this pie. I recommend chilling it for at least 4 hours. For the best taste and texture, chill it overnight. This allows the flavors to blend and the filling to set properly.
Freezing Instructions
Yes, you can freeze no-bake peanut butter cup pie! Freezing is a great way to save extra pie for later. To freeze, wrap it tightly in plastic wrap and then foil. This prevents freezer burn. You can freeze it for up to 2 months.
When you are ready to enjoy your pie, take it out of the freezer. Put it in the fridge for a few hours to thaw. For best results, let it thaw overnight. After it’s soft, you can slice and serve. Drizzle with chocolate sauce for a tasty touch!
FAQs
How long does the pie need to chill?
The pie needs to chill for at least 4 hours. This step allows the filling to set properly. If you want the best texture, chill it overnight. This gives the flavors time to blend well. Your pie will be firmer and easier to slice after a long chill.
Can I use crunchy peanut butter instead?
Yes, you can use crunchy peanut butter. This will change the texture of your pie. You will get a nice crunch in every bite. The flavor will stay rich and delicious. It may also give your pie a more rustic look.
What can I substitute for cream cheese?
You can use Greek yogurt or silken tofu as a substitute. Both options will lighten the pie. Greek yogurt adds a tangy taste, while silken tofu keeps it mild. These swaps can make your dessert healthier and still tasty.
This blog post guides you through making a delicious no-bake peanut butter cup pie. We covered the key ingredients, step-by-step instructions, and helpful tips to ensure your pie turns out perfect every time. Remember, choosing the right crust and technique can make all the difference. Feel free to explore variations and customize this dessert to suit your taste. By following these steps, you’ll create a treat that everyone will love. Enjoy your tasty pie and the smiles it brings!


![To make these vegan chocolate chip cookies, you will need a few key ingredients. Each one plays a special role in creating the perfect texture and flavor. Here’s the list of ingredients: - 1 cup almond flour - 1 cup all-purpose flour - 1/2 teaspoon baking soda - 1/2 teaspoon baking powder - 1/4 teaspoon salt - 1/2 cup coconut sugar - 1/2 cup maple syrup - 1/3 cup coconut oil, melted - 1 teaspoon vanilla extract - 1/2 cup vegan chocolate chips - 1/4 cup chopped walnuts (optional) Almond flour adds a nice, nutty flavor and keeps the cookies soft. All-purpose flour gives the cookies structure. Baking soda and baking powder help them rise. Coconut sugar sweetens the cookies while adding a hint of caramel flavor. Maple syrup adds moisture and sweetness. Coconut oil gives a lovely richness and helps with texture. Vanilla extract enhances the flavor of the chocolate chips. Vegan chocolate chips are a must for that classic taste. If you like nuts, walnuts add a crunchy touch. For the full recipe, follow the instructions carefully, and you’ll create cookies that everyone will love! 1. Preheating the oven First, set your oven to 350°F (175°C). This step helps the cookies bake evenly. While the oven heats, get your baking sheet ready by lining it with parchment paper. 2. Mixing dry ingredients In a big bowl, combine the almond flour, all-purpose flour, baking soda, baking powder, and salt. Use a whisk to blend them well. This ensures the leavening agents work when baking. 3. Combining wet ingredients In another bowl, mix the melted coconut oil, coconut sugar, maple syrup, and vanilla extract. Stir until it looks smooth. This mixture brings sweetness and flavor to your cookies. 1. Mixing wet and dry ingredients Pour the wet mix into the dry mix. Stir until no flour streaks show. The dough should be slightly sticky. This texture helps the cookies hold together. 2. Folding in chocolate chips and walnuts Gently fold in the vegan chocolate chips and walnuts if you choose to use them. Make sure they are evenly spread throughout the dough. This adds a delightful crunch and flavor. 1. Shaping the cookies Scoop tablespoon-sized portions of the dough. Roll them into balls and place them on your prepared baking sheet, leaving space between each ball. They will spread as they bake. 2. Baking time and tips for doneness Press each ball down gently with your palm to flatten it a bit. Bake for 10 to 12 minutes. Look for lightly golden edges. The cookies will seem soft but will firm up as they cool. Enjoy the aroma wafting through your kitchen! For the complete recipe, check out the Full Recipe. To get the best texture, start with room-temperature ingredients. When your coconut oil is melted but not hot, it blends well. Cold ingredients can lead to uneven mixing and odd textures. Use baking soda for a nice spread and chewiness. Baking powder adds lift but may make cookies puffier. You want a balance, so stick with 1/2 teaspoon of each, as this recipe suggests. To make your cookies pop, think about adding extracts or spices. A little cinnamon or a dash of nutmeg can elevate the flavor. You can also try almond or orange extract for a fun twist! If you're feeling adventurous, swap out chocolate chips. Try peanut butter chips, white chocolate, or even dried fruit. Each choice brings a new taste to the classic cookie. If your cookies spread too much, check your oven temperature. An oven that runs hot can cause this problem. You can also chill the dough for about 30 minutes before baking. This helps the dough hold its shape better. For cookies that are too crumbly, make sure to measure your flour correctly. Too much flour can lead to a dry texture. Add a small splash of almond milk to bring the dough together if needed. {{image_2}} If you want a gluten-free version of these cookies, you can use different flours. Try using all almond flour or a mix of almond and oat flour. You can also use a gluten-free flour blend. This keeps the texture nice and soft while making it safe for those with gluten sensitivities. Switching up the chocolate chips can bring new life to your cookies. You can use dark chocolate chips, white chocolate chips, or even peanut butter chips. You can also add fruits like dried cranberries or chopped bananas for a twist. If you enjoy nuts, consider adding chopped pecans or hazelnuts for a crunchy bite. Get creative with seasonal flavors! For fall, try adding pumpkin spice to the dough. This gives your cookies a warm and cozy taste. During the holidays, consider using peppermint extract or festive sprinkles. You can even shape the cookies into fun holiday designs. This makes them a perfect treat for any celebration! For the full recipe, check out the [Full Recipe]. To keep your vegan chocolate chip cookies fresh, store them in an airtight container. This method helps retain moisture and keeps them soft. You can place a slice of bread in the container to absorb any excess air. This trick works wonders for keeping cookies fresh longer. If you plan to eat them in a few days, simply store them at room temperature. For longer storage, freezing cookies is a great choice. Let the cookies cool completely before freezing. Place them in a single layer on a baking sheet. Once frozen solid, transfer them to a freezer-safe bag or container. Label the bag with the date. Frozen cookies can last up to three months. When you crave a treat, just pull one out and let it thaw. To enjoy leftover cookies, reheating is key. Preheat your oven to 350°F (175°C). Place the cookies on a baking sheet and warm for about 5 to 8 minutes. This will restore their soft, gooey texture. Alternatively, you can microwave them for 10-15 seconds. Just be careful not to overheat, or they may get tough. Enjoy every bite of those delicious cookies! Can I use regular flour instead of almond flour? Yes, you can use regular flour. However, almond flour adds a nice nutty taste. It also makes the cookies moist. If you swap it out, use a little less all-purpose flour. How long do these cookies last? These cookies can last up to a week in an airtight container. If you want them fresher, store them in the fridge. You can also freeze them for up to three months. Can I substitute maple syrup with another sweetener? Yes, you can use agave syrup or brown sugar. Both will work well. Just remember, each sweetener has its own taste and may change the cookie's texture a bit. What can I use instead of coconut sugar? You can use brown sugar or cane sugar as a substitute. Coconut sugar has a rich flavor, but the others will work in a pinch. Just keep in mind the sweetness level might change slightly. Do I need to chill the dough before baking? No, chilling the dough is not necessary. Chilling can help if you want thicker cookies. But for these cookies, you can bake them right after mixing. Can I add additional toppings to these cookies? Absolutely! You can add nuts, dried fruit, or even more chocolate chips. Feel free to get creative and experiment with flavors. You can create delicious vegan chocolate chip cookies with simple steps and great ingredients. We covered how to mix your dry and wet items, shape your cookies, and bake them perfectly. I shared tips for the best texture and flavor, along with common issues you might face. You now have options for gluten-free variations and how to store your cookies. Bake these cookies and enjoy every bite!](https://dailydishly.com/wp-content/uploads/2025/07/ef525e3c-3cc1-498f-b5ee-30e7bbeeb1ea-768x768.webp)

