
Indulge in the rich and creamy goodness of a No Bake Raspberry Chocolate Tart. With just a handful of simple ingredients, you can create a truly decadent dessert that’s perfect for any occasion. This tart features a crunchy cookie crust, smooth chocolate filling, and bursts of fresh raspberry flavor. Whether you’re hosting a dinner party or just treating yourself, this easy recipe will impress your taste buds. Let’s dive into the steps to make this delightful treat!
Ingredients
List of Ingredients
– 1 ½ cups chocolate cookie crumbs
– ½ cup unsalted butter, melted
– 1 cup dark chocolate chips
– 1 cup heavy cream
– 1 cup fresh raspberries, plus extra for garnish
– 2 tablespoons powdered sugar
– 1 teaspoon vanilla extract
– Pinch of salt
This tart is rich and creamy, perfect for any occasion. The base is made from chocolate cookie crumbs, which give a great taste and crunch. You need to melt unsalted butter to hold the crumbs together. This keeps the crust firm and tasty.
For the filling, we use dark chocolate chips. They are rich and give a deep flavor. Heavy cream is heated to help melt the chocolate. This mix creates a smooth and thick filling.
Fresh raspberries add a burst of flavor. They balance the sweet chocolate. Mashing them with powdered sugar makes a nice, chunky puree. The vanilla extract adds a warm note, and a pinch of salt enhances all the flavors.
Gather these ingredients to start your tart. Each one plays a key role in making this dessert a hit. Enjoy the mix of sweet and tart in every bite!
Step-by-Step Instructions
Preparing the Tart Crust
1. In a medium bowl, combine 1 ½ cups of chocolate cookie crumbs and ½ cup of melted unsalted butter. Mix them well until they blend together.
2. Next, press the cookie mixture into the bottom and up the sides of a tart pan. Make sure to press evenly to avoid gaps.
3. Chill the crust in the refrigerator for 10-15 minutes. This helps it set and hold its shape.
Making the Chocolate Filling
1. In a small saucepan, heat 1 cup of heavy cream over medium heat. Watch it closely until it starts to simmer.
2. Remove the saucepan from heat and add 1 cup of dark chocolate chips. Let them sit for 2-3 minutes so the chocolate melts.
3. Stir the chocolate mixture until it becomes smooth. Then add 1 teaspoon of vanilla extract and a pinch of salt for flavor.
Incorporating Raspberry Puree
1. In a separate bowl, gently mash 1 cup of fresh raspberries with 2 tablespoons of powdered sugar. You want a chunky puree, not a smooth one.
2. Carefully fold the raspberry puree into the chocolate mixture. Mix them until they are fully combined, creating a beautiful swirl.
Assembling and Chilling the Tart
1. Pour the raspberry chocolate filling into the prepared tart crust. Smooth the top using a spatula for an even finish.
2. Refrigerate the tart for at least 4 hours. This allows it to firm up properly and makes slicing easier.
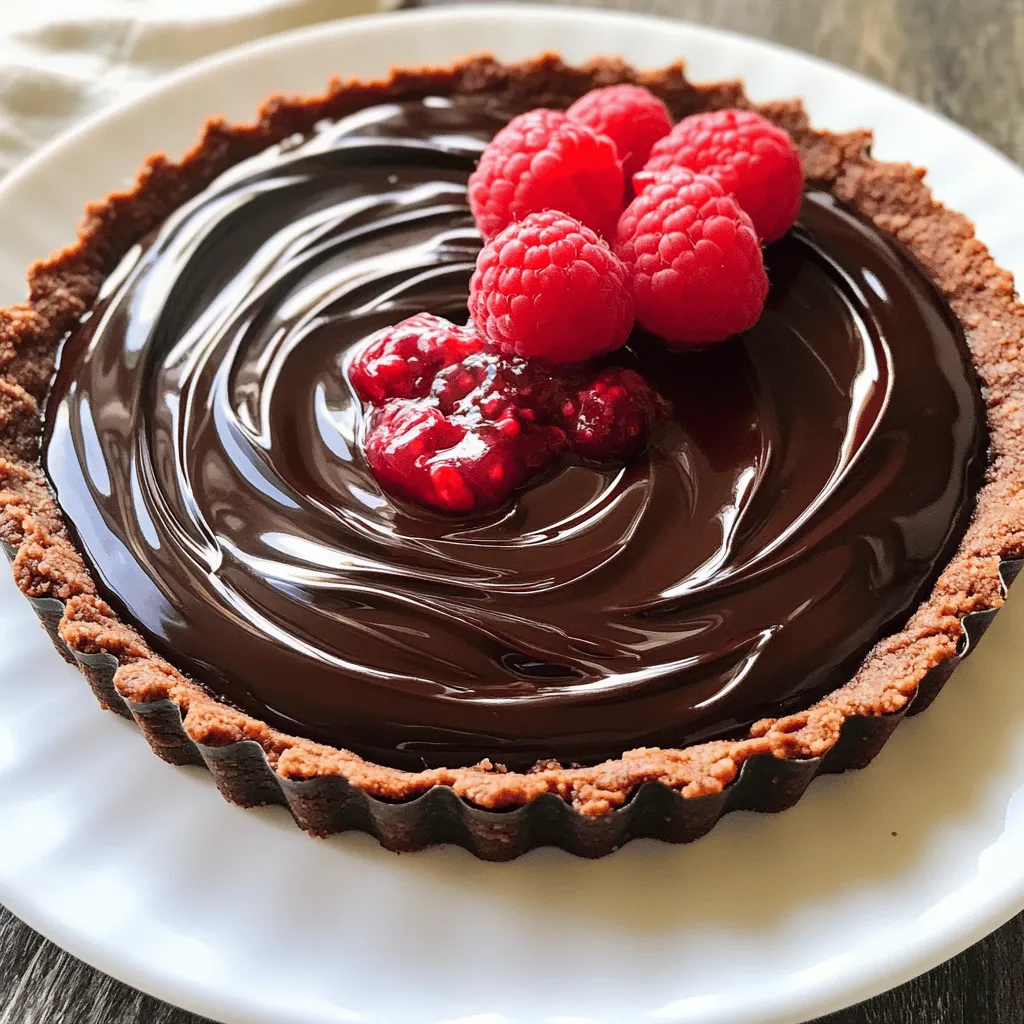
3. Once set, garnish the tart with extra fresh raspberries before serving. It adds a lovely touch and looks great on the plate.
Tips & Tricks
Perfecting the Tart Crust
To make a great tart crust, you need to avoid gaps. When you mix the chocolate cookie crumbs with melted butter, make sure it is wet enough. Press this mixture firmly into the tart pan. Use your fingers or a flat-bottomed glass to pack it tight. This helps create a smooth base. Chill the crust for 10-15 minutes in the fridge. This step helps it set and hold its shape.
You also want the right consistency for your crust. The mixture should be moist but not soggy. If it feels too dry, add a bit more melted butter. If it’s too wet, add more cookie crumbs. This balance is key for a sturdy crust.
Enhancing the Chocolate Filling
To make your filling extra rich, try using different types of chocolate. Dark chocolate gives a deep flavor, but you can mix in milk chocolate for a sweeter taste. You can also use semi-sweet chocolate if you want a balance.
Adjust the sweetness levels by adding more or less powdered sugar. If you prefer a less sweet filling, reduce the sugar. Taste the mixture as you go to find your perfect balance.
Serving Suggestions
When serving the tart, presentation matters. Serve slices on chilled plates to keep them fresh. Add a dollop of whipped cream on top to make it look fancy. You can also drizzle chocolate sauce over the tart. This adds flair and makes it even more delicious.
For a pop of color, garnish with fresh raspberries. They add brightness and a fresh taste. This is a simple way to impress your guests and make each slice look special.
Variations
Alternative Ingredients
You can make this tart more inclusive by swapping some ingredients. For a gluten-free crust, use gluten-free cookies. Brands like gluten-free Oreos work well. Just crush them like regular cookies and mix with melted butter.
If you need a dairy-free option, choose dairy-free chocolate chips. Many brands offer rich, dark chocolate that tastes great. You can also use coconut cream instead of heavy cream. It gives a nice flavor and keeps the tart creamy.
Flavor Additions
Want to mix things up? Add a burst of flavor with orange zest. Just a teaspoon will brighten the chocolate. You can also add other fruits like sliced strawberries or blueberries. These fruits can replace raspberries for a different taste.
Different Tart Shapes
Get creative with shapes! You can make mini tarts using a muffin tin. This way, each guest gets their own serving. Another idea is to use different tart pans. Heart-shaped or square pans can add fun to your dessert. Just make sure to adjust the chilling time if you change sizes.
Storage Info
How to Store the Tart
To keep your no bake raspberry chocolate tart fresh, store it in the refrigerator. You should place it in an airtight container. This method helps protect the tart from absorbing odors and maintains its creamy texture. If you do not have an airtight container, you can cover the tart with plastic wrap. Make sure it touches the surface to prevent air from getting in.
Freezing Instructions
You can freeze the tart if you want to save some for later. It is best to freeze the tart after it has set. Wrap it well in plastic wrap and then foil. This extra layer helps prevent freezer burn. When you are ready to eat it, thaw the tart in the fridge overnight. This method keeps the texture smooth and creamy. Avoid thawing at room temperature to maintain its quality.
FAQs
How long does it take for the tart to set?
The tart needs to chill in the fridge for at least 4 hours. This time helps the filling to firm up. I recommend making it the night before serving. This way, you ensure it is fully set and ready to enjoy.
Can I use frozen raspberries instead?
Yes, you can use frozen raspberries. Just remember to thaw them first. Drain any extra juice to avoid a watery mixture. This will keep your tart filling thick and tasty.
What can I serve with the tart?
This tart pairs well with a few tasty options. A dollop of whipped cream adds creaminess. You can also drizzle chocolate sauce for extra sweetness. A scoop of vanilla ice cream brings a nice chill and contrast.
Is this recipe easy to scale?
Yes, this recipe is easy to adjust. If you want more slices, simply double the ingredients. For fewer servings, cut the recipe in half. Just keep an eye on the chilling time.
This blog post outlined a delicious chocolate tart with raspberries. We covered ingredients, step-by-step instructions, and tips for a perfect treat. You can adjust flavors, use alternative ingredients, and even change the tart’s shape. Make sure to store it properly for the best taste. Enjoy creating this dessert, and don’t hesitate to try your own unique twists. You now have all the tools to make an amazing tart that impresses everyone! Happy baking!


