No-Bake Salted Caramel Pretzel Bars Delightful Treat

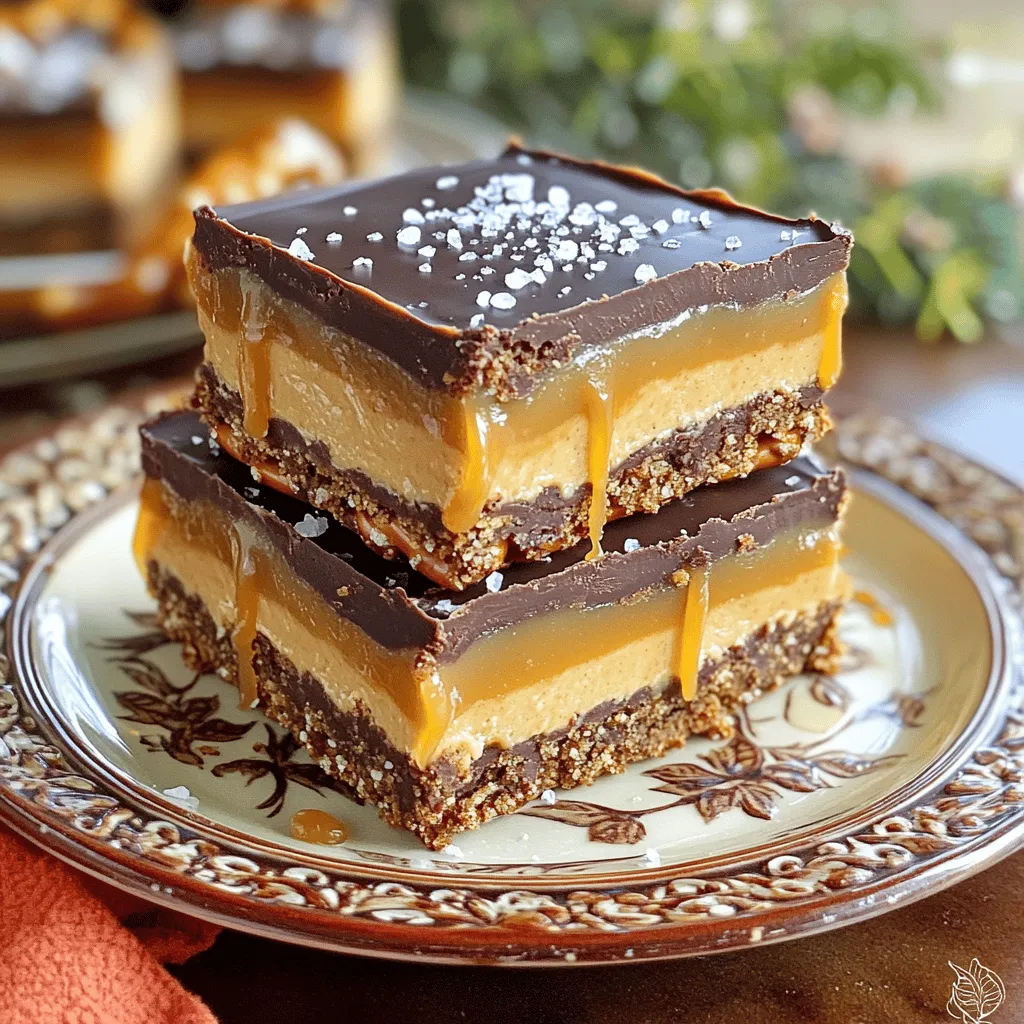
If you’re craving a sweet and salty treat, look no further! My No-Bake Salted Caramel Pretzel Bars are an easy and delightful dessert that everyone will love. With layers of crunchy pretzels, creamy peanut butter, and rich caramel, every bite is a joyful experience. Plus, you won’t need to turn on the oven! Let’s dive into this simple recipe that’s perfect for any occasion. You’ll impress your friends and family in no time!
Ingredients
List of Required Ingredients
– 2 cups crushed pretzels
– 1 cup unsalted butter, melted
– 1 cup brown sugar
– 1 cup creamy peanut butter
– 2 cups powdered sugar
– 1 cup caramel sauce (store-bought or homemade)
– Sea salt, for sprinkling
– 1/2 cup chocolate chips (milk or dark, as preferred)
To create these no-bake salted caramel pretzel bars, you need a mix of sweet and salty. First, the pretzels give a nice crunch and salty flavor. The butter binds everything together. Brown sugar adds a rich sweetness, while creamy peanut butter makes it smooth. The powdered sugar helps to thicken the peanut butter mix. Caramel sauce adds a sweet touch, and the sea salt balances the flavors. Finally, the chocolate chips bring it all together with a rich finish.
Optional Ingredients for Customization
– Different types of nut butters
– Additional toppings (nuts, sprinkles)
Feel free to change things up! You can use almond or cashew butter instead of peanut butter. This adds a new taste to the bars. You can also add nuts or sprinkles on top for extra fun. These options let you make the bars your own.
Step-by-Step Instructions
Preparing the Pretzel Crust
In a large mixing bowl, combine 2 cups of crushed pretzels with 1 cup of melted unsalted butter. Stir until the pretzels are coated well. This mix gives your bars a nice crunch. Next, press the mixture firmly into the bottom of a greased 9×13-inch baking dish. Make sure it’s even and compact. This step is key for a sturdy crust.
Making the Peanut Butter Layer
In another bowl, mix 1 cup of brown sugar, 1 cup of creamy peanut butter, and 2 cups of powdered sugar. Blend until it’s smooth and creamy. This layer brings richness to your bars. Spread this peanut butter mix evenly over the pretzel crust. Use a spatula to smooth it out nicely.
Adding Layers of Flavor
Now, drizzle half of the caramel sauce over the peanut butter layer. Reserve the other half for later. Use a knife to gently swirl the caramel into the mix. Be careful not to mix it too much; you want distinct layers. Next, melt 1/2 cup of chocolate chips in a microwave-safe bowl. Heat in 30-second intervals, stirring in between until smooth. Pour this melted chocolate over the caramel and peanut butter layers, spreading it evenly with a spatula.
Final Steps
Drizzle the remaining caramel sauce over the chocolate layer. This adds more flavor and a beautiful finish. Sprinkle a pinch of sea salt on top for that perfect sweet and salty balance. Place the baking dish in the refrigerator for at least 2 hours. This helps the bars set properly. Once set, cut them into squares or bars. Enjoy them chilled or at room temperature!
Tips & Tricks
Best Practices for Layering
To make your bars look great, smooth layers are key. Start by pressing the pretzel crust firmly. Use the back of a spatula to create an even surface. When you spread the peanut butter layer, make sure to cover every edge. This helps keep the layers neat.
Avoid mixing the layers too much, especially when adding caramel. Gently drizzle it and swirl with a knife. This keeps each layer distinct, adding to the visual appeal.
Serving Suggestions
The ideal serving temperature is chilled or at room temperature. This way, the layers hold their shape. For plating, serve the bars on a decorative plate. A tiered dessert stand adds height and charm. You can also garnish with extra pretzels or a light dusting of powdered sugar. This gives a special touch that impresses guests.
Troubleshooting Common Issues
If your peanut butter layer is grainy, it could be from over-mixing. To fix this, try using room temperature peanut butter. This helps it blend smoothly.
To prevent the chocolate from hardening too much, melt it gently. Use short bursts in the microwave, stirring well in between. This keeps the chocolate creamy and easy to spread.

Variations
Flavor Variations
You can easily change the taste of your no-bake salted caramel pretzel bars. First, try using different types of chocolate. White chocolate gives a creamy touch, while dark chocolate adds richness. Both options will taste great on top.
Next, consider flavored caramel or nut toppings. For a twist, use salted caramel sauce instead of regular. You could also add crushed nuts like pecans or almonds for extra crunch. These small changes can make the bars feel new and exciting.
Dietary Modifications
If you need gluten-free options, switch to gluten-free pretzels. Many brands offer tasty alternatives that work well in this recipe. The flavor remains just as good, and you still get that salty crunch.
For vegan substitutions, use plant-based butter in place of regular butter. You can also find vegan caramel sauce at many stores. These swaps make the dessert friendly for those following a vegan diet. Enjoy making it work for you!
Storage Info
Best Storage Practices
To keep your no-bake salted caramel pretzel bars fresh, store them in an airtight container. This helps prevent them from drying out. Place a sheet of parchment paper between layers of bars to avoid sticking. You can keep them in the refrigerator for up to one week. They taste best when chilled, but they are also good at room temperature.
Freezing Instructions
You can freeze these bars for longer storage. To freeze, wrap each bar in plastic wrap and then place them in an airtight container. Make sure to label the container with the date. When you want to enjoy them, take the bars out and let them thaw in the fridge overnight.
Freezing may change the texture slightly, making them a bit softer. However, the taste remains delicious. They will still have that sweet and salty flavor combo that you love.
FAQs
How long do no-bake salted caramel pretzel bars last?
No-bake salted caramel pretzel bars last about a week when stored properly. Keep them in an airtight container in the fridge. This helps keep them fresh and tasty. If you want to enjoy them longer, you can freeze them.
Can I substitute the pretzels in this recipe?
Yes, you can substitute the pretzels. Try using gluten-free pretzels for a gluten-free option. You could also use crushed graham crackers or even cookies for a different flavor. Each choice will change the taste a bit, but they’ll still be delicious!
What can I use instead of caramel sauce?
If you need a substitute for caramel sauce, you can use melted chocolate or fudge sauce. You could also make a simple homemade caramel using sugar and butter. This way, you can adjust the sweetness to your liking.
Is it possible to make these bars vegan?
Yes, you can make these bars vegan! Use plant-based butter and a vegan caramel sauce. You can also switch the creamy peanut butter for a nut-free spread. These changes make the bars tasty and suitable for everyone.
What’s the best way to cut the bars evenly?
To cut the bars evenly, use a sharp knife and a ruler. First, score the top lightly to mark where you will cut. Then, cut down firmly in a straight line. This method helps you get neat, even pieces.
You can create delicious no-bake salted caramel pretzel bars with simple steps. Our guide covered ingredients, preparation, and helpful tips. You can adjust flavors or toppings to fit your taste. Remember to store your bars properly for the best taste. Whether for a snack or a treat, these bars are sure to impress anyone who tries them. Enjoy making your own sweet masterpiece!


![To make a classic key lime pie, gather these simple ingredients: - 1 ½ cups graham cracker crumbs - ½ cup unsweetened coconut flakes - ⅓ cup granulated sugar - ½ cup unsalted butter, melted - 4 large egg yolks - 1 (14 oz) can sweetened condensed milk - ½ cup freshly squeezed key lime juice (about 12 key limes) - Zest of 2 key limes - 1 cup heavy whipping cream - 2 tablespoons powdered sugar - Lime slices and extra zest for garnish These ingredients create a sweet and tangy pie that sings with flavor. The graham cracker crust gives a crunchy base. The filling is creamy and zesty, thanks to the key lime juice. If you need to swap ingredients, here are a few ideas: - Use regular limes instead of key limes if they are hard to find. The taste will change slightly but still be good. - Swap coconut flakes for crushed nuts for a different texture in the crust. - Use light sweetened condensed milk to cut some calories. - If you want a dairy-free option, use coconut cream instead of heavy whipping cream. These substitutions can make the pie fit your needs while keeping it tasty. To pick the best key limes, look for these signs: - Choose limes that feel heavy for their size. This means they have more juice. - Look for limes that are smooth and firm. Avoid any that feel soft or have blemishes. - If you can, smell the limes. A sweet, fresh scent means they are ripe. Fresh key limes can elevate your pie to a whole new level. You’ll notice the bright flavor in every bite! For the full recipe, visit the [Full Recipe]. Making classic key lime pie is easy and fun. You will need to follow a few simple steps. First, you will prepare the crust. Next, you will mix the lime filling. Finally, you will bake and cool the pie. This recipe takes about 20 minutes to prep and 2 hours to chill. To start, gather your ingredients for the crust. You will need: - 1 ½ cups graham cracker crumbs - ½ cup unsweetened coconut flakes - ⅓ cup granulated sugar - ½ cup unsalted butter, melted 1. Preheat your oven to 350°F (175°C). 2. In a mixing bowl, mix the graham cracker crumbs, coconut flakes, and granulated sugar. 3. Pour in the melted butter and stir until it looks like wet sand. 4. Firmly press the mixture into the bottom and sides of a 9-inch pie pan. 5. Bake the crust for 8-10 minutes, until the edges are lightly golden. 6. Remove the crust from the oven and let it cool completely. Now, let’s make the lime filling. You will need: - 4 large egg yolks - 1 (14 oz) can sweetened condensed milk - ½ cup freshly squeezed key lime juice (about 12 key limes) - Zest of 2 key limes 1. In a large bowl, whisk the egg yolks until they turn pale. 2. Add the sweetened condensed milk to the bowl. 3. Pour in the key lime juice and lime zest. 4. Whisk the mixture until it is smooth and well combined. Next, it’s time to bake the filling. 1. Pour the lime mixture into your cooled crust. 2. Bake in the oven for 15 minutes, just until the filling is set. 3. After baking, remove the pie from the oven and let it cool at room temperature. 4. Refrigerate the pie for at least 2 hours to chill completely. Once chilled, you can top it with whipped cream and garnish it with lime slices and zest. Enjoy this zesty treat! For the complete details on how to make this pie, refer to the Full Recipe. To get the best texture for your Key Lime Pie, the filling needs to be smooth. Start by whisking the egg yolks until they look pale and creamy. This adds air and helps the pie rise slightly. Mix in the sweetened condensed milk slowly, then add the lime juice and zest. Make sure to whisk until everything blends well. This will give your pie that perfect creamy feel. Bake it just long enough to set, but not too long. Overbaking can make it rubbery. Making whipped cream at home is easy and fun! You will need heavy whipping cream and powdered sugar. Start with cold cream. Pour it into a bowl and use an electric mixer. Beat it on medium speed until soft peaks form. This usually takes about 2-3 minutes. Gradually add the powdered sugar and keep beating until stiff peaks form. This means the cream will hold its shape. Use it right away to top your chilled pie. You can even add a little vanilla for extra flavor! If your pie cracks, it may have baked too long. Make sure to check your filling after 15 minutes. A slight jiggle is okay! If your crust is too crumbly, try adding a bit more melted butter. When cooling, let it sit at room temperature before refrigerating. This helps avoid condensation. If your whipped cream doesn’t hold up, you might not have whipped it enough. Always use cold cream for the best results. For more details, check the Full Recipe. {{image_2}} Key lime pie is a classic dessert, but you can change it up in fun ways! If you love meringue, try adding it to your pie. Meringue is a light and fluffy topping made from egg whites. To make it, beat the egg whites until they form stiff peaks. Then, slowly add sugar until the mixture is glossy and thick. Spread it over the cooled pie and bake until golden. This adds a sweet and crunchy layer on top of the tart filling. For a gluten-free version of key lime pie, use almond flour or gluten-free graham crackers for the crust. You can also crush gluten-free cookies for a tasty base. The filling remains the same, so you still get that tangy flavor. This way, everyone can enjoy a slice! You can get creative with your crust. Instead of the classic graham cracker crust, think about using Oreo cookies or gingersnap cookies. Just crush them and mix with melted butter. You can also try a nut crust made from ground almonds or pecans. Each option gives a unique flavor that pairs well with the lime filling. For the full recipe, check out Zesty Classic Key Lime Pie. After enjoying your zesty classic key lime pie, you may have some leftovers. To keep it fresh, cover the pie with plastic wrap or foil. Store it in the fridge. This way, it stays cool and tasty. Make sure to eat it within three days for the best flavor. If you have slices, use an airtight container to keep them fresh. Freezing key lime pie is an excellent way to save it for later. First, let the pie cool completely after baking. Then, wrap it tightly in plastic wrap. After that, wrap it in foil for extra protection. You can also slice the pie before freezing for easy serving. When you’re ready to enjoy it, thaw the pie in the fridge overnight. This keeps the texture and flavor intact. Key lime pie can last in the refrigerator for about 3-4 days. If frozen, it stays good for about 2-3 months. You don’t need to reheat the pie; it’s best served cold. If you want to serve it warm, try putting it in the oven at a low temperature for a few minutes. Just be careful not to overheat it. The goal is to keep that creamy texture and tangy flavor. For the full recipe, check out the zesty classic key lime pie section! If you can't find key limes, use regular limes. They work well in this pie. The flavor will be slightly different but still tangy and tasty. You can also mix regular limes with a little lemon juice for extra zing. Yes, you can make Key Lime Pie ahead of time. It tastes even better after chilling. Just bake the pie, let it cool, and then refrigerate it. You can prepare it a day or two before serving. Just add the whipped cream before serving for the best texture. To check if the filling is set, gently shake the pie. If the center slightly jiggles but is firm, it’s ready. The filling will firm up more as it cools. Bake it for about 15 minutes to help it set properly. Key Lime Pie pairs well with fresh fruit. Berries or mango slices make great sides. You can also serve it with whipped cream on top. Some people enjoy a scoop of vanilla ice cream with it, too. For extra flair, add lime zest or slices as a garnish. For the full recipe, check out the Zesty Classic Key Lime Pie section above. Key lime pie is a simple and delicious treat. We explored the ingredients, substitutions, and tips for fresh key limes. I shared step-by-step instructions for the crust and filling, plus baking tips. You learned tricks for the perfect pie texture and homemade whipped cream. Variations include meringue and gluten-free options. We covered best storage methods and answered common questions about making this classic dessert. Now, you have everything you need to make a great key lime pie! Enjoy your baking adventure.](https://dailydishly.com/wp-content/uploads/2025/07/bf504450-0d09-4d53-b035-55d87c168019-768x768.webp)