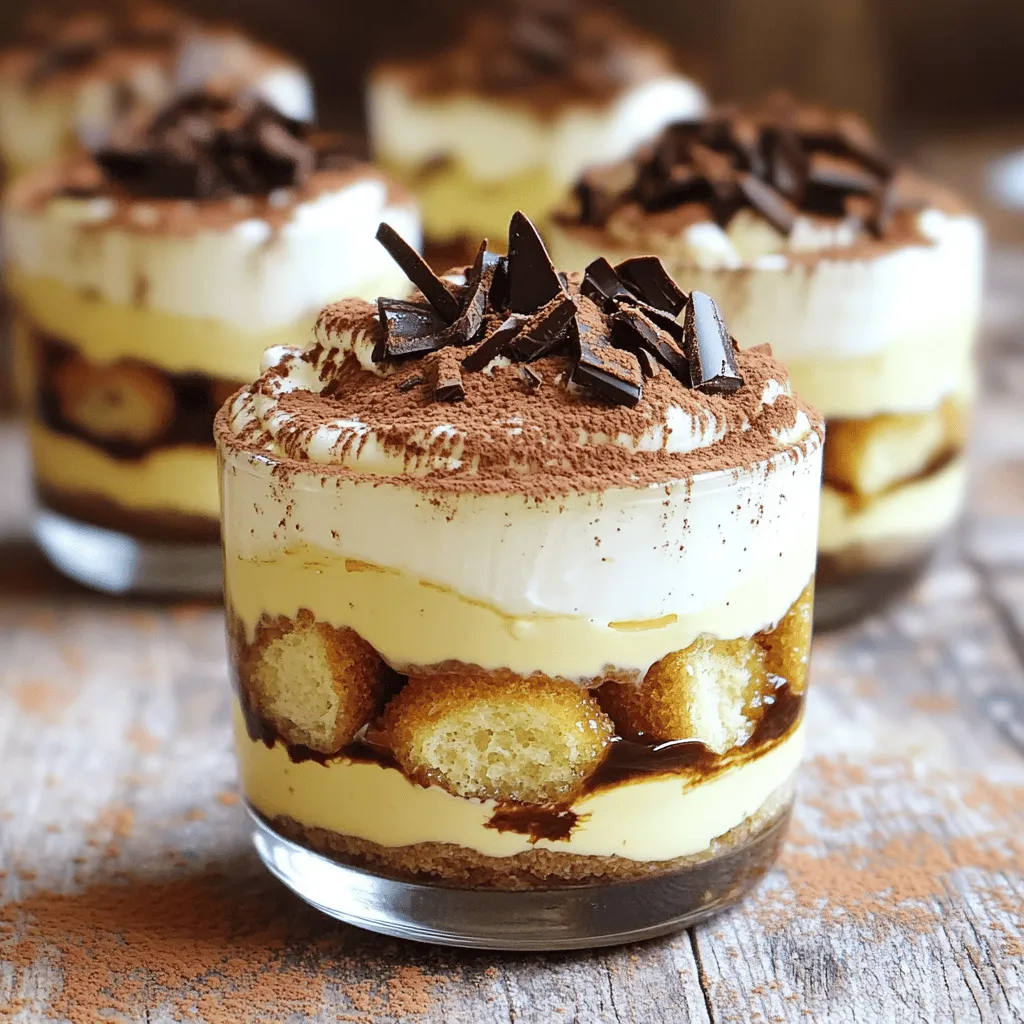
Indulge in a dessert that’s both quick and delightful: No-Bake Tiramisu Cups! You can create this easy treat without turning on your oven. With a few simple steps, you’ll impress your friends and family. This blog post covers all the ingredients, tips, and tricks to make perfect layered cups. Get ready to taste something extraordinary that everyone will love. Let’s dive in and whip up this delicious dessert together!
Ingredients
List of Ingredients
– 1 cup strong brewed coffee, cooled
– 2 tablespoons cocoa powder
– 8 ounces mascarpone cheese, softened
– 1 cup heavy whipping cream
– ½ cup powdered sugar
– 1 teaspoon vanilla extract
– 12 ladyfinger cookies
– Dark chocolate shavings for garnish
Special Ingredients Explained
Strong brewed coffee gives the tiramisu its rich flavor. You want it strong but cool.
Mascarpone cheese adds creaminess and a distinct taste. It makes the dessert special.
Ladyfinger cookies are light and soak up the coffee well. They create a nice texture.
Cocoa powder adds a bitter balance to the sweetness. It is key for that classic taste.
Heavy whipping cream is essential for the fluffiness of the dessert. It makes everything light.
Alternatives and Substitutions
If you don’t have mascarpone, you can mix cream cheese with heavy cream. This works well.
For a coffee-free option, use milk mixed with vanilla extract instead. It will still taste good.
If you’re out of ladyfingers, sponge cake or even graham crackers can work as a substitute.
Cocoa powder can be swapped with chocolate syrup for a sweeter twist. Just adjust the sugar.
Step-by-Step Instructions
Preparation Overview
Making no-bake tiramisu cups is simple and fun. You need just a few steps. We will layer coffee-soaked ladyfingers with a creamy mascarpone mix. This dessert looks fancy but takes only 20 minutes to prep. Let’s dive into the steps.
Detailed Step-by-Step Process
1. Start by brewing 1 cup of strong coffee. Let it cool completely.
2. In a shallow dish, mix the cooled coffee with 1 tablespoon of cocoa powder. Set this aside.
3. In a large bowl, whip 1 cup of heavy cream. Add ½ cup of powdered sugar and 1 teaspoon of vanilla extract. Beat until you see stiff peaks.
4. Gently fold in 8 ounces of softened mascarpone cheese. Be careful not to deflate the whipped cream.
5. Take 12 ladyfinger cookies. Dip each one quickly into the coffee mix. Soak them just enough, but don’t let them get soggy.
6. In serving cups or jars, place a layer of soaked ladyfingers at the bottom.
7. Add a big layer of the mascarpone mixture over the ladyfingers.
8. Repeat the layers, finishing with a layer of the mascarpone mix on top.
9. Sift the remaining cocoa powder over the top layer for a nice touch.
10. Chill the tiramisu cups in the fridge for at least 2 hours. This helps the flavors blend well.
11. Before serving, sprinkle dark chocolate shavings on top for a special finish.
Tips for Layering and Presentation
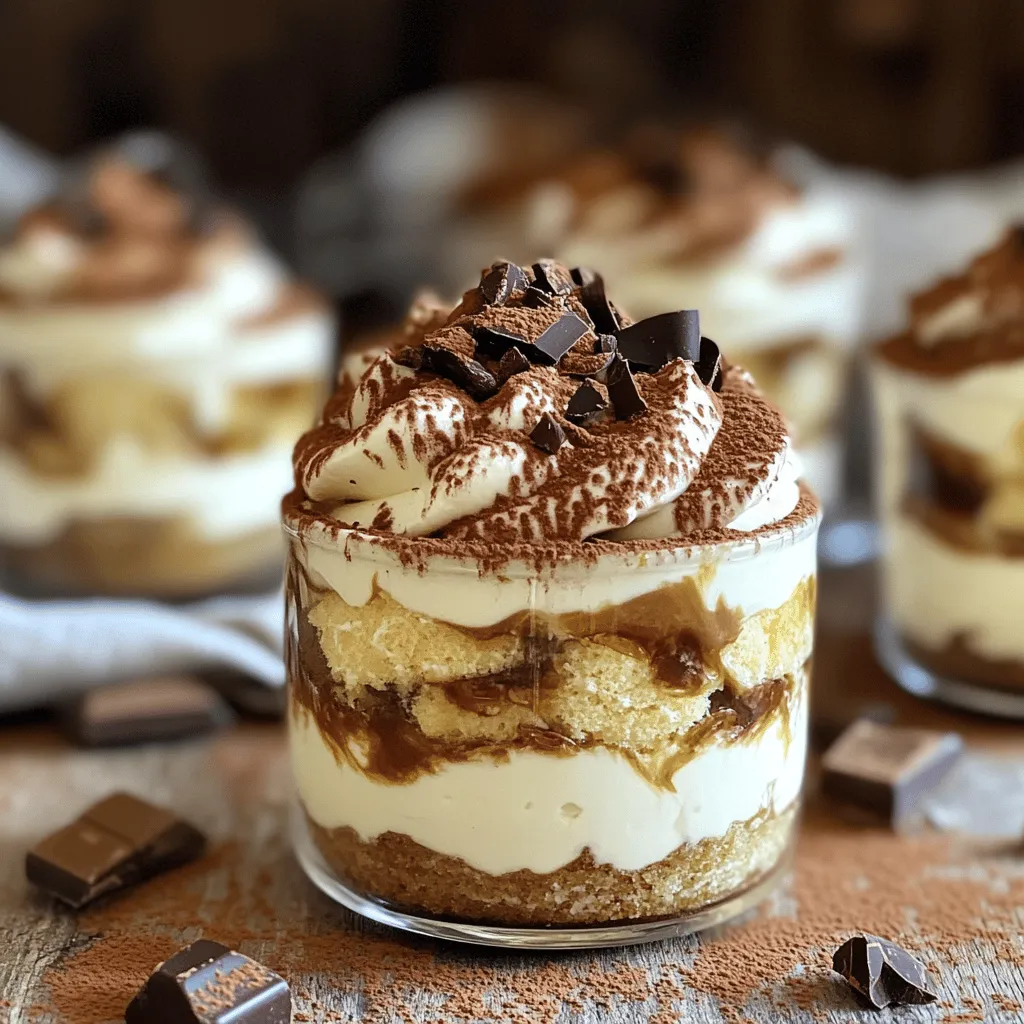
Use clear cups or jars to show off the layers. This makes the dessert look more appealing. When layering, keep the ladyfingers neat. Avoid over-soaking them to maintain texture. Sifting cocoa powder on top adds elegance. You can also use a piping bag for the mascarpone mix to create a fancy look. Enjoy making these delightful dessert cups!
Tips & Tricks
How to Achieve Perfect Whipped Cream
To make perfect whipped cream, start with cold tools. Chill your mixing bowl and beaters in the fridge. Use heavy cream for the best texture. Whip the cream until you see stiff peaks. This means it holds its shape well. Add powdered sugar and vanilla extract while whipping. This gives it a sweet flavor that pairs well with the tiramisu.
Avoiding Soggy Ladyfingers
To keep ladyfingers from getting soggy, dip them quickly. Just a second in the coffee mix is enough. You want them moist but not mushy. If they soak too long, they will fall apart. Layer them neatly in the cups to create nice layers. Remember, the goal is to have a good texture.
Enhancing Flavor Profiles
You can enhance flavors by adding a pinch of salt to the mascarpone mix. This balances sweetness and brings out the coffee flavor. Try using different cocoa powders for varied taste. Dark cocoa adds richness, while lighter cocoa gives a milder taste. You can also experiment with flavored extracts, like almond or orange. Each choice adds its unique twist to the dessert.
Variations
Flavor Variations
You can have fun with flavors in your no-bake tiramisu cups. Try adding chocolate or fruit. For a chocolate twist, mix some melted chocolate into the mascarpone. You can also add cocoa powder to the ladyfinger soak for a richer taste. If you love fruit, consider using fresh berries. Layer in some mashed strawberries or raspberries between the mascarpone. This adds a fresh and tangy note to the dessert.
Gluten-Free Options
You can make this dessert gluten-free with a few simple swaps. Use gluten-free ladyfingers or sponge cake. Many stores sell these options now. Just check the labels to ensure they fit your needs. You can also make your own ladyfingers using gluten-free flour. This way, everyone can enjoy this tasty treat without worry.
Vegan Substitutes
For a vegan version, swap out the dairy ingredients. Use coconut cream instead of mascarpone cheese. Chill a can of coconut milk overnight, then scoop out the solid cream. For the whipped topping, try using a plant-based whipping cream. You can also replace ladyfingers with vegan cookies or sponge cake. With these changes, you can enjoy a delicious vegan tiramisu cup that everyone will love.
Storage Info
Best Storage Practices
To keep your no-bake tiramisu cups fresh, store them in the fridge. Use an airtight container or cover each cup with plastic wrap. This helps prevent drying and keeps the flavors intact. Make sure to chill them right after you finish making them. This dessert needs time to set and taste better cold.
How Long Do Tiramisu Cups Last?
These tiramisu cups last about 2 to 3 days in the fridge. After that, the ladyfingers may become too soft. They will still taste good, but the texture will change. To enjoy them at their best, eat them within this time frame.
Freezing Tiramisu Cups
You can freeze tiramisu cups if you need to save them for later. Wrap each cup tightly with plastic wrap or foil. Place them in a freezer-safe bag or container. They can last up to a month in the freezer. When you’re ready to eat them, move the cups to the fridge overnight to thaw. Avoid refreezing once they have thawed, as this can ruin the texture.
FAQs
Can I make No-Bake Tiramisu Cups in advance?
Yes, you can make No-Bake Tiramisu Cups ahead of time. This dessert tastes even better after resting. I suggest making them a day before. Just cover them with plastic wrap and chill. They will soak up all the flavors. The longer they sit, the better they taste!
What can I use instead of mascarpone cheese?
If you don’t have mascarpone cheese, there are good swaps. You can use cream cheese mixed with sour cream. This mix gives you a similar taste. Another option is a blend of ricotta cheese and heavy cream. This choice will keep it creamy and smooth.
Is it safe to use raw eggs in Tiramisu?
I recommend avoiding raw eggs in Tiramisu. Raw eggs can carry bacteria. Instead, this recipe uses mascarpone and whipped cream for creaminess. It is a safe and tasty choice. You still get that rich flavor without the risk. Enjoy your dessert worry-free!
In this blog post, we explored key ingredients for Tiramisu cups, including unique alternatives. I shared clear step-by-step instructions for perfect preparation and tips for great results. We looked at flavor variations and options for gluten-free and vegan diets. Finally, I covered storage best practices to keep your Tiramisu fresh.
Tiramisu is a fun and tasty dessert. With these tips, you can create your own delicious cups easily. Enjoy the process and share with friends!