One-Pot Creamy Roasted Red Pepper Pasta Delight

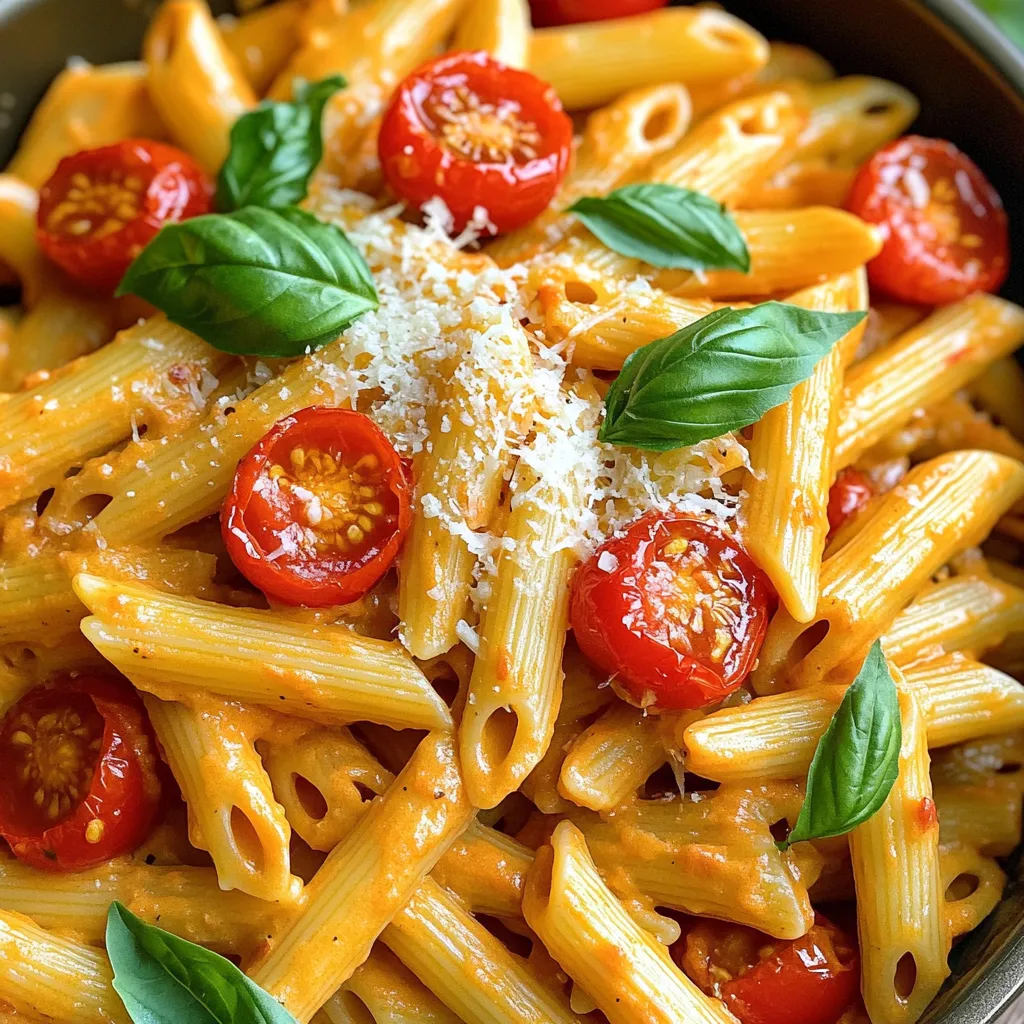
If you’re craving a dish that’s both creamy and bursting with flavor, you’re in the right place! Today, I’ll share my One-Pot Creamy Roasted Red Pepper Pasta Delight. This simple recipe combines roasted red peppers, rich cream, and your favorite pasta—all cooked in one pot! Perfect for weeknight dinners, it’s quick to prepare and easy to clean up. Let’s dive into this delicious meal that will impress everyone at your table!
Ingredients
List of Ingredients
– 12 oz pasta (penne or fusilli works well)
– 1 cup vegetable broth
– 1 cup heavy cream or coconut cream for a dairy-free option
– 2 large roasted red peppers, peeled and sliced
– 1 cup cherry tomatoes, halved
– 3 cloves garlic, minced
– 1 medium onion, finely chopped
– 1 teaspoon dried oregano
– 1 teaspoon red pepper flakes (adjust for spice preference)
– Salt and pepper to taste
– Fresh basil leaves, for garnish
– Grated Parmesan cheese, for serving (optional)
For this One-Pot Creamy Roasted Red Pepper Pasta, I always start with the pasta. You can choose either penne or fusilli. Both types hold the sauce well and add great texture. Next, I use vegetable broth as the base. It gives a nice depth of flavor. If you want a creamy twist, heavy cream works best. For a dairy-free option, coconut cream is a fantastic choice.
I love adding roasted red peppers. They add sweetness and a vibrant color. Cherry tomatoes also bring a fresh burst of flavor. I use three cloves of garlic for that aromatic kick and one medium onion for sweetness. Dried oregano adds warmth, while red pepper flakes give a little heat. Of course, salt and pepper help to enhance all these flavors.
Finally, I like to top my pasta with fresh basil leaves. They add a lovely aroma and color. If you want, sprinkle some grated Parmesan cheese on top for a salty finish. This combination of ingredients creates a creamy, flavorful dish that is sure to please everyone.
Step-by-Step Instructions
Preparation Steps
1. Sautéing onions and garlic
Start with a large pot or skillet. Heat a small drizzle of olive oil on medium heat. Add the finely chopped onion. Cook for about 3-4 minutes. The onions should become soft and clear. Then, add the minced garlic. Cook for another minute. You want the garlic to smell nice!
2. Blending the roasted red pepper sauce
Take two large roasted red peppers. Peel and slice them. Now, put these peppers in a blender. Add one cup of vegetable broth. Pour in one cup of heavy cream or coconut cream. Add one teaspoon of dried oregano and one teaspoon of red pepper flakes. Don’t forget to add salt and pepper to taste. Blend everything until it is smooth and creamy.
3. Combining ingredients for cooking
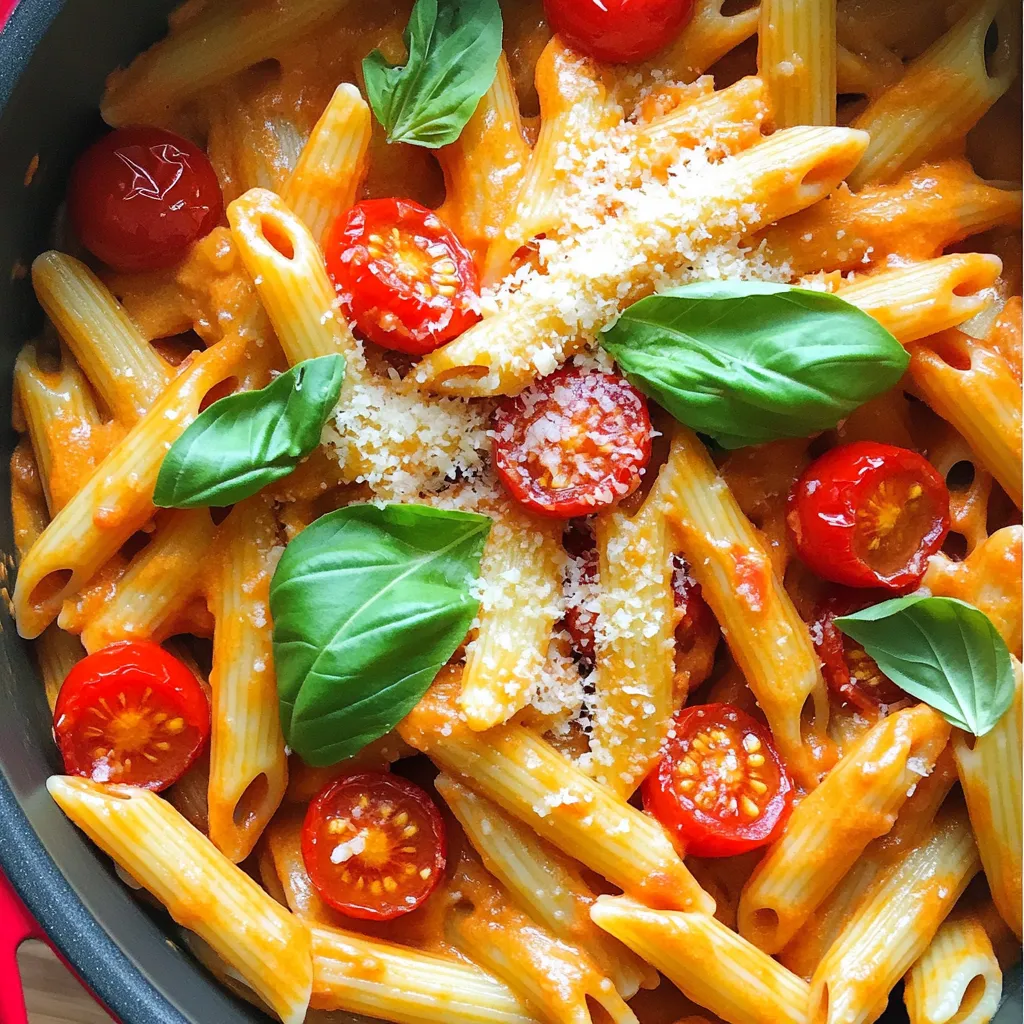
Pour the red pepper sauce into your pot with the sautéed onions and garlic. Add the halved cherry tomatoes and stir well. Bring the mixture to a gentle simmer. Now, add 12 ounces of uncooked pasta right into the pot. Make sure the pasta is well mixed and covered by the sauce. Cover the pot and cook for about 10-12 minutes. Stir occasionally to ensure even cooking. If the sauce gets too thick, add a splash of vegetable broth or water. Once the pasta is tender, check for seasoning. Adjust if needed, then serve hot with fresh basil and grated Parmesan cheese if you like.
Tips & Tricks
Cooking Hacks
Achieving the best creamy texture
To get a rich, creamy sauce, use heavy cream or coconut cream. Blend the roasted red peppers with the broth and cream until smooth. This mix gives you that dreamy texture. If the sauce seems thick, add a splash of broth or water to loosen it.
Adjusting spice levels
If you like it spicy, add more red pepper flakes. Start with one teaspoon and taste as you go. You can also add diced fresh chili for more heat. If you want less spice, cut back on the red pepper flakes or skip them.
Perfecting the cooking time for pasta
Cook the pasta for about 10-12 minutes. Stir it occasionally to prevent sticking. Check for doneness a minute before time is up. You want the pasta al dente, firm but cooked. If you overcook it, the pasta gets mushy and loses that nice bite.

Variations
Ingredient Substitutions
You can make this dish fit your needs with some easy swaps.
– Dairy-free alternatives: Use coconut cream instead of heavy cream. It adds a nice flavor and keeps it creamy. You can also try almond milk for a lighter option.
– Adding protein: If you want more protein, add cooked chicken or shrimp. Cook the protein separately and mix it in at the end. It will make your meal more filling.
– Vegetable additions: You can add more veggies for extra nutrition. Spinach, kale, or bell peppers work great. Just toss them in with the tomatoes while cooking. This not only boosts health but also adds color.
These simple changes let you make the dish your own.
Storage Info
Storing Leftovers
To keep your One-Pot Creamy Roasted Red Pepper Pasta fresh, follow these tips:
– Best practices for refrigeration: Let the pasta cool down first. Then, place it in an airtight container. Store it in the fridge for up to three days. This keeps it safe and tasty.
– How to reheat pasta without losing texture: When you are ready to eat, add a splash of water or broth. Heat it in a pot over low heat. Stir gently. This helps keep the pasta creamy and soft.
– Freezing options for longer storage: If you want to save some for later, freeze it. Use a freezer-safe container. It can last up to three months in the freezer. To reheat, let it thaw in the fridge overnight before warming it up.
FAQs
How long does One-Pot Creamy Roasted Red Pepper Pasta last in the fridge?
One-Pot Creamy Roasted Red Pepper Pasta can last up to four days in the fridge. Store it in an airtight container. Make sure it cools down before sealing. This keeps it fresh and tasty for your next meal.
Can I use other types of pasta?
Yes, you can use other types of pasta! Penne and fusilli are great, but you can try spaghetti or shell pasta too. Just remember to adjust the cooking time based on the pasta type. Check the package for the right cooking time.
What can I serve with this dish?
This pasta pairs well with a simple green salad. You might also enjoy it with garlic bread or roasted vegetables. For protein, grilled chicken or shrimp complements the dish nicely. Adding a sprinkle of Parmesan or a drizzle of olive oil can elevate your meal even more.
In this blog post, I shared how to make One-Pot Creamy Roasted Red Pepper Pasta. You learned about key ingredients like pasta, broth, and veggies. I covered simple steps to sauté, blend, and cook. Tips helped you get a creamy texture and adjust spices. I also shared fun variations and smart storage methods.
Enjoy creating this dish in your kitchen. It’s quick, easy, and delicious!


. Pasta Primavera is a colorful dish packed with fresh veggies and flavor. You learned how to pick the right pasta, sauté vegetables, and balance seasonings. Plus, we covered ways to customize for your taste and diet needs. Remember, storing leftovers properly keeps your meals fresh. Try new veggie swaps and protein options for fun twists. Enjoy creating your own Pasta Primavera masterpiece!](https://dailydishly.com/wp-content/uploads/2025/05/1202f33f-9285-4746-af91-946a78d77e80-768x768.webp)
![To make the sweet potato and black bean enchiladas, gather the following ingredients: - 2 medium sweet potatoes, peeled and diced - 1 can (15 oz) black beans, rinsed and drained - 1 cup corn kernels (fresh, frozen, or canned) - 1 teaspoon cumin - 1 teaspoon smoked paprika - ½ teaspoon chili powder - Salt and pepper to taste - 1 cup shredded cheddar cheese (or a vegan alternative) - 8 large tortillas (corn or flour) - 1 cup enchilada sauce (store-bought or homemade) - 2 tablespoons olive oil - Fresh cilantro and avocado slices for garnish These ingredients create a colorful and tasty meal. Sweet potatoes bring natural sweetness and nutrition. Black beans add protein and fiber, making these enchiladas hearty. Corn gives a nice crunch, while spices add depth. You can use different types of cheese to fit your taste. Also, consider adding more veggies like spinach or bell peppers for extra flavor. The enchilada sauce can be homemade or store-bought, depending on your time. Be sure to prep your ingredients before you start cooking. This makes the assembly easy and quick. For the full recipe, check out the instructions I provided earlier. Enjoy creating a dish that is both satisfying and fun to eat! To start, I cook the sweet potatoes. I peel and dice them into small cubes. Then, I boil water in a medium pot. Once boiling, I add the sweet potato cubes. I cook them for about 10 minutes, or until they are tender. After that, I drain them and mash them slightly with a fork. I like to leave some chunks for texture. Next, I flavor the sweet potato mixture. In a large bowl, I combine the mashed sweet potatoes with black beans, corn, cumin, smoked paprika, chili powder, salt, and pepper. I mix it well until everything combines. This mixture is full of flavor and nutrition. Now, I begin assembling the enchiladas. I spread ½ cup of enchilada sauce on the bottom of a 9x13 inch baking dish. This step helps keep the enchiladas from sticking. I take a tortilla and place it on a flat surface. I add about ¼ cup of the sweet potato and black bean mixture down the center. I sprinkle a little cheese on top. Then, I roll the tortilla tightly and place it seam-side down in the baking dish. I repeat this process until I use all the tortillas and filling. It's time to bake the enchiladas. I cover the dish with foil and bake them for 20 minutes. This keeps them moist while cooking. After 20 minutes, I remove the foil and bake for another 10 minutes. This last step makes the cheese bubbly and slightly golden. Once baked, I let the enchiladas cool for a few minutes. They are ready to be served. You can garnish them with fresh cilantro and avocado slices for extra flavor. For the full recipe, refer to the provided instructions. Choosing the right tortillas is key. I prefer using corn tortillas for a classic taste. They hold the filling well and get soft in the oven. If you like flour tortillas, they work too. Just warm them up first to make them more flexible. For cheese melting tips, choose a cheese that melts easily. Cheddar is a great option. You can mix it with Monterey Jack for a creamier texture. To help your cheese melt better, cover the enchiladas with foil while baking. This traps steam and keeps the cheese gooey. Preparing the filling in advance is a great time-saver. You can cook the sweet potatoes and mix them with the beans and spices the day before. Just store it in the fridge until you are ready to assemble. When it comes to storing assembled enchiladas, cover them tightly with plastic wrap or foil. You can keep them in the fridge for up to two days. If you want to freeze them, do so before baking. Just wrap them well and they can last up to three months. When you're ready to eat, bake them straight from the freezer; just add some extra time for cooking. For the full recipe, check out the Sweet Potato & Black Bean Enchiladas . {{image_2}} For a vegan twist, skip the cheese. Use a vegan cheese substitute. Nutritional yeast also adds a cheesy flavor. Instead of regular enchilada sauce, choose a vegan option or make your own. You can add more veggies, too. Try bell peppers, zucchini, or spinach for extra nutrition. These additions make the dish colorful and tasty. Want more heat? Add diced jalapeños to the filling. You can also increase the chili powder. If you prefer milder flavors, use less chili powder. Swap it for smoked paprika for a smoky taste without the heat. Try adding cumin or coriander for added depth. These spices can bring new flavors to your enchiladas. Making your own enchilada sauce is easy and fun. Combine tomatoes, onions, and spices for a fresh taste. You can also try green sauce for a zesty change. If you're short on time, store-bought sauces work well too. Just pick a brand you like. Experimenting with different sauces can really change the dish. For the full recipe and detailed instructions, check out the [Full Recipe]. To store leftover enchiladas, let them cool down first. Place them in an airtight container. This keeps them fresh for up to three days. When storing, try not to stack them. This helps avoid breaking the tortillas. You can also cover them with plastic wrap before sealing the container. To freeze enchiladas, wrap them well in foil or plastic wrap. You can also use a freezer-safe container. They will stay good for about three months. When you want to eat them, take them out and thaw overnight in the fridge. To reheat, bake them in the oven at 350°F (175°C) for about 25 minutes. You can also add a bit of sauce to keep them moist. Enjoy them like they are fresh! For the full recipe, check out Sweet Potato & Black Bean Enchiladas. Yes, you can use other beans in this recipe. Some great options include: - Pinto beans - Kidney beans - Chickpeas - White beans These beans add unique flavors and textures. Just make sure to rinse and drain them well. Each type of bean offers a different taste, so feel free to experiment! To make these enchiladas gluten-free, choose the right tortillas. You can use: - Corn tortillas - Gluten-free flour tortillas Both options work well. Make sure to check the labels for any gluten-containing ingredients. Gluten-free tortillas hold the filling nicely, giving you that perfect bite. When serving enchiladas, consider these tasty sides: - Mexican rice - Refried beans - A fresh salad - Guacamole - Salsa These sides enhance the meal and add more flavor. Enjoy your enchiladas with your favorite accompaniments for a complete dining experience. For the full recipe, check out the details above! This guide covered making tasty enchiladas with sweet potatoes, black beans, and spices. You learned how to prepare and assemble, plus tips for the best results. Keep your enchiladas fresh with proper storage or freeze them for later. Explore variations to suit your taste. Enjoy these dishes with your favorite sides. Now you’re ready to create delicious enchiladas anytime!](https://dailydishly.com/wp-content/uploads/2025/06/7d965e75-a030-40f0-bb8d-330850614dc3-768x768.webp)


