Pasta Primavera with Lemon Bright and Flavorful Dish
. Pasta Primavera is a colorful dish packed with fresh veggies and flavor. You learned how to pick the right pasta, sauté vegetables, and balance seasonings. Plus, we covered ways to customize for your taste and diet needs. Remember, storing leftovers properly keeps your meals fresh. Try new veggie swaps and protein options for fun twists. Enjoy creating your own Pasta Primavera masterpiece!](https://dailydishly.com/wp-content/uploads/2025/05/1202f33f-9285-4746-af91-946a78d77e80.webp)
Looking for a dish that’s both bright and flavorful? Pasta Primavera with lemon is your answer! This vibrant meal combines fresh veggies, pasta, and a zesty lemon kick. You’ll savor each bite while enjoying a simple, healthy dish. Follow my easy steps to create your own Pasta Primavera. Let’s dive in and bring color to your plate!
Ingredients
List of Ingredients
– 8 oz. spaghetti or preferred pasta
– 1 cup cherry tomatoes, halved
– 1 cup zucchini, sliced into half-moons
– 1 cup bell peppers (mixed colors), sliced
– 1 cup broccoli florets
– 1 cup fresh spinach
– 2 tablespoons olive oil
– 3 cloves garlic, minced
– Zest and juice of 1 lemon
– 1 teaspoon dried oregano
– Salt and pepper to taste
– Fresh basil leaves, for garnish
– Grated Parmesan cheese (optional, for serving)
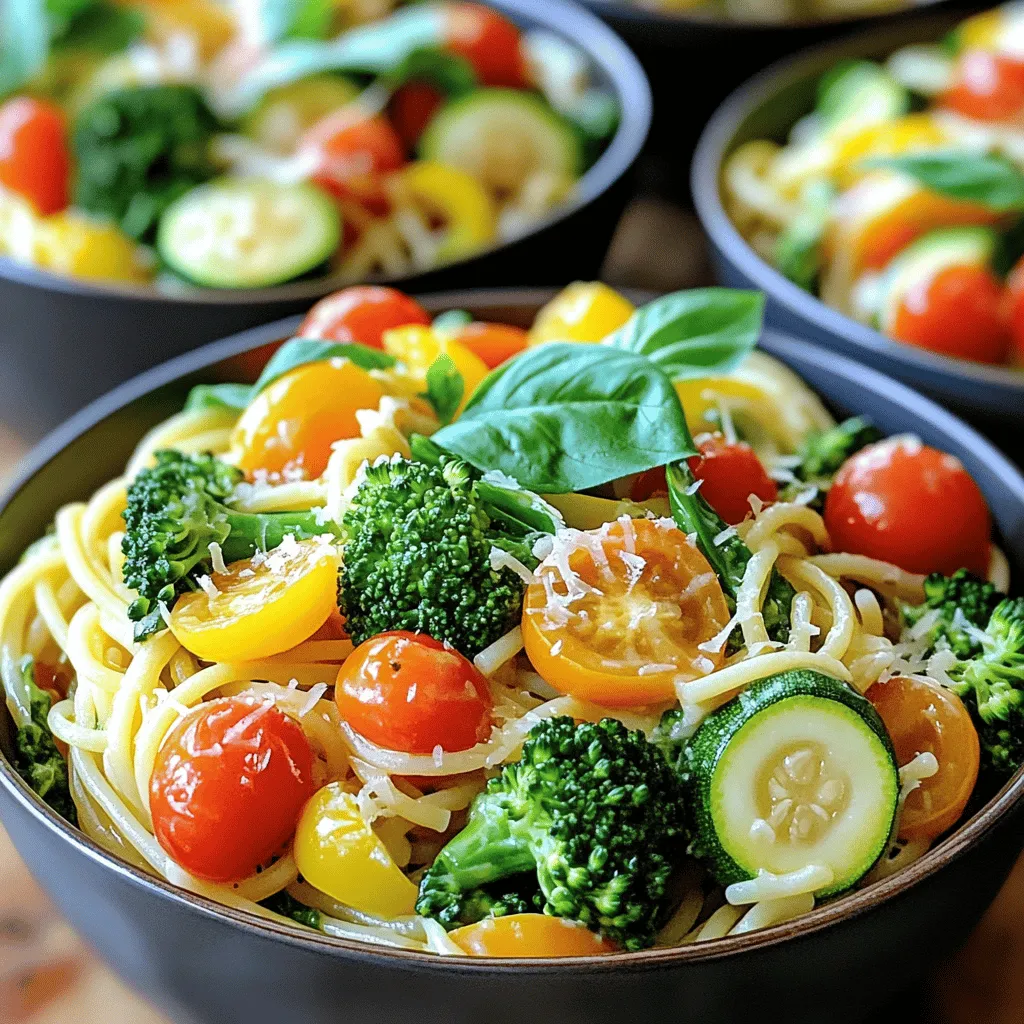
Gather these fresh ingredients before you start. I love using colorful bell peppers and ripe cherry tomatoes. They add sweetness and brightness to the dish. Fresh spinach wilts beautifully and gives a nice touch of green.
The lemon zest and juice are key to making the flavors pop. They bring a zing that cuts through the richness of the olive oil. Don’t skip the garlic; it brings warmth and depth.
You can use any pasta you like, but spaghetti works great. It holds the sauce well and mixes easily with the veggies. If you want to add protein, consider grilled chicken or sautéed shrimp.
These ingredients make a bright and flavorful dish.Have fun cooking!
Step-by-Step Instructions
Cooking the Pasta
– Bring a large pot of salted water to a boil.
– Cook pasta according to package instructions until al dente.
Start by boiling water in a large pot. The salt will help flavor the pasta. Once it’s boiling, add your pasta. Follow the time on the package for best results. Remember to reserve one cup of pasta water before draining the pasta.
Preparing the Vegetables
– Sauté garlic in olive oil.
– Add broccoli and bell peppers.
While the pasta cooks, heat olive oil in a large skillet. Once hot, add minced garlic. Sauté it for about 30 seconds, just until fragrant. Be careful not to burn it! Then, toss in the broccoli and bell peppers. Cook them for about 3 to 4 minutes. You want them to soften just a bit.
Combining Ingredients
– Add zucchini and cherry tomatoes.
– Stir in reserved pasta water and lemon.
– Toss in spinach and season.
Next, add the zucchini and cherry tomatoes to the skillet. Stir them for another 3 minutes. They should start to soften nicely. Pour in the reserved pasta water, starting with half a cup. Add the lemon juice and zest next. Let this simmer for 2 minutes. It will create a light sauce.
Finally, add the cooked pasta to the skillet. Toss in fresh spinach and mix everything well. The spinach will wilt quickly, adding a fresh touch. Season with salt and pepper to your taste. If the sauce feels thick, add more pasta water to loosen it.
Once combined, your Pasta Primavera with Lemon is ready to serve.
Tips & Tricks
Perfecting Your Pasta Primavera
To make great Pasta Primavera, choose the right pasta. I love using spaghetti. It holds sauce well and mixes nicely with veggies. You can also try fettuccine or penne, but spaghetti is my go-to. When it comes to seasoning, balance is key. Add salt to the boiling water. This helps flavor the pasta. After draining, taste the pasta. If it needs more salt, add it in the sauce.
Cooking Techniques
Save some pasta water before draining. This water is starchy and helps the sauce stick. Use about a cup, but start with half. If the sauce seems too thick later, add more water. For veggies, timing matters. Add the harder ones first, like broccoli and bell peppers. They need more time to cook. Soft veggies like spinach should go in last. This keeps them fresh and bright.
Assembly Tips
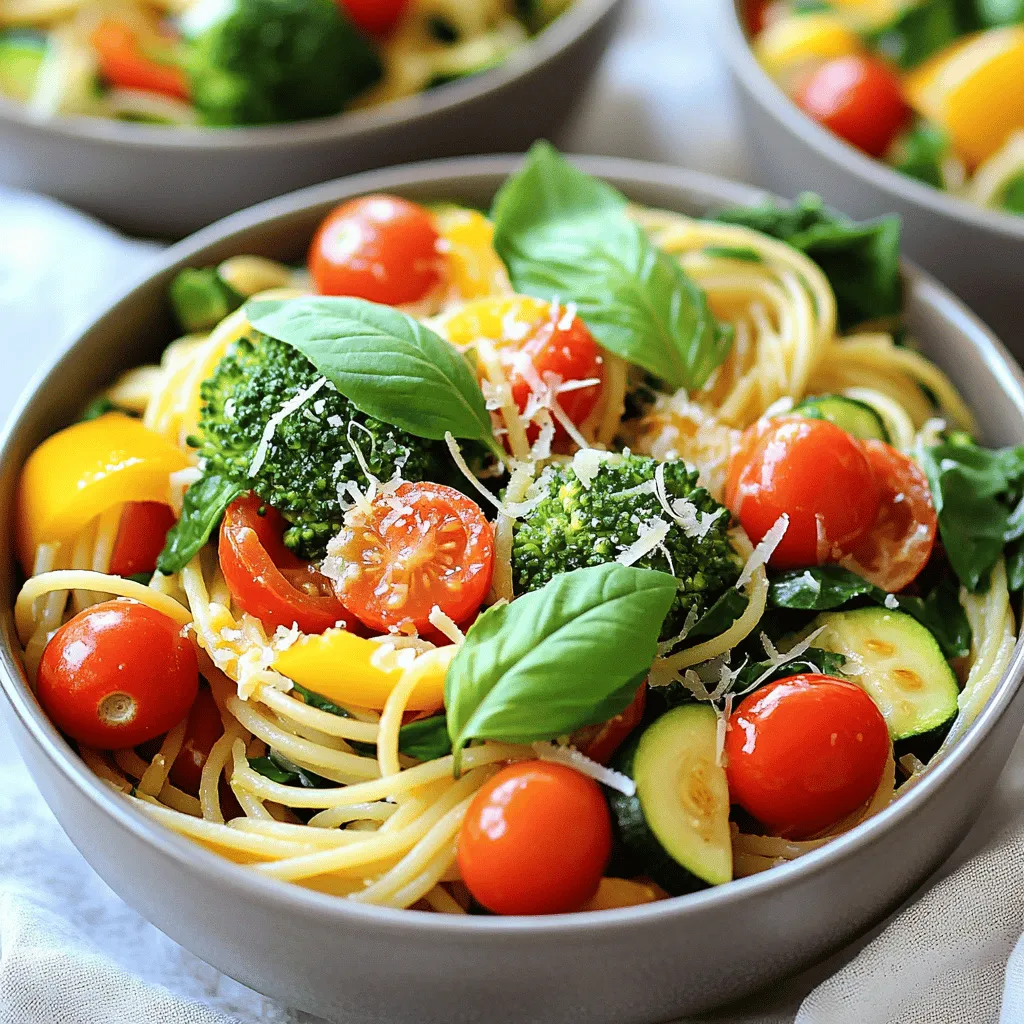
When serving, use deep bowls for a pretty look. This also helps hold the sauce. Add a few extra cherry tomatoes on top for color. A sprig of fresh basil adds a nice touch. For an extra layer of flavor, sprinkle grated Parmesan cheese on top. It makes the dish look fancy and taste even better. Enjoy your vibrant plate!

Variations
Seasonal Vegetable Swaps
You can change the veggies in your Pasta Primavera. Try using asparagus or peas for a fresh taste. Both add crunch and color to your dish. You can also swap lemon for lime. This twist gives a different zing to the flavor. With lime, the dish feels lighter and a bit tropical.
Protein Additions
Adding protein makes this dish more filling. You can toss in cooked chicken or shrimp. Both options pair nicely with the veggies and sauce. For a plant-based choice, try tofu. It absorbs flavors well and adds a nice texture. You can also use beans or lentils for a hearty vegetarian option.
Gluten-Free Alternatives
If you need gluten-free options, look for gluten-free pasta. Many brands offer good choices made from rice or chickpeas. These pastas cook well and taste great. For a vegan-friendly dish, skip the cheese and use nutritional yeast instead. It adds a cheesy flavor without dairy. You can still enjoy a bright and tasty meal.
Storage Info
Storing Leftovers
To keep your Pasta Primavera fresh, store leftovers in an airtight container. This helps maintain flavor and texture. I recommend refrigerating within two hours of cooking. In the fridge, your dish lasts about 3 to 5 days. Always check for any signs of spoilage before eating.
Freezing Tips
If you want to keep Pasta Primavera longer, freezing is a great option. First, cool the dish completely before packing it. Use freezer-safe bags or containers to avoid freezer burn. It can last up to three months in the freezer. To reheat, let it thaw in the fridge overnight. Then, warm it gently on the stove or in the microwave. You may need to add a splash of water to keep it moist.
Meal Prep Ideas
Pasta Primavera is perfect for meal prep. You can cook it on the weekend for busy weeknights. Start by chopping all your veggies in advance. Portion them into containers for easy assembly. When ready to eat, just heat and enjoy. This saves time and ensures you have a healthy meal on hand.
FAQs
What is Pasta Primavera?
Pasta Primavera is a bright dish filled with fresh vegetables. It often uses pasta like spaghetti. The dish is known for its colorful veggies, such as bell peppers, zucchini, and broccoli. It originated in Italy, but many variations exist around the world. You can swap in different vegetables based on the season.
Can I make this dish ahead of time?
Yes, you can prep Pasta Primavera in advance. Cook the pasta and store it in the fridge. You can chop the veggies and keep them chilled. Just remember to cook the veggies fresh before serving. To reheat, warm the pasta and veggies in a skillet. Add a splash of olive oil or reserved pasta water for moisture.
How can I enhance the flavor?
To enhance the flavor, try adding herbs like basil or parsley. A pinch of red pepper flakes can add heat. You can also use fresh lemon juice to brighten the dish. For extra creaminess, consider adding a splash of cream or a dollop of ricotta. Top with grated cheese for richness.
Pasta Primavera is a colorful dish packed with fresh veggies and flavor. You learned how to pick the right pasta, sauté vegetables, and balance seasonings. Plus, we covered ways to customize for your taste and diet needs. Remember, storing leftovers properly keeps your meals fresh. Try new veggie swaps and protein options for fun twists. Enjoy creating your own Pasta Primavera masterpiece!
. Pasta Primavera is a colorful dish packed with fresh veggies and flavor. You learned how to pick the right pasta, sauté vegetables, and balance seasonings. Plus, we covered ways to customize for your taste and diet needs. Remember, storing leftovers properly keeps your meals fresh. Try new veggie swaps and protein options for fun twists. Enjoy creating your own Pasta Primavera masterpiece!](https://dailydishly.com/wp-content/uploads/2025/05/1202f33f-9285-4746-af91-946a78d77e80-300x300.webp)

![- 4 cups fresh broccoli florets - 1 medium onion, chopped - 2 cloves garlic, minced Fresh broccoli florets are key to this soup. They bring a bright color and a nice crunch. Chopped onion adds a sweet base flavor. Minced garlic gives a touch of warmth and depth. Together, these ingredients form a great start for our cozy soup. - 4 cups vegetable broth - 2 cups shredded sharp cheddar cheese - 1 cup heavy cream Vegetable broth gives our soup a rich, savory taste. Shredded sharp cheddar cheese is the star. It melts beautifully, creating that creamy texture we love. Heavy cream adds smoothness and richness. These dairy ingredients make the soup feel indulgent and satisfying. - 1 tablespoon olive oil - Salt and pepper to taste - 1 teaspoon paprika (for a hint of spice) - 1 tablespoon cornstarch (optional, for thickening) Olive oil is perfect for sautéing the onion and garlic. Salt and pepper enhance all the flavors in the soup. Paprika gives a slight kick that pairs well with cheddar. If you like a thicker soup, cornstarch is your friend. Just mix it with a little water before adding it in. For the full recipe, check out Cozy Broccoli Cheddar Bliss! 1. Sautéing the onion and garlic Start by heating the olive oil in a large pot over medium heat. Add the chopped onion and sauté it until it turns translucent, which should take about 5 minutes. This step builds a great base flavor. Next, stir in the minced garlic and cook for one more minute. The garlic will become fragrant, adding depth to your soup. 2. Cooking the broccoli and broth mixture Add the fresh broccoli florets and the vegetable broth to the pot. Bring the mixture to a boil. Once boiling, reduce the heat and let it simmer for about 15 minutes. You want the broccoli to be tender during this time. This step lets the flavors meld together beautifully. 1. Blending the soup to the desired consistency If you like a smooth soup, grab an immersion blender. Blend the soup until it reaches your preferred texture. If you prefer chunks, blend it less or leave it as is. This step lets you customize the soup to your liking. 2. Stirring in cream, cheese, and seasonings Now, stir in the heavy cream and shredded sharp cheddar cheese. Add salt, pepper, and paprika to taste. Keep cooking on low heat until the cheese melts completely. This step creates that creamy goodness we all crave in broccoli cheddar soup. 1. Thickening the soup (if desired) If you want a thicker soup, mix the cornstarch with a little cold water first. Then, stir this mixture into the soup. Let it cook for another 2-3 minutes. This step gives your soup that perfect, hearty texture. 2. Tasting and adjusting flavors Finally, taste your soup. Add more salt, pepper, or paprika as needed. This step ensures your soup is just right for your palate. Enjoy your cozy bowl of broccoli cheddar bliss! For the complete method, check out the Full Recipe. - Fresh Ingredients: Always choose fresh broccoli florets. They give the best flavor and color. Look for bright green florets with no yellow spots. Fresh onions and garlic also boost taste. - Blending Methods: Use an immersion blender for easy blending. You can blend until smooth or leave some chunks. If you don't have one, carefully transfer the soup to a blender in batches. - Additional Spices: Try adding a pinch of nutmeg or cayenne pepper for warmth. A sprinkle of paprika adds color and flavor. You can also mix in some fresh herbs like thyme or parsley. - Pairing Suggestions: Serve with a crusty bread or a side salad. These pair well and add comfort. A simple green salad with a tangy vinaigrette works great. - Too-Thin Soup: If your soup is too thin, mix a tablespoon of cornstarch with cold water. Stir this into the soup and cook for a few minutes until thickened. - Seasoning Balance: If the soup tastes bland, add more salt and pepper. Taste as you go, and adjust to your preference. A splash of lemon juice can brighten the flavors too. {{image_2}} You can make this soup lighter by using low-fat dairy options. Swap heavy cream for low-fat milk or a plant-based milk. This change still keeps the soup creamy. You can also add more vegetables. Carrots and spinach fit well in this soup. They boost nutrition and add color. Mixing in different cheese varieties can change the taste. Try gouda or pepper jack for a twist. You can also add herbs like thyme or basil for extra flavor. Crispy bacon gives a rich taste and crunch. It adds depth to the creamy soup. If you need a gluten-free version, use cornstarch as a thickener. Make sure your vegetable broth is gluten-free too. For vegan options, swap cheese and cream for plant-based alternatives. Nutritional yeast gives a cheesy flavor without dairy. You can still enjoy this soup without animal products. Feel free to explore these variations to make this easy broccoli cheddar soup your own. For a full recipe, check the [Full Recipe]. Store your broccoli cheddar soup in a tight container. Let it cool first. The best practice is to use glass or BPA-free plastic. This soup lasts about 3 to 4 days in the fridge. When you want a bowl, just take it out and reheat. To freeze soup, let it cool completely. Pour it into freezer-safe containers, leaving some space at the top. This helps with expansion. Use containers made for freezing to avoid cracks. It can stay fresh for up to 3 months in the freezer. When you're ready, move it to the fridge to thaw overnight. You have two great options to reheat your soup. You can use the stovetop or microwave. On the stovetop, heat it gently over medium-low heat. Stir often to prevent sticking. If you use the microwave, heat in short bursts. Stir in between to ensure even heating. When reheating, you might notice the soup has thickened. To restore creaminess, add a splash of cream or broth. This keeps your soup smooth and delicious! Enjoy your cozy bowl of soup anytime. Broccoli cheddar soup lasts about 3 to 4 days in the fridge. To keep it fresh, store it in an airtight container. Make sure to cool it down before putting it in the fridge. This way, you can enjoy those cheesy flavors for a few days. Yes, you can make this soup ahead of time. It’s great for meal prep! I often make a big batch and store it. Just let it cool, then store it in the fridge. Reheat it on the stove or in the microwave when you're ready to eat. This soup tastes even better the next day as the flavors blend more. You can serve this soup with many sides. A slice of crusty bread is perfect for dipping. A simple salad adds freshness and crunch. You could also enjoy it with a grilled cheese sandwich for extra comfort. These pairings make your meal even more delightful! Yes, this broccoli cheddar soup can be gluten-free. Just use gluten-free vegetable broth and cornstarch. Always check labels to ensure the ingredients are safe. This way, everyone can enjoy this creamy delight without worry. This blog post covered everything you need to make delicious broccoli cheddar soup. We explored key ingredients like fresh broccoli, sharp cheddar, and heavy cream. You learned step-by-step instructions for preparation, blending, and adjusting flavors. We also shared tips for enhancing your soup, plus healthy variations to try. Lastly, I provided storage and reheating advice. Enjoy making your soup, knowing it’s simple and adaptable. Dive in, savor every bite, and share it with loved ones. Happy cooking!](https://dailydishly.com/wp-content/uploads/2025/06/80916b53-9b02-4ceb-883a-5c917337c047-768x768.webp)


