Are you ready to savor a delicious Peach Cream Pie? This recipe is both easy and oh-so-creamy! With fresh peaches, rich cream, and a crumbly crust, every bite is a delight. I’ll guide you through each step, ensuring that your pie turns out perfect every time. Let’s dive in and create a dessert that will impress family and friends alike!
Ingredients
For a Peach Cream Pie, gather these simple ingredients. They are easy to find and create a delicious dessert.
– Fresh peaches
– Heavy cream
– Cream cheese
– Powdered sugar
– Vanilla extract
– Graham cracker pie crust
– Lemon juice
– Cornstarch
– Garnish options
Fresh peaches bring a sweet and juicy flavor. Heavy cream and cream cheese create a rich, creamy filling. Powdered sugar adds the right sweetness, while vanilla extract gives a warm aroma. The graham cracker pie crust adds a crunchy base that contrasts perfectly with the soft filling.
Lemon juice brightens the peach taste and balances the sweetness. Cornstarch helps thicken the peach mixture, keeping it from getting too runny. For garnish, consider fresh mint leaves or extra peach slices to make it look pretty.
Step-by-Step Instructions
Preparation of Peaches
First, take your fresh peaches. You need about 2 cups of them. Peel and slice the peaches. In a medium bowl, toss the sliced peaches with 1 tablespoon of lemon juice and 1 tablespoon of cornstarch. This step is key. The lemon juice keeps the peaches bright. The cornstarch helps thicken the pie filling. Set the bowl aside for a bit. Let the mixture thicken as you move on to the next steps.
Whipping the Cream
Next, grab a large mixing bowl. Pour in 1 cup of heavy cream. Start whipping it until you see soft peaks form. This means the cream should hold its shape but not be too stiff. Slowly add in 1/2 cup of powdered sugar and 1 teaspoon of vanilla extract. Keep whipping until you reach medium peaks. You should see the cream get fluffy and light. This adds a nice texture to your pie.
Combining Ingredients
Now, take another bowl and add 1 cup of softened cream cheese. Beat it until smooth and creamy. This is important for a nice texture in the pie. Once smooth, gently fold in the whipped cream. Use a spatula and be careful not to deflate the whipped cream. You want it to stay light and airy. This mixture is the creamy layer of your pie.
Assembling the Pie
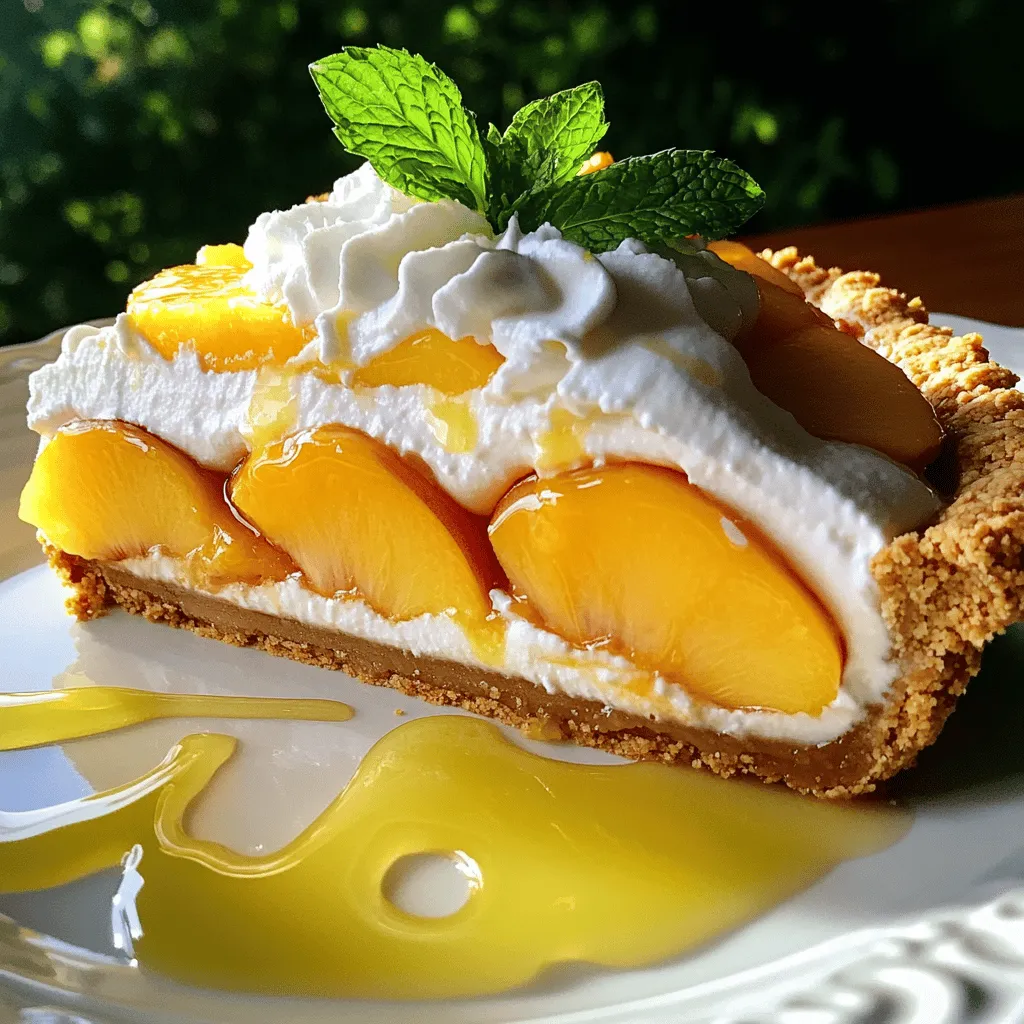
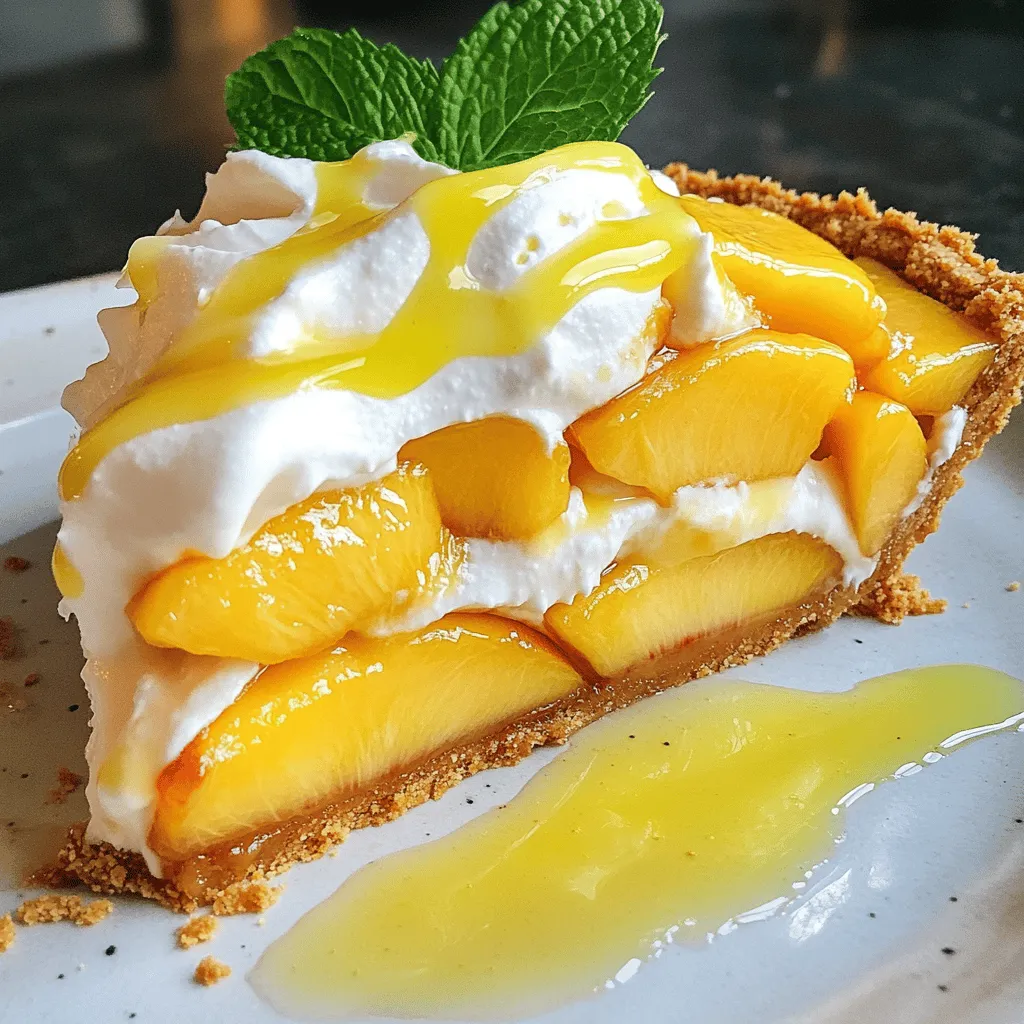
Let’s put the pie together. Take the pre-made graham cracker pie crust. Start by layering the peach mixture at the bottom. Spread it evenly. Then, pour the cream cheese mixture over the peaches. Smooth the top with your spatula. Make sure it looks nice and even. This is where the pie gets its delightful creaminess.
Setting the Pie
Finally, it’s time to let the pie chill. Place the pie in the refrigerator for at least 4 hours. This helps it set properly. A good tip is to cover it lightly with plastic wrap. This keeps it fresh and prevents any odors from the fridge. Make sure it chills well before you slice it. The waiting will be worth it when you take that first bite of Peach Cream Pie Delight.
Tips & Tricks
Presentation Tips
To serve your Peach Cream Pie well, slice it on chilled plates. This keeps the pie fresh and cool. For a fun touch, drizzle some peach juice from the filling on each slice. You can also add a small dollop of whipped cream to each slice for extra creaminess. A sprinkle of fresh mint leaves will give it a pop of color and a hint of flavor.
Cooking Tips
Getting the cream just right is key. Whip the heavy cream until you see soft peaks. This gives your pie a light and airy feel. When you fold in the whipped cream with the cream cheese, do it gently. This keeps the texture fluffy. For the crust, avoid sogginess by layering the peach mixture first. Let the pie chill for a bit to firm it up and keep the crust crisp.
Troubleshooting Common Issues
If your pie doesn’t set, don’t worry! You can fix it. Just put it back in the fridge for a few more hours. If the filling seems too sweet, add a squeeze of lemon juice. This will balance the flavors and brighten the dish. Always taste your filling before assembling the pie. Adjust as needed to achieve the perfect blend of flavors.
Variations
Alternative Fruit Options
You can switch out peaches for other fruits. Try fresh berries, like strawberries or blueberries. They add a sweet and tart flavor that works well. You can also use tropical fruits like mango or pineapple. Their sweetness pairs nicely with creamy fillings. Mixing fruits can create a unique flavor profile. For example, peaches and raspberries together make a great combo.
Dietary Modifications
If you need a gluten-free option, use a gluten-free graham cracker crust. They taste just as good as the regular ones. For those who avoid dairy, there are non-dairy cream cheese brands. You can also whip coconut cream for a dairy-free treat. Each option keeps the pie creamy and delicious.
Flavor Enhancements
To elevate the flavor, add spices like cinnamon or nutmeg. Just a pinch can make a big difference. You can also try almond extract for a nutty twist. This adds depth and warmth to each slice. Experimenting with these flavors can surprise your taste buds. Keep it fun and creative!
Storage Info
Proper Storage Techniques
To keep your Peach Cream Pie fresh, store it in the fridge. Cover it tightly with plastic wrap or aluminum foil. This helps to keep moisture in and prevents the pie from absorbing other smells. A glass or plastic container with a lid also works well. Make sure the pie is fully chilled before covering it. This helps the filling set and makes it easier to slice.
Freezing Instructions
If you want to enjoy the pie later, you can freeze it. First, cut it into slices. Wrap each slice in plastic wrap, then place them in a freezer-friendly bag. Be sure to remove as much air as possible. This prevents ice crystals from forming. When you’re ready to eat, take a slice out and let it thaw in the fridge overnight. For the best taste, enjoy it within two months.
FAQs
What is the best way to ripen peaches?
To ripen peaches, choose peaches that are firm but have a slight give. Place them in a paper bag at room temperature. This traps the ethylene gas they release, speeding up ripening. Check them daily. Once ripe, store them in the fridge to slow down the process. Look for a sweet scent and a soft feel to know they are ready to eat.
Can I use frozen peaches for this recipe?
Yes, you can use frozen peaches. They are handy when fresh ones are out of season. Frozen peaches save time and can be just as tasty. However, they may release more juice, which can make your pie watery. To avoid this, drain excess juice and add a bit more cornstarch to thicken.
How long does the peach cream pie last in the refrigerator?
Peach cream pie lasts about 3 to 4 days in the fridge. Store it covered with plastic wrap or in an airtight container. Check for signs of spoilage like an off smell or a change in texture. If the pie looks or smells off, it’s best to toss it to be safe.
Can I make this pie ahead of time?
Absolutely! You can make the pie a day or two in advance. Just keep it in the fridge until you’re ready to serve. This allows the flavors to meld together nicely. If you plan to freeze it, do so before adding the cream layer. Thaw it in the fridge before serving for the best taste.
This blog post covered how to make a delicious peach cream pie. We discussed the key ingredients, preparation steps, and tips for the best results. You learned about alternative fruits and ways to store the pie properly. Remember, using fresh ingredients matters for flavor. Making this pie ahead saves time and adds joy to any meal. Enjoy each slice and share it with family and friends. With practice, you will master this treat. Happy baking!


