Peach Raspberry Crisp Simple and Tasty Dessert Recipe

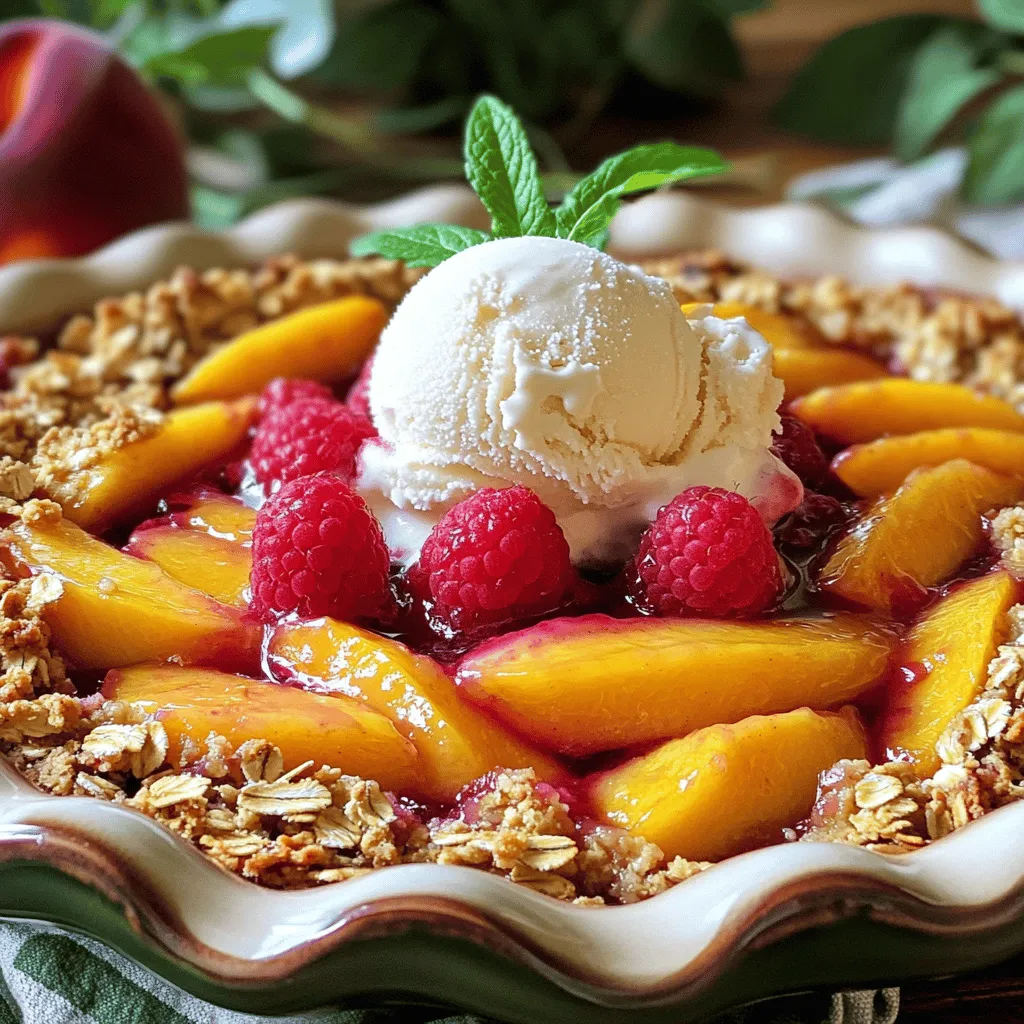
If you’re craving a sweet and simple dessert, this Peach Raspberry Crisp is the answer! I’ll guide you through making this delicious treat using fresh peaches and tangy raspberries. With just a few easy steps and tasty ingredients, you can whip up dessert that impresses everyone. Plus, I’ll share tips on serving and storing leftovers. Ready to enjoy a mouthwatering dessert? Let’s get started on this Peach Raspberry Crisp recipe!
Ingredients
Main Ingredients Needed
– 4 ripe peaches, peeled and sliced
– 1 cup fresh raspberries
– 1 cup rolled oats
– 1/2 cup all-purpose flour
– 1/2 cup brown sugar
– 1/4 cup granulated sugar
– 1 teaspoon ground cinnamon
– 1/4 teaspoon salt
– 1/2 cup cold unsalted butter, cubed
– 1 teaspoon vanilla extract
Peaches bring sweetness and juiciness. Choose ripe ones for the best flavor. Raspberries add a tart kick, balancing the sweetness of the peaches. Oats and flour create a crunchy topping that makes this dessert special.
Optional Ingredients
– Vanilla ice cream for serving
– Mint for garnish
Vanilla ice cream adds creaminess and extra flavor. A sprig of mint brightens up the dish and makes it look pretty.
Ingredient Substitutions
– Gluten-free options: Use gluten-free oats and flour.
– Alternative sweeteners: Swap brown sugar for coconut sugar or honey.
You can easily adapt this recipe. Gluten-free eaters can enjoy it too. Using alternative sweeteners helps if you want less sugar.
Step-by-Step Instructions
Preparation Steps
Prepping the fruit
Start by peeling and slicing four ripe peaches. Make sure the peaches are soft to the touch. Next, take one cup of fresh raspberries. Place both fruits in a large mixing bowl. Sprinkle one tablespoon of granulated sugar over them. Gently toss to coat the fruit with sugar. This step brings out the natural juices and sweetness.
Mixing dry ingredients
In another bowl, mix one cup of rolled oats, half a cup of all-purpose flour, half a cup of brown sugar, one teaspoon of ground cinnamon, and a quarter teaspoon of salt. Use a whisk to combine these dry ingredients well. Mixing them evenly helps ensure every bite is flavorful.
Assembling the Crisp
Layering the fruit and topping
Grease a 9×9-inch baking dish with butter or cooking spray. Spread the peach and raspberry mixture evenly at the bottom. This creates a delicious base for your crisp. Next, take the oat mixture and sprinkle it generously over the fruit layer. Make sure to cover all the fruit. This topping will turn golden brown and crunchy while baking.
Baking Instructions
Optimal oven settings
Preheat your oven to 350°F (175°C). This temperature helps cook the fruit while crisping the topping.
Baking time guidelines
Place the baking dish in the preheated oven. Bake for 30 to 35 minutes. Keep an eye on it. The topping should turn golden brown, and the fruit should bubble. Once done, remove it from the oven and let it cool slightly before serving. Enjoy this warm dessert with a scoop of vanilla ice cream for a treat!
Tips & Tricks
Choosing the Right Peaches
When picking peaches, choose ripe ones. Ripe peaches feel soft but not mushy. They have a sweet smell and a nice color. Unripe peaches are hard and lack flavor. You can let unripe peaches sit at room temperature to ripen. Check them daily for softness.
Perfecting the Crisp Topping
A good topping makes the dish shine. For the best texture, combine oats, flour, and sugar. Use cold butter, and blend until it looks like coarse crumbs. This gives a nice crunch.
To enhance flavor, add a pinch of nutmeg or some chopped nuts. You can even mix in a bit of coconut for a tropical twist. Tweak it to your liking to create a unique topping!
Serving Suggestions
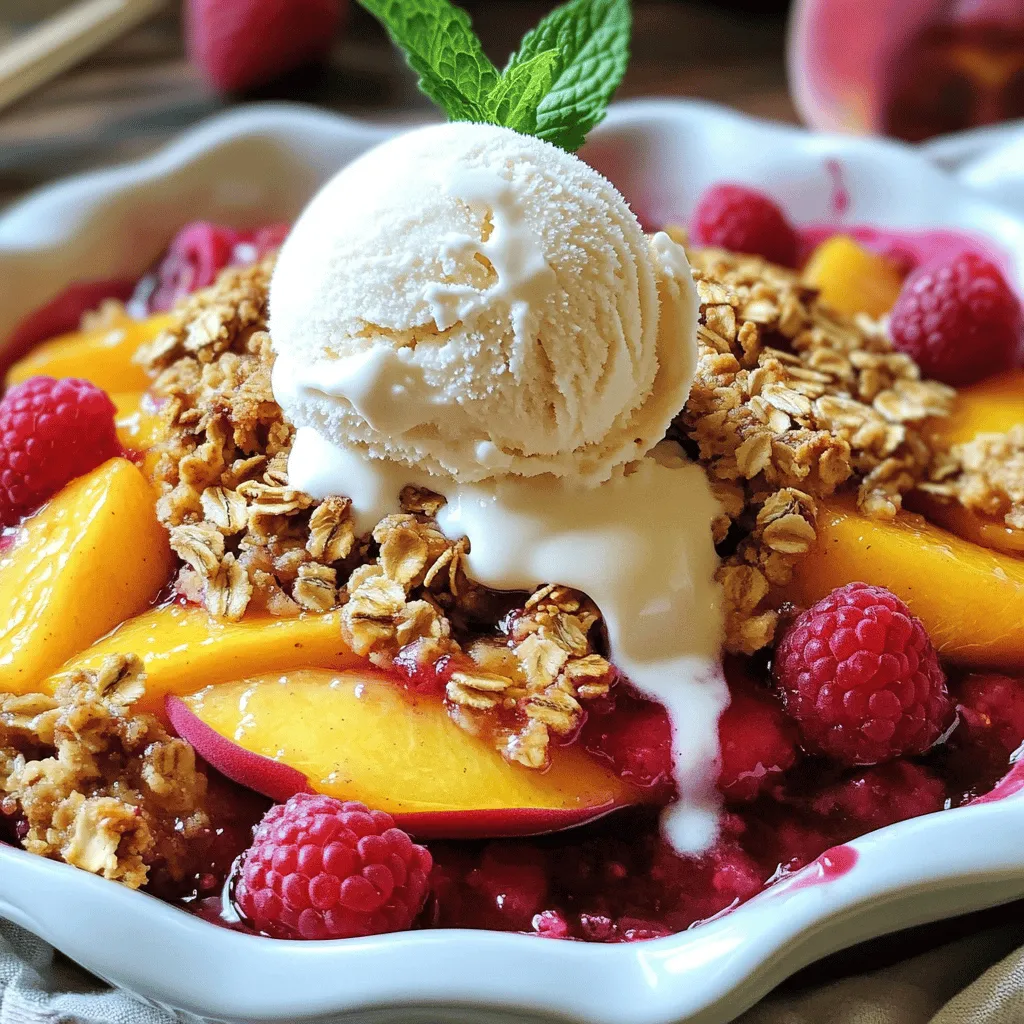
Serving Peach Raspberry Crisp warm is key. Top it with a scoop of vanilla ice cream. The cold ice cream melts with the warm crisp, creating a perfect treat.
For a nice touch, garnish with a sprig of mint. This adds color and a fresh aroma. Serve it in clear bowls to show off those lovely layers!

Variations
Fruit Combinations
You can change the fruit in your crisp. Adding other berries, like blueberries or strawberries, gives it a new twist. Each berry brings its own flavor, making your dessert fun and fresh. You can also mix in different stone fruits. Try plums or nectarines for a unique taste. These fruits pair well with peaches and raspberries.
Healthier Options
If you want a lighter dessert, reduce the sugar. You can cut the brown sugar by half. This way, the fruit’s natural sweetness shines. Making it vegan is easy, too. Use coconut oil instead of butter. You can also swap the granulated sugar for maple syrup or agave nectar. Both give a nice flavor while keeping it plant-based.
Seasonal Adjustments
You can adjust your recipe for seasonal fruits. In summer, fresh peaches and raspberries taste great. In fall, try using apples and pears. Both options will keep your crisp delicious year-round. This way, you can enjoy the best flavors each season has to offer.
Storage Info
Storing Leftovers
To store leftover peach raspberry crisp, let it cool first. Cover it tightly with plastic wrap or foil. Place it in the fridge. It will stay fresh for up to four days. To reheat, preheat your oven to 350°F (175°C). Place the crisp in an oven-safe dish. Heat for about 10 to 15 minutes, until warm. You can also microwave it for a quick option. Just heat it for 30 seconds at a time.
Freezing the Crisp
If you want to freeze peach raspberry crisp, cool it down completely. Wrap it tightly in plastic wrap or foil. Place it in a freezer-safe bag or container. Make sure to label it with the date. You can freeze it for up to three months. When ready to eat, let it thaw in the fridge overnight. Then, reheat it as described above.
Shelf Life
Peach raspberry crisp lasts for about four days in the fridge. If you freeze it, the quality stays good for up to three months. After that, it may lose its flavor and texture. Always check for off smells or signs of freezer burn before eating. Enjoy your delicious dessert at its best!
FAQs
Can I use frozen fruit?
Yes, you can use frozen raspberries and peaches. Frozen fruit is convenient and saves time. However, there are some downsides. Frozen fruit can be watery when baked. That might make your crisp soggy. If using frozen fruit, thaw it first and drain excess liquid. This helps keep the texture right.
How do I know when the crisp is done?
Look for a golden brown topping. The fruit should bubble around the edges. This means the crisp is ready. If the topping is pale, it needs more time. Always check after 30 minutes. If it looks good, take it out and let it cool.
Can I prepare this ahead of time?
Yes, you can par-bake the crisp. Bake it until the topping is slightly set. Cool it and store it in the fridge. You can also prepare the fruit and topping separately. Just layer them and bake when you’re ready. This saves time on busy days.
You learned how to make a delicious fruit crisp using peaches and raspberries. We covered the key ingredients, preparation steps, and baking details. I shared tips for choosing ripe peaches and perfecting the crisp topping. You can also explore fun variations and healthier options. Storing leftovers or freezing was addressed too.
Enjoy making your own crisp and feel proud of your creation. Simple steps lead to tasty treats!


![- 1 cup all-purpose flour - 1 cup whole wheat flour - 2 tablespoons brown sugar - 2 teaspoons baking powder - 1 teaspoon baking soda - 1 teaspoon ground cinnamon - 1 teaspoon ground nutmeg - 1/2 teaspoon ground ginger - 1/4 teaspoon ground cloves - 1/4 teaspoon salt - 1 cup pumpkin puree - 1 1/2 cups milk (dairy or non-dairy) - 2 large eggs - 1/4 cup melted butter or coconut oil - 1 teaspoon vanilla extract - Maple syrup - Whipped cream - Powdered sugar - Extra cinnamon To make perfect Pumpkin Spice Waffles, you need to gather all the right ingredients. Start with your flours. I use both all-purpose and whole wheat flour for a nice texture. Brown sugar adds a touch of sweetness that balances the spices well. Next, you have your leavening agents. Baking powder and baking soda work together to create fluffy waffles. The spices make this dish special. Ground cinnamon, nutmeg, ginger, and cloves give that warm, cozy taste we love in fall. Don’t forget the salt; it helps enhance all the flavors. Pumpkin puree is the star here. It adds moisture and that lovely pumpkin flavor. I prefer using fresh puree, but canned works just fine too. For the liquid, milk brings everything together; you can use dairy or a non-dairy option. Eggs bind the batter and add richness. Butter or coconut oil adds fat, making the waffles tender. Lastly, vanilla extract gives a lovely aroma. Don't skip the toppings! Maple syrup is a must, and whipped cream makes it feel special. A dusting of powdered sugar or cinnamon can take it to the next level. With these ingredients ready, you can follow the Full Recipe for a delightful breakfast treat. Preheat your waffle iron according to the manufacturer’s instructions. This step helps your waffles cook evenly and become crispy. In a large bowl, whisk together the following dry ingredients: - 1 cup all-purpose flour - 1 cup whole wheat flour - 2 tablespoons brown sugar - 2 teaspoons baking powder - 1 teaspoon baking soda - 1 teaspoon ground cinnamon - 1 teaspoon ground nutmeg - 1/2 teaspoon ground ginger - 1/4 teaspoon ground cloves - 1/4 teaspoon salt This mix gives your waffles their warm, spice flavor. In another bowl, mix the wet ingredients until smooth: - 1 cup pumpkin puree - 1 1/2 cups milk (dairy or non-dairy) - 2 large eggs - 1/4 cup melted butter or coconut oil - 1 teaspoon vanilla extract The pumpkin puree adds moisture and a rich taste. Pour the wet ingredients into the dry mix. Stir gently until just combined. A few lumps are okay; overmixing makes the waffles tough. Lightly grease the waffle iron if needed. Pour an appropriate amount of batter into the preheated iron. Cook until golden brown. This usually takes a few minutes. Serve your waffles hot. Drizzle with maple syrup, add whipped cream, and sprinkle cinnamon for extra flavor. Don't forget to check out the Full Recipe for more details! To make your waffles light and fluffy, follow these tips: - Use fresh baking powder and baking soda. This gives your waffles the lift they need. - Mix the batter until just combined. A few lumps are okay; overmixing can make them tough. - Let the batter rest for a few minutes before cooking. This helps the waffles rise better. - Preheat your waffle iron well. A hot iron ensures a crispy outside and soft inside. You can add fun twists to your pumpkin spice waffles. Here are some ideas: - Fold in chocolate chips for a sweet surprise. They melt and create a lovely gooey texture. - Add chopped nuts like walnuts or pecans for crunch. They bring a nice contrast to the soft waffles. - Mix in dried fruit, such as cranberries or raisins, for extra sweetness and chewiness. - Try a splash of maple extract for a deeper flavor. It pairs perfectly with pumpkin. Taking care of your waffle iron is key for great results. Here are some best practices: - Always preheat your waffle iron according to the manufacturer’s instructions. A hot iron cooks evenly. - Lightly grease the iron with butter or oil if needed. This prevents sticking and ensures a clean release. - Don't open the waffle iron too soon. Wait until the steam stops before checking for doneness. - Clean your waffle iron after each use. This keeps it in good shape and ready for your next batch. For the full recipe, check out the [Full Recipe]. {{image_2}} To make gluten-free pumpkin spice waffles, you can swap out the all-purpose flour. Use a gluten-free all-purpose flour blend instead. Make sure it has xanthan gum for the right texture. You can also add a bit of almond flour for extra flavor. This will give the waffles a nice nutty taste. Check the baking powder to ensure it is gluten-free as well. This simple change makes your breakfast safe for everyone. Want to make these waffles vegan? It's easy! Replace the eggs with flax eggs. Mix one tablespoon of ground flaxseed with three tablespoons of water for each egg. Let it sit for five minutes to thicken. Use almond milk or any other non-dairy milk instead of regular milk. Swap the butter for coconut oil or a vegan butter alternative. These changes keep the flavor while making it plant-based. You can add more fun to your pumpkin spice waffles. Try mixing in chocolate chips for a sweet twist. Nuts like walnuts or pecans add a crunchy texture. You can also use different spices. Try cardamom for a unique taste or allspice for a warm flavor. Adding a splash of maple extract can make it even more delicious. Feel free to experiment and find your favorite flavors! To keep your leftover waffles fresh, place them in an airtight container. You can also wrap them in plastic wrap or aluminum foil. Store them in the fridge for up to three days. When you want to eat them, just warm them up in the toaster or microwave. If you want to save waffles for later, freezing is a great option. First, let the waffles cool completely. Then, place a piece of parchment paper between each waffle. This prevents them from sticking together. Store them in a freezer bag or container. They can last up to three months in the freezer. To reheat, pop them in a toaster or bake them in the oven. This keeps them crispy. Waffles stored in the fridge last about three days. If frozen, they remain good for three months. After that, they may lose flavor and texture. Always check for any signs of spoilage before enjoying your waffles. Enjoy them fresh for the best taste! You can use several options if you don't have pumpkin puree. Here are some ideas: - Sweet potato puree: It has a similar texture and flavor. - Butternut squash puree: This option is also sweet and creamy. - Homemade pumpkin puree: Just roast fresh pumpkin until soft, then blend. Using these alternatives may change the flavor slightly, but they still taste great. To get your waffles nice and crispy, follow these tips: - Preheat your waffle iron: Make sure it’s hot before adding batter. - Use a little extra oil: Adding a bit more oil to the batter can help. - Don't overmix the batter: A few lumps are fine; this helps keep them light. - Cook longer: If they are not crispy enough, cook them a little longer. These tricks will help you achieve that perfect crunch. Yes, you can prepare the batter ahead of time. Here’s how: - Store in the fridge: Keep the batter in an airtight container for up to 24 hours. - Stir before use: Give it a gentle stir if it separates. Keep in mind that letting the batter sit too long may affect the rise. You can find pre-made pumpkin spice waffles in many stores. Check these places: - Supermarkets: Look in the frozen breakfast section. - Health food stores: They often carry organic or gluten-free options. - Online retailers: Websites like Amazon may have several brands available. Brands like Eggo and Nature's Path often sell great options. Toppings can enhance your pumpkin spice waffles. Here are some ideas: - Maple syrup: A classic choice that complements the spices well. - Whipped cream: Adds creaminess and sweetness. - Powdered sugar: A light dusting makes them look fancy. - Extra cinnamon: Sprinkle some on top for added flavor. These toppings will take your waffles to the next level! In this article, we explored how to craft perfect pumpkin spice waffles from scratch. We covered ingredient lists, step-by-step instructions, and tips for the best flavor and texture. I also shared ways to vary the recipe for gluten-free or vegan options, plus storage advice. Enjoying homemade waffles can be simple and fun. You can impress your family with these warm, delicious treats at breakfast or brunch. Give them a try, and savor every bite!](https://dailydishly.com/wp-content/uploads/2025/06/28ffe532-610a-4fe8-ab83-510bf8d3c6f3-768x768.webp)

