Peanut Butter Chocolate Overnight Oats Easy Recipe

Are you ready for a breakfast that’s both delicious and easy? Peanut Butter Chocolate Overnight Oats are the perfect start to your day. Packed with flavor and nutrients, this recipe will satisfy your sweet tooth and fuel your morning. I’ll guide you through simple steps, tasty toppings, and creative twists. Let’s dive into the world of creamy, chocolatey goodness that wakes you up right!
Ingredients
Main Ingredients for Peanut Butter Chocolate Overnight Oats
For this simple recipe, you need:
– 1 cup rolled oats
– 2 cups almond milk (or any milk of your choice)
– 2 tablespoons peanut butter (natural, creamy)
– 2 tablespoons cocoa powder (unsweetened)
– 2 tablespoons maple syrup (or honey)
– 1/2 teaspoon vanilla extract
– A pinch of salt
These ingredients come together to make a creamy and rich base. The rolled oats soak up the almond milk, creating a soft texture. The peanut butter adds a nutty flavor, while cocoa powder gives it that chocolate taste.
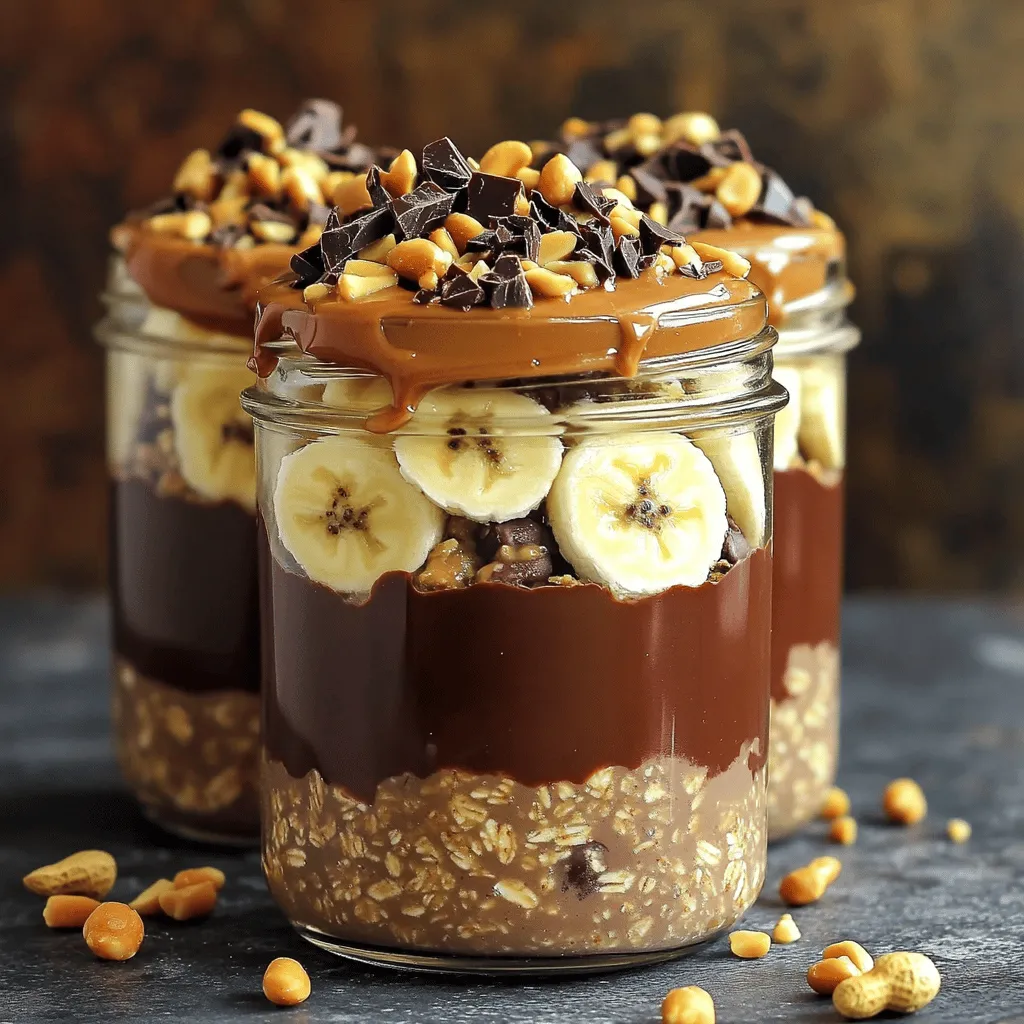
Optional Toppings and Add-Ins
You can customize your oats with these fun extras:
– Sliced banana
– Chopped peanuts
– Dark chocolate shavings
– Fresh berries
– A drizzle of honey or maple syrup
These toppings not only add flavor but also make your oats look pretty. You can switch them up based on what you like or have on hand.
Nutritional Benefits of Key Ingredients
Here’s why these ingredients are good for you:
– Rolled oats provide fiber. This helps keep you full and supports digestion.
– Peanut butter is rich in protein and healthy fats. These nutrients fuel your body.
– Cocoa powder is full of antioxidants. It can help improve heart health.
– Maple syrup offers natural sweetness and contains minerals like zinc and manganese.
By combining these ingredients, you create a breakfast that is not only tasty but also nutritious.
Step-by-Step Instructions
Preparation Steps for Making Overnight Oats
To start, gather your ingredients. You will need rolled oats, almond milk, peanut butter, cocoa powder, maple syrup, vanilla, salt, banana, peanuts, and chocolate. In a medium bowl, mix together the rolled oats and almond milk. Then, add the peanut butter, cocoa powder, maple syrup, and a pinch of salt.
How to Mix Ingredients Properly
Whisk all the ingredients well. Make sure the peanut butter blends in smoothly. You want a creamy texture. Once mixed, divide the oats into two jars. This recipe makes two servings. Seal the jars tightly. Put them in the fridge overnight. If you can’t wait, let them sit for at least four hours.
Tips for Storing and Timing
Store your jars in the fridge to keep them fresh. They stay good for up to five days. When you’re ready to eat, stir the oats. For a yummy topping, add sliced banana, chopped peanuts, and dark chocolate shavings. If you prefer, warm them in the microwave for one minute. Enjoy your tasty Peanut Butter Chocolate Overnight Oats!
Tips & Tricks
How to Achieve the Perfect Texture
To make your overnight oats smooth, use rolled oats. They soak up the milk well. If you want a creamier mix, add more almond milk. Let the oats sit overnight. This will help them become soft and fluffy. Stir them again in the morning for a nice blend. You can also add a bit of yogurt for a creamier texture.
Substitutions for Vegan or Nut-Free Options
If you need a vegan option, use maple syrup instead of honey. For a nut-free version, swap peanut butter with sunflower seed butter. You can also use oat milk instead of almond milk. This keeps the taste rich without nuts. Always check for allergies when you make substitutions.
Serving Suggestions for Enhanced Flavor
To make your oats even better, top them with fresh fruit. Sliced bananas or berries add a nice touch. You can also sprinkle cinnamon or a drizzle of honey on top. Try adding a few chocolate chips for a sweet twist. For a crunch, add granola or chopped nuts. Make each bowl a treat with these simple additions.

Variations
Different Flavor Combinations to Try
You can change the flavors of your peanut butter chocolate overnight oats. Try adding cinnamon for warmth. Mix in some chia seeds for a fun texture. You can also swap the cocoa powder with matcha for a green twist. Want fruity flavors? Add berries or diced apples. These changes keep breakfast exciting.
Adding Protein: Greek Yogurt and More
Boost your oats with protein. Greek yogurt works great. It adds creaminess and a tangy taste. You can also stir in protein powder. This helps keep you full longer. For a nut-free option, consider using sunflower seed butter instead. Both add flavor and nutrients.
Making it a Dessert: Sweet Additions
Transform your oats into a dessert. Add chocolate chips for extra sweetness. You can also mix in some whipped cream on top. A drizzle of caramel sauce can make it feel indulgent. Try sprinkling crushed cookies for crunch. These sweet touches make your oats feel like a treat.
Storage Info
How to Store Leftover Overnight Oats
You can store leftover overnight oats in the fridge. Seal them in airtight containers. This keeps them fresh and tasty. If you use jars, just put the lid on tightly. Overnight oats can last well in the fridge for a few days. I enjoy eating them for breakfast or snacks.
Shelf Life and Freezing Options
Overnight oats stay good in the fridge for about 4 to 5 days. If you want to keep them longer, you can freeze them. Pour the oats into freezer-safe containers. Make sure to leave some space at the top since they expand when frozen. You can freeze them for up to 3 months. Just thaw them in the fridge before you eat.
Best Containers for Storage
I recommend using glass jars or plastic containers. Glass jars are great because you can see the layers. They are also easy to clean. Plastic containers work well too and are lightweight. Choose containers with tight-fitting lids to keep air out. This helps keep your oats fresh.
FAQs
Can I use quick oats instead of rolled oats?
Yes, you can use quick oats. Quick oats cook faster than rolled oats. They absorb liquid quicker, which can change the texture. If you like a smoother consistency, quick oats work well. However, rolled oats give a chewier bite. Both options are tasty!
How long can I keep overnight oats in the fridge?
You can keep overnight oats in the fridge for up to five days. Store them in airtight containers. This makes them perfect for meal prep! Just make sure to add fresh toppings right before you eat. It keeps everything crisp and delicious.
What is the best way to reheat overnight oats?
The best way to reheat overnight oats is in the microwave. Place the oats in a bowl and heat for one minute. Stir halfway through to ensure even heating. If they seem dry, add a splash of milk. This keeps them creamy and tasty. You can also enjoy them cold if you prefer.
For the complete recipe, check out the Peanut Butter Chocolate Dream Overnight Oats 🥜.
In this blog post, we explored how to make delicious peanut butter chocolate overnight oats. We covered key ingredients and their benefits, plus preparation steps for the best results. You learned tips for texture and fun variations to try. Storing your oats properly helps keep them fresh. Overall, this recipe is easy and nutritious. It makes a great start to your day. Enjoy customizing it to fit your taste!


. You learned about tasty no-bake oatmeal cookie bars. We covered the key ingredients and step-by-step instructions for making them. You now know tips for perfect texture and options for variations and storage. These bars are easy to customize. They are healthy snacks that you can enjoy anytime. Keep exploring your flavors and share these bars with friends and family. Enjoy your cooking adventure!](https://dailydishly.com/wp-content/uploads/2025/07/f09ca3d9-767d-43d9-b263-9e4a23fd83a9-768x768.webp)


![- 1 cup (2 sticks) unsalted butter, softened - 1 cup brown sugar, packed - 1/2 cup granulated sugar - 2 large eggs - 2 teaspoons vanilla extract These ingredients form the base of your cookie bars. The butter adds richness, while the sugars provide sweetness and moisture. Eggs help bind everything together, and vanilla adds that warm, sweet flavor we all love. - 3 cups all-purpose flour - 1 teaspoon baking soda - 1/2 teaspoon salt The flour gives structure to the bars. Baking soda is a leavening agent, which helps them rise and become soft. Salt enhances flavor and balances the sweetness, making each bite even better. - 2 cups chocolate chips (semi-sweet or milk chocolate) - 1/2 cup chopped walnuts or pecans (optional) Chocolate chips are the star of these bars! You can choose semi-sweet for a balanced taste or milk chocolate for a sweeter bite. If you like a little crunch, add walnuts or pecans for extra texture. Don’t forget to check the [Full Recipe] for precise measurements. - Preheat the oven to 350°F (175°C). - Grease a 9x13-inch baking dish or line it with parchment paper. Start by setting your oven. This step is key. A hot oven helps the bars rise nicely. Greasing or lining the dish makes it easy to remove the bars later. - Cream together butter, brown sugar, and granulated sugar until fluffy. Next, grab a big bowl. Add your softened butter, brown sugar, and granulated sugar. Mix them well. You want the mixture light and fluffy. This step adds air, making your bars soft. - Add eggs and vanilla extract, mix well. - Blend in dry ingredients and fold in chocolate chips and nuts. Now, it’s time for the eggs and vanilla. Add them one at a time. Mix well after each one. In another bowl, whisk the flour, baking soda, and salt. Slowly add this mix to the butter mix. Stir gently. Finally, fold in your chocolate chips and nuts. This is where the magic happens! - Spread dough in the prepared dish and bake for 25-30 minutes. - Cool before cutting into squares. Spread your dough evenly in the dish. Bake it for 25 to 30 minutes. The edges should turn golden brown. Use a toothpick to check if it’s done. After baking, let the bars cool for about 10 minutes. Then transfer them to a wire rack. Once cooled, cut them into squares. Enjoy your sweet treat or share with friends! For the full recipe, check the details above. To get the best cookie bars, measure your flour right. Too much flour makes them dry. Use a spoon to scoop the flour into your measuring cup. Level it off with a knife. This way, you get just the right amount. Also, let your butter and eggs sit out for a bit. Room temperature helps the mix blend better. It makes your bars soft and chewy. When baking, always check if your bars are done. A toothpick works great for this. Stick it in the center of the bars. If it comes out clean or with a few crumbs, they are ready. If it’s wet, give them more time. After baking, cool the bars in the pan for about ten minutes. Then move them to a wire rack. This keeps them from getting soggy. How you serve your cookie bars matters. Use a wooden platter for a nice touch. It makes your dessert look inviting. You can sprinkle powdered sugar on top for a sweet look. For extra delight, drizzle melted chocolate over the bars. This makes them even more tempting. Enjoy these tasty treats with friends and family! For the full recipe, check out the details above. {{image_2}} You can make these cookie bars gluten-free. Just swap all-purpose flour with a gluten-free flour blend. Many blends work well. Look for ones that have a good mix of flours. This will give your bars a nice texture. Follow the same recipe steps. The taste will still be amazing! If you want vegan cookie bars, it’s simple! Use vegan butter instead of regular butter. For eggs, you can use applesauce or flaxseed meal. Mix one tablespoon of flaxseed with three tablespoons of water. Let it sit for five minutes to thicken. This works as a great egg replacement. The bars will taste just as good! You can also change the flavors of your cookie bars. Try adding spices like cinnamon for a warm taste. You can also mix different types of chocolate. Dark chocolate, white chocolate, or even mint chocolate can add a fun twist. Feel free to get creative! Each variation brings a new taste to enjoy. To keep your chocolate chip cookie bars fresh, use airtight containers. You can store them at room temperature for about three days. If you want them to last longer, put them in the fridge. They will stay good there for about a week. Make sure to let them cool completely before storing. This helps keep their soft texture. Freezing cookie bars is easy and smart for longer shelf life. First, cut the bars into squares. Then, wrap each square in plastic wrap. After that, place the wrapped bars in a freezer bag. Remove as much air as possible before sealing. You can freeze them for up to three months. When you’re ready to eat, simply thaw in the fridge overnight. To reheat your cookie bars, use the oven or microwave. If using the oven, set it to 350°F (175°C). Place the bars on a baking sheet for about 5-7 minutes. This helps restore their chewy texture. If you prefer the microwave, heat for about 10-15 seconds. Watch closely so they don’t overheat. Enjoy your warm, gooey treat again! To check if your chocolate chip cookie bars are done, use a toothpick. Insert it into the center of the bars. If it comes out clean or with a few moist crumbs, they are ready. You can also look at the edges. They should be golden brown. The center may still look soft but will set as it cools. Remember, it's better to slightly underbake than to overbake. This keeps them chewy and soft. Yes, you can substitute some ingredients in this recipe. If you don't have brown sugar, you can use white sugar instead. It will change the flavor, but the bars will still taste good. You can also swap out the butter for coconut oil. This gives a nice flavor and makes them dairy-free. If you want a gluten-free option, use a gluten-free flour blend. Just keep in mind that the texture may vary slightly. To make your chocolate chip cookie bars even more delicious, try adding extra treats. You can mix in caramel bits for a sweet surprise. Chopped candy bars like Snickers or Reese's can add fun flavors. You can also use flavored chips, like butterscotch or peanut butter chips, for variety. Experiment with different nuts or dried fruit for more texture. These additions make the bars unique and tasty! To make delicious chocolate chip cookie bars, we focused on key ingredients, mixing steps, and storage tips. By using simple methods and variations, anyone can create their perfect treat. Remember, measuring flour right and cooling your bars properly are essential for success. Whether you prefer classic, gluten-free, or vegan options, the enjoyment of baking is universal. Follow these steps and tips for tasty results every time. You’ll impress friends and family with your skills!](https://dailydishly.com/wp-content/uploads/2025/05/88326a6b-fa01-43d4-bb00-6171d5f3f1c3-768x768.webp)