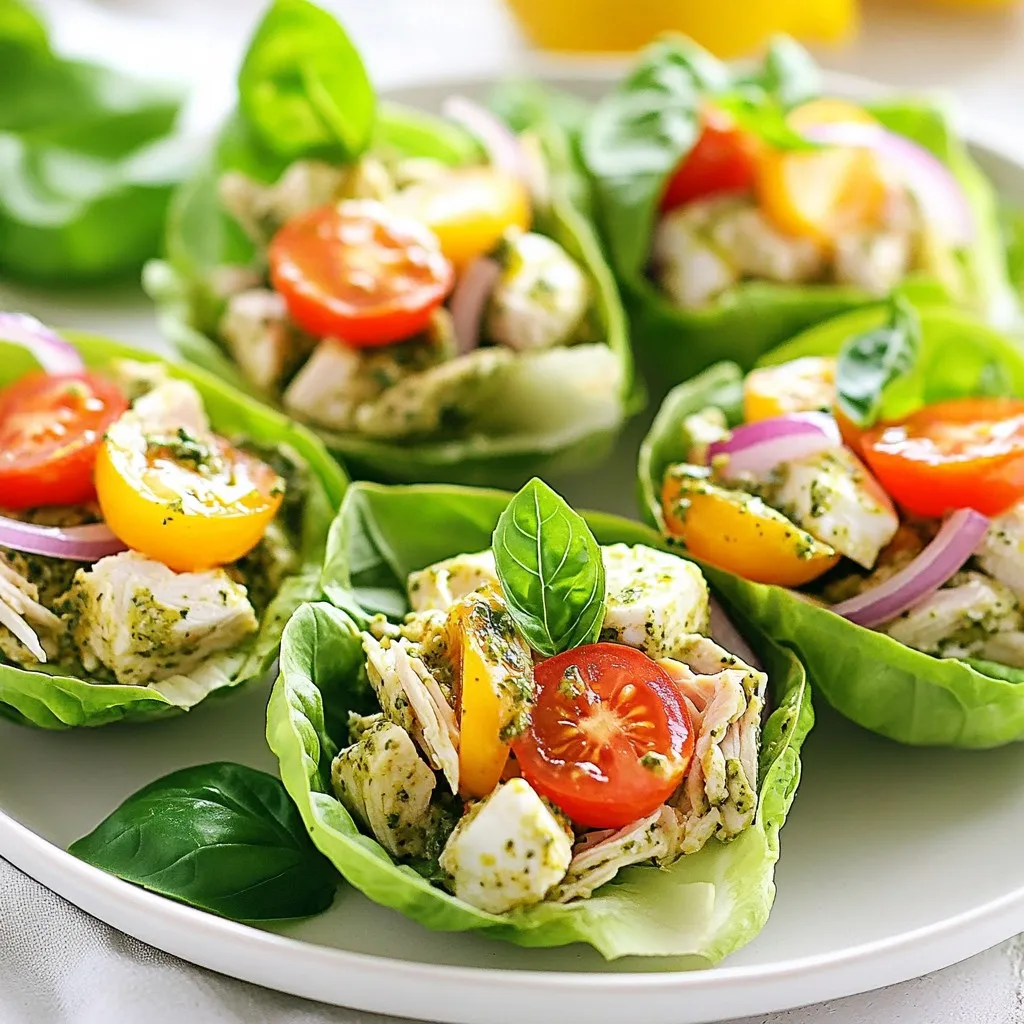
Looking for a quick, fresh meal that’s packed with flavor? Try these Pesto Chicken Salad Lettuce Cups! With tender chicken, creamy mozzarella, and zesty basil pesto, this easy dish is as fun to make as it is to eat. Perfect for lunch or a light dinner, you can customize it to fit your taste. Let’s dive into the simple ingredients and steps that make this salad a winner!
Why I Love This Recipe
- Quick and Easy: This recipe comes together in just 15 minutes, making it perfect for a busy weeknight dinner or a quick lunch.
- Fresh and Flavorful: The combination of basil pesto, cherry tomatoes, and fresh lettuce delivers a burst of flavor with every bite.
- Healthy and Nutritious: Packed with protein from the chicken and vitamins from the veggies, this dish is both satisfying and healthy.
- Customizable: Feel free to add your favorite ingredients like avocado or bell peppers to make it uniquely yours!
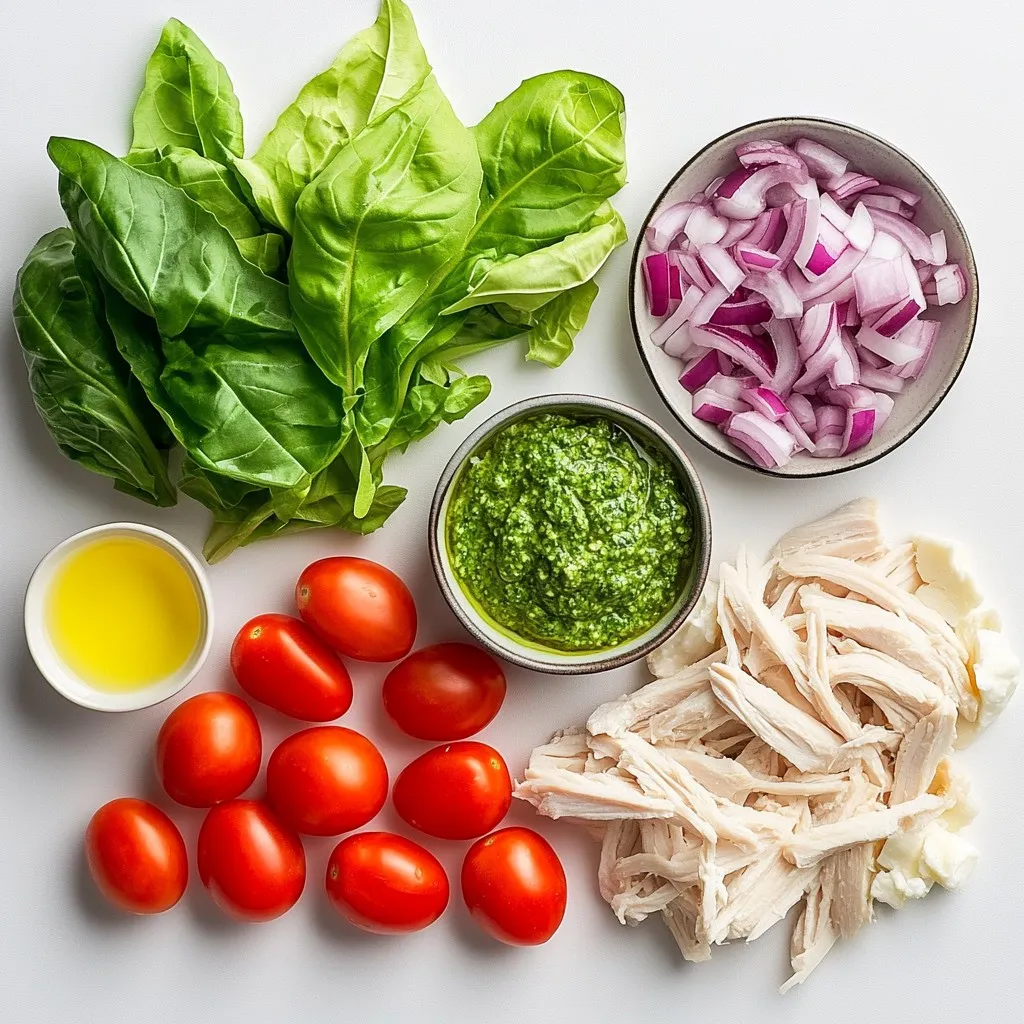
Ingredients
List of Ingredients
– 2 cups cooked chicken, shredded
– 1/2 cup basil pesto
– 1/2 cup cherry tomatoes, halved
– 1/4 cup red onion, finely chopped
– 1/4 cup mozzarella cheese, diced
– 1 tablespoon lemon juice
– Salt and pepper to taste
– 1 head of romaine or butter lettuce, leaves separated
– Fresh basil leaves for garnish (optional)
To start, gather your ingredients. You’ll need cooked chicken. Shredded chicken works best. Next, grab some basil pesto. You can use store-bought or make your own. You’ll also need cherry tomatoes, which add a nice pop of color and flavor. Red onion brings a bit of crunch. The mozzarella cheese gives a creamy touch to the salad.
Don’t forget the lemon juice! It brightens up the dish. Seasoning is key, so have salt and pepper ready. Finally, get your lettuce leaves. Romaine or butter lettuce both work well. Optional garnishes like fresh basil leaves can add a lovely finish.
This list of ingredients makes a fresh and tasty meal. As you prepare, remember that each ingredient plays a role. The chicken provides protein, while the pesto adds flavor. This mix creates a delightful balance.
Step-by-Step Instructions
Preparing the Chicken Salad
Start by grabbing a large mixing bowl. In this bowl, combine the cooked chicken, basil pesto, cherry tomatoes, red onion, and mozzarella cheese. Mix these ingredients well. The chicken should be fully coated with the pesto. Next, drizzle the lemon juice over the mixture. This adds brightness to the flavors. Finally, season with salt and pepper to taste. Stir well again to ensure all flavors are even.
Assembling the Lettuce Cups
Now, take a sturdy lettuce leaf. Spoon a generous amount of the chicken salad mixture into the center of the leaf. Make sure to fill it well but don’t overdo it. Fold the sides of the lettuce leaf over the filling. This creates a cup shape that holds the salad. Repeat this step with the remaining leaves and filling. Your cups should look neat and ready to eat!
Serving Suggestions
For presentation, arrange the lettuce cups on a nice platter. You can add fresh basil leaves on top for color and flavor. They make the dish look even more appealing. To pair, serve these cups with a light soup or a fresh fruit salad. This keeps your meal fresh and light. Enjoy the fun of eating with your hands!
Tips & Tricks
Making the Best Pesto Chicken Salad
To make the best pesto chicken salad, use shredded chicken. It blends well with the other flavors. You can use leftover chicken or rotisserie chicken for convenience.
Choosing the right pesto is key. You can buy store-bought or make homemade. Fresh basil pesto gives a bright taste. If you want a twist, try sun-dried tomato pesto.
Common Mistakes to Avoid
One common mistake is overfilling the lettuce cups. If you add too much filling, they can tear. Aim for a good balance of salad in each cup.
Another mistake is not seasoning properly. Taste your mixture before serving. Add salt and pepper to enhance the flavors.
Serving and Enjoyment Tips
Serve your pesto chicken salad cups fresh. They are best when the lettuce is crisp. For a fun touch, add cherry tomatoes on top for color.
If you have leftovers, store them in the fridge. The salad can stay fresh for a day, but the lettuce will wilt. It’s best to keep the filling and lettuce separate until ready to eat.
Pro Tips
- Use Rotisserie Chicken: For a quicker preparation, consider using store-bought rotisserie chicken. It saves time and adds great flavor.
- Customize the Pesto: Feel free to experiment with different types of pesto, such as sun-dried tomato or spinach pesto, to give your salad a unique twist.
- Add Crunch: For extra texture, include some chopped nuts like walnuts or pine nuts in the salad mixture.
- Make Ahead: This chicken salad can be prepared a few hours in advance. Just keep the lettuce cups separate until serving to maintain their crispness.
Variations
Ingredient Substitutions
You can swap the chicken for other proteins. Try shredded turkey or canned tuna. These options will still give you a tasty salad. If you need a vegetarian choice, use chickpeas or tofu instead.
For dairy-free options, use avocado instead of mozzarella. You can also skip the cheese or use a nut-based cheese. This makes the salad creamy without dairy.
Flavor Variations
To add crunch, toss in some nuts or seeds. Almonds or sunflower seeds work great. They give your salad a nice texture.
You can also change the herbs and spices. Try adding dill or cilantro for a fresh taste. A pinch of red pepper flakes can bring heat if you like spice.
Dietary Considerations
For a gluten-free salad, check your pesto. Some brands add gluten. Use gluten-free pesto or make your own.
If you want a low-carb meal, skip the lettuce and use cucumber slices instead. This keeps the meal light and fresh while staying within your carb goals.
Storage Info
How to Store Leftovers
To keep your pesto chicken salad fresh, store it in the fridge. Use an airtight container to seal it well. This helps keep the flavors strong and the salad crisp. The salad stays fresh for about three days. After that, the lettuce may wilt, and the flavors fade.
Freezing Instructions
You can freeze the salad, but I don’t recommend it. Freezing changes the texture of the chicken and vegetables. If you must freeze it, use a freezer-safe container. Make sure to leave some space for expansion. When ready to eat, thaw it in the fridge overnight. Eat it within a day after thawing for the best taste.
FAQs
How long does it take to prepare Pesto Chicken Salad Lettuce Cups?
It takes just 15 minutes to prepare this dish. You will spend 15 minutes from start to finish. That’s quick!
Can I use different types of lettuce?
Yes, you can use other types of lettuce. Romaine and butter lettuce are great options. Both types make strong cups. You can even try green leaf or red leaf lettuce. Just choose what you like best!
What is the best way to make homemade pesto?
Making homemade pesto is simple. Here are the steps:
1. Gather fresh basil leaves, pine nuts, garlic, Parmesan cheese, and olive oil.
2. In a food processor, blend basil, garlic, and nuts until chopped.
3. Slowly add olive oil while blending until smooth.
4. Stir in grated Parmesan cheese.
5. Season with salt to taste.
Can I make this recipe in advance?
Yes, you can make this recipe ahead of time. To do this, store the salad and lettuce cups separately. This keeps the lettuce crisp. You can mix the chicken salad a day before. Just keep it in the fridge. Assemble the cups just before serving for the best taste!
This blog post covers how to make tasty pesto chicken salad lettuce cups. You now know the key ingredients and how to prepare them step-by-step. I shared tips to avoid common mistakes and offered variations to suit different diets. Remember to store leftovers properly for fresh meals later. Feel free to experiment with flavors and ingredients to make this recipe your own. Enjoy making and serving this fun dish and impress your friends and family with your skill