Pesto Zoodle Salad Crisp and Flavorful Summer Dish

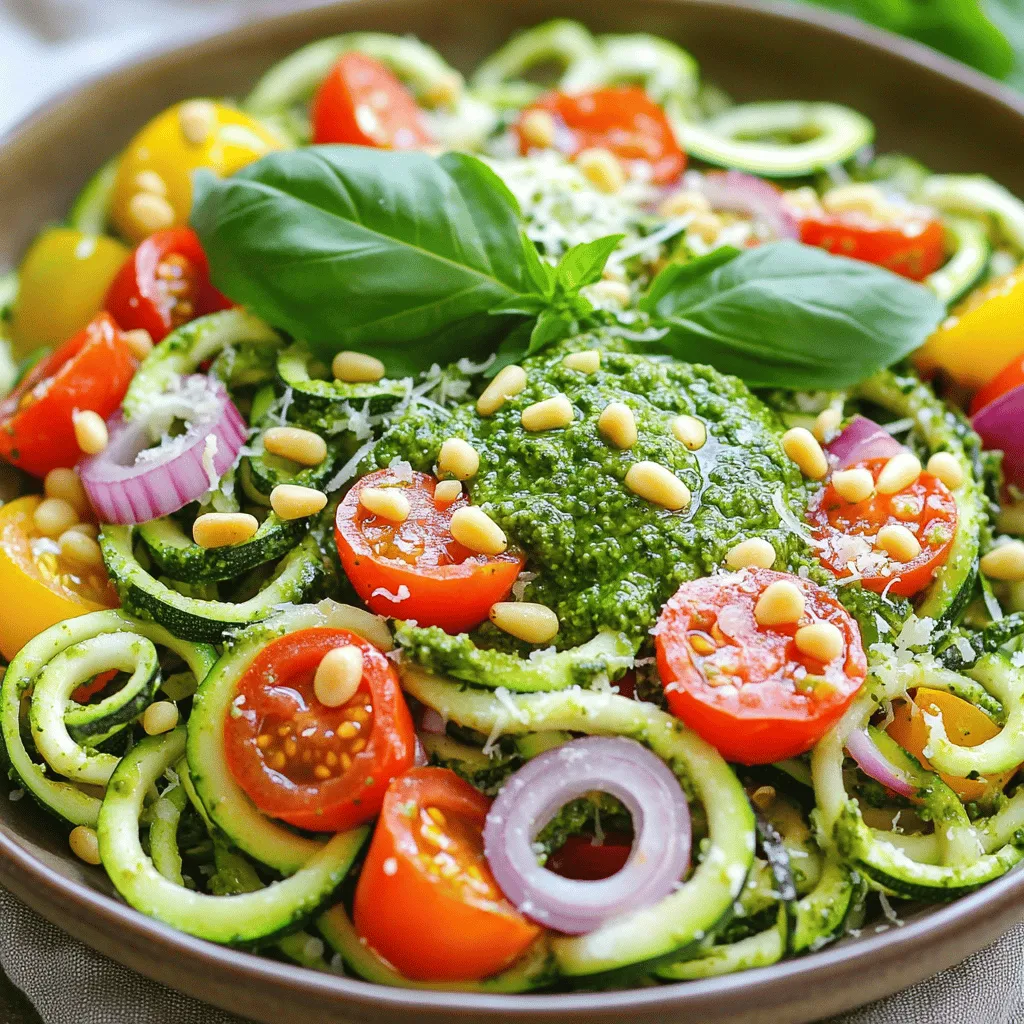
If you’re craving a fresh and colorful dish, look no further. This Pesto Zoodle Salad burst with flavor and is perfect for summer. Made with spiralized zucchini, cherry tomatoes, and a homemade basil pesto, it’s both light and satisfying. Whether you want a quick lunch or a side for dinner, this salad is the answer. Let’s dive into how to create this crisp and vibrant dish!
Ingredients
Main Ingredients
– 3 medium zucchinis (spiralized into zoodles)
– 1 cup cherry tomatoes, halved
– 1/2 cup bell peppers, diced (any color)
– 1/4 cup red onion, thinly sliced
Pesto Ingredients
– 1 cup fresh basil leaves
– 1/4 cup pine nuts, lightly toasted
– 1/2 cup grated parmesan cheese (or nutritional yeast for a vegan option)
– 1/2 cup olive oil
– 2 cloves garlic, minced
– Salt and pepper to taste
– Juice of 1 lemon
Optional Garnishes
– Additional pine nuts
– Extra basil leaves
– Lemon zest
When making Pesto Zoodle Salad, fresh ingredients shine. Start with firm zucchinis. They should be medium-sized and easy to spiralize. I love using a spiralizer for this recipe because it makes long, fun zoodles. You can also use a julienne peeler if you don’t have one.
Next, cherry tomatoes bring a burst of sweetness. Halve them to keep their shape and add color. Any bell pepper works, so choose your favorite color. Dice them small for easy bites. Red onion gives a nice crunch and slight bite. Slice them thin for a gentle onion flavor.
Now onto the pesto. Fresh basil is a must for that herbal taste. Pine nuts add a nutty crunch, and toasting them enhances their flavor. Parmesan cheese gives richness, but you can use nutritional yeast for a vegan twist. Olive oil helps blend everything smoothly, while garlic adds depth.
Don’t forget the salt, pepper, and lemon juice. They balance the flavors. For garnishes, I recommend extra pine nuts and basil for that fresh touch. Lemon zest is a great way to brighten up the dish.
Step-by-Step Instructions
Preparing the Pesto
– Combine basil, pine nuts, parmesan, garlic, and olive oil in a food processor.
– Blend until smooth and creamy, adjusting oil for desired consistency.
I like to use fresh basil for the best flavor. The garlic adds a nice zing, while the parmesan gives it richness. If you want a lighter version, you can use nutritional yeast instead of cheese. Just add salt and pepper to taste, and a squeeze of lemon juice brightens it up.
Making the Zoodles
– Spiralize the zucchinis using a spiralizer or julienne peeler.
Zoodles are a fun and healthy twist on pasta. They add crunch and freshness to the dish. If you don’t have a spiralizer, a julienne peeler works great too. Just make sure to cut the zoodles into even sizes for a uniform bite.
Combining Ingredients
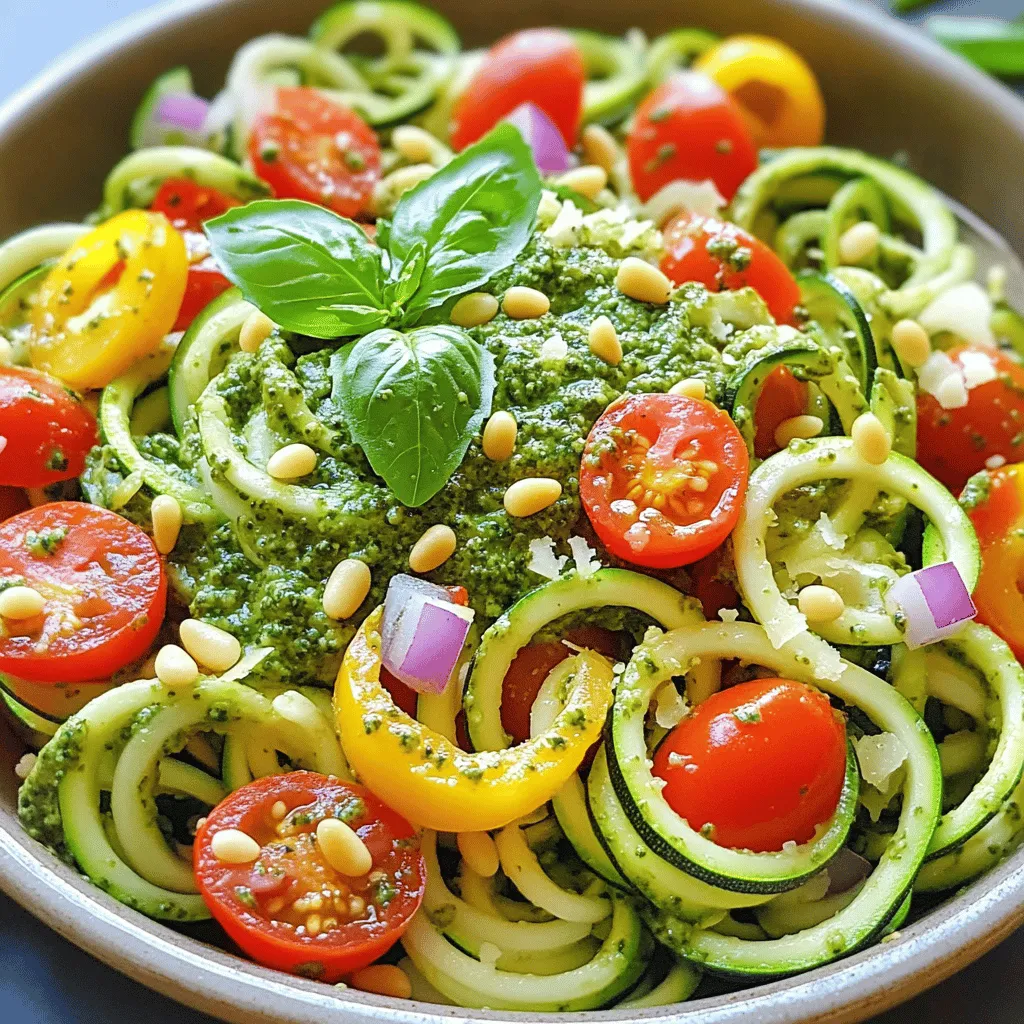
– In a large bowl, mix zoodles, cherry tomatoes, bell peppers, and red onion.
– Pour prepared pesto over the mixture and toss gently.
This step is all about bringing flavors together. The zoodles pair well with sweet cherry tomatoes and colorful bell peppers. The red onion adds a nice crunch and a bit of bite. When you add the pesto, make sure to coat everything well for maximum flavor.
Allowing Flavors to Meld
– Let the salad sit for 10 minutes before serving.
– Toss gently again and adjust seasoning if necessary.
Letting the salad sit allows the flavors to blend and develop. It’s like letting a fine wine breathe! Before you serve, give it another gentle toss to ensure every zoodle is coated in that tasty pesto. If it needs a little more salt or pepper, this is the time to adjust.Enjoy your fresh and vibrant Pesto Zoodle Salad!
Tips & Tricks
Perfecting the Pesto
To make the best pesto, always use fresh basil. It gives the dish a bright and vivid taste. Avoid using dried basil, as it lacks the same flavor. Fresh lemon juice helps prevent browning in the pesto. This keeps your sauce looking fresh and appealing.
Enhancing Texture
Add extra crunch by sprinkling more pine nuts on top. This little change makes a big difference in texture. Chilling your ingredients before mixing can also enhance the freshness. It makes every bite feel cool and crisp.
Serving Suggestions
Serve your Pesto Zoodle Salad chilled for a refreshing meal. It tastes even better on a hot day. You can pair it with grilled chicken or shrimp for extra protein. This makes it a balanced dish that fills you up.

Variations
Add Proteins
You can boost your Pesto Zoodle Salad with proteins. Try adding grilled chicken or shrimp for a heartier meal. Both options add flavor and substance. If you prefer plant-based choices, chickpeas work well too. They provide protein while keeping the dish light.
Different Vegetables
Incorporating different vegetables can enhance the salad’s flavor and texture. Roasted bell peppers or carrots add sweetness and depth. You can also add spinach or arugula for a nutrient boost. These greens bring freshness and vibrant colors to your dish.
Vegan Option
For a vegan twist, swap parmesan cheese with nutritional yeast or cashew cream. Nutritional yeast lends a cheesy flavor without dairy. Cashew cream offers a creamy texture and richness. Both options keep your salad delicious while catering to vegan diets.
Storage Info
Storing Leftovers
To keep your Pesto Zoodle Salad fresh, store leftovers in an airtight container. This helps keep the zoodles crisp and the flavors bright. Place the container in the refrigerator.
Shelf Life
Enjoy your salad within 2-3 days for the best taste and texture. After this time, the zoodles may become soggy. The pesto can also lose its vibrant flavor.
Freezing Options
You can freeze the pesto for later use. Just remember to add the zoodles fresh right before serving. This way, they stay crunchy and delicious!
FAQs
How do I spiralize zucchini?
To spiralize zucchini, use a spiralizer or a julienne peeler to create zoodles. Simply grip the zucchini and twist it against the blade. This technique makes long, thin noodles that are fun to eat and soak up flavor.
Can I make this salad ahead of time?
It’s best served fresh, but you can prepare pesto and chop vegetables in advance. This way, you can quickly assemble the salad when you’re ready to eat. Just keep everything in the fridge until you’re set to serve.
What can I substitute for pine nuts?
If you don’t have pine nuts, try walnuts or almonds for a different flavor. Both nuts add a nice crunch and pair well with the pesto. You can even toast them to enhance their taste.
Is this salad gluten-free?
Yes, all ingredients are gluten-free. This makes the Pesto Zoodle Salad a great choice for those with gluten sensitivities. You can enjoy it without worry!
What is the nutritional value of Pesto Zoodle Salad?
For a detailed breakdown, check the nutritional information per serving. It contains healthy fats from the olive oil and nuts, plus vitamins from the fresh veggies. This salad is light and nourishing, making it perfect for summer!
This blog post shares a simple recipe for Pesto Zoodle Salad. You learned about the main ingredients, like zoodles, cherry tomatoes, and basil pesto. I guided you through each step, from making pesto to mixing the salad. I also gave tips to enhance flavor and texture. You can customize the salad with different proteins and vegetables, and I covered storage options and FAQs too. Enjoy this fresh dish now or later! It’s healthy, tasty, and easy to make. Try it out, and let your kitchen creativity shine!


![- 1 pound large shrimp, peeled and deveined - 1/4 cup honey - 3 cloves garlic, minced - 2 tablespoons soy sauce - 1 tablespoon fresh lemon juice For the best flavor, fresh ingredients work wonders. When I use large shrimp, they soak up the marinade well. Honey adds sweetness, while garlic brings a rich taste. Soy sauce provides a savory kick, and lemon juice balances the flavors. - 1 tablespoon olive oil - 1 teaspoon crushed red pepper flakes - Salt and pepper to taste - Skewers (soaked in water if wooden) Olive oil helps the shrimp cook well on the grill. The red pepper flakes add a bit of heat, so adjust them based on your spice preference. Always season with salt and pepper to enhance the dish. If you use wooden skewers, soaking them prevents burning while grilling. - Lemon wedges - Fresh parsley Lemon wedges brighten the dish and make it look appealing. Fresh parsley adds a pop of color and freshness. These garnishes make your skewers not just tasty but also beautiful. For the full recipe, check out the details above. First, gather your marinade ingredients. In a bowl, mix together the honey, minced garlic, soy sauce, lemon juice, olive oil, crushed red pepper flakes, salt, and pepper. Whisk this mixture well until it’s blended. Next, add your peeled and deveined shrimp to the bowl. Make sure each shrimp gets coated with the marinade. Cover the bowl with plastic wrap and place it in the fridge. Let it marinate for at least 30 minutes. This helps the shrimp soak up all that yummy flavor. While the shrimp marinates, it's time to get your grill ready. Preheat the grill to medium-high heat. If you use wooden skewers, soak them in water for about 30 minutes. This step is key. It stops the skewers from burning while grilling. Now for the fun part! Start by threading the marinated shrimp onto the skewers. Leave a little space between each shrimp to help them cook evenly. Place the skewers on the grill. Cook the shrimp for about 2-3 minutes on each side. You’ll know they’re done when they turn pink and opaque. During cooking, brush any extra marinade over the shrimp. This gives them an extra burst of flavor. Once cooked, remove the skewers from the grill and let them rest for a minute. Enjoy these delicious Honey Garlic Shrimp Skewers! For the full recipe, check out the details above. To get the best Honey Garlic Shrimp Skewers, set your grill to medium-high heat. This temperature cooks the shrimp nicely without burning them. You want the grill hot enough to sear the shrimp but not so hot that they turn dry. Leave a little space between each shrimp on the skewers. This helps them cook evenly. If they are too close, they will steam instead of grilling. Proper spacing lets the heat circulate around each piece. Want to spice things up? You can add extra herbs like cilantro, basil, or even a pinch of cumin. These will give your skewers a unique twist. If you want a touch of sweetness, try adding a bit of orange juice or zest. For a different flavor, you can swap the marinade. Try teriyaki sauce for a sweet and savory taste. Or use a spicy chili paste for heat. The options are endless, and each twist can create a new favorite. Pair your Honey Garlic Shrimp Skewers with fresh sides. A light salad with mixed greens and a citrus dressing works great. You can also serve them with a side of grilled vegetables for added color and flavor. For presentation, arrange the skewers on a large platter. Add lemon wedges and sprigs of parsley for a pop of color. This not only makes it look appealing but adds freshness to each bite. Don’t forget to have extra dipping sauce on the side for your guests! {{image_2}} You can change the main protein in this recipe. If you want to swap shrimp for chicken, use boneless chicken breast cut into bite-sized pieces. For a plant-based option, tofu works great too. Just press the tofu to remove excess water before marinating. You can also switch the sweetener. If honey is not your thing, try maple syrup or agave. These options will add a unique twist to the flavor. You can cook these shrimp in different ways. Grilling adds a smoky taste, which makes the dish special. However, if you don’t have a grill, you can bake the shrimp in the oven. Set your oven to 400°F (200°C) and cook for about 10-12 minutes. Another great option is to use a skillet on the stovetop. Heat a bit of oil and cook the shrimp for 2-3 minutes on each side until they turn pink and opaque. To enhance the taste, you can add tropical elements. Pineapple chunks or shredded coconut can give your skewers a fun twist. Don’t be afraid to experiment with herbs! Fresh cilantro, basil, or mint can add freshness and depth. Try adding a mix of herbs to see what suits your taste best. For the full recipe, check out the Honey Garlic Shrimp Skewers section. After you enjoy your honey garlic shrimp skewers, store any leftovers in the fridge. Place them in a clean, airtight container. This will keep them fresh and safe to eat. Try to eat them within three days for the best taste. If you want to keep them longer, you can freeze them. Wrap the skewers tightly in plastic wrap or foil, then put them in a freezer bag. Cooked shrimp skewers can last up to three months in the freezer. When it's time to eat your leftovers, reheating them properly is key. The oven works best for this. Preheat your oven to 350°F. Place the skewers on a baking sheet and cover them with foil. Heat for about 10-15 minutes until warm. If you're in a rush, you can use the microwave. Place the shrimp on a microwave-safe plate and cover it with a damp paper towel. Heat in short bursts of 30 seconds until warmed. To keep the shrimp juicy, avoid overheating them. Cooked honey garlic shrimp skewers can last in the fridge for about three days. After that, the shrimp may spoil. Signs of spoilage include a sour smell, a slimy texture, or discoloration. If you notice any of these signs, it's best to throw them away. Always prioritize your health and safety when it comes to food storage. For the best flavor, marinate the shrimp for at least 30 minutes. This time allows the shrimp to soak up the sweet and savory notes of the marinade. If you have time, marinating for up to 2 hours enhances the taste even more. Just remember not to exceed this time, as shrimp can become mushy. Yes, you can use frozen shrimp. To prepare frozen shrimp, first, thaw them in the fridge overnight. If you need them quicker, place the shrimp in a sealed bag and submerge it in cold water for about 15-20 minutes. Once thawed, rinse them under cold water and pat dry before marinating. Several sides pair well with Honey Garlic Shrimp Skewers. Try serving them with: - Steamed rice or quinoa for a filling base. - Grilled vegetables like zucchini or bell peppers for a colorful plate. - A fresh salad with mixed greens and a light vinaigrette for crunch. - Garlic bread to soak up any extra sauce. Yes, you can make Honey Garlic Shrimp Skewers in the oven. Preheat your oven to 400°F (200°C). Place the skewers on a baking sheet lined with foil. Bake for about 8-10 minutes, flipping halfway through. The shrimp should be pink and opaque when done. This method is perfect if you don’t have a grill. For more details, check the [Full Recipe]. This blog post covers all you need for perfect Honey Garlic Shrimp Skewers. You learned about the key ingredients, including shrimp, honey, and garlic. I shared step-by-step grilling instructions and useful tips for a better cook. Plus, I offered variations for different tastes and storage advice for leftovers. Now you can make delicious skewers with confidence. Enjoy trying new flavors and impressing your friends and family with this recipe!](https://dailydishly.com/wp-content/uploads/2025/07/c236e5ff-bf7a-4bb5-97d9-fa918dc47393-768x768.webp)