Pickle Ranch Chicken Bites Flavorful and Easy Recipe

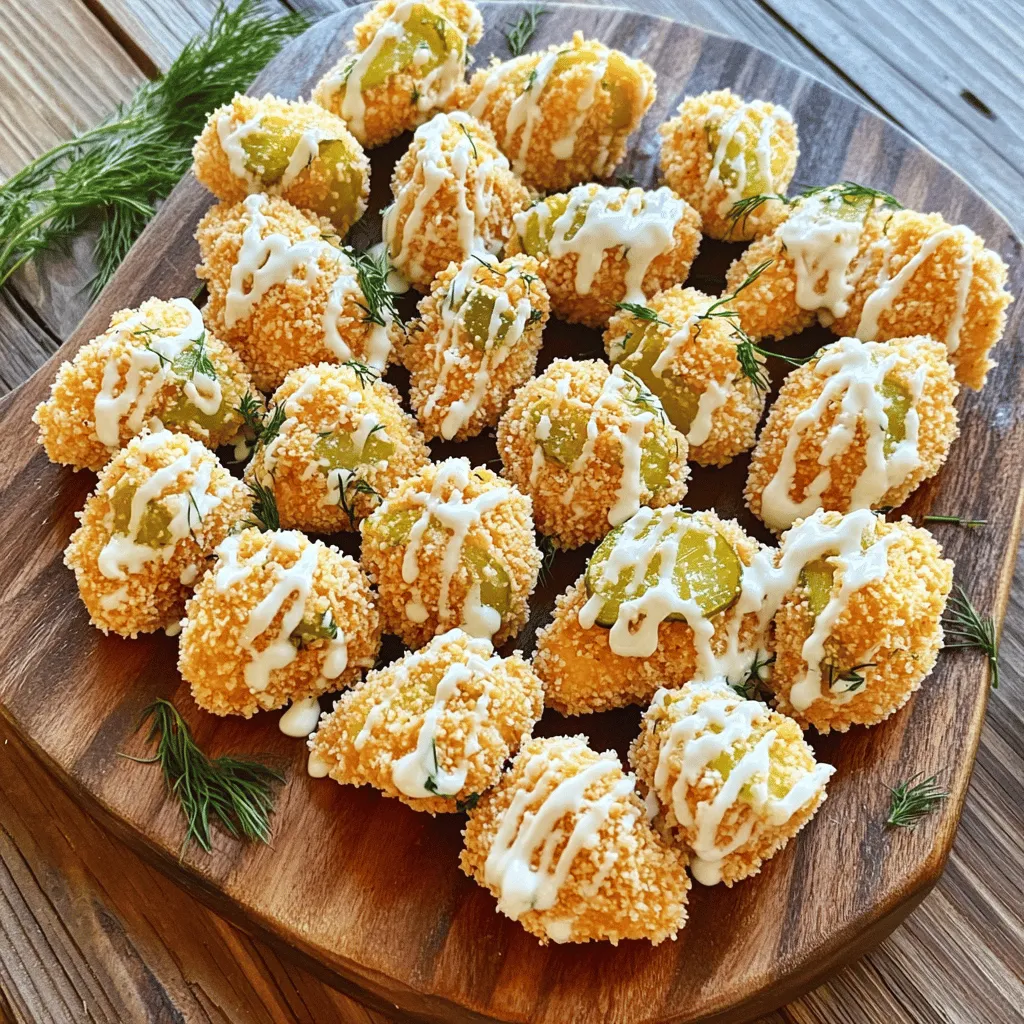
Are you ready to spice up your snack game? I’m excited to share my easy recipe for Pickle Ranch Chicken Bites. These crispy, flavorful bites combine the tangy taste of pickle with creamy ranch, creating a delight for your taste buds. Whether you’re hosting game night or want a quick dinner, this recipe is sure to please. Let’s dive into the ingredients and make something delicious today!
Ingredients
Main Ingredients for Pickle Ranch Chicken Bites
To make pickle ranch chicken bites, you need a few key items:
– 1 lb boneless, skinless chicken breasts, cut into bite-sized pieces
– 1 cup dill pickle juice
– 1 cup all-purpose flour
– 2 large eggs, beaten
– 1 cup breadcrumbs (preferably panko for extra crunch)
– 1/2 cup ranch dressing
– Fresh dill, for garnish (optional)
These ingredients come together to create a tasty and crunchy dish. The chicken absorbs the pickle juice flavor, making each bite juicy.
Seasoning and Marinade Components
The right seasonings make a big difference. For the chicken bites, mix these spices:
– 1 teaspoon onion powder
– 1 teaspoon garlic powder
– 1 teaspoon paprika
– 1 teaspoon black pepper
– 1/2 teaspoon salt
These spices add depth and flavor to the chicken. The marinade is simple but effective. The pickle juice tenderizes the chicken and adds a tangy kick.
Suggested Dipping Sauce Options
While ranch dressing pairs well with these bites, you can try other dips too. Here are some ideas:
– Spicy mayo for a kick
– Honey mustard for sweetness
– Ketchup for classic flavor
These dips can enhance the overall experience of the chicken bites. You can mix and match to find your favorite.
Step-by-Step Instructions
Marinating the Chicken
Start by marinating the chicken. In a bowl, mix the chicken pieces with dill pickle juice. Make sure every piece is covered. This juice gives the chicken a tangy and bold flavor. Cover the bowl and place it in the fridge. Let it marinate for at least one hour. If you have more time, letting it sit overnight works even better. The longer it soaks, the better the taste.
Setting Up the Breading Station
Next, set up your breading station. Use three bowls for this process. In the first bowl, combine the flour, onion powder, garlic powder, paprika, black pepper, and salt. This blend adds both flavor and crunch. In the second bowl, beat the eggs until smooth. In the third bowl, fill it with the breadcrumbs. I like to use panko for extra crispiness. Now, you have everything ready to coat the chicken.
Baking the Chicken Bites
Now it’s time to cook! Preheat your oven to 400°F (200°C). Line a baking sheet with parchment paper or spray it lightly with cooking spray. Take the marinated chicken out and pat it dry with paper towels. This step helps the coating stick better. Dredge each piece in the seasoned flour first. Shake off any extra flour. Next, dip it in the beaten eggs, followed by a good coating of breadcrumbs. Place the breaded chicken bites on the baking sheet, leaving space between them.
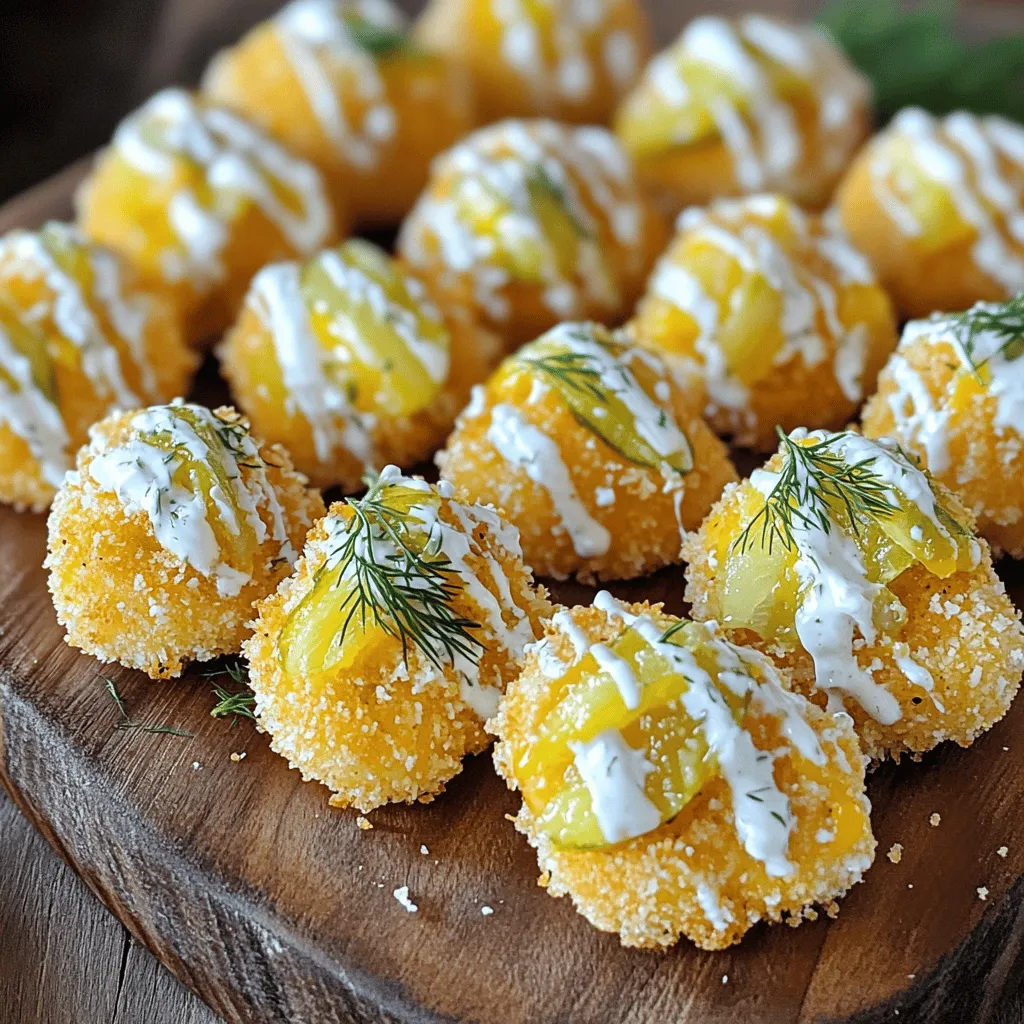
Bake the chicken bites for 15 to 20 minutes. They should turn golden brown and crispy. To check if they are done, the internal temperature should reach 165°F (75°C). Once cooked, transfer the bites to a serving platter. Drizzle with ranch dressing and sprinkle with fresh dill if you like. Enjoy these flavorful bites as a snack or a main dish.
Tips & Tricks
How to Ensure Perfectly Crispy Chicken Bites
To get the best crunch, use panko breadcrumbs. They give a light, airy texture. Make sure to pat the chicken dry after marinating. This step helps the coating stick better. Also, arrange the chicken bites in a single layer on the baking sheet. This allows hot air to circulate around them while cooking. Lastly, bake until they are golden brown. This ensures a crispy finish.
Common Mistakes to Avoid
One common mistake is not marinating long enough. For maximum flavor, marinate the chicken for at least one hour. Another mistake is overcrowding the baking sheet. If the bites are too close together, they can steam instead of bake. Avoid using too much flour when coating. This can lead to a thick, gummy layer instead of a nice crunch. Always shake off excess flour before breading.
Ideas for Enhancing Flavor
To boost the taste, try adding spices to the flour mix. A pinch of cayenne can add heat, while lemon zest can brighten the flavor. You might also blend some ranch seasoning into the breadcrumbs. This adds an extra kick. For a tangy twist, drizzle extra pickle juice over the chicken bites before serving. Fresh dill or chives as a garnish can add a fresh touch, too.

Variations
Alternative Seasonings and Sauces
You can change the flavor of your Pickle Ranch Chicken Bites easily. Try adding hot sauce to the egg mixture. This gives a nice kick. You can also use smoked paprika for a deeper flavor. For a zesty touch, mix lemon zest into the flour. If you want a sweet twist, honey mustard can replace ranch dressing. Experimenting with spices can make this dish exciting.
Ingredient Swaps for Dietary Needs
If you have dietary restrictions, you can make swaps. For gluten-free options, use almond flour or a gluten-free blend instead of all-purpose flour. Instead of ranch dressing, try a dairy-free version made from cashews. For a low-carb option, substitute chicken with cauliflower bites. Each swap keeps the essence of the dish while fitting your needs.
Cooking Method Variations (Air Frying, Frying)
You have options for cooking methods. Air frying gives you a crispy texture with less oil. Set your air fryer to 400°F and cook for 10-12 minutes. Flip halfway for even cooking. If you prefer frying, heat oil in a pan over medium heat. Fry the bites for about 3-4 minutes per side until golden brown. Each method can enhance the flavor and texture of your chicken bites.
Storage Info
Best Practices for Storing Leftovers
Store your leftover Pickle Ranch Chicken Bites in an airtight container. Let them cool first. Place a paper towel at the bottom to absorb moisture. This helps keep them crispy. You can keep them in the fridge for up to three days. If you want them to last longer, freezing is a great option.
How to Reheat Leftover Chicken Bites
To reheat your chicken bites, use the oven for the best results. Preheat your oven to 350°F (175°C). Spread the chicken bites on a baking sheet. Heat them for about 10 to 15 minutes. Check to ensure they reach an internal temperature of 165°F (75°C). This keeps them crispy and delicious. You can also use an air fryer at 350°F for about 5-7 minutes.
Freezing Tips for Meal Prep
If you want to freeze your chicken bites, do it before cooking. After breading, place them on a baking sheet lined with parchment paper. Freeze until solid, then transfer to a freezer bag. They can last up to three months in the freezer. When ready to cook, bake them straight from frozen, adding a few extra minutes to the cooking time.
FAQs
How long do Pickle Ranch Chicken Bites last in the fridge?
Pickle Ranch Chicken Bites can last for about 3 to 4 days in the fridge. It’s best to store them in an airtight container. This keeps them fresh and safe to eat. If you want to enjoy them later, just reheat them before serving. This helps regain some of the crispiness.
Can I use frozen chicken for this recipe?
Yes, you can use frozen chicken for this recipe. Just make sure to thaw it completely before marinating. You can do this overnight in the fridge or use the microwave. Thawing ensures the chicken absorbs the pickle juice well. This step is key for flavor and texture.
What should I serve with Pickle Ranch Chicken Bites?
You can serve Pickle Ranch Chicken Bites with a variety of sides. They pair well with fresh veggies, like carrot sticks or celery. A simple salad or coleslaw also complements them nicely. For dipping, ranch dressing is a perfect match. You can also try honey mustard or a spicy aioli for extra flavor.
In this post, we covered all you need to know about making Pickle Ranch Chicken Bites. We explored the key ingredients and provided clear steps for marinating and baking. You learned tips for crispiness and common mistakes to avoid. We also discussed variations to suit your taste and dietary needs.
Remember, these bites are versatile and fun. Enjoy creating your own twist and share them with friends and family!


![To make a great creamy feta pasta salad, you'll need a few simple ingredients. Here’s what you should gather: - 8 oz (225 g) fusilli pasta - 1 cup feta cheese, crumbled - 1/2 cup Greek yogurt - 1/4 cup olive oil - 1 tablespoon lemon juice - 1 teaspoon dried oregano - 1/2 teaspoon garlic powder - 1 cup cherry tomatoes, halved - 1 cucumber, diced - 1/4 red onion, finely chopped - Salt and pepper to taste - Fresh basil leaves for garnish Each ingredient brings its own flavor to the dish. The fusilli pasta adds a fun twist, while the feta cheese offers a rich, creamy taste. Greek yogurt makes the dressing smooth and adds a nice tang. Olive oil brings depth, and lemon juice gives a bright kick. Herbs like oregano and garlic powder enhance the taste. The cherry tomatoes and cucumber add freshness, and red onion brings a mild crunch. Finally, salt, pepper, and basil leaves round out this delightful salad. For the full recipe, you can check out the complete instructions. This creamy feta pasta salad is sure to be a hit! To make this creamy feta pasta salad, start by cooking the fusilli. Bring a large pot of salted water to a boil. Add the fusilli and cook it according to the package instructions. I recommend checking the pasta a minute or two early. You want it al dente, meaning it should have a slight bite to it. Once cooked, drain the pasta in a colander. Rinse it under cold water to stop the cooking process. This step cools the pasta quickly and keeps it from becoming mushy. Set it aside while you prepare the dressing. Now, let’s make the creamy dressing. In a medium bowl, combine the crumbled feta cheese and Greek yogurt. Add olive oil, lemon juice, dried oregano, and garlic powder. Use a fork to mash the feta and yogurt together. Mix until you get a creamy texture. Taste the dressing and adjust the seasoning. You may want to add more salt or pepper. This step is key for a flavor-packed salad. In a large mixing bowl, add the cooled fusilli, halved cherry tomatoes, diced cucumber, and chopped red onion. Pour the creamy feta dressing over the pasta and mix gently. Toss until everything is coated well. Chill the salad in the fridge for at least 30 minutes. This time allows the flavors to blend and deepen. Before serving, stir again and garnish with fresh basil leaves. Enjoy your fresh and delicious creamy feta pasta salad! To get the best creamy texture, mix your ingredients well. Start by mashing the feta with a fork. This helps it blend smoothly. Next, add Greek yogurt and olive oil. Use the fork to mix until you see no lumps. This step is key for a silky dressing. When you combine the dressing with the pasta, do it gently. Toss the pasta slowly to coat every piece. If you mix too hard, the pasta may break. You want it smooth, not mushy. To boost the flavor, think about adding fresh herbs. Basil and parsley work well with feta. You can also try adding a dash of chili flakes for some heat. If you're feeling adventurous, a sprinkle of smoked paprika can add depth. You can include optional ingredients too. Consider adding olives for a briny kick. Roasted red peppers can bring sweetness. These add-ins make your salad more exciting and unique. Creamy feta pasta salad pairs nicely with grilled chicken or fish. It also goes great with a side of crusty bread. For a complete meal, serve it alongside a fresh green salad. To make your dish look appealing, use a large, colorful bowl. Garnish with whole basil leaves on top. This not only adds beauty but also enhances the fresh aroma. Enjoy your delicious salad! For the full recipe, check out the [Full Recipe]. {{image_2}} You can switch up the pasta type for your creamy feta pasta salad. Try using penne, rotini, or even whole wheat pasta. Each type brings a new texture to the dish. If you prefer gluten-free options, choose rice or chickpea pasta. These options taste great and work well with the creamy feta dressing. Adding extra veggies and proteins boosts the nutrition of your salad. Consider mixing in spinach, bell peppers, or even artichokes. For protein, grilled chicken or chickpeas are fantastic choices. You can also experiment with cheese. Try adding mozzarella or goat cheese for a different flavor. Seasonal ingredients can change the taste of your pasta salad. In summer, use fresh corn, zucchini, or basil. These bright flavors make a refreshing dish. For winter, think about roasted vegetables like sweet potatoes or Brussels sprouts. The flavors will warm you up and keep the dish hearty. To keep your creamy feta pasta salad fresh, use an airtight container. Make sure it seals well. This will help keep the salad from drying out. You can store it in the fridge for up to three days. If you notice any changes in smell or texture, it is best to throw it away. When reheating the pasta salad, use the microwave. Heat it in short bursts to avoid overcooking. Stir it gently to ensure even warmth. If the salad feels dry, add a little olive oil or a splash of water. This will help bring back its creamy texture. Can you freeze creamy feta pasta salad? It’s not the best option. Freezing can change the texture of the feta and yogurt. If you still want to freeze it, use a freezer-safe container. Make sure to remove as much air as possible. You can keep it in the freezer for up to a month. When ready to eat, thaw it in the fridge overnight before serving. I recommend using classic feta cheese for this salad. Classic feta has a tangy and salty taste. It crumbles well and mixes nicely with the other ingredients. You can also try flavored feta. Flavored feta may include herbs or spices. These add different tastes to your pasta salad. However, classic feta keeps the dish light and fresh. Yes, you can make this pasta salad ahead of time. I suggest preparing it at least two hours before serving. This allows the flavors to mingle well. You can also store it in the fridge overnight. Just be sure to stir it before serving. This will help mix the dressings again. If you don't have Greek yogurt, you can try sour cream. Sour cream gives a similar creamy texture. Another option is cream cheese. Just mix it well to keep it smooth. For dairy-free options, consider using coconut yogurt. Almond or cashew yogurt also works well. These will change the flavor slightly but still taste great. For the complete list of ingredients and instructions, check out the [Full Recipe](#). In this blog post, we explored how to make a delicious creamy feta pasta salad. We covered the key ingredients, including fusilli, feta cheese, and fresh veggies. You learned the best cooking methods and how to create the perfect dressing. I shared tips to enhance flavor and storage advice for leftovers. Ready to impress your friends with this dish? A creamy feta pasta salad will please everyone. Enjoy making it and let the flavors shine!](https://dailydishly.com/wp-content/uploads/2025/07/1e04cd5b-2977-4013-97be-e6e1a5f7ba16-768x768.webp)
. High-quality images are key for any recipe. They help you see the colors and textures of the dish. When serving, a bright bowl can make your salad pop. Try to layer the ingredients for a beautiful look. You can also add a sprig of cilantro on top for that finishing touch. How long does the salad last in the fridge? This salad lasts about 2 to 3 days in the fridge. Store it in a sealed container. The avocados may brown, but the taste stays good. Can I use canned beans instead of dried? Yes, canned beans are great for this salad. They save time and are easy to use. Just rinse and drain them before adding. Can I make this salad ahead of time? You can make this salad a few hours ahead. Just wait to add the avocados until right before serving. This keeps them fresh and green. What are the best toppings to add? Toppings like crumbled feta, fresh cilantro, or diced jalapeños really enhance the salad. You can also add a sprinkle of nuts for crunch. Is this salad gluten-free? Yes, this salad is naturally gluten-free. It contains no wheat or gluten products. What are the health benefits of black beans and avocados? Black beans are high in fiber and protein. They help with digestion and keep you full. Avocados are rich in healthy fats and vitamins. They support heart health and skin. This salad is a nutrient-packed choice. For the full recipe, check out the detailed instructions and enjoy creating this tasty dish! This avocado and black bean salad is fresh, nutritious, and easy to make. You learned about essential ingredients, how to prepare them, and tips for the best results. The recipe allows for tasty twists and options for everyone. Enjoy creating your own version while keeping it healthy and satisfying. This salad is a great dish for lunch, dinner, or gatherings. With vibrant flavors and colors, it’s sure to impress. Dive in and savor every bite!](https://dailydishly.com/wp-content/uploads/2025/06/59c4ae36-0ebd-4eac-932b-d71541cf887d-768x768.webp)
![- 2 ripe avocados, diced - 1 cup sweet corn (canned or grilled) - 1 cup cherry tomatoes, halved - 1 red bell pepper, diced - 1/4 cup red onion, finely chopped - 1/4 cup fresh cilantro, chopped - Juice of 2 limes - 2 tablespoons olive oil - 1 teaspoon cumin powder - Salt and pepper to taste I love using ripe avocados in this salad. They add creaminess. Sweet corn brings a nice crunch and sweetness. Cherry tomatoes add freshness and a pop of color. Red bell pepper gives it a crisp bite. Red onion adds a sharp taste that balances the other flavors. Fresh cilantro brightens everything up with its unique flavor. Lime juice adds a tangy kick. Olive oil gives richness. Cumin powder adds warmth. Salt and pepper round out the taste perfectly. - Additional vegetables - Cheese options - Protein additions (e.g., black beans, chicken) Feel free to add more vegetables like cucumbers or radishes for extra crunch. You can sprinkle cheese like feta or cotija for a salty bite. For a heartier dish, add protein like black beans or grilled chicken. These options make the salad more filling and can change the flavor profile. I love how versatile this salad is! For the full recipe, check out the provided details. 1. Combining base ingredients Start by grabbing a large mixing bowl. Add the diced avocados and sweet corn. Next, toss in the halved cherry tomatoes, diced red bell pepper, and finely chopped red onion. These fresh ingredients create a colorful base. 2. Whisking the dressing In a small bowl, combine lime juice, olive oil, cumin powder, salt, and pepper. Use a whisk to mix the dressing well. This will add flavor and bring the salad together. 3. Tossing and seasoning the salad Pour the dressing over the salad mixture. Gently toss everything together until all ingredients are coated. Taste the salad and adjust the seasoning if needed. Let it sit for about 10 minutes before serving to let the flavors blend. - Choosing ripe avocados Look for avocados that are slightly soft when you squeeze them. They should yield to gentle pressure. This ensures a creamy texture in your salad. - Tips for cutting vegetables Use a sharp knife to cut the veggies. For the avocados, cut them in half, remove the pit, and scoop out the flesh with a spoon. Dice them into bite-sized pieces. - Balancing flavors in the dressing Adjust the lime juice and salt to your taste. If you like it tangy, add more lime. A pinch of sugar can balance the acidity if needed. To make your avocado corn salad pop, serve it in a large, shallow bowl. This type of dish lets the colors shine. I love to garnish with fresh cilantro leaves on top. Adding lime wedges on the side makes it look fresh and inviting. For dishware, choose bright colors. White or light-colored bowls make the salad's colors stand out. You want your guests to be drawn in by the vibrant greens, reds, and yellows. You can prepare this salad a bit early. Chop the vegetables and store them in separate containers. This keeps them fresh and crunchy. You can mix the dressing in advance too. Just keep it in a jar in the fridge. When ready to serve, combine everything in a big bowl. Pour the dressing over the salad and toss gently. This way, your salad stays fresh and tasty. To keep the salad fresh, store it in an airtight container. This locks in flavors and keeps the ingredients crisp. If you notice browning avocados, squeeze a bit more lime juice on top. It helps slow down the browning. For the full recipe, check the earlier section. Enjoy your fresh and flavorful avocado corn salad! {{image_2}} You can easily change this salad. Spice it up by adding diced jalapeños. This will give it a kick. You can also try different dressings. A zesty vinaigrette adds a bright note. If you want creaminess, go for a yogurt-based dressing. Both options fit well with the fresh flavors. This salad shines in every season. In summer, add diced mango or peach. Their sweetness pairs perfectly with the corn and avocado. For winter, think roasted vegetables. Roasted sweet potatoes or bell peppers add warmth. These variations keep the dish fresh and exciting all year. For the full recipe, check out the detailed instructions above. To keep your avocado corn salad fresh, store it in the fridge. Use an airtight container. This will help keep moisture in and air out. To prevent browning of avocados, squeeze a little lime juice over them. The lime slows down oxidation. You can also cover the salad tightly with plastic wrap. Press the wrap directly onto the salad to limit air exposure. Your salad lasts for about 1 to 2 days in the fridge. After that, it may lose its taste and texture. Signs that your salad has spoiled include a strong, sour smell or a mushy texture. If you see dark spots on the avocados, it's time to toss it. Always trust your senses to decide if it's safe to eat. For the full recipe, check out the details above! To make this salad vegan, swap the honey for maple syrup if you like sweetness. Use a vegan olive oil dressing instead of any store-bought dressings. All the main ingredients are vegan-friendly. This gives you a fresh, tasty salad that fits your diet. Yes, you can use frozen corn! Just thaw it first. If you want a crisp taste, try grilling it briefly. This adds a nice smoky flavor. Both options work well in this salad. This salad pairs well with many dishes. You can add grilled chicken or shrimp for protein. It also works great with black beans for a vegetarian option. Serve it alongside tacos or grilled fish for a full meal. For a light meal, enjoy it on its own. For the complete recipe, check out the [Full Recipe]. In this blog post, I covered how to make a delicious avocado salad. You learned about the main ingredients, like ripe avocados, sweet corn, and cherry tomatoes. I shared tips for preparation and gave you ideas on how to present and store your salad. Remember, feel free to mix in different flavors or proteins. Get creative and make this dish your own. With fresh ingredients and simple steps, you can create a tasty and healthy meal that everyone will enjoy.](https://dailydishly.com/wp-content/uploads/2025/07/333f1f81-7d50-4cc6-bd3d-a33e08904fb9-768x768.webp)


