Pickle Ranch Chicken Breakfast Burritos Recipe Delight

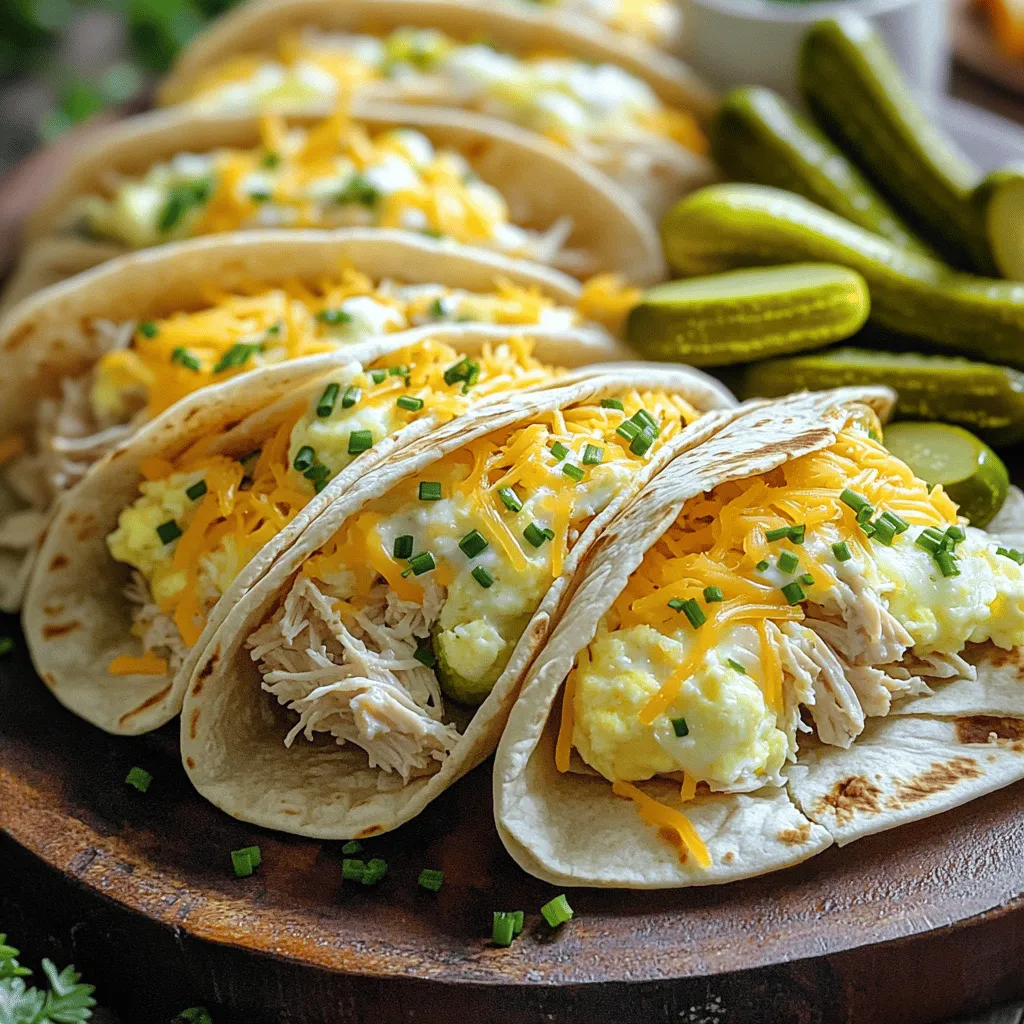
Start your day right with a burst of flavor in every bite! My Pickle Ranch Chicken Breakfast Burritos are tasty and easy to make. You’ll love the mix of juicy chicken, tangy pickles, and creamy ranch dressing. This recipe hits all the right notes for breakfast lovers. Are you ready to spice up your morning meals? Let’s dive into this fun and delicious recipe!
Ingredients
Main Ingredients
– 2 cups cooked chicken, shredded
– 1/2 cup dill pickles, finely chopped
– 1/2 cup ranch dressing
– 4 large eggs
– 1/4 cup milk
Additional Ingredients
– 1 cup shredded cheddar cheese
– 4 large flour tortillas
– 1/2 teaspoon garlic powder
– 1/2 teaspoon onion powder
– Salt and pepper to taste
Garnish Suggestions
– Fresh chives, chopped
– Extra dill pickles for serving
The main ingredients are simple yet flavorful. The chicken provides protein. Dill pickles add a tangy crunch. Ranch dressing ties it all together with creaminess. Eggs give the burrito a nice fluffy texture.
In the additional ingredients, cheese melts beautifully, giving richness. Flour tortillas are the perfect wrap for these tasty fillings. Garlic powder and onion powder boost the flavor profile without overwhelming it. Salt and pepper balance everything out for a perfect bite.
For garnishes, fresh chives add a pop of color and taste. Extra dill pickles on the side bring joy with every crunch.
Step-by-Step Instructions
Preparing the Chicken Mixture
In a medium bowl, you will create the chicken mixture. Start by adding the shredded chicken. Next, chop the dill pickles finely and add them to the bowl. Pour in the ranch dressing. Mix everything well until the chicken is fully coated. This mixture gives the burrito a tangy kick that pairs perfectly with the eggs.
Whisking the Eggs
Now, grab another bowl to whisk the eggs. Crack four large eggs into the bowl. Add 1/4 cup of milk to make them creamy. Sprinkle in garlic powder, onion powder, salt, and pepper. Whisk until all the ingredients are well combined. This egg mixture will add richness to the burritos.
Cooking the Burritos
Heat a non-stick skillet over medium heat. Pour in the egg mixture and cook gently. Stir until the eggs are scrambled and just set, but still creamy. Remove the skillet from heat. Take the flour tortillas and lay them out flat. Spoon a generous amount of the chicken mixture into the center of each tortilla. Add the scrambled eggs on top and sprinkle with shredded cheddar cheese.
Now, fold the sides of each tortilla in and roll them tightly from the bottom. Place the rolled burritos seam-side down in the skillet. Cook for 2-3 minutes on each side until golden brown and crispy. Remove them from the skillet and let them cool slightly. Cut each burrito in half to reveal the delicious filling inside.Enjoy your tasty creation!
Tips & Tricks
Elevating Flavor
To make your Pickle Ranch Chicken Breakfast Burritos even better, you can add spices or hot sauce to the chicken mixture. A pinch of cayenne or some red pepper flakes can add a nice kick. You can also try different types of cheese. Pepper jack or cream cheese can add unique flavors. Don’t forget to experiment with different tortilla types too! Whole wheat or spinach tortillas can add color and nutrients.
Cooking Techniques
Using a non-stick skillet is key to prevent sticking. It makes the cooking process smoother and easier. Make sure your eggs are just set to keep them creamy. If you cook them too long, they may become dry. Stir gently as they cook to get that perfect texture.
Presentation Tips
Garnish your burritos with fresh chives for a pop of color. Serve them with extra dill pickles on the side for added crunch. You can also plate the burritos neatly on a large platter. A little care in presentation makes the meal more inviting. Enjoy with your favorite hot sauce for an extra burst of flavor!

Variations
Vegetarian Version
You can easily make a vegetarian version of the Pickle Ranch Chicken Breakfast Burritos. Just swap the chicken for black beans or tofu. Black beans add a creamy texture and protein. Tofu is a great choice if you want a meat-like feel. Both options keep the dish tasty and filling.
Different Dressings
Feel free to get creative with dressings! While ranch is classic, you can try buffalo or blue cheese for a fun twist. Buffalo dressing gives a spicy kick, while blue cheese adds a rich, tangy flavor. These changes can transform your burrito into a whole new experience.
Additional Fillings
Want to pack in more flavor? Add extra veggies or proteins. Consider bell peppers, spinach, or avocado. You can also include bacon or sausage for more variety. These additions not only enhance taste but also boost nutrition. Experiment to find your perfect mix!
Storage Info
Refrigeration
To store leftover burritos in the fridge, wrap them tightly in foil or plastic wrap. Place them in an airtight container for extra freshness. These burritos can last up to three days. Always check for any signs of spoilage before eating.
Freezing Instructions
If you want to freeze burritos for future meals, wrap each burrito in foil. Then, place them in a freezer-safe bag. Label the bag with the date. These burritos can keep well in the freezer for up to three months. When you are ready to eat, thaw them in the fridge overnight.
Reheating Tips
To reheat burritos without losing texture, use an oven or skillet. Preheat the oven to 350°F (175°C) and place the burrito on a baking sheet. Heat for about 15-20 minutes, or until warm. If using a skillet, heat on medium-low. Cook for about 5-7 minutes on each side until heated through. Enjoy your burrito just like new!
FAQs
Can I use fresh chicken instead of cooked?
Yes, you can use fresh chicken for this recipe. Start by seasoning the chicken with salt and pepper. Heat a skillet over medium heat and add a little oil. Cook the chicken for about 6-7 minutes on each side until it is cooked through and no longer pink. Let it cool, then shred it for your burritos.
What sauces pair well with Pickle Ranch Chicken Breakfast Burritos?
Several sauces work great with these burritos. Here are some tasty options:
– Hot sauce for a spicy kick.
– BBQ sauce for a smoky flavor.
– Extra ranch dressing for creaminess.
– Salsa for a fresh and zesty touch.
How long do these burritos last in the fridge?
These burritos can last about 3-4 days in the fridge. Make sure to store them in an airtight container. Check for spoilage signs like off smells or mold before eating. If they look or smell bad, it’s best to toss them.
We covered how to make Pickle Ranch Chicken Breakfast Burritos. You learned about the key ingredients, step-by-step cooking, and tips to elevate your dish. Don’t forget variations like using black beans or different dressings. Storing leftovers properly ensures you enjoy them later. Now you can create these tasty burritos, impressing friends and family alike. Enjoy the process and make it your own!


![- 1 cup quinoa, rinsed - 2 cups water or vegetable broth - 1 large cucumber, diced - 1 red bell pepper, diced - 1 cup cherry tomatoes, halved - 1/4 red onion, finely chopped - 1 cup fresh parsley, chopped - 1/4 cup tahini - 2 tablespoons lemon juice - 1 tablespoon olive oil - 1 clove garlic, minced - Salt and pepper to taste This salad starts with quinoa as the base. Quinoa is a great source of protein and fiber. Rinsing the quinoa helps remove its bitter coating. Use fresh veggies for crunch and color. I love using cucumbers and bell peppers for a fresh bite. Cherry tomatoes bring sweetness and juicy flavor. The red onion adds a nice kick, while parsley gives a fresh touch. The tahini sauce is the star. It adds a creamy texture and nutty flavor. Mix tahini with lemon juice, olive oil, and garlic for a bright dressing. This makes the salad so tasty! - 1/4 cup sunflower seeds or chopped nuts for crunch For extra flavor and texture, you can add sunflower seeds or nuts. They give a nice crunch. Try almonds or walnuts for a rich taste. Fresh herbs like mint or cilantro can also brighten the dish. - Calories per serving: About 250 - Macronutrient breakdown: 10g protein, 12g fats, 30g carbs - Dietary considerations: Gluten-free, vegan, and packed with nutrients This salad is not just tasty; it's also healthy! Each serving has around 250 calories. You get protein from quinoa and tahini. The veggies add vitamins and minerals. Plus, it fits many diets, like vegan and gluten-free. Snack on this salad for a boost of energy! Check the Full Recipe for all the details. 1. Start by rinsing 1 cup of quinoa under cold water. This helps remove any bitter taste. 2. In a medium saucepan, combine the rinsed quinoa and 2 cups of water or vegetable broth. 3. Bring the mixture to a boil over medium-high heat. 4. Once boiling, reduce the heat to low, cover, and let it simmer. Cook for about 15 minutes. 5. The quinoa is done when it is fluffy and the water is absorbed. Remove it from heat and let it cool slightly. 1. In a small bowl, mix together 1/4 cup tahini, 2 tablespoons lemon juice, and 1 tablespoon olive oil. 2. Add 1 clove of minced garlic, salt, and pepper to taste. 3. Whisk until smooth. If the dressing is too thick, add a little water to reach your desired consistency. 1. In a large mixing bowl, combine 1 diced cucumber, 1 diced red bell pepper, 1 cup of halved cherry tomatoes, 1/4 finely chopped red onion, and 1 cup of chopped fresh parsley. 2. Add the cooled quinoa to the vegetable mix and gently toss everything together. 3. Drizzle the tahini dressing over the salad and stir well to coat all the ingredients. 4. For extra crunch, sprinkle 1/4 cup of sunflower seeds or chopped nuts on top before serving. For the full recipe, you can check the details provided above. Enjoy your fresh and flavorful Lemon Tahini Quinoa Salad! To cook quinoa, use a 2:1 ratio of water to quinoa. Rinse the quinoa first. This removes the bitter coating. Bring the water to a boil. Once boiling, lower the heat. Cover the pot and let it simmer for about 15 minutes. Fluff the quinoa with a fork after cooking. This keeps it light and airy, avoiding mushy quinoa. Herbs can change the taste of your salad. Fresh mint or dill works well. Try adding basil for a different twist. For spice, consider adding a pinch of cumin or paprika. These spices bring out the flavors of the vegetables and dressing. Presentation matters! Serve the salad in a large bowl. Garnish with lemon slices and fresh parsley. This adds color and appeal. For a fun twist, use clear glasses. Layer the salad for a stunning visual. Pair this salad with grilled chicken or fish for a complete meal. It’s also great beside roasted veggies. {{image_2}} You can easily add more protein to your Lemon Tahini Quinoa Salad. Chickpeas are a great choice. They add texture and a nutty flavor. Just rinse and drain a can of chickpeas. Then, fold them into the salad for extra protein. Grilled chicken or tofu also works well. Cook the chicken or tofu until it’s golden brown. Then, chop it into bite-sized pieces. Mix it in with the salad for a hearty meal. You can change this salad based on the season. In spring, add fresh peas, radishes, or asparagus. These veggies brighten up the dish and add crunch. In winter, you can use roasted root vegetables. Try carrots or sweet potatoes. They add warmth and depth to the salad while keeping it filling. If you want to switch up the flavor, try other dressings. A simple olive oil and vinegar mix gives a light taste. You can also use yogurt for a creamy twist. Adjust the flavors to suit your taste. Add more lemon juice for tanginess. Or, include herbs like dill or cilantro for freshness. For the complete recipe, check out the [Full Recipe]. To keep your Lemon Tahini Quinoa Salad fresh, store it in the fridge. Use an airtight container. This helps maintain flavor and texture. Before putting it away, let the salad cool. Hot food can raise the fridge temperature, which is not good. Your salad lasts about three to five days in the fridge. Check for any changes in color or smell. If it looks slimy or smells off, toss it out. To reheat, use the microwave. Heat it gently to avoid drying it out. Stir it halfway through to ensure even warming. If you want to serve leftovers, try adding fresh herbs or a squeeze of lemon juice. This can brighten the flavors again. For the full recipe, refer back to the main section. To make this creamy dressing, mix the tahini, lemon juice, olive oil, minced garlic, salt, and pepper in a bowl. Use a whisk for a smooth blend. Adjust the thickness by adding water if needed. This dressing adds a zesty flavor and a creamy texture to your salad. Yes, you can prepare this salad in advance. Store the salad and dressing separately in the fridge. This keeps the vegetables crisp. Combine them just before serving. It tastes even better after the flavors meld together. If you can't find tahini, you can use these alternatives: - Sunflower seed butter - Almond butter - Greek yogurt Each of these options has a unique flavor. Sunflower seed butter is nut-free and creamy. Almond butter adds a nutty taste. Greek yogurt gives a tangy kick. Keep in mind that substituting may change the salad's taste. Adjust the amount of lemon juice to balance flavors. Always taste as you go to find your perfect mix. Enjoy experimenting! This blog post covered how to make a delicious Lemon Tahini Quinoa Salad. You learned about essential and optional ingredients, like quinoa, vegetables, and tahini. I gave you step-by-step instructions, plus tips for cooking and flavoring. We explored salad variations and how to store it properly. This salad is versatile and easy to make. Try adding your favorite ingredients to make it unique. Enjoy a tasty and healthy dish that fits any season!](https://dailydishly.com/wp-content/uploads/2025/07/0131a3b2-a937-48f9-ad75-9f78e7be101a-768x768.webp)


![To make Greek Lemon Chicken Soup, you need fresh and simple ingredients. These give the soup its bright flavor and comforting feel. Here’s the list of what you’ll need: - 1 lb boneless, skinless chicken breasts - 6 cups chicken broth - 1 medium onion, chopped - 2 cloves garlic, minced - 1 cup carrots, diced - 1 cup celery, diced - 1 cup orzo pasta or rice - 3 large eggs - 1/3 cup fresh lemon juice (about 2-3 lemons) - 1 teaspoon dried oregano - Salt and pepper to taste - Fresh dill, for garnish These ingredients come together to create a soup that warms the soul. The chicken offers protein, while the vegetables add nutrients and texture. The lemon juice gives it a zesty kick. I always stress the importance of fresh ingredients. They make the soup vibrant and full of flavor. Using orzo or rice helps to make the soup hearty. You can choose according to your preference. Eggs add creaminess without heavy cream, keeping the dish light. Don’t skip the fresh dill; it adds a wonderful aroma and flavor. For the full recipe and step-by-step instructions, check out the section labeled "Full Recipe." - Boil chicken in broth. Place 1 lb of boneless, skinless chicken breasts in 6 cups of chicken broth. Bring it to a boil over medium-high heat. Let the chicken simmer for 15 to 20 minutes, until it’s cooked through. - Remove and shred. Once done, take the chicken out and let it cool a bit. Use two forks to shred it into bite-sized pieces. Set this chicken aside for later. - Add onion, garlic, carrots, and celery. In the same pot with the broth, add 1 medium chopped onion, 2 minced garlic cloves, 1 cup diced carrots, and 1 cup diced celery. - Cook until tender. Stir and let the veggies cook for about 10 minutes, until they become tender and fragrant. - Stir in orzo or rice. After the veggies soften, add 1 cup of orzo pasta or rice. Cook it according to the package instructions, usually around 8 to 10 minutes. - Whisk eggs and lemon juice. In a bowl, whisk together 3 large eggs and 1/3 cup of fresh lemon juice until well mixed. - Temper eggs with hot broth. Once the orzo is ready, reduce the heat to low. Gradually add a ladle of the hot broth to the egg mixture while whisking constantly. This step helps prevent the eggs from scrambling. - Add to the pot, return chicken. Slowly pour the tempered egg mixture back into the pot while stirring. Add the shredded chicken back in, along with 1 teaspoon of dried oregano, salt, and pepper to taste. Let the soup warm through for 3 to 5 minutes. This method brings every flavor together in a cozy bowl of Greek Lemon Chicken Soup. You can find the complete recipe [Full Recipe]. How to prevent eggs from scrambling To keep the eggs from scrambling, you must temper them first. Start by whisking together the eggs and lemon juice in a bowl. Slowly add a ladle of hot broth from the pot into this bowl. Whisk continuously while pouring. This warms the eggs without cooking them. Once the mixture is warm, pour it back into the pot while stirring. This method helps create a smooth texture. Achieving the right consistency The soup should be creamy but still light. If it feels too thick, add more broth until it reaches your desired consistency. If you prefer a thicker soup, let it simmer a bit longer to reduce. Just remember to stir often to prevent sticking. The orzo or rice will also absorb some broth, so adjust as needed. Best accompaniments for Greek Lemon Chicken Soup This soup pairs well with a simple side salad or crusty bread. A fresh Greek salad with tomatoes, cucumbers, and feta adds a nice crunch. You can also serve it with warm pita or toasted baguette slices. These sides enhance the meal and round out the flavors. Presentation tips with dill and lemon zest For a beautiful presentation, ladle the soup into bowls. Garnish each bowl with a sprig of fresh dill. Add a twist of lemon zest on top for color and flavor. A slice of lemon on the side brightens up the dish. This not only looks great but also adds a burst of fresh taste. {{image_2}} To make Greek Lemon Chicken Soup vegan or vegetarian, you can switch out the chicken. Use tofu, tempeh, or chickpeas instead. For broth, swap chicken broth with vegetable broth. This keeps the same warm flavor while being plant-based. Instead of orzo, you can use quinoa or rice noodles. These options add a nice texture and soak up the soup’s flavor well. They are also gluten-free, which is great for many diets. If you don’t have orzo, any small pasta works. You can try ditalini, small shells, or even farro. Each gives a unique twist to the dish. For vegetables, consider adding sweet corn, peas, or bell peppers. These add color and a hint of sweetness. You can also try kale or spinach for a nutritious boost. Mixing different veggies keeps the soup exciting and tasty. For the full recipe, check out the detailed cooking steps. To keep your Greek Lemon Chicken Soup fresh, follow these steps: - Refrigeration tips: Let the soup cool to room temperature. Transfer it to an airtight container. It’s best to store it in the fridge for up to 3 days. - Freezing instructions: For longer storage, freeze the soup. Use a freezer-safe container, leaving some space at the top for expansion. It can stay frozen for up to 3 months. When you want to enjoy your soup again, reheating is key. Here’s how to do it right: - Best methods for reheating soup: Use the stovetop for even heating. Place the soup in a pot over medium heat, stirring often. You can also use the microwave, but do it in short bursts to prevent hot spots. - Tips for maintaining flavor and texture: Add a splash of chicken broth or water while reheating. This keeps the soup from getting too thick and helps refresh the flavors. How can I make Greek Lemon Chicken Soup gluten-free? To make this soup gluten-free, simply replace orzo with gluten-free pasta or rice. This swap keeps the soup tasty and light. What is the origin of Greek Lemon Chicken Soup? This comforting dish, known as Avgolemono, comes from Greece. It blends chicken, lemon, and eggs, creating a rich flavor. Can I use leftover chicken for this recipe? Absolutely! Leftover chicken adds great flavor. Just shred it and add it to the soup when you combine ingredients. How long does this soup last in the refrigerator? Greek Lemon Chicken Soup lasts about three to four days in the fridge. Store it in an airtight container for best results. What are the nutritional benefits of this soup? This soup is rich in protein from chicken and eggs. It also offers vitamins from vegetables and lemon's vitamin C. Can I make this soup in a slow cooker or instant pot? Yes, you can! For a slow cooker, cook on low for 6-8 hours. For an instant pot, use the soup setting for about 20 minutes. Be sure to follow the Full Recipe for best results. This blog post walked you through making Greek Lemon Chicken Soup. We covered the key ingredients, from chicken and broth to fresh lemon juice. You learned how to prepare the chicken and cook the veggies. I shared tips to perfect the soup and ideas for serving it. Variations and proper storage techniques were also highlighted. This soup is not only tasty but also easy to make. Whether you stick to the classic recipe or try a twist, enjoy every warm bowl!](https://dailydishly.com/wp-content/uploads/2025/06/65f566a6-d6b5-4832-8417-ad5d991989df-768x768.webp)
