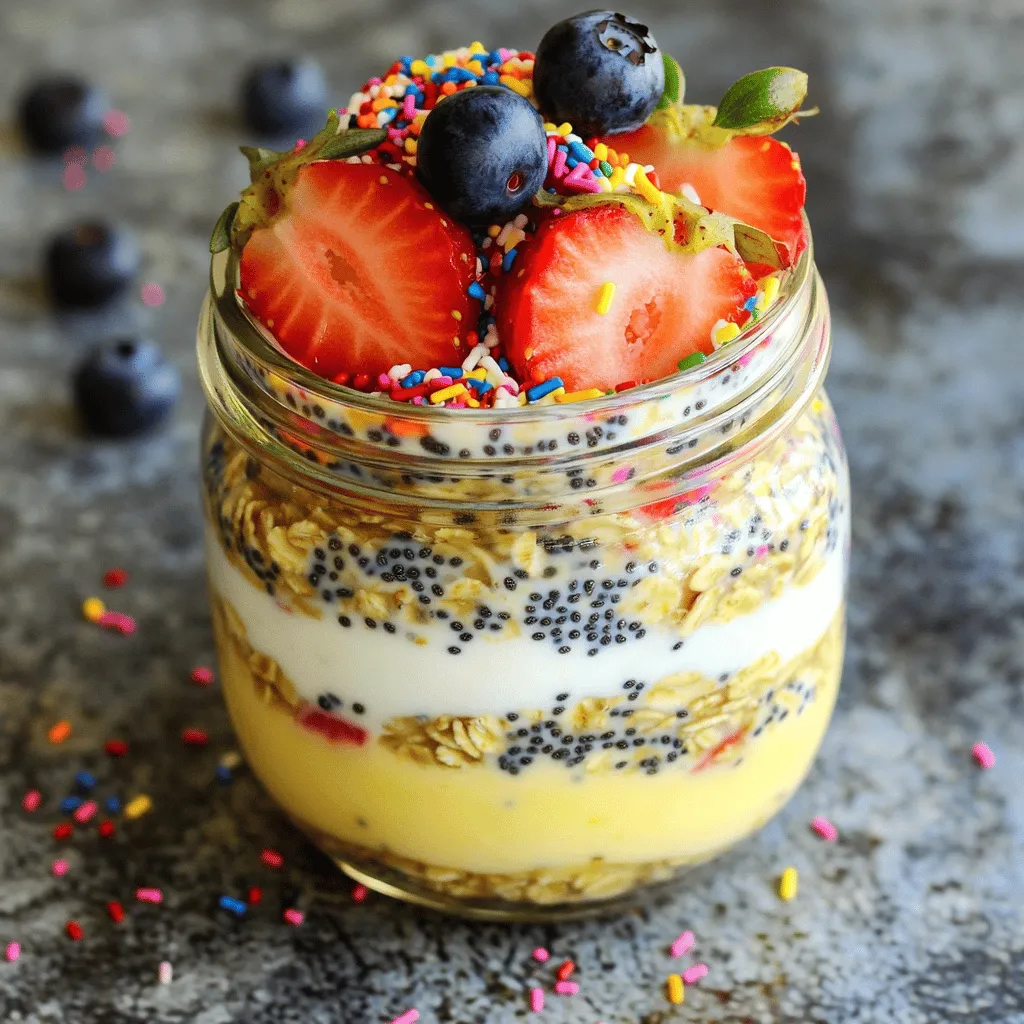
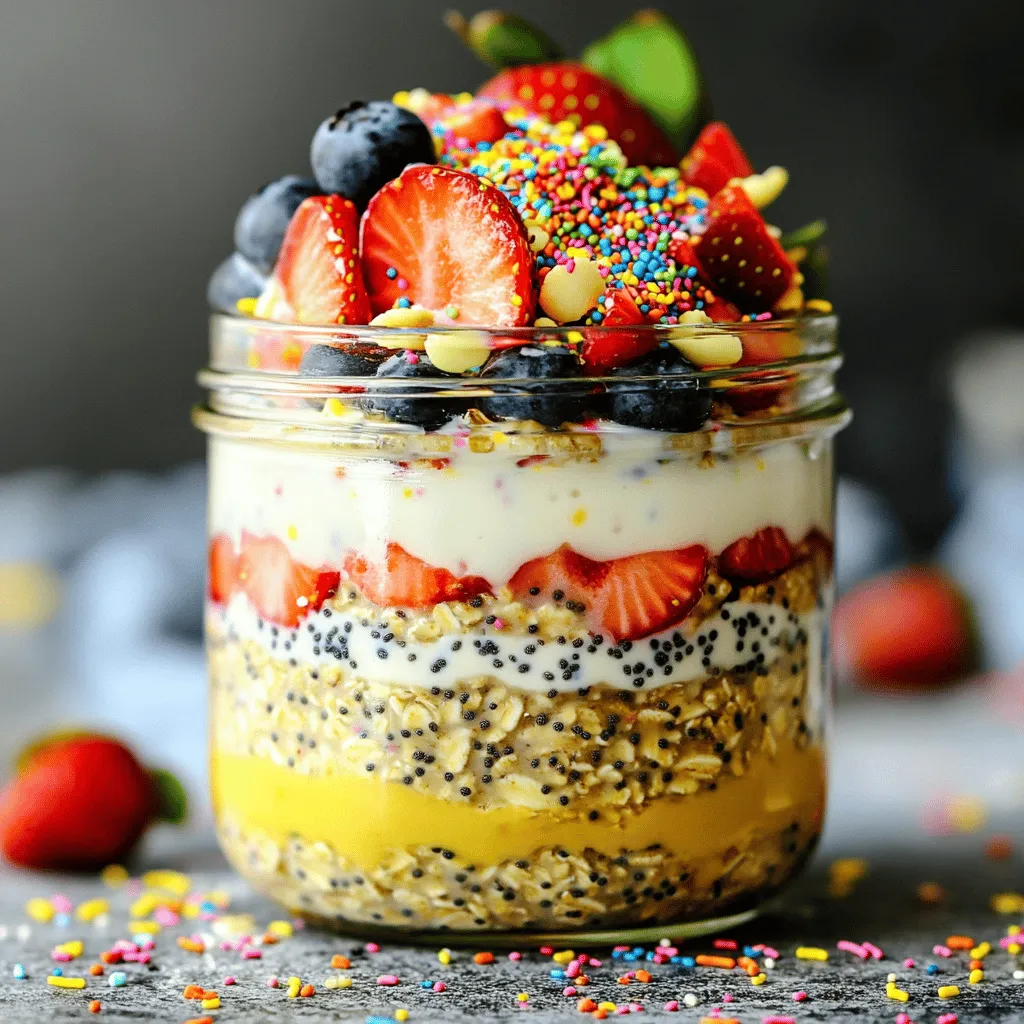
Looking for a tasty way to fuel your mornings? Try my Protein Birthday Cake Overnight Oats! Packed with protein, this fun twist on breakfast feels like dessert. You’ll combine wholesome ingredients like rolled oats, Greek yogurt, and colorful sprinkles for a treat that’s both nutritious and delicious. Join me as I share the easy steps to create your new favorite breakfast, plus tips for customization and storage! Let’s get started!
Ingredients
To make Protein Birthday Cake Overnight Oats, you need simple and healthy ingredients. Here’s what you will need:
– 1 cup rolled oats
– 1 cup almond milk (or any milk of choice)
– 1 scoop vanilla protein powder
– 2 tablespoons Greek yogurt
– 1 tablespoon chia seeds
– 1 tablespoon maple syrup (or honey)
– 1 teaspoon vanilla extract
– 1 tablespoon sprinkles (plus extra for topping)
– Fresh fruit for topping (such as strawberries, blueberries, or bananas)
Each ingredient plays a key role. Rolled oats give you a hearty base. Almond milk keeps it creamy and adds flavor. Vanilla protein powder boosts protein, making it a perfect breakfast. Greek yogurt adds creaminess and probiotics. Chia seeds help with texture and add fiber.
Maple syrup or honey adds a touch of sweetness. Vanilla extract enhances the lovely birthday cake flavor. Sprinkles make it fun and festive! Fresh fruit adds color and more taste.
Gathering these ingredients is easy. You can find most at your local grocery store. Don’t skip any! Each one adds to the delight of this treat.
Step-by-Step Instructions
Preparation Steps
– Combining Ingredients
Start by gathering all your ingredients. In a medium bowl or jar, add 1 cup of rolled oats, 1 cup of almond milk, 1 scoop of vanilla protein powder, 2 tablespoons of Greek yogurt, 1 tablespoon of chia seeds, 1 tablespoon of maple syrup, and 1 teaspoon of vanilla extract. This mix forms the base of your oats.
– Mixing Thoroughly
Use a spoon or whisk to mix everything together. You want to ensure no dry clumps of protein powder remain. A smooth blend gives you a better texture.
– Folding in Sprinkles
Once mixed, gently fold in 1 tablespoon of sprinkles. This step adds fun color and a festive touch. Make sure the sprinkles are evenly spread throughout the mixture.
– Refrigeration Guidelines
Cover the bowl or jar using a lid or plastic wrap. Place it in the refrigerator. Let it chill overnight or for at least 4 hours. This time allows the oats to soak up the liquid and flavors.
Serving Suggestions
– Stirring Before Serving
When ready to eat, give the oats a good stir. This action helps mix the flavors again. If the mixture is too thick, add a splash of almond milk to loosen it up.
– Tips for Adding Fresh Fruit and Extra Toppings
Top your birthday cake overnight oats with fresh fruit like strawberries, blueberries, or bananas. You can also add more sprinkles for extra fun. The fruit gives a nice burst of flavor and nutrition.
Tips & Tricks
Best Practices for Making Overnight Oats
– Avoiding Clumps of Protein Powder: When you mix the protein powder, do it slowly. Add the powder to the milk first. This helps it blend in better. Stir well to break up any clumps. A whisk works great for this.
– Adjusting Thickness of the Mixture: If your oats are too thick, add a bit more liquid. Use almond milk or your choice of milk. Start with a tablespoon at a time. Stir and check the texture again. You want it creamy but not runny.
– Proper Storage Tips for Maximum Freshness: Store your oats in a sealed jar or bowl. This keeps them fresh and tasty. Use glass containers for a great seal. They also make it easy to see the oats.
Enhancing Flavor and Texture
– Using Different Milk Options: You can use any milk you like. Almond milk is light and tasty. But try coconut milk or oat milk for a creamier feel. Each type adds its own flavor.
– Experimenting with Sweeteners and Toppings: Maple syrup is sweet and rich, but honey works too. You can also use agave syrup or stevia. For toppings, fresh fruit like strawberries or bananas adds color and taste. Don’t forget extra sprinkles for a birthday feel!
Variations
Customization Ideas
You can make this protein birthday cake overnight oats your own. Start with flavor variations. Do you love chocolate? Just swap the vanilla protein powder for chocolate protein powder. Want a fruity twist? Use strawberry protein powder for a fresh taste. You can even blend in some cocoa powder for a chocolate cake feel.
Another fun idea is to add nut butters for extra protein. Almond butter or peanut butter can give your oats a rich, creamy texture and a nutty taste. Just mix in a tablespoon when you combine your ingredients. This small change can make your oats even more filling and tasty.
Dietary Modifications
If you need gluten-free options, choose gluten-free rolled oats. They work just as well and still taste great. Check the label on your protein powder, too, to ensure it is gluten-free.
For a vegan-friendly version, replace Greek yogurt with dairy-free yogurt. You can also use plant-based protein powders, like pea protein. Swap almond milk for any non-dairy milk you like. These changes keep the recipe delicious while meeting your dietary needs.
Storage Info
Optimal Storage Conditions
To keep your protein birthday cake overnight oats fresh, store them in the fridge. Use a sealed jar or bowl to prevent spills and keep flavors strong. Overnight oats can last up to five days when stored properly. This lets you prepare meals in advance for busy mornings.
For best results, make sure to mix well before refrigerating. This helps the oats soak up the milk and protein powder. If you notice any liquid at the top, just give it a quick stir before serving.
Reheating and Serving Suggestions
You can enjoy your overnight oats cold or warm. Cold oats are refreshing, especially on hot days. If you prefer warm oats, heat them in the microwave for about 30 to 60 seconds. Be sure to stir them halfway to heat evenly.
Top your oats with fresh fruit, more sprinkles, or even a drizzle of honey for extra fun. The toppings add color and flavor, making each bite special. Enjoy this delightful treat any time of day!
FAQs
What is the best protein powder to use?
The best protein powder for this recipe is vanilla flavor. I suggest whey or plant-based protein. Both options blend well and boost taste. Focus on a protein powder with no added sugar. This keeps your overnight oats healthy and tasty.
Can I make this recipe ahead of time?
Yes, you can make this recipe ahead of time. In fact, it tastes better when made a day before. Just mix all the ingredients, cover, and chill overnight. This way, you save time on busy mornings.
How long can I store overnight oats in the fridge?
You can store overnight oats in the fridge for up to five days. Each day, the oats soak up more flavor. Just remember to stir before you eat. If it gets too thick, add a splash of milk.
Can I use instant oats instead of rolled oats?
You can use instant oats, but the texture will change. Instant oats cook faster and become mushy. Rolled oats provide a nice chewy bite. If you prefer instant oats, reduce the soaking time to just 30 minutes.
In this post, we explored how to make tasty overnight oats. We covered the key ingredients like rolled oats, almond milk, and chia seeds. You learned step-by-step instructions for mixing and serving. We also shared tips for flavoring and keeping your oats fresh. You can customize your recipe to fit your needs. With a bit of creativity, your breakfast can be fun and healthy! Enjoy trying out different flavors and toppings to make this dish your own. Keep experimenting until you find your favorite combo!


