Pumpkin Chocolate Chip Pancake Stack Delightful Recipe

Get ready to treat yourself with my Pumpkin Chocolate Chip Pancake Stack! This recipe combines fall flavors with a sweet twist that kids and adults love. Imagine fluffy pancakes infused with pumpkin and dotted with chocolate chips—pure bliss on a plate. Whether it’s for breakfast or a cozy brunch, this recipe is easy to make and even easier to enjoy. Let’s dive into the delicious details that make this stack a must-try!
Ingredients
Main Ingredients for Pumpkin Chocolate Chip Pancake Stack
To make a great pumpkin chocolate chip pancake stack, you need:
– 1 cup all-purpose flour
– 1 tablespoon baking powder
– 1/2 teaspoon baking soda
– 1/2 teaspoon salt
– 1 teaspoon ground cinnamon
– 1/2 teaspoon ground nutmeg
– 1 cup canned pumpkin puree
– 2 large eggs
– 1/2 cup milk (or plant-based alternative)
– 1/4 cup maple syrup (plus more for serving)
– 1 teaspoon vanilla extract
– 1/2 cup chocolate chips
Baking Essentials
You also need some basic tools to make these pancakes:
– Mixing bowls
– Whisk or fork
– Non-stick skillet or griddle
– Measuring cups and spoons
Additional Items for Serving
When it comes to serving, consider these extras:
– Maple syrup for drizzling
– Butter or oil for cooking
– Powdered sugar for dusting
– Whipped cream for a rich touch
– Extra chocolate chips for garnish
– Pumpkin slices for decoration
These ingredients and tools will set you up for a delicious pancake experience!
Step-by-Step Instructions
Preparing the Dry Ingredients
First, gather your dry ingredients. In a large bowl, combine:
– 1 cup all-purpose flour
– 1 tablespoon baking powder
– 1/2 teaspoon baking soda
– 1/2 teaspoon salt
– 1 teaspoon ground cinnamon
– 1/2 teaspoon ground nutmeg
Whisk these together until mixed well. This step is key for even flavor.
Mixing the Wet Ingredients
Now, in a separate bowl, mix your wet ingredients. Add:
– 1 cup canned pumpkin puree
– 2 large eggs
– 1/2 cup milk (or a plant-based alternative)
– 1/4 cup maple syrup
– 1 teaspoon vanilla extract
Stir these until smooth. This mix gives the pancakes their rich flavor.
Cooking the Pancakes
Heat a non-stick skillet over medium heat. Lightly grease it with butter or oil. Pour about 1/4 cup of batter for each pancake onto the skillet. Cook until bubbles form, about 2-3 minutes. Flip the pancake and cook for another 2 minutes until golden brown. Repeat this with the rest of the batter. Adjust the heat as needed to prevent burning.
Serving Suggestions
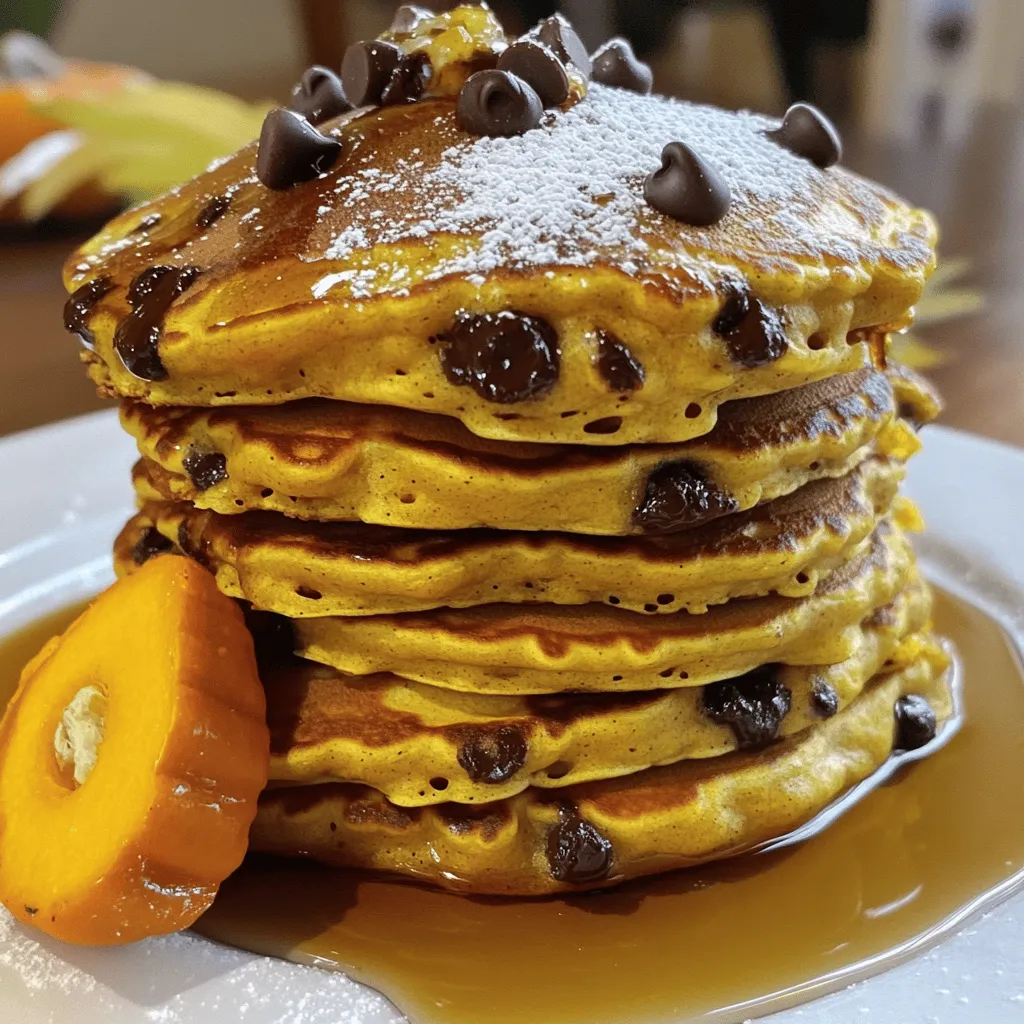
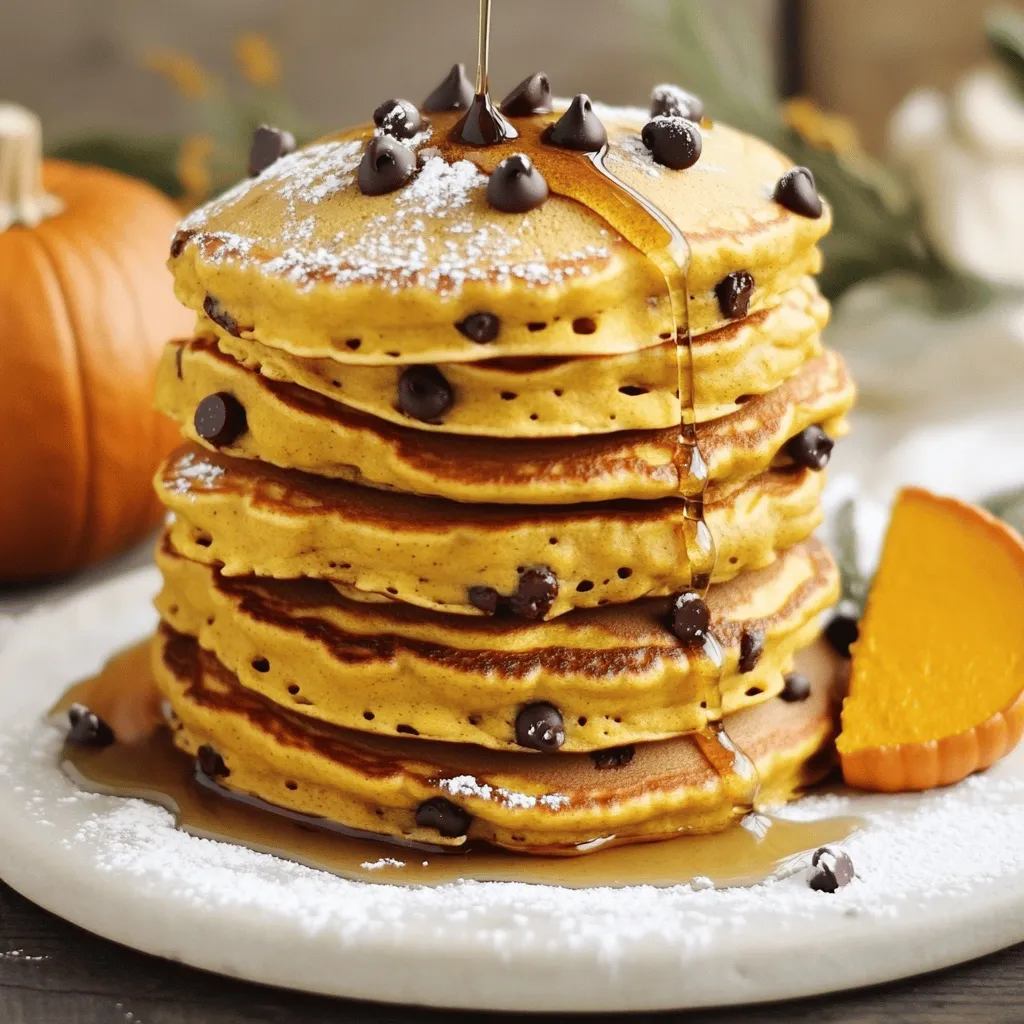
Stack your pancakes high on a plate. Drizzle extra maple syrup over the top. For a fun touch, sprinkle more chocolate chips. Serve warm for the best taste. You can also add whipped cream or a slice of pumpkin for decoration. Enjoy this delightful treat!
Tips & Tricks
Achieving the Perfect Pancake Texture
To make your pancakes fluffy, use fresh baking powder. Mix dry and wet ingredients separately. Combine them gently. Lumps in the batter are okay; they help keep the pancakes fluffy. Let the batter rest for about 5 minutes. This allows the baking powder to work better.
Recommended Cooking Techniques
Heat your skillet on medium, not too hot. If it’s too hot, the pancakes will burn. Use a non-stick pan or griddle. Lightly grease it with butter or oil. Pour about 1/4 cup of batter for each pancake. Cook until bubbles form on top, then flip. Each side should be golden brown. Adjust heat as needed to avoid burning.
Serving and Presentation Tips
Stack pancakes high on a large plate. Drizzle with maple syrup for sweetness. Add a sprinkle of chocolate chips for a fun touch. Dust with powdered sugar for a festive look. You can also top them with whipped cream. A slice of pumpkin on the side adds a nice touch. Enjoy your delicious creation!

Variations
Alternative Add-Ins
You can make these pancakes even better by adding nuts or fruits. Chopped walnuts or pecans add a nice crunch. You can also try adding sliced bananas or blueberries. These add flavor and nutrients. Just fold them into the batter before cooking.
Gluten-Free or Dairy-Free Modifications
If you need gluten-free pancakes, swap the all-purpose flour for a gluten-free blend. Look for one that works for baking. For a dairy-free option, use almond milk or oat milk instead of regular milk. These changes keep the flavor and texture great.
Flavor Enhancements
Want to spice things up? Try adding extra spices like ginger or cloves. A pinch of allspice can also add warmth. You can even use flavored extracts, like almond or orange. These small tweaks can elevate your pancake experience to a new level.
Storage Info
Proper Storage Techniques
To keep your pumpkin chocolate chip pancakes fresh, let them cool first. Stack them with parchment paper between each pancake. Place the stack in an airtight container. Store the container in the fridge if you plan to eat them soon. They stay good for about three days this way.
Reheating Instructions
To reheat your pancakes, use a microwave or a skillet. For the microwave, place a pancake on a plate. Heat it for about 30 seconds. If you want it crisp, use a skillet. Heat it on medium for a few minutes until warm. This keeps them nice and soft.
Freezing and Thawing Pancakes
You can freeze these pancakes for later. Stack them as before and wrap them tightly in plastic wrap. Then, place them in a freezer bag. They can last up to two months in the freezer. When you want to eat them, take out the pancakes and let them thaw in the fridge overnight. You can reheat them after thawing. Enjoy your delicious pancakes anytime!
FAQs
Can I use fresh pumpkin instead of canned?
Yes, you can use fresh pumpkin. First, roast the pumpkin until soft. Then, scoop out the flesh and mash it until smooth. This fresh pumpkin gives a nice flavor. Just use the same amount as canned pumpkin puree.
How do I make pumpkin chocolate chip pancakes fluffier?
To make them fluffier, you can add an extra egg. You can also use buttermilk instead of regular milk. This makes the batter lighter. Make sure not to overmix the batter. A few lumps are okay.
What can I substitute for maple syrup?
If you don’t have maple syrup, you can use honey or agave syrup. Both add sweetness. You can even try fruit purees, like applesauce, for a different taste.
How long do leftovers last?
Leftover pancakes can last up to three days in the fridge. Store them in an airtight container. You can also freeze them for up to two months. Reheat in a microwave or toaster. Enjoy your pancakes anytime!
Now you know how to make tasty pumpkin chocolate chip pancakes. We covered the key ingredients and steps, plus tips for great texture and storage. Feel free to try different add-ins or swap ingredients to fit your needs. Enjoy your pancakes fresh, reheated, or frozen! Experiment and have fun with this easy recipe. You’ll impress family and friends every time!


![- 4 slices of thick bread (brioche or challah) - 2 large eggs - 1/2 cup milk - 1 teaspoon vanilla extract - 1 teaspoon ground cinnamon - 1 tablespoon granulated sugar - Additional mixture (1 tablespoon sugar and 1/2 teaspoon cinnamon) - 1 tablespoon unsalted butter (for frying) - Maple syrup or honey for serving The key to great Cinnamon Sugar French Toast Sticks lies in the ingredients. Start with thick slices of bread like brioche or challah. These breads soak up the egg mixture well. For the egg mix, use large eggs, milk, and vanilla extract. This mix adds richness and flavor. Next, you need cinnamon and sugar. Ground cinnamon brings warmth and spice, while granulated sugar adds sweetness. You will want an extra mix of sugar and cinnamon for coating later. This makes them irresistible. Don't forget the butter! A tablespoon of unsalted butter helps fry the sticks. It gives them a nice golden color and flavor. The dish pairs perfectly with maple syrup or honey for dipping. With these ingredients, you can make a delightful breakfast or snack that everyone will love. Check out the Full Recipe for all the details! In a shallow bowl, whisk together the eggs, milk, vanilla, cinnamon, and sugar. This mix is key. It gives the French toast sticks their rich flavor. Make sure the ingredients blend well. You want a smooth mixture. This will coat the bread perfectly. Next, slice the bread into sticks. Aim for 1-inch wide pieces. This size helps them cook evenly. Using thick bread, like brioche or challah, adds great taste. Uniform sticks ensure that every bite is just as tasty as the last. Now, dip each stick into the egg mixture. Make sure they get fully coated. Let any extra liquid drip off before cooking. Heat a non-stick skillet over medium heat. Add butter and let it melt. Once the pan is ready, place the sticks in without crowding. Cook for about 2-3 minutes on each side. You want them golden brown and a bit crispy. After cooking, mix some sugar and cinnamon in a bowl. While the sticks are warm, roll them in this mix. The cinnamon sugar coating makes them delightful! For more details, you can refer to the [Full Recipe]. The best bread makes a big difference. I love using thick bread like brioche or challah. These types add a soft texture and sweet flavor. They soak up the egg mixture well and stay soft inside. You can also try Texas toast for a nice change. Look for bread that isn't too fresh. Day-old bread works best. It holds up better while cooking. To get perfect golden-brown sticks, use medium heat. If the heat is too high, they might burn. Keep an eye on them while cooking. Flip them carefully with a spatula. Cook for about 2-3 minutes on each side. The goal is a crispy outside and soft center. If they are browning too fast, lower the heat. This way, you get that nice, even color. You can serve these sticks in many fun ways! Maple syrup or honey make great dips. They add sweetness and flavor. You can also add fresh fruit like strawberries or bananas on the side. For extra flair, sprinkle some whipped cream on top. If you're feeling adventurous, try a chocolate sauce for dipping. It makes a tasty treat! {{image_2}} You can add chocolate chips or fruit to the egg mixture. This twist makes your French toast sticks even more fun. Just fold in small amounts of your favorite fruit, like berries or bananas, before dipping the bread. For chocolate lovers, sprinkle in some mini chocolate chips. These additions bring sweetness and texture to each bite. Switching to brown sugar or flavored syrups can change the flavor profile. Brown sugar adds a rich, caramel taste that pairs well with cinnamon. You can also try flavored syrups, like maple or vanilla, for a unique touch. Drizzle these on or serve them for dipping. Each option offers a new twist on this classic dish. You can easily make this dish plant-based by swapping out eggs and milk. Use a mixture of flaxseed meal and water instead of eggs. For milk, try almond, soy, or oat milk. These substitutes maintain the creaminess and flavor you want. This way, everyone can enjoy cinnamon sugar French toast sticks, regardless of their diet. For the full recipe, check the main article. To keep leftover cinnamon sugar French toast sticks fresh, follow these steps: - Cool the sticks: Let them cool to room temperature. - Use an airtight container: Place the sticks in a container with a tight lid. - Refrigerate: Store them in the fridge for up to three days. - Freeze for longer storage: For freezing, wrap each stick in plastic wrap and place them in a freezer bag. To enjoy the sticks again, reheating is key: - Oven method: Preheat your oven to 350°F (175°C). Place the sticks on a baking sheet and heat for about 10 minutes. This keeps them crispy. - Skillet method: Heat a non-stick skillet over medium heat. Add a small amount of butter, then place the sticks in the pan. Cook for 2-3 minutes on each side. Knowing how long your cinnamon sugar French toast sticks last is important: - In the fridge: They stay fresh for about three days. - In the freezer: They can last for up to three months. When ready to eat, thaw in the fridge overnight before reheating. By following these storage tips, you can savor every bite of your delicious cinnamon sugar French toast sticks. For the full recipe, refer to the earlier sections. Yes, you can prepare them in advance. Make the egg mixture and cut the bread into sticks. Store them in an airtight container in the fridge for a few hours. You can also cook them, then keep them warm in the oven at low heat. This way, you save time and still enjoy a tasty breakfast. If you need alternatives, try using gluten-free bread or low-carb options like cloud bread. You can also use slices of banana or even zucchini for a unique twist. These options still give you a fun shape and taste great with cinnamon sugar! To keep the sticks crisp, don't soak them too long in the egg mixture. Just a quick dip works wonders. Make sure your pan is hot enough before cooking. This helps to seal the outside quickly, keeping the inside soft but not soggy. Enjoy your delicious Cinnamon Sugar French Toast Sticks! In this blog post, we covered how to make delicious Cinnamon Sugar French Toast Sticks. You learned about the key ingredients, step-by-step cooking instructions, and helpful tips for the best results. I also shared fun variations and storage techniques to keep your leftovers fresh. Enjoying these treats at breakfast or brunch elevates your meal. Whether you customize the flavors or pick the right bread, your French toast will impress. Try it out and make each bite count.](https://dailydishly.com/wp-content/uploads/2025/07/664e1dd1-150a-4660-86e6-505ad35a42cc-768x768.webp)
