Pumpkin Pecan Cheesecake Bars Rich and Decadent Treat

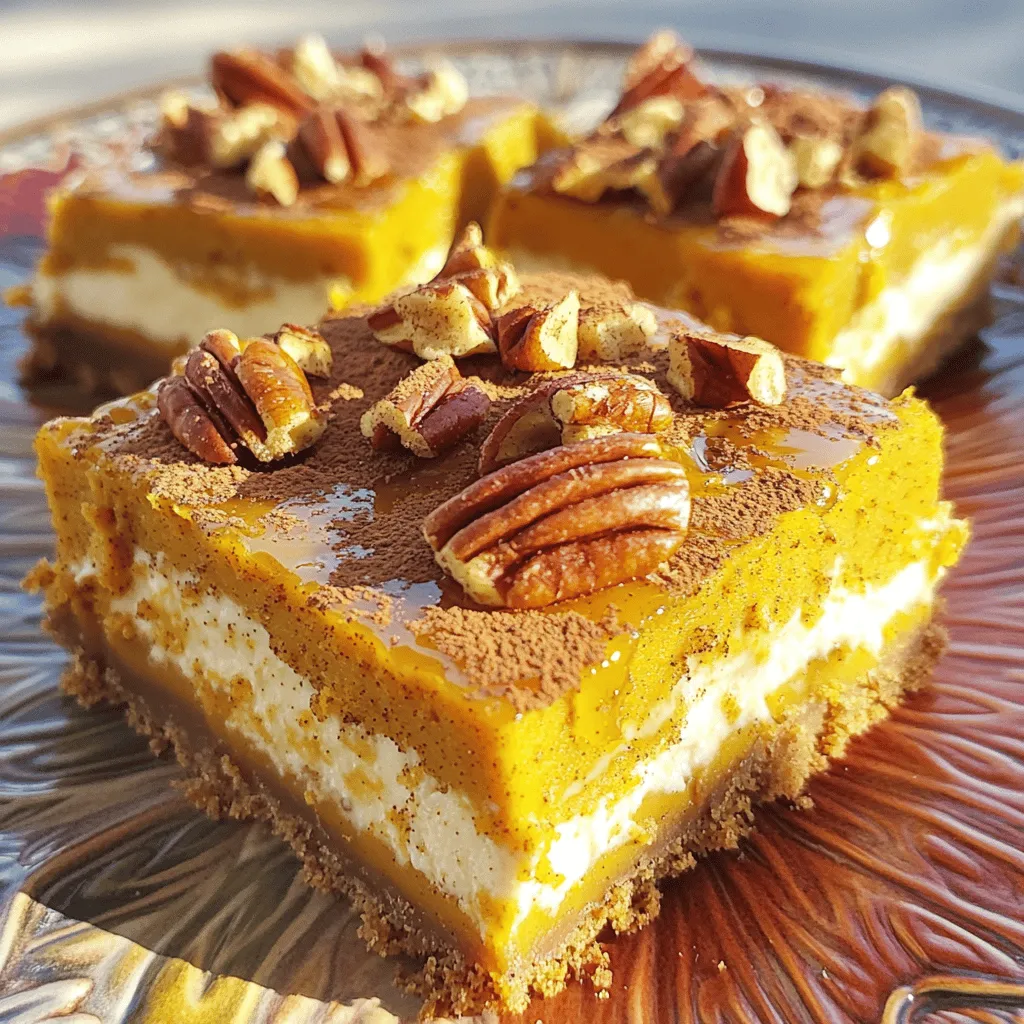
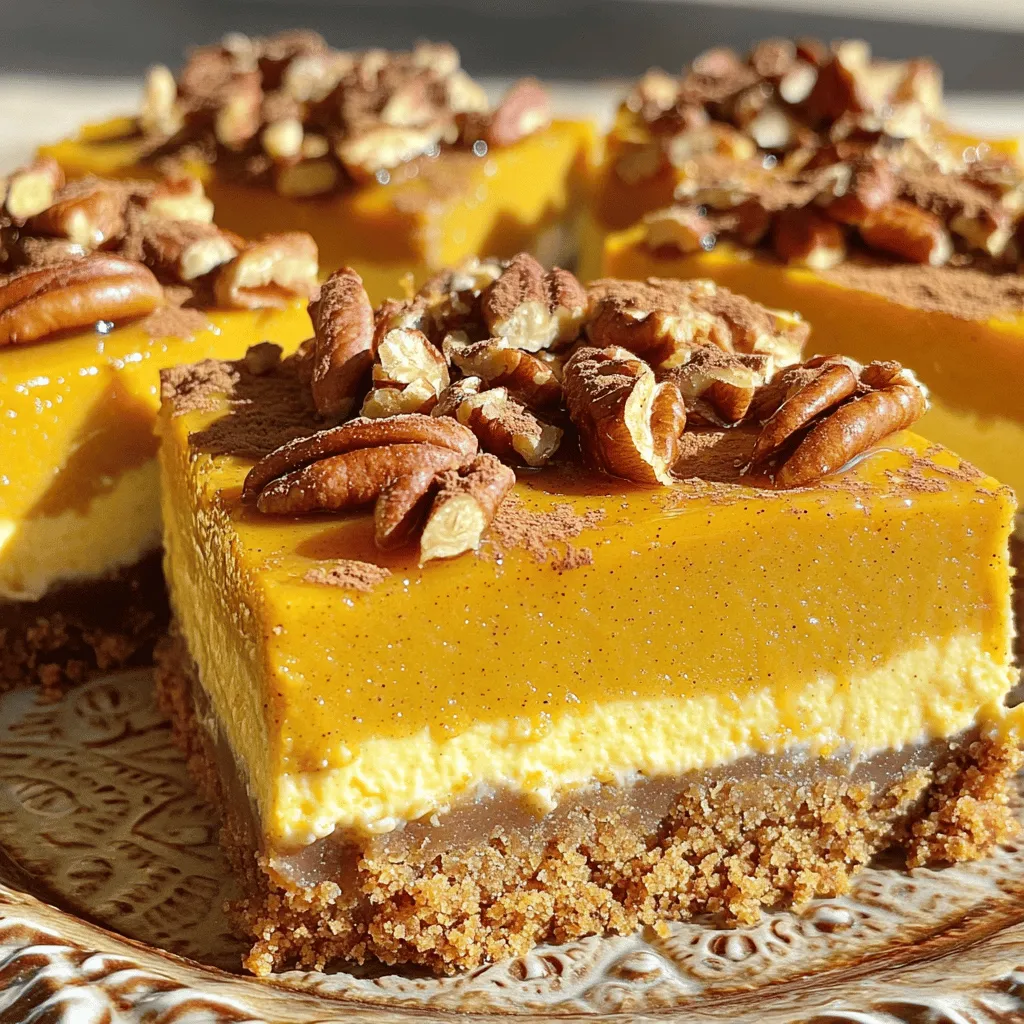
If you love the cozy flavors of fall, you’re in for a treat! These Pumpkin Pecan Cheesecake Bars combine creamy cheesecake with rich pumpkin and crunchy pecans. Not only are they easy to make, but they’re also a showstopper for any gathering. From the buttery graham cracker crust to the spiced filling, every bite delivers warmth and delight. Let’s dive into making this rich and decadent dessert that will impress your friends and family!
Ingredients
Primary Ingredients List
– 1 cup graham cracker crumbs
– 1/4 cup unsalted butter, melted
– 1/4 cup brown sugar
– 1 1/2 cups cream cheese, softened
– 1 cup pure pumpkin puree
– 1/2 cup granulated sugar
– 2 large eggs
– 1 teaspoon vanilla extract
– 1 teaspoon ground cinnamon
– 1/2 teaspoon ground nutmeg
– 1/4 teaspoon ground ginger
– 1/4 cup chopped pecans (plus more for topping)
– Pinch of salt
To create the perfect pumpkin pecan cheesecake bars, you need quality ingredients. Fresh ingredients bring out the best flavor. For the crust, graham cracker crumbs provide a sweet and crunchy base. I use unsalted butter to control the saltiness. The brown sugar adds a warm, caramel-like taste.
The cream cheese is the star of the filling. It gives the bars a rich and creamy texture. Pure pumpkin puree adds moisture and flavor. Granulated sugar balances the pumpkin’s natural earthiness. The eggs help bind everything together, making the bars firm and set.
Spices like cinnamon, nutmeg, and ginger bring warmth and a hint of fall to every bite. Chopped pecans add a delightful crunch and nutty flavor. Finally, a pinch of salt enhances all these wonderful flavors.
Ingredient Substitutions
– Alternatives for graham cracker crust: You can use crushed vanilla wafers or almond flour for a gluten-free option.
– Dairy-free options for cream cheese: Look for plant-based cream cheese for a dairy-free version.
– Sweetener variations: You might swap granulated sugar with coconut sugar or maple syrup for a different taste.
These substitutions keep the essence of the bars while catering to various diets. Always taste as you go to ensure the flavors stay balanced.
Step-by-Step Instructions
Preparing the Crust
1. First, preheat your oven to 350°F (175°C). Line an 8×8 inch baking pan with parchment paper. Leave some paper hanging over the edges for easy removal later.
2. In a mixing bowl, combine:
– 1 cup graham cracker crumbs
– 1/4 cup unsalted butter, melted
– 1/4 cup brown sugar
– A pinch of salt
Mix everything until the crumbs feel moist.
3. Press this mixture evenly into the bottom of the baking pan. This forms the crust. Bake it for 10 minutes. Once done, take it out and let it cool for a few minutes.
Making the Cheesecake Filling
4. In another bowl, beat together:
– 1 1/2 cups cream cheese, softened
– 1 cup pure pumpkin puree
– 1/2 cup granulated sugar
– 2 large eggs
– 1 teaspoon vanilla extract
– 1 teaspoon ground cinnamon
– 1/2 teaspoon ground nutmeg
– 1/4 teaspoon ground ginger
Mix until the filling is smooth and all ingredients are well combined.
5. Now, fold in:
– 1/4 cup chopped pecans
This adds a nice crunch and flavor to the cheesecake.
Baking and Cooling Process
6. Pour the cheesecake mixture over the cooled graham cracker crust.
7. Bake in the oven for about 30-35 minutes. The center should be set but still jiggle slightly.
8. Once baked, remove it from the oven. Let it cool in the pan for about 10 minutes.
9. After cooling, sprinkle more chopped pecans on top. Let the cheesecake bars cool to room temperature. Then, refrigerate them for at least 2 hours to help them set.
10. When fully chilled, use the parchment overhang to lift the bars out of the pan. Cut them into squares or rectangles. Enjoy your delicious pumpkin pecan cheesecake bars!
Tips & Tricks
Achieving the Perfect Texture
Using room temperature ingredients is key for a smooth cheesecake. Cold cream cheese can clump and cause lumps. Let your cream cheese sit out for about 30 minutes before mixing. This helps it blend well with other ingredients.
To avoid cracks in the cheesecake, do not overbake it. Bake until the center is just set. It should still jiggle a bit. Cooling slowly is also important. Turn off the oven and leave the door slightly open for about 15 minutes. This gradual change in temperature keeps the cheesecake from cracking.
Flavor Enhancements
Spices can make your cheesecake even better. Ground cinnamon, nutmeg, and ginger add warmth and depth. You can also try adding a pinch of cloves for an extra kick.
For toppings, consider drizzling caramel sauce on top. It adds sweetness and a nice contrast. Chopped pecans not only enhance flavor but also add a nice crunch. You could also use whipped cream for a light touch.
Serving Suggestions
When serving, use a decorative plate for a beautiful presentation. A little drizzle of caramel or chocolate sauce can make it special. Garnish with a sprinkle of cinnamon or extra pecans for visual appeal.
Pair these cheesecake bars with a warm drink. A cup of coffee or spiced chai works great. For a festive touch, serve with apple cider. This combination enhances the fall flavors of the bars.

Variations
Flavor Modifications
You can play with flavors in pumpkin pecan cheesecake bars. Want a twist? Add chocolate or caramel swirls. Swirl chocolate sauce into the cheesecake mix before baking. It adds richness and a fun flair. For caramel, drizzle it on top before serving. It makes each bite a sweet surprise.
Not a fan of pecans? You can use other nuts like walnuts or almonds. If you prefer a nut-free version, just skip them. The cheesecake will still taste great!
Mini or Bite-Sized Versions
If you want to make mini or bite-sized treats, use a mini muffin tin. Simply follow the same recipe, but pour the batter into each cup. Bake for about 15-20 minutes. Check for a slight jiggle in the center. These bites are perfect for parties and easy to share!
For even smaller bites, use a small cookie scoop. This method helps you create uniform sizes. They are cute and just the right size for a quick dessert!
Seasonal Variations
Make your cheesecake bars festive! For holidays, add spices like allspice or cloves. You can also top them with whipped cream and sprinkle cinnamon. It brings a cozy feel to your treats.
Want to explore other fall flavors? Try adding apple or pear puree to the mix. This will give your bars a fruity twist. Mixing in these flavors keeps your recipe fresh and exciting every season.
Storage Info
Refrigerator Storage
To store leftover pumpkin pecan cheesecake bars, place them in an airtight container. This keeps them fresh and tasty. You can also cover the bars tightly with plastic wrap. They stay good in the fridge for up to five days. If you want to keep them longer, freezing is a great option.
Freezing Instructions
Freezing cheesecake bars is easy. First, cut them into squares. Wrap each piece in plastic wrap. Then, put the wrapped bars in a freezer-safe bag or container. This prevents freezer burn. They can last up to three months in the freezer. When you want to enjoy them, move the bars to the fridge to thaw overnight. This helps maintain their creamy texture and flavor.
Reheating Tips
When ready to serve, you might want to warm the bars a bit. The best method is to use the oven. Preheat it to 350°F (175°C). Place the bars on a baking sheet and heat for about 10 minutes. This warms them through without losing their quality. You can also use a microwave. Heat for just a few seconds at a time, checking often to avoid overheating. Enjoy your delicious treat warm or at room temperature!
FAQs
Can I make these cheesecake bars ahead of time?
Yes, you can make these cheesecake bars ahead of time. I recommend making them a day before you plan to serve them. This allows the flavors to meld together nicely. After baking, let the bars cool completely. Then, cover them tightly with plastic wrap. Store them in the fridge until you are ready to enjoy them. This method keeps the bars fresh and delicious.
How do I prevent the bars from sticking?
To prevent the bars from sticking, use parchment paper. Line your baking pan with it, leaving some overhang. This overhang helps you lift the bars out easily once they are cool. Also, make sure to grease the pan lightly with butter or cooking spray before placing the parchment paper. This extra step ensures no part of the bars sticks to the pan.
Can I use fresh pumpkin instead of canned?
You can use fresh pumpkin instead of canned. Fresh pumpkin brings a bright taste to the bars. To prepare fresh pumpkin, cut it in half, scoop out the seeds, and bake until soft. Once cooled, scoop out the flesh and mash it until smooth. This process takes more time, but the flavor is worth it.
What can I do with leftovers?
If you have leftovers, there are many fun ways to use them. You can crumble the bars over yogurt for breakfast or a tasty snack. Another idea is to layer them in a trifle with whipped cream and nuts. You can also freeze the bars for later. Wrap them individually in plastic wrap, then store them in an airtight container. This way, you can enjoy a treat whenever you want!
You now have all the details needed to create a delicious pumpkin pecan cheesecake. From selecting the right ingredients to mastering the baking process, each step is essential for success. Remember, you can get creative with flavors or make mini treats. Store leftovers safely or pair them with fun toppings. Enjoy making this fall favorite for any occasion. Happy baking!


![To make a tasty Honey Lime Fruit Salad, you need the following ingredients: - 2 cups diced watermelon - 1 cup diced pineapple - 1 cup diced mango - 1 cup sliced strawberries - 1 cup blueberries - 1 tablespoon honey - 2 tablespoons fresh lime juice - 1 teaspoon lime zest - Fresh mint leaves for garnish These ingredients create a colorful and refreshing dish. Each fruit adds its unique flavor and texture. You can also personalize your salad with optional ingredients. Consider adding: - Kiwi for extra zing - Grapes for sweetness - Chopped nuts for crunch - A sprinkle of cinnamon for warmth Feel free to mix and match based on what you have at home. Remember, the more colorful your salad, the more fun it will be to eat! For the full recipe, check out the detailed instructions provided. To make a great Honey Lime Fruit Salad, start by dicing and slicing your fruits. Here’s how: - Watermelon: Cut the melon in half. Use a sharp knife to slice it into strips. Then, dice those strips into small cubes. - Pineapple: Cut off the top and bottom. Stand it up and slice off the skin. Remove the core and dice the fruit. - Mango: Slice the mango around the pit. Cut the flesh into cubes while still in the skin. Then scoop it out. - Strawberries: Remove the green tops. Slice them from top to bottom. - Blueberries: These are easy! Just rinse them well under cold water. For freshness, always pick ripe fruits. Check for bright colors and a sweet smell. This ensures your salad has the best flavor. Now it's time to combine the fruits. In a large mixing bowl, add all your diced and sliced fruits together. Gently stir them to mix well. Next, let's make the honey-lime dressing. In a small bowl, whisk these together until smooth: - 1 tablespoon honey - 2 tablespoons fresh lime juice - 1 teaspoon lime zest Pour this honey-lime mixture over the fruit in the mixing bowl. Gently toss the fruit salad. You want every piece to be coated with the dressing. Be careful not to mash the fruit; you want it to stay whole. Let the salad sit for about 10 minutes. This resting time helps the flavors blend. Before serving, add fresh mint leaves on top for a pretty touch. For the complete recipe, check the [Full Recipe]. Enjoy your refreshing and healthy dish! To make the best Honey Lime Fruit Salad, start with ripe fruits. Ripe fruits taste sweeter. Look for watermelons that feel heavy and have a uniform color. Choose pineapples that smell sweet at the base. Mangoes should give slightly when pressed. Strawberries should be bright red with no white spots. Blueberries should be plump and firm. Avoid over-mixing the salad. If you toss too hard, fruits can break apart. Gently mix the fruits and dressing. This keeps the salad looking fresh and colorful. Let it sit for about ten minutes after mixing. This helps the flavors blend nicely. For serving, use a clear glass bowl. This lets the colors shine through. You can also serve it in hollowed-out fruits like oranges or pineapples. It adds a fun twist! Pair this salad with grilled chicken or fish. It works great for picnics, barbecues, or brunch. You can even serve it as a light dessert. Kids love it too! You can make this salad vegan by skipping the honey. Use maple syrup or agave nectar instead. Both options give a nice sweetness. For low-sugar choices, reduce the honey or syrup even more. You can also try using sugar-free sweeteners. They work well without changing the taste. You can find the Full Recipe in the previous sections to guide you through the steps! {{image_2}} You can change the fruits based on the season. In summer, use juicy peaches or nectarines. In fall, try crisp apples or pears. Mixing in nuts or granola can add a nice crunch. Almonds or walnuts work great. You can also sprinkle in some granola for extra texture. This makes your salad not just tasty, but also fun to eat. To give your salad a new twist, add some spices. A pinch of chili powder can bring a nice kick. If you prefer a warm taste, try adding fresh ginger. For a citrus boost, mix in orange or grapefruit. These small changes can create exciting flavors. You will be surprised by how different your fruit salad can taste. How you serve the salad can impress your guests. You can hollow out a melon or pineapple to hold the fruit. This makes for a beautiful serving dish. Another fun idea is to layer the salad in a trifle dish. This creates a colorful display. Your guests will love the look and taste of your Honey Lime Fruit Salad! Check out the Full Recipe for more ideas. To keep your honey lime fruit salad fresh, store it in the fridge. Use a clean, airtight container to prevent air from spoiling the fruit. This method helps keep the flavors vibrant and the fruits crisp. Aim to eat the salad within three days for the best taste. Can you freeze fruit salad? Yes, but it’s tricky. Freezing changes the texture of fruits. If you choose to freeze it, do so without the dressing. Pack the fruit tightly in a freezer-safe bag, removing as much air as possible. To defrost, place the bag in the fridge overnight. This slow method helps maintain some texture. How can you tell when the salad is no longer fresh? Look for signs of mushiness or off-smells. If the fruit looks dull or has excessive liquid, it’s time to toss it. For safety, do not eat spoiled food. Always trust your senses to ensure your meals are safe and tasty. To make Honey Lime Fruit Salad, follow these steps: 1. Gather your fruits. You need watermelon, pineapple, mango, strawberries, and blueberries. 2. Dice the watermelon, pineapple, and mango into bite-sized pieces. Slice the strawberries. 3. In a large bowl, mix all the fruits together. 4. In a smaller bowl, whisk 1 tablespoon of honey, 2 tablespoons of lime juice, and 1 teaspoon of lime zest. 5. Pour the honey-lime mix over the fruits. 6. Gently toss the fruits to coat them in the dressing. 7. Let it rest for about 10 minutes. This helps the flavors mix. 8. Add fresh mint leaves on top before serving. This simple process makes a bright and tasty dish in just 25 minutes. For the detailed recipe, check the Full Recipe. You can use many fruits in this salad. Here are some great options: - Apples for a crunch. - Kiwi for a tangy twist. - Grapes for added sweetness. - Oranges for a juicy burst. Feel free to mix and match based on what you like or have at home! Yes, you can prepare this salad ahead of time. - Make it up to 2 hours before serving. - Keep it in the fridge to stay fresh. - If you make it too early, the fruits might get mushy. Toss the salad just before serving to keep it crisp. This blog post has covered everything you need for a tasty Honey Lime Fruit Salad. We started with key ingredients and clear steps for prep and mixing. I shared tips to enhance freshness and how to serve it well. We explored variation ideas to keep it exciting, and I gave you storage tips for leftovers. Remember, this salad is fun to make and customize. Enjoy the fresh tastes, and don’t hesitate to experiment with your favorites!](https://dailydishly.com/wp-content/uploads/2025/07/a7fe8aa9-0619-4c4c-8a63-94d099c8a4d2-768x768.webp)


![- Zucchini and Raisin Essentials - 2 cups grated zucchini - 1 cup raisins Zucchini adds moisture and a soft texture to the bread. Raisins bring sweetness and chewiness. Using fresh, firm zucchini makes the best bread. - Sweeteners and Fats - 1 cup granulated sugar - 1/2 cup packed brown sugar - 1/2 cup vegetable oil - 3 large eggs - 2 teaspoons vanilla extract Granulated sugar gives a crisp crust. Brown sugar adds depth and moisture. Vegetable oil keeps the bread soft. Eggs bind the ingredients and add richness. - Dry Ingredients Overview - 2 cups all-purpose flour - 1 teaspoon baking soda - 1/2 teaspoon baking powder - 1 teaspoon ground cinnamon - 1/2 teaspoon ground nutmeg - 1/4 teaspoon salt Flour provides structure. Baking soda and powder help the bread rise. Cinnamon and nutmeg add warmth and flavor. Salt balances the sweetness. - Optional Add-ins (Nuts, Spices) - 1/2 cup chopped walnuts (optional) Nuts add crunch and a nutty flavor. You can also add spices like ginger or cloves for a twist. Check out the Full Recipe for exact measurements and instructions! Preheating the Oven and Preparing the Pan First, preheat your oven to 350°F (175°C). This step is key for even baking. While the oven heats, grease and flour a 9x5-inch loaf pan. This helps the bread release easily after baking. Mixing Wet Ingredients In a large bowl, combine the grated zucchini, granulated sugar, brown sugar, vegetable oil, eggs, and vanilla extract. Use a whisk or spoon to mix until everything is well blended. This creates a moist base for your bread. Combining Dry Ingredients In another bowl, whisk together the flour, baking soda, baking powder, cinnamon, nutmeg, and salt. This mixture adds structure and flavor to your bread. Make sure there are no lumps. Final Batter Preparation Gradually add the dry ingredients to the wet mixture. Stir gently until just combined. It's important not to overmix. This keeps the bread light and fluffy. Fold in the raisins and walnuts if you choose to use them. This adds texture and sweetness. Pouring Batter into the Pan Carefully pour the batter into your prepared loaf pan. Use a spatula to smooth the top. This helps the bread bake evenly and look nice. Baking Duration and Temperature Place the pan in the preheated oven. Bake for 50-60 minutes. The bread is ready when a toothpick inserted in the center comes out clean. Checking for Doneness To check if your bread is done, look for a golden-brown color on top. If the toothpick has wet batter, bake for a few more minutes. Let it bake fully for the best taste. You can find the full recipe above for more details on this delightful zucchini raisin bread! - Ensuring Moisture with Grated Zucchini Grated zucchini adds moisture to your bread. Use a box grater or food processor to shred it finely. Before adding it to the mix, squeeze out excess water. This step keeps your bread from being too wet or soggy. - Avoiding Overmixing When mixing the wet and dry ingredients, stir just until combined. Overmixing makes the bread tough. It’s okay if some lumps remain. This helps keep the bread light and fluffy. - Proper Cooling Techniques After baking, let the bread cool in the pan for about 10 minutes. This helps it firm up. Then transfer it to a wire rack. Cooling it completely helps avoid sogginess and allows the flavors to settle. - Ideal Pairings and Presentation Ideas Serve slices warm with butter or cream cheese. For a special touch, sprinkle cinnamon on top. You can also pair it with a hot cup of tea or coffee. This makes for a cozy snack or breakfast. - Storage Tips for Maximum Freshness Store leftover bread in an airtight container at room temperature. This keeps it soft for several days. For longer storage, wrap it in plastic wrap and freeze. When you want to eat it, thaw it at room temperature. Enjoy fresh slices whenever you like! For the complete recipe, refer to the Full Recipe section above. {{image_2}} You can make your zucchini raisin bread even better with simple tweaks. Adding spices beyond cinnamon and nutmeg works wonders. Try ginger or allspice for a warm, fragrant touch. A pinch of cardamom also brings a lovely depth. Incorporating other fruits or nuts boosts flavor and texture. Chopped apples or crushed pineapple add sweetness and moisture. You can swap raisins for dried cranberries for a tart burst. If you prefer nuts, walnuts or pecans lend a delightful crunch. If you're looking for vegan substitutions, replace eggs with flaxseed meal or applesauce. Use a plant-based oil too. Almond or coconut milk can replace regular milk if you choose to add some. Using whole wheat flour is a smart swap. It adds fiber and nutrients while keeping the bread moist. You can use half all-purpose and half whole wheat flour for a balanced taste. Reducing sugar content is another way to make this bread healthier. You can cut the granulated sugar by a third. The zucchini adds natural sweetness, so you won’t miss much. Using ripe bananas or unsweetened applesauce can also help cut sugar while adding flavor. For the full recipe, check out the section above! To keep your zucchini raisin bread fresh, store it at room temperature. Wrap it in plastic wrap or place it in an airtight container. This helps keep the bread moist and flavorful. Enjoy it within a few days for the best taste. If you want to keep it longer, consider refrigerating it. But remember, the cold may change the texture slightly. If you want to save your zucchini raisin bread for later, freezing is a great option. First, let the bread cool completely after baking. Then, wrap it tightly in plastic wrap, followed by aluminum foil. This dual layer helps prevent freezer burn. You can freeze it for up to three months. To thaw your bread, simply remove it from the freezer. Leave it wrapped at room temperature for a few hours. When it's soft, you can slice it. If you want it warm, pop a slice in the toaster. This makes a delicious treat. Don't forget, you can use the [Full Recipe] to make more for your freezing needs! Can I use frozen zucchini in this recipe? Yes, you can use frozen zucchini. Just thaw it first and drain any extra water. This helps keep your bread moist. Frozen zucchini works well in baked goods. It still adds great flavor and texture. How can I make this recipe gluten-free? To make this recipe gluten-free, swap the all-purpose flour for gluten-free flour. Many brands offer blends that work well in baking. Just ensure they contain xanthan gum or add it separately. This helps with the bread's structure and texture. What are the nutritional benefits of zucchini in baking? Zucchini is low in calories and high in fiber. It adds moisture to your bread without extra fat. Zucchini also contains vitamins A and C, which are good for your health. Plus, it has antioxidants. These benefits make zucchini a smart choice for baking. For the complete recipe, take a look at the Full Recipe section. In this post, we explored the step-by-step process of making delicious zucchini raisin bread. We discussed essential ingredients, baking tips, and storage methods. You learned how to mix wet and dry components effectively and check for perfect doneness. Remember, don’t skip on the grated zucchini for moisture, and feel free to add your favorite nuts or spices. Whether you enjoy it fresh or stored, this bread is sure to please. Happy baking!](https://dailydishly.com/wp-content/uploads/2025/06/9b9e6e77-b918-4e2e-978b-be2d7f9f5a48-768x768.webp)

