Pumpkin Spice Pancakes Irresistible Fall Treat

Fall is here, and what better way to celebrate than with delicious pumpkin spice pancakes? These fluffy treats capture the essence of the season with warm spices and creamy pumpkin flavor. I’ll guide you through simple ingredients, easy steps, and tips to ensure your pancakes are just right. Plus, I’ll share variations for gluten-free and vegan options. Get ready to make breakfast fun and festive this fall!
Ingredients
Detailed List of Ingredients
– 1 cup all-purpose flour
– 1 tablespoon baking powder
– 1 teaspoon baking soda
– 1 teaspoon pumpkin pie spice
– ½ teaspoon salt
– 1 cup pumpkin puree
– 2 large eggs
– 1 cup milk (or a dairy-free alternative)
– 2 tablespoons brown sugar
– 1 teaspoon vanilla extract
– 2 tablespoons melted butter (plus extra for cooking)
For those with dietary restrictions, you can easily swap out some ingredients. Use gluten-free flour instead of all-purpose flour. For a vegan version, replace eggs with flaxseed meal mixed with water. You can substitute milk with almond milk or oat milk.
Using fresh ingredients is key for great taste. Fresh pumpkin puree makes a big difference. Canned pumpkin can work, but fresh has more flavor. Use fresh eggs and real vanilla extract for the best results. This enhances the flavor and makes your pancakes truly shine. Enjoy the warmth of fall with each bite!
Step-by-Step Instructions
Preparing the Dry Ingredients
Start by gathering your dry ingredients. In a large mixing bowl, add 1 cup of all-purpose flour, 1 tablespoon of baking powder, 1 teaspoon of baking soda, 1 teaspoon of pumpkin pie spice, and ½ teaspoon of salt. Whisk these together until well combined. Accurate measuring is key here. Too much flour can make pancakes dense, while too little can make them flat.
Combining the Wet Ingredients
Next, it’s time for the wet ingredients. In a separate bowl, mix together 1 cup of pumpkin puree, 2 large eggs, 1 cup of milk, 2 tablespoons of brown sugar, 1 teaspoon of vanilla extract, and 2 tablespoons of melted butter. Stir until the mixture is smooth. If it’s lumpy, you might not enjoy the texture. A smooth mixture helps the pancakes cook evenly.
Cooking the Pancakes
Now, heat your skillet over medium heat. Add a small amount of melted butter to coat the pan. Pour about ¼ cup of pancake batter onto the skillet for each pancake. Cook for about 2-3 minutes until bubbles form on the surface. This is a sign they are ready to flip. Gently turn the pancakes and cook for another 2-3 minutes until they turn golden brown. Repeat this process with the remaining batter, adding more butter to the skillet as needed. Enjoy your pumpkin spice pancakes warm!
Tips & Tricks
Achieving Perfect Pancakes
To get pancakes just right, avoid overmixing. When you combine the wet and dry ingredients, gently fold them together. It is okay if some lumps remain in the batter. This keeps the pancakes fluffy.
For consistent pancake thickness, use the same amount of batter for each pancake. I recommend using a ¼ cup measure. It helps create even pancakes that cook evenly.
Enhancing the Pumpkin Spice Flavor
You can boost the pumpkin spice flavor by adding more spices. A pinch of nutmeg or cinnamon can add warmth. If you like a little heat, try a dash of ginger.
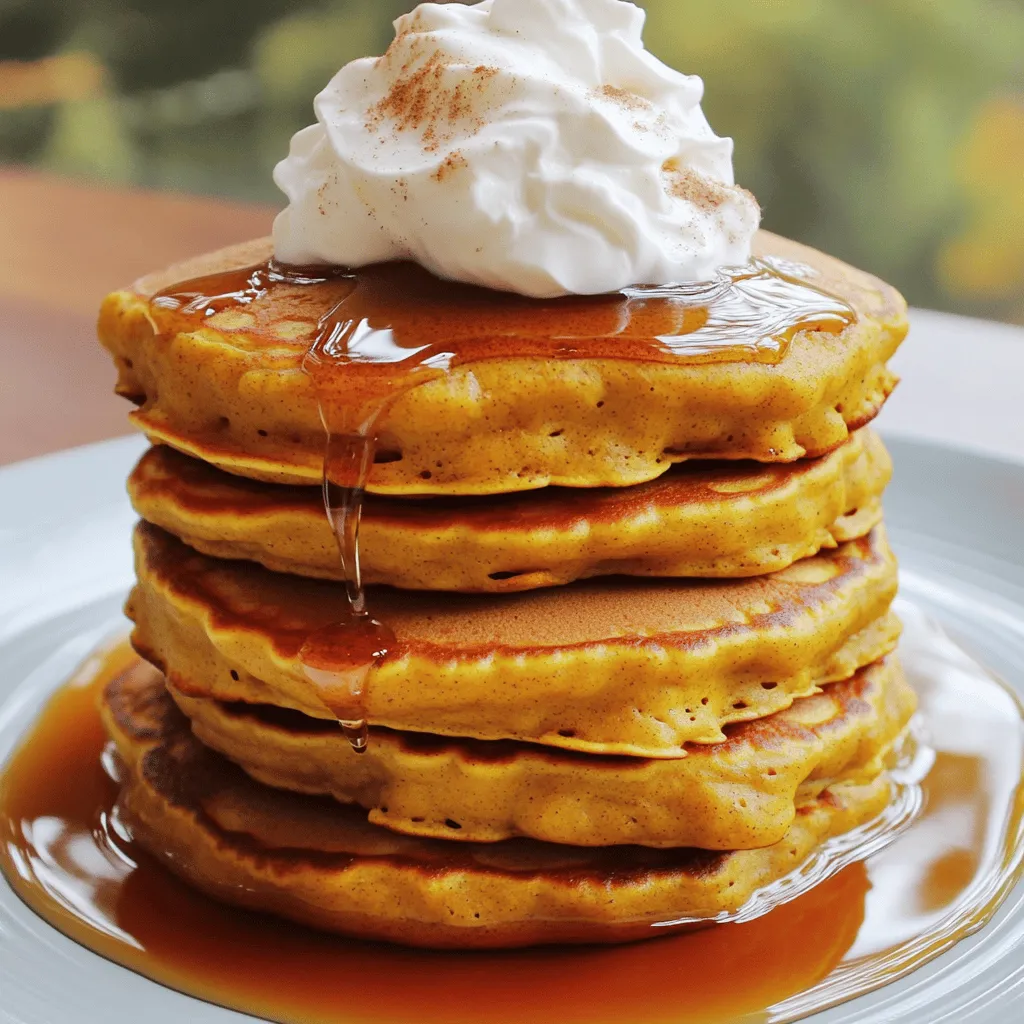
Toppings can make these pancakes shine. Maple syrup is a classic choice. Fresh whipped cream adds a light touch. For a fun twist, top with chopped nuts or chocolate chips.

Variations
Gluten-Free Pumpkin Spice Pancakes
To make gluten-free pumpkin spice pancakes, swap all-purpose flour for a gluten-free blend. Look for blends that have xanthan gum. This gum helps mimic the texture of regular flour. You may also want to use almond flour or coconut flour, but adjust the amount. Start with less and add more as needed. Cooking time might change slightly. Keep an eye on the pancakes as they cook. They may take a bit longer to brown.
Vegan Pumpkin Spice Pancakes
For vegan pumpkin spice pancakes, you can replace eggs with flaxseed meal or applesauce. Use one tablespoon of flaxseed meal mixed with three tablespoons of water for each egg. This mix helps bind the ingredients. Instead of milk, try almond milk or oat milk for a creamy texture. Make sure to mix well to keep the right consistency. The batter should be thick but pourable.
Additional Flavor Variants
You can add chocolate chips to your pancake mix for a sweet twist. Just fold in half a cup of mini chocolate chips before cooking. If you want a nutty flavor, add chopped walnuts or pecans. About a quarter cup will give you a nice crunch. These variations can make your pumpkin spice pancakes even more fun and tasty.
Storage Info
Storing Leftover Pancakes
To store leftover pancakes, let them cool completely. Place them in a single layer in an airtight container. You can also use parchment paper between layers to prevent sticking. If you want to freeze them, wrap each pancake in plastic wrap and then in foil. This keeps them fresh for a long time. When you want to reheat, thaw them in the fridge overnight. For quick reheating, use a microwave or toaster. Heat them for about 30 seconds in the microwave or pop them in a toaster for a few minutes. This keeps them soft and tasty.
Shelf Life of Pumpkin Spice Pancakes
Pumpkin spice pancakes can last in the fridge for about three to four days. If you freeze them, they can stay good for up to two months. When checking for spoilage, look for any mold or a sour smell. If they feel dry or hard, it’s best to throw them away. Always trust your senses; they guide you well in the kitchen. Enjoy these pancakes while they’re fresh for the best taste.
FAQs
Can I make the batter ahead of time?
Yes, you can make the batter ahead! To prepare it in advance, mix your dry and wet ingredients in separate bowls. Store each bowl in the fridge until you are ready to cook. This keeps the batter fresh. Just remember to stir gently before cooking. If the batter is too thick, add a little milk to thin it out.
What can I serve with pumpkin spice pancakes?
There are many tasty options! Here are some great ideas:
– Maple syrup for sweetness
– Whipped cream for a creamy touch
– Chopped nuts for crunch
– Fresh fruit like bananas or apples
– A sprinkle of powdered sugar for extra flair
How do I know when the pancakes are done?
Look for bubbles! When you see bubbles on the top of the pancake, it’s time to flip. Cook until both sides are golden brown. A good pancake will feel springy when you press it lightly.
Is it possible to use pumpkin pie filling instead of puree?
You can use pumpkin pie filling, but it has spices and sugar added. This may change the flavor. If you choose it, cut back on the spices and sugar in your recipe. The texture may also be a bit different, so keep that in mind. For the best results, stick with pumpkin puree for a classic taste.
You now have all the tools to make delicious pumpkin spice pancakes. We covered the ingredients, cooking steps, and how to store leftovers. You can even modify recipes for dietary needs, like gluten-free or vegan options. Remember, fresh ingredients matter. With these tips, you’ll create pancakes that are perfect for any occasion. Enjoy the process, get creative, and share your tasty results!


![- Zucchini and Raisin Essentials - 2 cups grated zucchini - 1 cup raisins Zucchini adds moisture and a soft texture to the bread. Raisins bring sweetness and chewiness. Using fresh, firm zucchini makes the best bread. - Sweeteners and Fats - 1 cup granulated sugar - 1/2 cup packed brown sugar - 1/2 cup vegetable oil - 3 large eggs - 2 teaspoons vanilla extract Granulated sugar gives a crisp crust. Brown sugar adds depth and moisture. Vegetable oil keeps the bread soft. Eggs bind the ingredients and add richness. - Dry Ingredients Overview - 2 cups all-purpose flour - 1 teaspoon baking soda - 1/2 teaspoon baking powder - 1 teaspoon ground cinnamon - 1/2 teaspoon ground nutmeg - 1/4 teaspoon salt Flour provides structure. Baking soda and powder help the bread rise. Cinnamon and nutmeg add warmth and flavor. Salt balances the sweetness. - Optional Add-ins (Nuts, Spices) - 1/2 cup chopped walnuts (optional) Nuts add crunch and a nutty flavor. You can also add spices like ginger or cloves for a twist. Check out the Full Recipe for exact measurements and instructions! Preheating the Oven and Preparing the Pan First, preheat your oven to 350°F (175°C). This step is key for even baking. While the oven heats, grease and flour a 9x5-inch loaf pan. This helps the bread release easily after baking. Mixing Wet Ingredients In a large bowl, combine the grated zucchini, granulated sugar, brown sugar, vegetable oil, eggs, and vanilla extract. Use a whisk or spoon to mix until everything is well blended. This creates a moist base for your bread. Combining Dry Ingredients In another bowl, whisk together the flour, baking soda, baking powder, cinnamon, nutmeg, and salt. This mixture adds structure and flavor to your bread. Make sure there are no lumps. Final Batter Preparation Gradually add the dry ingredients to the wet mixture. Stir gently until just combined. It's important not to overmix. This keeps the bread light and fluffy. Fold in the raisins and walnuts if you choose to use them. This adds texture and sweetness. Pouring Batter into the Pan Carefully pour the batter into your prepared loaf pan. Use a spatula to smooth the top. This helps the bread bake evenly and look nice. Baking Duration and Temperature Place the pan in the preheated oven. Bake for 50-60 minutes. The bread is ready when a toothpick inserted in the center comes out clean. Checking for Doneness To check if your bread is done, look for a golden-brown color on top. If the toothpick has wet batter, bake for a few more minutes. Let it bake fully for the best taste. You can find the full recipe above for more details on this delightful zucchini raisin bread! - Ensuring Moisture with Grated Zucchini Grated zucchini adds moisture to your bread. Use a box grater or food processor to shred it finely. Before adding it to the mix, squeeze out excess water. This step keeps your bread from being too wet or soggy. - Avoiding Overmixing When mixing the wet and dry ingredients, stir just until combined. Overmixing makes the bread tough. It’s okay if some lumps remain. This helps keep the bread light and fluffy. - Proper Cooling Techniques After baking, let the bread cool in the pan for about 10 minutes. This helps it firm up. Then transfer it to a wire rack. Cooling it completely helps avoid sogginess and allows the flavors to settle. - Ideal Pairings and Presentation Ideas Serve slices warm with butter or cream cheese. For a special touch, sprinkle cinnamon on top. You can also pair it with a hot cup of tea or coffee. This makes for a cozy snack or breakfast. - Storage Tips for Maximum Freshness Store leftover bread in an airtight container at room temperature. This keeps it soft for several days. For longer storage, wrap it in plastic wrap and freeze. When you want to eat it, thaw it at room temperature. Enjoy fresh slices whenever you like! For the complete recipe, refer to the Full Recipe section above. {{image_2}} You can make your zucchini raisin bread even better with simple tweaks. Adding spices beyond cinnamon and nutmeg works wonders. Try ginger or allspice for a warm, fragrant touch. A pinch of cardamom also brings a lovely depth. Incorporating other fruits or nuts boosts flavor and texture. Chopped apples or crushed pineapple add sweetness and moisture. You can swap raisins for dried cranberries for a tart burst. If you prefer nuts, walnuts or pecans lend a delightful crunch. If you're looking for vegan substitutions, replace eggs with flaxseed meal or applesauce. Use a plant-based oil too. Almond or coconut milk can replace regular milk if you choose to add some. Using whole wheat flour is a smart swap. It adds fiber and nutrients while keeping the bread moist. You can use half all-purpose and half whole wheat flour for a balanced taste. Reducing sugar content is another way to make this bread healthier. You can cut the granulated sugar by a third. The zucchini adds natural sweetness, so you won’t miss much. Using ripe bananas or unsweetened applesauce can also help cut sugar while adding flavor. For the full recipe, check out the section above! To keep your zucchini raisin bread fresh, store it at room temperature. Wrap it in plastic wrap or place it in an airtight container. This helps keep the bread moist and flavorful. Enjoy it within a few days for the best taste. If you want to keep it longer, consider refrigerating it. But remember, the cold may change the texture slightly. If you want to save your zucchini raisin bread for later, freezing is a great option. First, let the bread cool completely after baking. Then, wrap it tightly in plastic wrap, followed by aluminum foil. This dual layer helps prevent freezer burn. You can freeze it for up to three months. To thaw your bread, simply remove it from the freezer. Leave it wrapped at room temperature for a few hours. When it's soft, you can slice it. If you want it warm, pop a slice in the toaster. This makes a delicious treat. Don't forget, you can use the [Full Recipe] to make more for your freezing needs! Can I use frozen zucchini in this recipe? Yes, you can use frozen zucchini. Just thaw it first and drain any extra water. This helps keep your bread moist. Frozen zucchini works well in baked goods. It still adds great flavor and texture. How can I make this recipe gluten-free? To make this recipe gluten-free, swap the all-purpose flour for gluten-free flour. Many brands offer blends that work well in baking. Just ensure they contain xanthan gum or add it separately. This helps with the bread's structure and texture. What are the nutritional benefits of zucchini in baking? Zucchini is low in calories and high in fiber. It adds moisture to your bread without extra fat. Zucchini also contains vitamins A and C, which are good for your health. Plus, it has antioxidants. These benefits make zucchini a smart choice for baking. For the complete recipe, take a look at the Full Recipe section. In this post, we explored the step-by-step process of making delicious zucchini raisin bread. We discussed essential ingredients, baking tips, and storage methods. You learned how to mix wet and dry components effectively and check for perfect doneness. Remember, don’t skip on the grated zucchini for moisture, and feel free to add your favorite nuts or spices. Whether you enjoy it fresh or stored, this bread is sure to please. Happy baking!](https://dailydishly.com/wp-content/uploads/2025/06/9b9e6e77-b918-4e2e-978b-be2d7f9f5a48-768x768.webp)

