Fall is here, and that means it’s time for pumpkin spice! If you love this cozy flavor, you’ll adore my Pumpkin Spice Truffles. These delightful treats combine pure pumpkin, cream cheese, and warm spices, making them a perfect bite-sized dessert. They’re easy to make and even easier to eat! Let’s dive into this delicious recipe and embrace the season’s favorite flavor. Your taste buds will thank you!
Ingredients
Essential Ingredients for Pumpkin Spice Truffles
– 1 cup pure pumpkin puree
– 8 oz cream cheese, softened
– 2 cups powdered sugar
– 2 teaspoons pumpkin pie spice
– 1 teaspoon vanilla extract
Optional Ingredients
– 1 cup dark chocolate chips (vegan if desired)
– 1 tablespoon coconut oil (for chocolate coating)
– Extra pumpkin pie spice for dusting
The key to making delicious pumpkin spice truffles is using the right ingredients. Start with pure pumpkin puree. This gives the truffles their rich flavor and vibrant color. Next, cream cheese adds a creamy texture. It also balances the sweetness.
Powdered sugar sweetens the mix. It blends well with the pumpkin and cream cheese. Pumpkin pie spice brings warmth and a classic fall taste. A splash of vanilla extract enhances all the flavors.
You can add dark chocolate chips for a rich coating. If you want a vegan option, choose vegan chocolate chips. Coconut oil helps the chocolate melt smoothly. For a festive finish, use extra pumpkin pie spice for dusting.
Gather these ingredients, and you’re ready to create a fall treat that everyone will love!
Step-by-Step Instructions
Preparing the Truffle Mixture
Start by taking a large bowl. In it, combine the following:
– 1 cup pure pumpkin puree
– 8 oz cream cheese, softened
– 2 cups powdered sugar
– 2 teaspoons pumpkin pie spice
– 1 teaspoon vanilla extract
Using a hand mixer or spatula, blend these ingredients together. Mix until the texture is smooth and all ingredients are well combined.
Forming the Truffles
Next, add in 1 cup of crushed graham crackers. Stir well until the mixture thickens. This will help the truffles hold their shape. Cover the bowl and chill the mixture in the fridge for about one hour. After chilling, scoop out small portions—about 1 inch in diameter. Roll these portions between your palms to form smooth balls. Place your truffles on a baking sheet lined with parchment paper.
Coating the Truffles
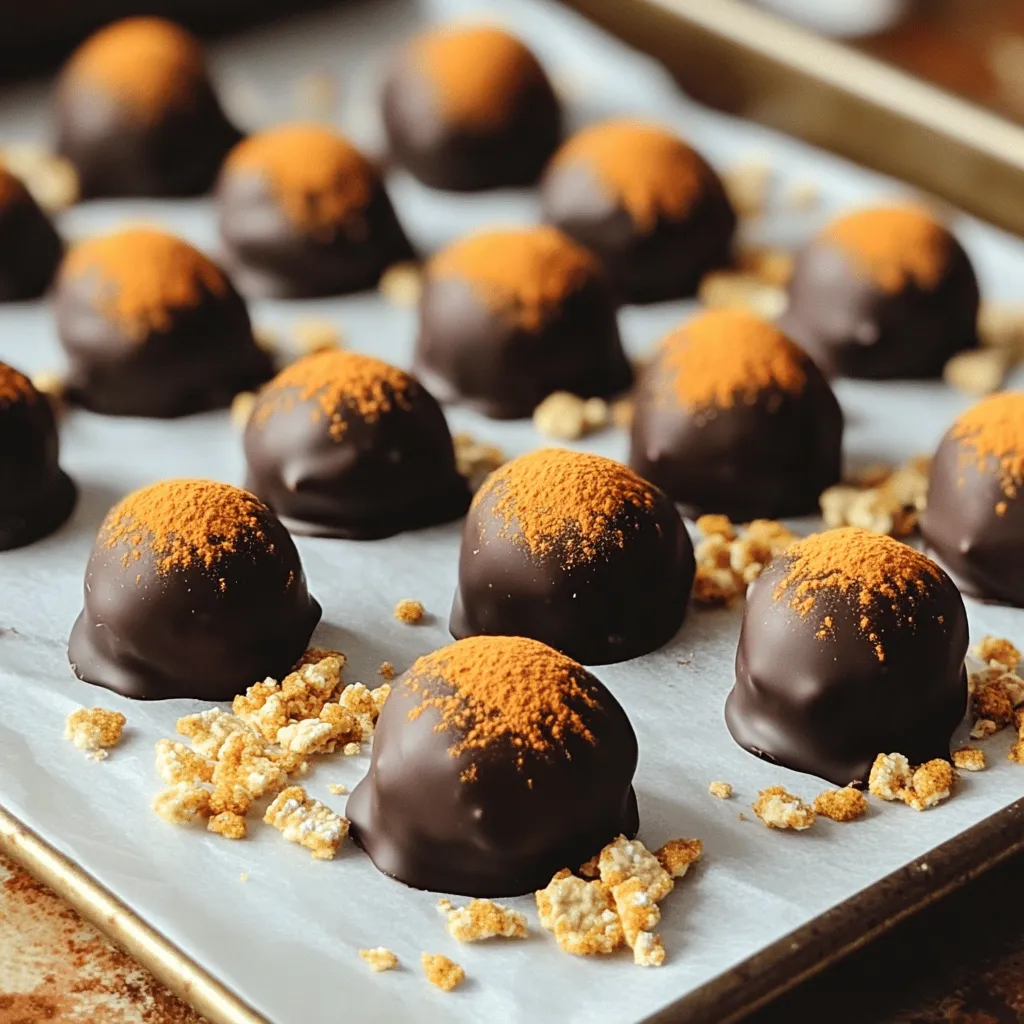
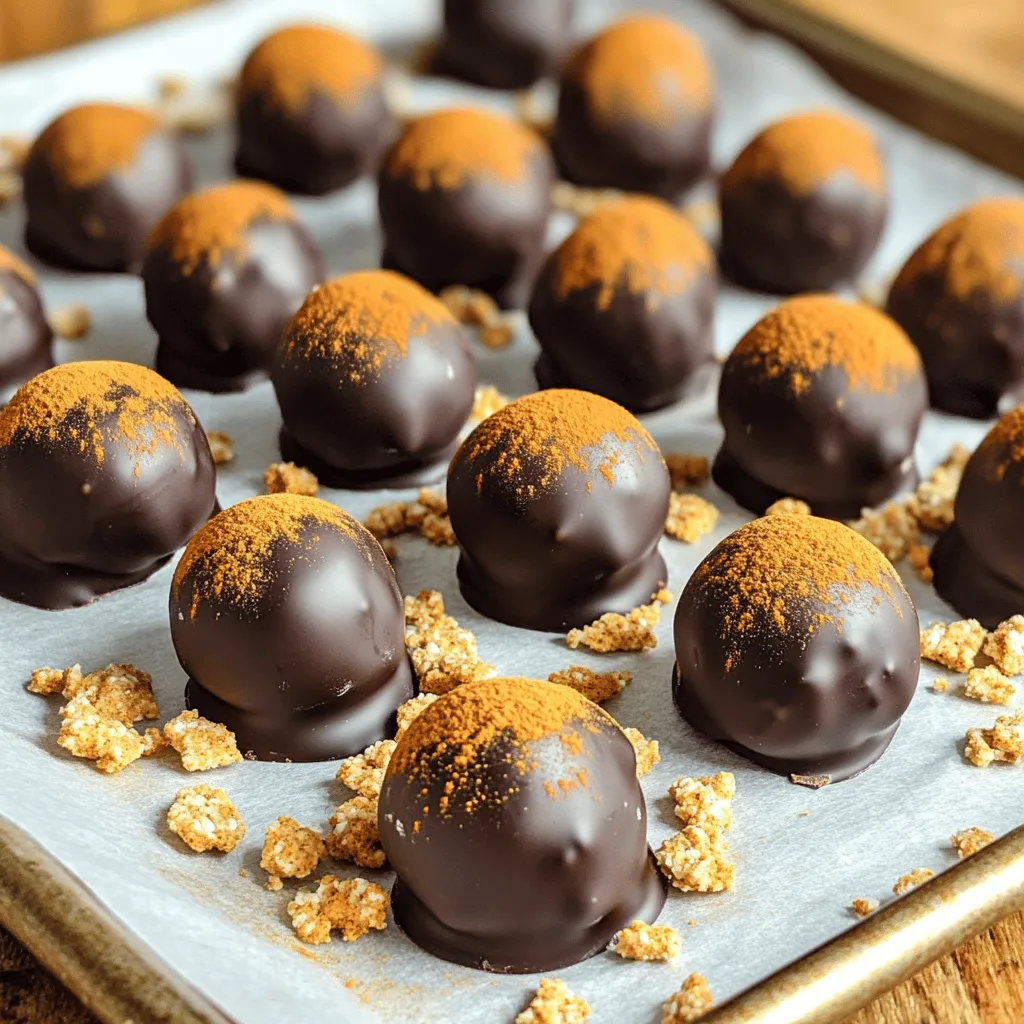
Now it’s time to coat the truffles. In a microwave-safe bowl, melt 1 cup of dark chocolate chips and 1 tablespoon of coconut oil. Heat in 30-second intervals, stirring in between until the chocolate is smooth. Dip each truffle into the melted chocolate, letting the excess drip off. Place them back on the parchment-lined baking sheet. If you like, dust them lightly with extra pumpkin pie spice while the chocolate is still wet. Finally, refrigerate the truffles for about 30 minutes until the chocolate hardens. Enjoy your tasty fall treat!
Tips & Tricks
Achieving the Perfect Texture
Chilling the mixture is key for smooth truffles. It helps firm the mix and makes rolling easier. If you skip this step, your truffles may turn out too soft. To avoid a grainy texture, mix thoroughly. Make sure the cream cheese is soft and blended well with the pumpkin puree. This will help create a creamy and delightful filling.
Chocolate Coating Tips
Melting chocolate requires patience. Use a microwave-safe bowl and heat in 30-second bursts. Stir after each interval until smooth. This helps prevent burning the chocolate. Dip each truffle carefully. Allow excess chocolate to drip off before placing them on parchment paper. For an even coat, swirl the truffles gently in the chocolate. This ensures they are fully covered and look great.
Enhancing Flavor
You can add more flavor with spices. Try a pinch of cinnamon or nutmeg for extra warmth. Adjust the sweetness by using less powdered sugar if desired. Taste the mixture before chilling, and add more sugar if you want it sweeter. This way, you can make the truffles just right for your taste buds.
Variations
Alternative Chocolate Options
You can choose between white chocolate and dark chocolate for your truffles. Dark chocolate gives a rich taste that pairs well with pumpkin. White chocolate adds a sweet creaminess. Try flavored chocolate, like orange or cinnamon, for a fun twist. These options make your truffles unique and exciting.
Dietary Modifications
If you want vegan truffles, use vegan cream cheese and dark chocolate. Brands now offer tasty vegan options that work well. For gluten-free truffles, swap regular graham crackers for gluten-free ones. This way, everyone can enjoy your delightful treat without worries.
Additional Flavor Profiles
To enhance your truffles, try adding chopped nuts or dried fruits. Walnuts or pecans add crunch and flavor. Dried cranberries or raisins bring sweetness. You can also add a hint of coffee or caramel. This creates layers of flavor that make each bite special.
Storage Info
How to Store Pumpkin Spice Truffles
For the best storage, use an airtight container. This keeps your truffles fresh. Line the container with parchment paper. This helps prevent sticking. Place the truffles in a single layer. Avoid stacking them if possible. Keep the container in the fridge. The cool temperature helps maintain their texture.
Optimal refrigeration conditions
Keep your fridge at around 35°F to 40°F. This is the best range for storing truffles. Avoid placing them in the door. The temperature there can vary too much. Instead, choose a shelf in the middle.
Shelf Life
Pumpkin spice truffles can last about one week in the fridge. Check for signs of spoilage, like off smells. If you want to store them longer, freezing is a great option.
Freezing options and best practices
To freeze truffles, first, chill them in the fridge. Once firm, place them in an airtight container. You can also use a freezer bag. Lay parchment paper between layers if stacking. They can last up to three months in the freezer. When ready to eat, let them thaw in the fridge overnight. This keeps their texture smooth and creamy.
FAQs
Can I make pumpkin spice truffles ahead of time?
Yes, you can make pumpkin spice truffles in advance. They taste even better after a day in the fridge. I suggest storing them in an airtight container. This keeps them fresh and moist. You can prepare them up to a week ahead. Just remember to let them cool completely before storing. If you want to freeze them, wrap each truffle tightly in plastic wrap. Then place them in a freezer bag. They stay good for about three months.
Where can I buy ready-made pumpkin spice truffles?
You can find pumpkin spice truffles at many local stores. Look for them in specialty candy shops or gourmet markets. Some big grocery stores also carry them during fall. Online, you can check websites like Amazon or specialty food sites. Many bakeries and chocolate shops offer them, too. They often have unique flavors, making them a fun treat to try.
How can I adjust the sweetness of the truffles?
Adjusting sweetness is easy. If you want less sugar, reduce the powdered sugar in the mix. Start with one and a half cups and taste as you go. You can also use sugar substitutes like stevia or erythritol. If you like it sweeter, add more powdered sugar little by little. Just ensure the mixture remains smooth. Balancing sweetness can enhance the pumpkin flavor, making your truffles shine.
These pumpkin spice truffles are simple to make using easy ingredients and steps. You can mix creamy pumpkin, sweet sugar, and spice to create a tasty treat. Remember to chill your mixture for the best texture. Try different coat options, or add your favorite flavors, like nuts or coffee. Store them right for lasting goodness. Enjoy making these fun treats, whether for yourself or to share. You’re sure to impress everyone with your new skills!


