Pumpkin Spice Waffles Irresistibly Flavorful Recipe
![- 1 cup all-purpose flour - 1 cup whole wheat flour - 2 tablespoons brown sugar - 2 teaspoons baking powder - 1 teaspoon baking soda - 1 teaspoon ground cinnamon - 1 teaspoon ground nutmeg - 1/2 teaspoon ground ginger - 1/4 teaspoon ground cloves - 1/4 teaspoon salt - 1 cup pumpkin puree - 1 1/2 cups milk (dairy or non-dairy) - 2 large eggs - 1/4 cup melted butter or coconut oil - 1 teaspoon vanilla extract - Maple syrup - Whipped cream - Powdered sugar - Extra cinnamon To make perfect Pumpkin Spice Waffles, you need to gather all the right ingredients. Start with your flours. I use both all-purpose and whole wheat flour for a nice texture. Brown sugar adds a touch of sweetness that balances the spices well. Next, you have your leavening agents. Baking powder and baking soda work together to create fluffy waffles. The spices make this dish special. Ground cinnamon, nutmeg, ginger, and cloves give that warm, cozy taste we love in fall. Don’t forget the salt; it helps enhance all the flavors. Pumpkin puree is the star here. It adds moisture and that lovely pumpkin flavor. I prefer using fresh puree, but canned works just fine too. For the liquid, milk brings everything together; you can use dairy or a non-dairy option. Eggs bind the batter and add richness. Butter or coconut oil adds fat, making the waffles tender. Lastly, vanilla extract gives a lovely aroma. Don't skip the toppings! Maple syrup is a must, and whipped cream makes it feel special. A dusting of powdered sugar or cinnamon can take it to the next level. With these ingredients ready, you can follow the Full Recipe for a delightful breakfast treat. Preheat your waffle iron according to the manufacturer’s instructions. This step helps your waffles cook evenly and become crispy. In a large bowl, whisk together the following dry ingredients: - 1 cup all-purpose flour - 1 cup whole wheat flour - 2 tablespoons brown sugar - 2 teaspoons baking powder - 1 teaspoon baking soda - 1 teaspoon ground cinnamon - 1 teaspoon ground nutmeg - 1/2 teaspoon ground ginger - 1/4 teaspoon ground cloves - 1/4 teaspoon salt This mix gives your waffles their warm, spice flavor. In another bowl, mix the wet ingredients until smooth: - 1 cup pumpkin puree - 1 1/2 cups milk (dairy or non-dairy) - 2 large eggs - 1/4 cup melted butter or coconut oil - 1 teaspoon vanilla extract The pumpkin puree adds moisture and a rich taste. Pour the wet ingredients into the dry mix. Stir gently until just combined. A few lumps are okay; overmixing makes the waffles tough. Lightly grease the waffle iron if needed. Pour an appropriate amount of batter into the preheated iron. Cook until golden brown. This usually takes a few minutes. Serve your waffles hot. Drizzle with maple syrup, add whipped cream, and sprinkle cinnamon for extra flavor. Don't forget to check out the Full Recipe for more details! To make your waffles light and fluffy, follow these tips: - Use fresh baking powder and baking soda. This gives your waffles the lift they need. - Mix the batter until just combined. A few lumps are okay; overmixing can make them tough. - Let the batter rest for a few minutes before cooking. This helps the waffles rise better. - Preheat your waffle iron well. A hot iron ensures a crispy outside and soft inside. You can add fun twists to your pumpkin spice waffles. Here are some ideas: - Fold in chocolate chips for a sweet surprise. They melt and create a lovely gooey texture. - Add chopped nuts like walnuts or pecans for crunch. They bring a nice contrast to the soft waffles. - Mix in dried fruit, such as cranberries or raisins, for extra sweetness and chewiness. - Try a splash of maple extract for a deeper flavor. It pairs perfectly with pumpkin. Taking care of your waffle iron is key for great results. Here are some best practices: - Always preheat your waffle iron according to the manufacturer’s instructions. A hot iron cooks evenly. - Lightly grease the iron with butter or oil if needed. This prevents sticking and ensures a clean release. - Don't open the waffle iron too soon. Wait until the steam stops before checking for doneness. - Clean your waffle iron after each use. This keeps it in good shape and ready for your next batch. For the full recipe, check out the [Full Recipe]. {{image_2}} To make gluten-free pumpkin spice waffles, you can swap out the all-purpose flour. Use a gluten-free all-purpose flour blend instead. Make sure it has xanthan gum for the right texture. You can also add a bit of almond flour for extra flavor. This will give the waffles a nice nutty taste. Check the baking powder to ensure it is gluten-free as well. This simple change makes your breakfast safe for everyone. Want to make these waffles vegan? It's easy! Replace the eggs with flax eggs. Mix one tablespoon of ground flaxseed with three tablespoons of water for each egg. Let it sit for five minutes to thicken. Use almond milk or any other non-dairy milk instead of regular milk. Swap the butter for coconut oil or a vegan butter alternative. These changes keep the flavor while making it plant-based. You can add more fun to your pumpkin spice waffles. Try mixing in chocolate chips for a sweet twist. Nuts like walnuts or pecans add a crunchy texture. You can also use different spices. Try cardamom for a unique taste or allspice for a warm flavor. Adding a splash of maple extract can make it even more delicious. Feel free to experiment and find your favorite flavors! To keep your leftover waffles fresh, place them in an airtight container. You can also wrap them in plastic wrap or aluminum foil. Store them in the fridge for up to three days. When you want to eat them, just warm them up in the toaster or microwave. If you want to save waffles for later, freezing is a great option. First, let the waffles cool completely. Then, place a piece of parchment paper between each waffle. This prevents them from sticking together. Store them in a freezer bag or container. They can last up to three months in the freezer. To reheat, pop them in a toaster or bake them in the oven. This keeps them crispy. Waffles stored in the fridge last about three days. If frozen, they remain good for three months. After that, they may lose flavor and texture. Always check for any signs of spoilage before enjoying your waffles. Enjoy them fresh for the best taste! You can use several options if you don't have pumpkin puree. Here are some ideas: - Sweet potato puree: It has a similar texture and flavor. - Butternut squash puree: This option is also sweet and creamy. - Homemade pumpkin puree: Just roast fresh pumpkin until soft, then blend. Using these alternatives may change the flavor slightly, but they still taste great. To get your waffles nice and crispy, follow these tips: - Preheat your waffle iron: Make sure it’s hot before adding batter. - Use a little extra oil: Adding a bit more oil to the batter can help. - Don't overmix the batter: A few lumps are fine; this helps keep them light. - Cook longer: If they are not crispy enough, cook them a little longer. These tricks will help you achieve that perfect crunch. Yes, you can prepare the batter ahead of time. Here’s how: - Store in the fridge: Keep the batter in an airtight container for up to 24 hours. - Stir before use: Give it a gentle stir if it separates. Keep in mind that letting the batter sit too long may affect the rise. You can find pre-made pumpkin spice waffles in many stores. Check these places: - Supermarkets: Look in the frozen breakfast section. - Health food stores: They often carry organic or gluten-free options. - Online retailers: Websites like Amazon may have several brands available. Brands like Eggo and Nature's Path often sell great options. Toppings can enhance your pumpkin spice waffles. Here are some ideas: - Maple syrup: A classic choice that complements the spices well. - Whipped cream: Adds creaminess and sweetness. - Powdered sugar: A light dusting makes them look fancy. - Extra cinnamon: Sprinkle some on top for added flavor. These toppings will take your waffles to the next level! In this article, we explored how to craft perfect pumpkin spice waffles from scratch. We covered ingredient lists, step-by-step instructions, and tips for the best flavor and texture. I also shared ways to vary the recipe for gluten-free or vegan options, plus storage advice. Enjoying homemade waffles can be simple and fun. You can impress your family with these warm, delicious treats at breakfast or brunch. Give them a try, and savor every bite!](https://dailydishly.com/wp-content/uploads/2025/06/28ffe532-610a-4fe8-ab83-510bf8d3c6f3.webp)
Are you ready to indulge in a warm, cozy treat? These pumpkin spice waffles blend classic fall flavors into a tasty breakfast that everyone loves. You’ll enjoy how simple it is to whip up this irresistible recipe. With easy-to-find ingredients and step-by-step instructions, you can impress your family or friends in no time. Let’s dive into the delightful world of pumpkin spice waffles that will fill your kitchen with warmth!
Ingredients
List of Ingredients
– 1 cup all-purpose flour
– 1 cup whole wheat flour
– 2 tablespoons brown sugar
– 2 teaspoons baking powder
– 1 teaspoon baking soda
– 1 teaspoon ground cinnamon
– 1 teaspoon ground nutmeg
– 1/2 teaspoon ground ginger
– 1/4 teaspoon ground cloves
– 1/4 teaspoon salt
– 1 cup pumpkin puree
– 1 1/2 cups milk (dairy or non-dairy)
– 2 large eggs
– 1/4 cup melted butter or coconut oil
– 1 teaspoon vanilla extract
Additional Ingredients for Toppings
– Maple syrup
– Whipped cream
– Powdered sugar
– Extra cinnamon
To make perfect Pumpkin Spice Waffles, you need to gather all the right ingredients. Start with your flours. I use both all-purpose and whole wheat flour for a nice texture. Brown sugar adds a touch of sweetness that balances the spices well.
Next, you have your leavening agents. Baking powder and baking soda work together to create fluffy waffles. The spices make this dish special. Ground cinnamon, nutmeg, ginger, and cloves give that warm, cozy taste we love in fall. Don’t forget the salt; it helps enhance all the flavors.
Pumpkin puree is the star here. It adds moisture and that lovely pumpkin flavor. I prefer using fresh puree, but canned works just fine too. For the liquid, milk brings everything together; you can use dairy or a non-dairy option.
Eggs bind the batter and add richness. Butter or coconut oil adds fat, making the waffles tender. Lastly, vanilla extract gives a lovely aroma.
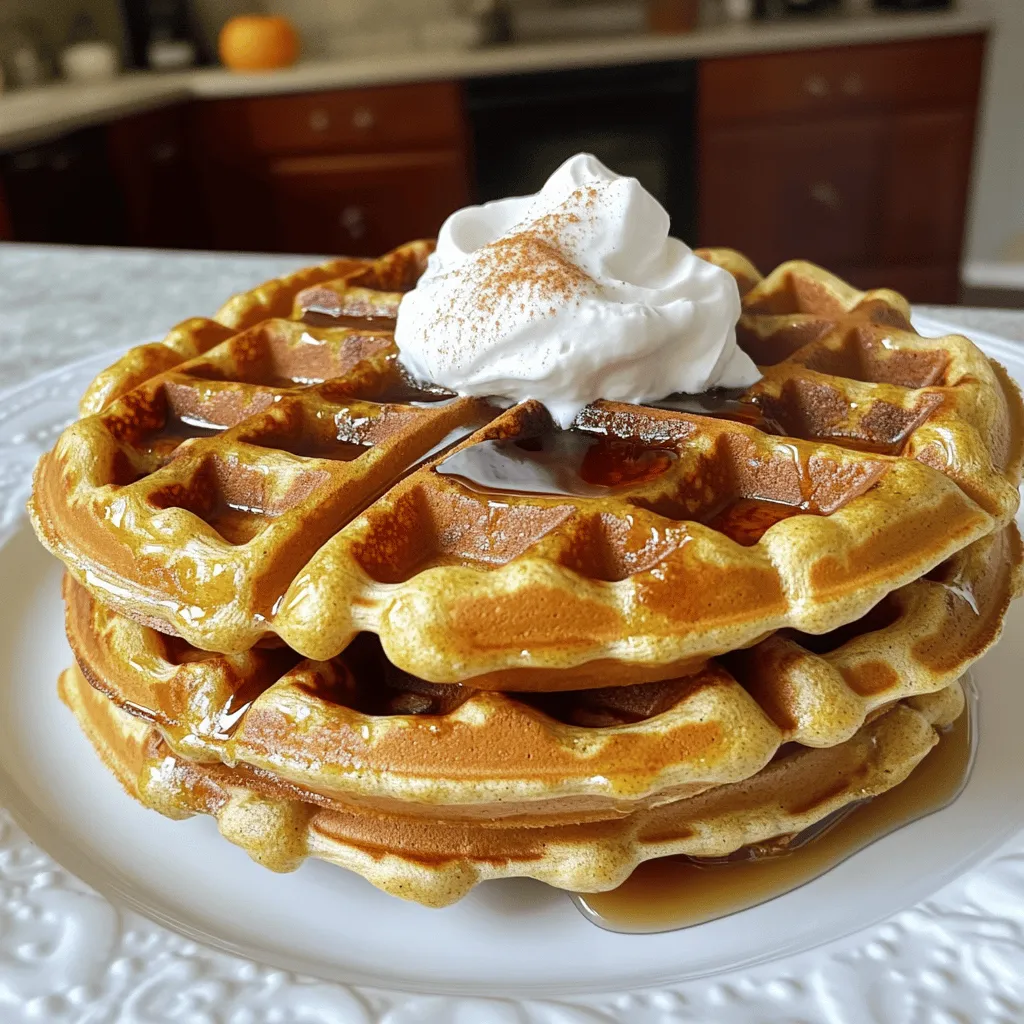
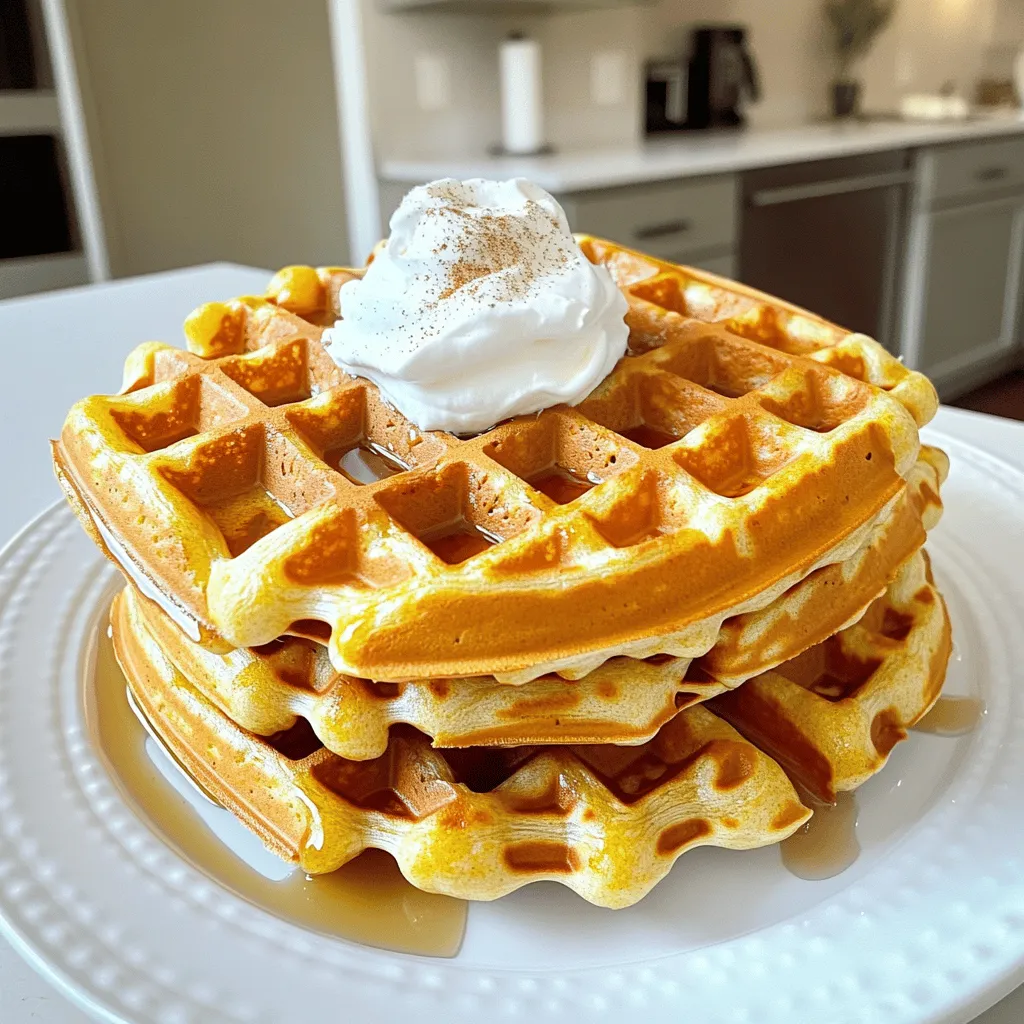
Don’t skip the toppings! Maple syrup is a must, and whipped cream makes it feel special. A dusting of powdered sugar or cinnamon can take it to the next level.
Step-by-Step Instructions
Preparing the Waffle Iron
Preheat your waffle iron according to the manufacturer’s instructions. This step helps your waffles cook evenly and become crispy.
Mixing Dry Ingredients
In a large bowl, whisk together the following dry ingredients:
– 1 cup all-purpose flour
– 1 cup whole wheat flour
– 2 tablespoons brown sugar
– 2 teaspoons baking powder
– 1 teaspoon baking soda
– 1 teaspoon ground cinnamon
– 1 teaspoon ground nutmeg
– 1/2 teaspoon ground ginger
– 1/4 teaspoon ground cloves
– 1/4 teaspoon salt
This mix gives your waffles their warm, spice flavor.
Combining Wet Ingredients
In another bowl, mix the wet ingredients until smooth:
– 1 cup pumpkin puree
– 1 1/2 cups milk (dairy or non-dairy)
– 2 large eggs
– 1/4 cup melted butter or coconut oil
– 1 teaspoon vanilla extract
The pumpkin puree adds moisture and a rich taste.
Combining Dry and Wet Mixtures
Pour the wet ingredients into the dry mix. Stir gently until just combined. A few lumps are okay; overmixing makes the waffles tough.
Cooking the Waffles
Lightly grease the waffle iron if needed. Pour an appropriate amount of batter into the preheated iron. Cook until golden brown. This usually takes a few minutes.
Serving Suggestions
Serve your waffles hot. Drizzle with maple syrup, add whipped cream, and sprinkle cinnamon for extra flavor.
Tips & Tricks
Achieving the Perfect Texture
To make your waffles light and fluffy, follow these tips:
– Use fresh baking powder and baking soda. This gives your waffles the lift they need.
– Mix the batter until just combined. A few lumps are okay; overmixing can make them tough.
– Let the batter rest for a few minutes before cooking. This helps the waffles rise better.
– Preheat your waffle iron well. A hot iron ensures a crispy outside and soft inside.
Flavor Enhancements
You can add fun twists to your pumpkin spice waffles. Here are some ideas:
– Fold in chocolate chips for a sweet surprise. They melt and create a lovely gooey texture.
– Add chopped nuts like walnuts or pecans for crunch. They bring a nice contrast to the soft waffles.
– Mix in dried fruit, such as cranberries or raisins, for extra sweetness and chewiness.
– Try a splash of maple extract for a deeper flavor. It pairs perfectly with pumpkin.
Best Practices for Waffle Iron Use
Taking care of your waffle iron is key for great results. Here are some best practices:
– Always preheat your waffle iron according to the manufacturer’s instructions. A hot iron cooks evenly.
– Lightly grease the iron with butter or oil if needed. This prevents sticking and ensures a clean release.
– Don’t open the waffle iron too soon. Wait until the steam stops before checking for doneness.
– Clean your waffle iron after each use. This keeps it in good shape and ready for your next batch.

Variations
Gluten-Free Pumpkin Spice Waffles
To make gluten-free pumpkin spice waffles, you can swap out the all-purpose flour. Use a gluten-free all-purpose flour blend instead. Make sure it has xanthan gum for the right texture. You can also add a bit of almond flour for extra flavor. This will give the waffles a nice nutty taste. Check the baking powder to ensure it is gluten-free as well. This simple change makes your breakfast safe for everyone.
Vegan Pumpkin Spice Waffles
Want to make these waffles vegan? It’s easy! Replace the eggs with flax eggs. Mix one tablespoon of ground flaxseed with three tablespoons of water for each egg. Let it sit for five minutes to thicken. Use almond milk or any other non-dairy milk instead of regular milk. Swap the butter for coconut oil or a vegan butter alternative. These changes keep the flavor while making it plant-based.
Additional Flavor Variations
You can add more fun to your pumpkin spice waffles. Try mixing in chocolate chips for a sweet twist. Nuts like walnuts or pecans add a crunchy texture. You can also use different spices. Try cardamom for a unique taste or allspice for a warm flavor. Adding a splash of maple extract can make it even more delicious. Feel free to experiment and find your favorite flavors!
Storage Info
Refrigerating Leftover Waffles
To keep your leftover waffles fresh, place them in an airtight container. You can also wrap them in plastic wrap or aluminum foil. Store them in the fridge for up to three days. When you want to eat them, just warm them up in the toaster or microwave.
Freezing and Reheating
If you want to save waffles for later, freezing is a great option. First, let the waffles cool completely. Then, place a piece of parchment paper between each waffle. This prevents them from sticking together. Store them in a freezer bag or container. They can last up to three months in the freezer. To reheat, pop them in a toaster or bake them in the oven. This keeps them crispy.
Shelf Life
Waffles stored in the fridge last about three days. If frozen, they remain good for three months. After that, they may lose flavor and texture. Always check for any signs of spoilage before enjoying your waffles. Enjoy them fresh for the best taste!
FAQs
What can I substitute for pumpkin puree?
You can use several options if you don’t have pumpkin puree. Here are some ideas:
– Sweet potato puree: It has a similar texture and flavor.
– Butternut squash puree: This option is also sweet and creamy.
– Homemade pumpkin puree: Just roast fresh pumpkin until soft, then blend.
Using these alternatives may change the flavor slightly, but they still taste great.
How do I make my waffles extra crispy?
To get your waffles nice and crispy, follow these tips:
– Preheat your waffle iron: Make sure it’s hot before adding batter.
– Use a little extra oil: Adding a bit more oil to the batter can help.
– Don’t overmix the batter: A few lumps are fine; this helps keep them light.
– Cook longer: If they are not crispy enough, cook them a little longer.
These tricks will help you achieve that perfect crunch.
Can I prepare the batter in advance?
Yes, you can prepare the batter ahead of time. Here’s how:
– Store in the fridge: Keep the batter in an airtight container for up to 24 hours.
– Stir before use: Give it a gentle stir if it separates.
Keep in mind that letting the batter sit too long may affect the rise.
Where can I buy pre-made pumpkin spice waffles?
You can find pre-made pumpkin spice waffles in many stores. Check these places:
– Supermarkets: Look in the frozen breakfast section.
– Health food stores: They often carry organic or gluten-free options.
– Online retailers: Websites like Amazon may have several brands available.
Brands like Eggo and Nature’s Path often sell great options.
What are some ideal toppings for pumpkin spice waffles?
Toppings can enhance your pumpkin spice waffles. Here are some ideas:
– Maple syrup: A classic choice that complements the spices well.
– Whipped cream: Adds creaminess and sweetness.
– Powdered sugar: A light dusting makes them look fancy.
– Extra cinnamon: Sprinkle some on top for added flavor.
These toppings will take your waffles to the next level!
In this article, we explored how to craft perfect pumpkin spice waffles from scratch. We covered ingredient lists, step-by-step instructions, and tips for the best flavor and texture. I also shared ways to vary the recipe for gluten-free or vegan options, plus storage advice.
Enjoying homemade waffles can be simple and fun. You can impress your family with these warm, delicious treats at breakfast or brunch. Give them a try, and savor every bite!
![- 1 cup all-purpose flour - 1 cup whole wheat flour - 2 tablespoons brown sugar - 2 teaspoons baking powder - 1 teaspoon baking soda - 1 teaspoon ground cinnamon - 1 teaspoon ground nutmeg - 1/2 teaspoon ground ginger - 1/4 teaspoon ground cloves - 1/4 teaspoon salt - 1 cup pumpkin puree - 1 1/2 cups milk (dairy or non-dairy) - 2 large eggs - 1/4 cup melted butter or coconut oil - 1 teaspoon vanilla extract - Maple syrup - Whipped cream - Powdered sugar - Extra cinnamon To make perfect Pumpkin Spice Waffles, you need to gather all the right ingredients. Start with your flours. I use both all-purpose and whole wheat flour for a nice texture. Brown sugar adds a touch of sweetness that balances the spices well. Next, you have your leavening agents. Baking powder and baking soda work together to create fluffy waffles. The spices make this dish special. Ground cinnamon, nutmeg, ginger, and cloves give that warm, cozy taste we love in fall. Don’t forget the salt; it helps enhance all the flavors. Pumpkin puree is the star here. It adds moisture and that lovely pumpkin flavor. I prefer using fresh puree, but canned works just fine too. For the liquid, milk brings everything together; you can use dairy or a non-dairy option. Eggs bind the batter and add richness. Butter or coconut oil adds fat, making the waffles tender. Lastly, vanilla extract gives a lovely aroma. Don't skip the toppings! Maple syrup is a must, and whipped cream makes it feel special. A dusting of powdered sugar or cinnamon can take it to the next level. With these ingredients ready, you can follow the Full Recipe for a delightful breakfast treat. Preheat your waffle iron according to the manufacturer’s instructions. This step helps your waffles cook evenly and become crispy. In a large bowl, whisk together the following dry ingredients: - 1 cup all-purpose flour - 1 cup whole wheat flour - 2 tablespoons brown sugar - 2 teaspoons baking powder - 1 teaspoon baking soda - 1 teaspoon ground cinnamon - 1 teaspoon ground nutmeg - 1/2 teaspoon ground ginger - 1/4 teaspoon ground cloves - 1/4 teaspoon salt This mix gives your waffles their warm, spice flavor. In another bowl, mix the wet ingredients until smooth: - 1 cup pumpkin puree - 1 1/2 cups milk (dairy or non-dairy) - 2 large eggs - 1/4 cup melted butter or coconut oil - 1 teaspoon vanilla extract The pumpkin puree adds moisture and a rich taste. Pour the wet ingredients into the dry mix. Stir gently until just combined. A few lumps are okay; overmixing makes the waffles tough. Lightly grease the waffle iron if needed. Pour an appropriate amount of batter into the preheated iron. Cook until golden brown. This usually takes a few minutes. Serve your waffles hot. Drizzle with maple syrup, add whipped cream, and sprinkle cinnamon for extra flavor. Don't forget to check out the Full Recipe for more details! To make your waffles light and fluffy, follow these tips: - Use fresh baking powder and baking soda. This gives your waffles the lift they need. - Mix the batter until just combined. A few lumps are okay; overmixing can make them tough. - Let the batter rest for a few minutes before cooking. This helps the waffles rise better. - Preheat your waffle iron well. A hot iron ensures a crispy outside and soft inside. You can add fun twists to your pumpkin spice waffles. Here are some ideas: - Fold in chocolate chips for a sweet surprise. They melt and create a lovely gooey texture. - Add chopped nuts like walnuts or pecans for crunch. They bring a nice contrast to the soft waffles. - Mix in dried fruit, such as cranberries or raisins, for extra sweetness and chewiness. - Try a splash of maple extract for a deeper flavor. It pairs perfectly with pumpkin. Taking care of your waffle iron is key for great results. Here are some best practices: - Always preheat your waffle iron according to the manufacturer’s instructions. A hot iron cooks evenly. - Lightly grease the iron with butter or oil if needed. This prevents sticking and ensures a clean release. - Don't open the waffle iron too soon. Wait until the steam stops before checking for doneness. - Clean your waffle iron after each use. This keeps it in good shape and ready for your next batch. For the full recipe, check out the [Full Recipe]. {{image_2}} To make gluten-free pumpkin spice waffles, you can swap out the all-purpose flour. Use a gluten-free all-purpose flour blend instead. Make sure it has xanthan gum for the right texture. You can also add a bit of almond flour for extra flavor. This will give the waffles a nice nutty taste. Check the baking powder to ensure it is gluten-free as well. This simple change makes your breakfast safe for everyone. Want to make these waffles vegan? It's easy! Replace the eggs with flax eggs. Mix one tablespoon of ground flaxseed with three tablespoons of water for each egg. Let it sit for five minutes to thicken. Use almond milk or any other non-dairy milk instead of regular milk. Swap the butter for coconut oil or a vegan butter alternative. These changes keep the flavor while making it plant-based. You can add more fun to your pumpkin spice waffles. Try mixing in chocolate chips for a sweet twist. Nuts like walnuts or pecans add a crunchy texture. You can also use different spices. Try cardamom for a unique taste or allspice for a warm flavor. Adding a splash of maple extract can make it even more delicious. Feel free to experiment and find your favorite flavors! To keep your leftover waffles fresh, place them in an airtight container. You can also wrap them in plastic wrap or aluminum foil. Store them in the fridge for up to three days. When you want to eat them, just warm them up in the toaster or microwave. If you want to save waffles for later, freezing is a great option. First, let the waffles cool completely. Then, place a piece of parchment paper between each waffle. This prevents them from sticking together. Store them in a freezer bag or container. They can last up to three months in the freezer. To reheat, pop them in a toaster or bake them in the oven. This keeps them crispy. Waffles stored in the fridge last about three days. If frozen, they remain good for three months. After that, they may lose flavor and texture. Always check for any signs of spoilage before enjoying your waffles. Enjoy them fresh for the best taste! You can use several options if you don't have pumpkin puree. Here are some ideas: - Sweet potato puree: It has a similar texture and flavor. - Butternut squash puree: This option is also sweet and creamy. - Homemade pumpkin puree: Just roast fresh pumpkin until soft, then blend. Using these alternatives may change the flavor slightly, but they still taste great. To get your waffles nice and crispy, follow these tips: - Preheat your waffle iron: Make sure it’s hot before adding batter. - Use a little extra oil: Adding a bit more oil to the batter can help. - Don't overmix the batter: A few lumps are fine; this helps keep them light. - Cook longer: If they are not crispy enough, cook them a little longer. These tricks will help you achieve that perfect crunch. Yes, you can prepare the batter ahead of time. Here’s how: - Store in the fridge: Keep the batter in an airtight container for up to 24 hours. - Stir before use: Give it a gentle stir if it separates. Keep in mind that letting the batter sit too long may affect the rise. You can find pre-made pumpkin spice waffles in many stores. Check these places: - Supermarkets: Look in the frozen breakfast section. - Health food stores: They often carry organic or gluten-free options. - Online retailers: Websites like Amazon may have several brands available. Brands like Eggo and Nature's Path often sell great options. Toppings can enhance your pumpkin spice waffles. Here are some ideas: - Maple syrup: A classic choice that complements the spices well. - Whipped cream: Adds creaminess and sweetness. - Powdered sugar: A light dusting makes them look fancy. - Extra cinnamon: Sprinkle some on top for added flavor. These toppings will take your waffles to the next level! In this article, we explored how to craft perfect pumpkin spice waffles from scratch. We covered ingredient lists, step-by-step instructions, and tips for the best flavor and texture. I also shared ways to vary the recipe for gluten-free or vegan options, plus storage advice. Enjoying homemade waffles can be simple and fun. You can impress your family with these warm, delicious treats at breakfast or brunch. Give them a try, and savor every bite!](https://dailydishly.com/wp-content/uploads/2025/06/28ffe532-610a-4fe8-ab83-510bf8d3c6f3-300x300.webp)


![To make these chocolate-covered banana bites, you will need simple, fresh ingredients. Here is the list: - 2 large bananas - 1 cup dark chocolate chips (or semi-sweet) - 1 tablespoon coconut oil - 1/4 cup chopped nuts (walnuts, almonds, or pistachios) - Sea salt for sprinkling - Optional toppings: 1/4 cup shredded coconut or mini marshmallows These ingredients work together for a tasty treat. The bananas add natural sweetness, while the dark chocolate provides rich flavor. Coconut oil helps the chocolate melt smoothly and adds a hint of tropical taste. The nuts give a nice crunch, and sea salt balances the sweetness. You can also mix in optional toppings like shredded coconut or mini marshmallows for fun twists. When choosing bananas, look for ones that are ripe but not too soft. This way, they will hold their shape when coated. For chocolate, dark chocolate chips melt well and taste great, but you can pick semi-sweet if you prefer. Once you gather your ingredients, you’re ready to make a delightful snack. For the complete process, check the Full Recipe. - Peel and slice bananas into bite-sized rounds. - Arrange banana slices on a parchment-lined baking sheet. Start with ripe bananas. They should be firm but not too soft. Slice them about one inch thick. This size helps them hold their shape when coated in chocolate. Lining the baking sheet with parchment paper keeps the bites from sticking. - Combine chocolate chips and coconut oil in a microwave-safe bowl. - Microwave in intervals, stirring, until smooth. Use dark chocolate chips for a rich taste. The coconut oil makes the chocolate smooth and shiny. Heat in short bursts of thirty seconds. Stir after each burst to prevent burning. When melted, the chocolate should be silky and easy to dip. - Use a fork or toothpick to coat banana slices in chocolate. - Allow excess chocolate to drip off. Hold the banana slice with a fork or toothpick. Dip it fully into the melted chocolate. Let any extra chocolate fall back into the bowl. This step ensures a nice, even coat. - Sprinkle nuts onto chocolate-coated banana bites. - Optionally, add shredded coconut or mini marshmallows. While the chocolate is still wet, add your favorite toppings. Nuts give a nice crunch. Coconut and marshmallows add a fun twist. Get creative with your choices! - Place the baking sheet in the freezer. - Chill for 15-20 minutes until the chocolate sets. Freezing helps the chocolate harden quickly. This step gives you a perfect bite. Keep an eye on them to make sure they don’t freeze too long. - Arrange on a serving platter. - Sprinkle with sea salt for extra flavor. Once chilled, place the banana bites on a nice platter. A light sprinkle of sea salt can enhance the flavor. These treats are perfect for sharing with friends or family. For the complete recipe, check out the [Full Recipe]. For melting, I recommend dark chocolate or semi-sweet chocolate. Both types melt well and give a rich flavor. Avoid chocolate with added ingredients, as they may not melt smoothly. To stop chocolate from seizing, add a bit of coconut oil. This helps keep the chocolate smooth and shiny while you dip your bananas. You can get creative with toppings! Try adding chopped nuts like walnuts or almonds for crunch. For a fun twist, sprinkle on shredded coconut or mini marshmallows. Bananas pair well with peanut butter too. Drizzle some on top after dipping for a tasty combo. If you're feeling adventurous, add a pinch of cinnamon for warmth. Present your chocolate-covered banana bites on a colorful platter. For a fun touch, use mini cupcake liners. They look cute and make for easy serving. Pair these bites with a glass of cold milk or a warm cup of tea. They also go well with vanilla ice cream for a sweet dessert combo. Enjoy your tasty creation! {{image_2}} You can easily make these bites vegan or dairy-free. Use plant-based chocolate chips instead of dark chocolate. Look for brands that are labeled dairy-free. You can also skip the nuts if you need a nut-free version. Simply leave them out or choose seeds like pumpkin or sunflower for crunch. You can switch up the chocolate for fun. Try white chocolate for a sweet twist. Milk chocolate is another tasty choice. If you want to get creative, add spices like cinnamon or nutmeg. Extracts like vanilla or almond also bring unique flavors. These small changes make a big impact on taste. Bananas are great, but other fruits work well too. Strawberries and apples both taste amazing with chocolate. You can even mix bananas with berries. Slice them small to make bite-sized treats. This way, you get a variety of flavors in one bite. Enjoy experimenting with different fruits! To keep your chocolate-covered banana bites fresh, store them in the fridge. Use an airtight container to prevent odors. Place parchment paper between layers if stacking them. This keeps the chocolate from sticking. If you want to store them longer, freezing works well too. Just place them on a baking sheet first. Once frozen, transfer them to a freezer-safe bag. This prevents them from clumping together. To thaw, just leave them in the fridge for a few hours before enjoying. When stored well in the fridge, these treats last about a week. If you freeze them, they can last up to two months. Check for signs of spoilage like brown spots on the bananas or a change in texture. If they look or smell off, it’s best to toss them. If you have leftover melted chocolate, don’t waste it! You can reuse it for other treats. Drizzle it on popcorn, or dip pretzels for a sweet and salty snack. You can also make chocolate-covered strawberries or marshmallows. Just be sure to reheat it gently to keep it smooth. For the best results, use the Full Recipe to make your banana bites. Enjoy the fun of creating delicious snacks while managing your storage effectively! Yes, you can use milk chocolate. It adds a sweeter taste. Dark chocolate has a richer flavor. Dark chocolate also has more health benefits, like antioxidants. It has less sugar than milk chocolate, making it a better choice for some. If you prefer sweet, go for milk chocolate. If you want a deeper flavor, stick with dark. To keep the chocolate firm, store the bites in a cool place. A fridge works great, but avoid the freezer after setting. You can also use a chocolate with a higher cocoa content. This type melts less easily. If you serve them warm, try using coconut oil. It helps the chocolate stay solid longer. Yes, you can make these bites ahead of time. They store well in the fridge for about a week. Just place them in an airtight container. If you want to keep them longer, you can freeze them. Make sure to separate layers with parchment paper to avoid sticking. Thaw them in the fridge before serving for the best taste. Chocolate-covered banana bites can be healthy in moderation. Bananas provide potassium and fiber. Dark chocolate has antioxidants, which are good for you. However, watch your portions. Eating too many can add extra sugar and calories. Pair these bites with a balanced diet for better health. Enjoy them as a treat rather than a daily snack. For the full recipe, check out the details above. You learned how to make tasty chocolate-covered banana bites. We covered the simple steps, from slicing bananas to melting chocolate. You can mix and match ingredients for fun variations. Remember, storing them well keeps them fresh and tasty for longer. Whether serving these bites at a party or enjoying them yourself, they are a delightful treat. Experiment with toppings and flavors to make them yours. Enjoy creating your own chocolate-covered banana bites!](https://dailydishly.com/wp-content/uploads/2025/06/88d9cc62-4f1a-4e00-b9c6-f86f49f25fdc-768x768.webp)

