Roasted Garlic Cauliflower Mash Creamy and Flavorful Dish

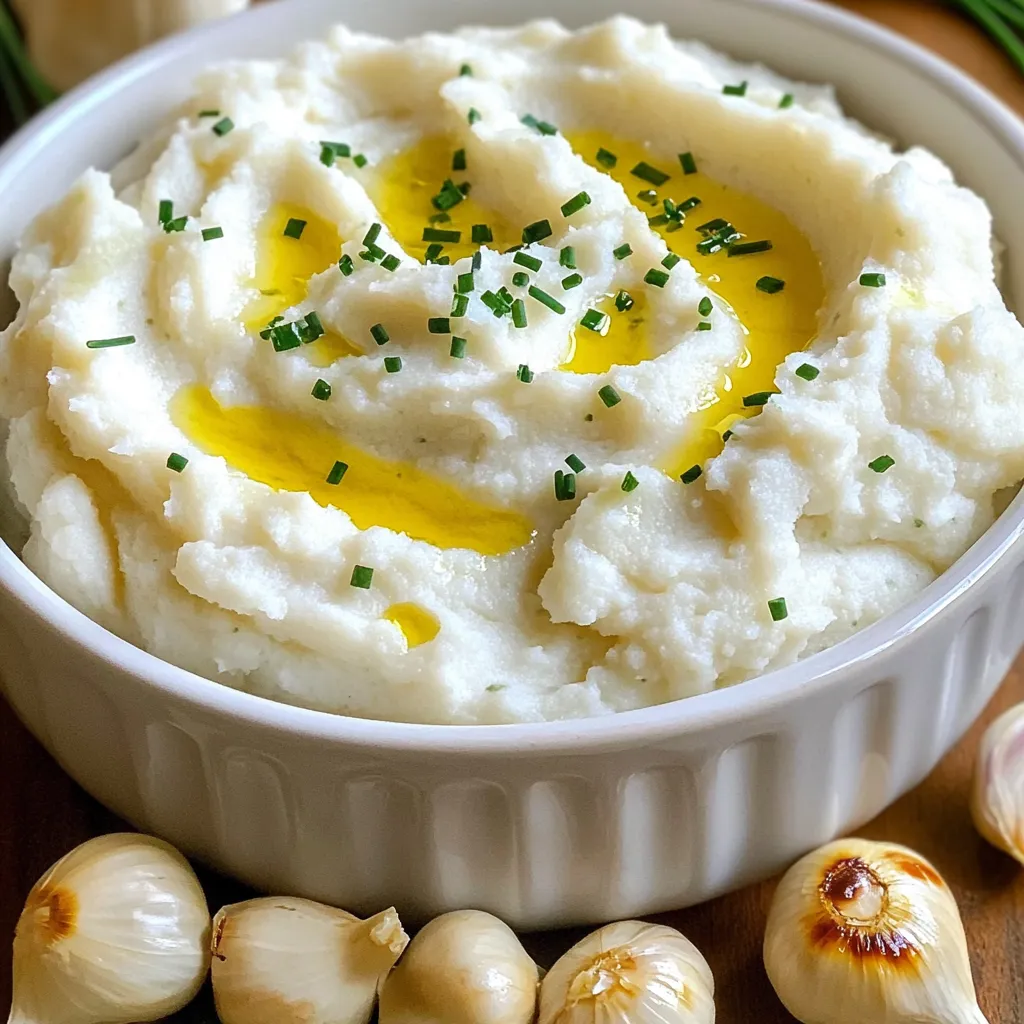
Are you ready to elevate your dinner game with a creamy and flavorful twist? Roasted Garlic Cauliflower Mash is the perfect dish that combines taste and health. With just a few simple ingredients like cauliflower and garlic, this mash gives you the comfort of traditional potatoes without the extra carbs. Whether you’re vegan, gluten-free, or just looking to impress at your next meal, this guide will help you achieve the best garlic mash ever!
Ingredients
Main Ingredients
– 1 large head cauliflower, chopped into florets
– 5 cloves garlic, unpeeled
– 2 tablespoons olive oil
Optional Ingredients
– 2 tablespoons nutritional yeast for a cheesy flavor
– 1/4 cup unsweetened almond milk or any milk of your choice
– 1 tablespoon fresh thyme leaves or 1 teaspoon dried thyme
Seasoning and Garnish
– Salt and freshly ground black pepper to taste
– 1 tablespoon butter, vegan or regular
– Chopped chives for garnish (optional)
Gather these ingredients to make your roasted garlic cauliflower mash. The main ingredients bring a great base. Cauliflower is the star here, and it gives a nice, creamy texture. Garlic adds rich flavor. Olive oil helps with roasting and adds a bit of a nice taste.
You can choose optional ingredients to add more depth. Nutritional yeast gives a cheesy flavor without dairy. Almond milk makes the mash creamy. Fresh herbs like thyme add a touch of brightness.
For seasoning, salt and pepper make the flavors pop. A bit of butter adds richness. Chives are perfect for a fresh garnish at the end. With these ingredients, you will create a mash that is creamy and full of flavor.
Step-by-Step Instructions
Preparation
– Preheat your oven to 400°F (200°C).
– Take your large head of cauliflower and chop it into florets.
– Grab 5 cloves of garlic, keeping them unpeeled.
– Place the florets and whole garlic cloves on a baking sheet.
– Drizzle the mixture with 2 tablespoons of olive oil.
– Sprinkle salt and pepper to taste.
– Toss everything to coat well.
Roasting Process
– Roast in the oven for about 25-30 minutes.
– Check that the cauliflower is tender and slightly golden.
– Stir the mixture halfway through cooking to ensure even roasting.
Blending and Serving
– Once roasted, take the baking sheet out of the oven.
– Let it cool a bit, then squeeze the garlic from their skins.
– In a large mixing bowl, combine the roasted cauliflower and garlic.
– Add in 1/4 cup of unsweetened almond milk, 2 tablespoons of nutritional yeast, and thyme.
– Toss in 1 tablespoon of butter for extra creaminess.
– Using an immersion blender or potato masher, blend until smooth or chunky.
– Taste it and adjust the seasoning with more salt and pepper if needed.
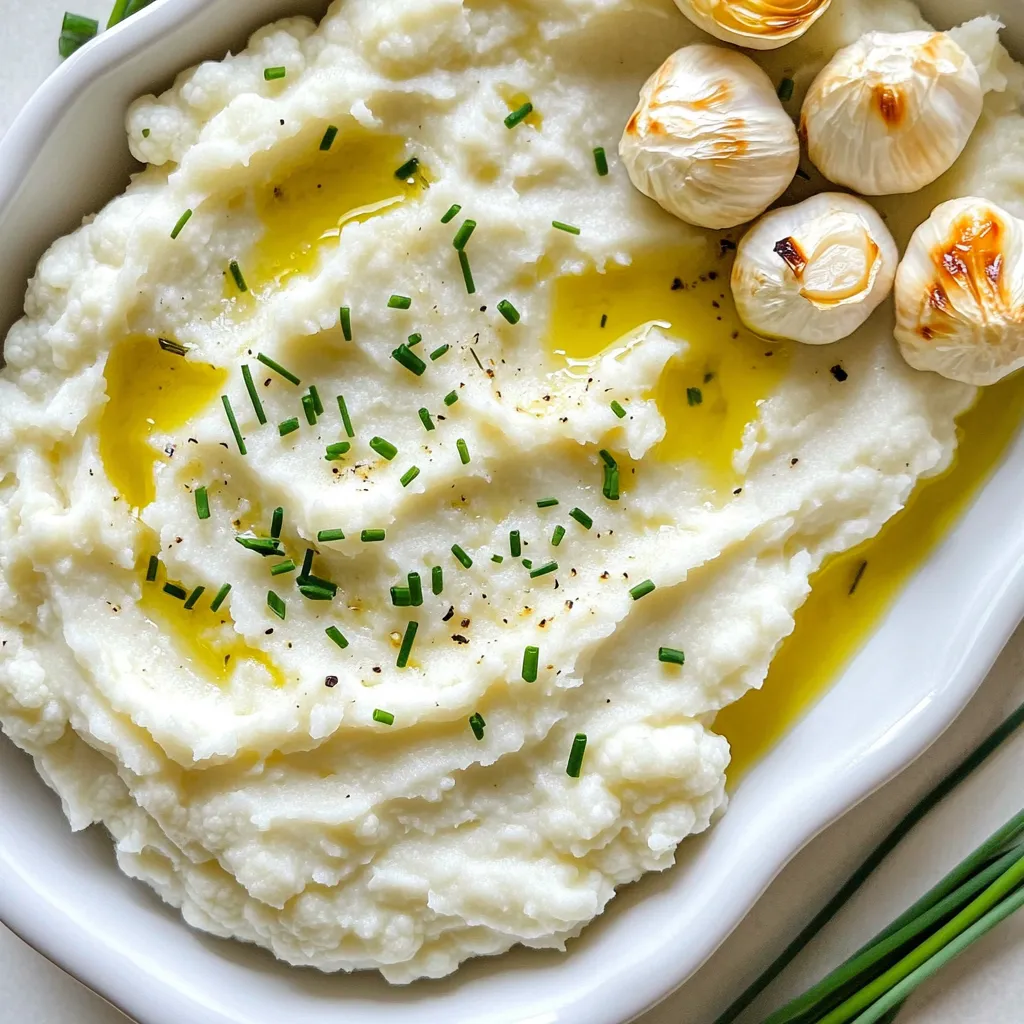
– Serve warm, and top with chopped chives for a fresh touch.
Tips & Tricks
Perfecting the Roasting
To get even cooking, cut the cauliflower into similar-sized florets. This way, they all cook at the same rate. Spread them out on a baking sheet. Make sure they are not crowded. Stir the florets halfway through roasting. This helps them brown nicely.
For the best garlic flavor, roast the garlic whole and unpeeled. Roasting brings out its sweet taste. When you squeeze the roasted garlic from its skin, it will be soft and flavorful. This adds depth to your mash.
Achieving Optimal Consistency
Do you prefer smooth or chunky mash? Use an immersion blender for a smooth texture. If you want a chunkier mash, a potato masher works great. You can mix it until it is just right for you.
If the mash is too thick, add more milk. Start with a little at a time. Stir well and check the texture. This helps you find the perfect creaminess.
Flavor Enhancements
Don’t be afraid to experiment! Try adding herbs like rosemary or parsley. Spices like paprika can give it a kick. You can mix and match to find your favorite flavors.
For garnishes, chopped chives add a nice touch. They give a fresh taste and look great on top. You can also sprinkle some extra thyme for a pop of color and flavor.

Variations
Different Flavor Profiles
You can easily change the flavor of your roasted garlic cauliflower mash. Adding spices brings new life to the dish. Try mixing in paprika for a smoky taste or cumin for warmth. Both spices enhance the mash without overpowering it. You can also add greens. Incorporating vegetables like spinach or kale adds color and nutrients. Just mix them in when blending the mash.
Dietary Modifications
If you need dairy-free options, use almond milk or any plant-based milk. This keeps it creamy without dairy. For a cheesy flavor, add nutritional yeast. It adds richness without any dairy. Also, this dish is gluten-free. All the main ingredients are safe for those with gluten issues.
Serving Suggestions
This mash pairs well with proteins like chicken or fish. It also complements roasted veggies or salads. If you have leftovers, get creative. Use the mash as a base for veggie bowls or a topping for baked potatoes. It can easily spice up your meals for the week.
Storage Info
Storing Leftovers
After enjoying your roasted garlic cauliflower mash, store any leftovers in an airtight container. Keep it in the fridge. This helps keep your mash fresh and tasty. It lasts about 3 to 5 days in the fridge. If you see any signs of spoilage, throw it away.
Freezing Cauliflower Mash
To freeze your mash, let it cool first. Then, scoop it into freezer bags. Remove as much air as you can before sealing. This helps prevent freezer burn. It keeps well for about 2 to 3 months. When you want to use it, thaw it in the fridge overnight.
To maintain texture, avoid using a microwave for thawing. Let it sit in the fridge instead. This slow thaw helps keep it creamy.
Reheating Tips
You can reheat your cauliflower mash in a few ways. The microwave is fast. Pour the mash into a bowl and cover it. Heat in short bursts, stirring in between. This helps heat it evenly.
You can also use the stovetop. Place the mash in a pot over low heat. Stir often to prevent sticking. Add a splash of almond milk or water if it seems dry. This keeps it smooth and creamy.
FAQs
Can I use frozen cauliflower instead of fresh?
Yes, you can use frozen cauliflower. Frozen cauliflower saves time. It’s already washed and cut. This can cut your prep time in half. However, it may have more water. This extra water can make your mash watery. To avoid this, drain it well after cooking. Fresh cauliflower gives a better texture and flavor.
How do I make Roasted Garlic Cauliflower Mash vegan?
To make it vegan, swap out the butter and milk. Use vegan butter instead of regular butter. For milk, unsweetened almond milk works great. You could also try oat or soy milk. These substitutes keep the creamy texture. They still let the garlic shine through.
What’s the difference between this mash and traditional mashed potatoes?
Roasted garlic cauliflower mash is lower in carbs. Cauliflower has fewer calories than potatoes. It’s also high in fiber and vitamins. Flavor-wise, the garlic adds a rich taste. Cauliflower has a unique, nutty flavor too. This mash is lighter and can be a great side dish.
This blog post shared a simple way to make roasted garlic cauliflower mash. We explored its key ingredients, like cauliflower, garlic, and olive oil. You learned step-by-step instructions to prepare, roast, and blend your mash. Useful tips helped improve your cooking technique and flavor. We even explored variations and storage methods.
This dish is not only tasty but also flexible for any dietary needs. Enjoy this nutritious alternative to traditional mashed potatoes. Your culinary skills will impress anyone at the table.


. To start, grab a large mixing bowl. Open the can of black beans, rinse, and drain them. Use a fork or potato masher to mash the beans. Aim for a mostly smooth texture but leave some chunks for bite. Next, add the cooked quinoa, breadcrumbs, and chopped red onion. Toss in the finely chopped bell pepper, minced garlic, and spices: chili powder, cumin, smoked paprika, salt, and pepper. Finally, squeeze in the lime juice. Mix everything until it feels well combined. If the mixture is too wet, sprinkle in more breadcrumbs until it can hold its shape. Once your mixture is ready, divide it into four equal parts. Shape each part into a patty that is about one inch thick. Heat olive oil in a non-stick skillet over medium heat. When the oil is hot, carefully place the patties in the skillet. Cook each side for about 4-5 minutes. Look for a golden brown color and ensure they are heated through. This step gives the burgers a nice crispy edge. Now it's time to serve your spicy black bean burgers! Place each patty on a hamburger bun. Top with your favorite ingredients, like avocado slices, lettuce, tomato, and spicy mayo. For a beautiful plate, pair the burgers with sweet potato fries or a mixed greens salad. The colors will look great together and make your meal even more appetizing. For the full recipe, check the details above. To get the best texture, mash your black beans well. Leave some chunks for that hearty bite. Add cooked quinoa to bind everything together. Use breadcrumbs or oat flour for a firmer patty. If the mix feels too wet, just add more breadcrumbs. This helps the burgers hold their shape. Want more heat? Try adding chopped jalapeños or a dash of cayenne pepper. You can also mix in some hot sauce or sriracha for an extra kick. Don’t forget to taste as you go! Adjust the spices until you get the flavor you want. Fresh herbs like cilantro can brighten up the taste too. Store cooked burgers in an airtight container. They will stay fresh for about three days in the fridge. To reheat, use the skillet on medium heat. Cook for about three minutes on each side. You can also microwave them for a quicker option; just cover them to keep moisture. If you want longer storage, freeze the uncooked patties. They’ll last up to three months in the freezer. Enjoy them anytime with the full recipe! {{image_2}} You can swap black beans for other beans. Chickpeas or kidney beans work well. Each bean brings a unique flavor and texture. For example, chickpeas add a nutty taste. Kidney beans give a softer bite. Just mash them like you do with black beans. Follow the same recipe steps for great results. Want more nutrition? Add grains or veggies to your burger mix. Cooked brown rice or farro can boost fiber. You can also mix in grated carrots or zucchini. These add moisture and flavor. Just remember to squeeze out excess water from veggies. This keeps your burger from getting too wet. Experimenting with spices can change your burger game. Try adding smoked chipotle for heat. Or mix in fresh herbs like cilantro or parsley. For a Mediterranean twist, add oregano and feta cheese. These spices and herbs change the flavor and make it exciting. Don't be afraid to get creative with what you have! For the full recipe, check out the detailed steps above. To keep your cooked spicy black bean burgers fresh, let them cool first. Place them in an airtight container. Store them in the fridge for up to three days. This helps maintain their flavor and texture. Freezing your burgers is a great option for meal prep. After they cool, wrap each burger in plastic wrap. Then, place them in a freezer-safe bag. They can last up to three months in the freezer. When you’re ready to eat, just thaw them in the fridge overnight. Use glass or BPA-free plastic containers for best results. These containers seal tightly and prevent air from entering. This keeps your burgers from drying out. If you’re freezing, look for heavy-duty freezer bags. They help protect against freezer burn. To make your Spicy Black Bean Burgers stick, you need the right balance. Start by mashing the black beans well. Leave some chunks for texture. Mix in breadcrumbs or oat flour. This helps hold the burgers together. If the mix feels too wet, add more breadcrumbs. You want a moldable consistency. This simple trick ensures your burgers stay intact while cooking. You can serve many tasty sides with Spicy Black Bean Burgers. Here are some great options: - Sweet potato fries - Mixed greens salad - Coleslaw - Grilled vegetables - Corn on the cob These sides add color and flavor to your meal. They also complement the burgers well. Feel free to mix and match to find what you like best! Yes, you can bake black bean burgers! Baking is a healthier option. Preheat your oven to 375°F (190°C). Line a baking sheet with parchment paper. Place the shaped patties on it. Bake for about 20-25 minutes. Flip them halfway for even cooking. You’ll still get a nice texture without frying. This method works well and keeps the burgers light! To sum up, we explored how to make tasty spicy black bean burgers. We looked at key ingredients, cooking steps, and tips for the perfect texture. You can try fun variations and learn how to store leftovers. These burgers are easy to tweak for your tastes. They are delicious and healthy. Enjoy making them your own, and share with friends!](https://dailydishly.com/wp-content/uploads/2025/06/bb742c5e-0c76-419c-af3f-f1da08f0abd3-768x768.webp)


![To make smoky chipotle bean burritos, gather these key ingredients: - 1 cup black beans, cooked and mashed - 1 cup pinto beans, cooked and mashed - 1 tablespoon chipotle pepper in adobo sauce, minced - 4 large flour tortillas - 1 cup cooked brown rice - 1 cup corn kernels (fresh, frozen, or canned) - 1 cup shredded cheese (cheddar or a cheese blend) These ingredients create a rich and satisfying filling. The black and pinto beans add protein and flavor. The tortillas hold everything together, making it easy to enjoy. The right spices and seasonings elevate your burritos. Here’s what you need: - 1 teaspoon smoked paprika - 1 teaspoon ground cumin - ½ teaspoon garlic powder - ½ teaspoon onion powder - Salt and pepper to taste Smoked paprika gives a deep flavor. Ground cumin adds warmth and earthiness. Garlic and onion powders bring out the savory notes. Adjust the salt and pepper based on your taste. Toppings add freshness and fun to your burritos. Consider these options: - ½ cup sour cream or Greek yogurt - Fresh cilantro, chopped - Lime wedges for serving Sour cream or yogurt adds creaminess. Cilantro brings a touch of brightness. Lime juice adds zing and balances the flavors. Feel free to mix and match your toppings! Checking out the Full Recipe can help you see how to use these ingredients effectively. To start, gather your ingredients. In a medium bowl, mix 1 cup of black beans and 1 cup of pinto beans. Use a fork to mash them slightly, but leave some texture for bite. This adds a nice feel to the burrito. Next, add 1 tablespoon of minced chipotle pepper in adobo sauce. This gives the burrito its smoky kick. Then, sprinkle in 1 teaspoon of smoked paprika, 1 teaspoon of ground cumin, ½ teaspoon of garlic powder, and ½ teaspoon of onion powder. Season with salt and pepper to taste. Mix everything well, so the flavors blend nicely. Now, let’s assemble the burritos. Take a clean surface or a large plate. Lay out one large flour tortilla on the surface. Add an even scoop of the bean mixture down the center of the tortilla. Be generous, but don’t overfill! Next, add a scoop of cooked brown rice, followed by a sprinkle of corn kernels. Top it all off with a handful of shredded cheese. Now, fold the sides of the tortilla over the filling. Then, roll the burrito tightly from the bottom up. Repeat this with the remaining tortillas until all the filling is used. To cook the burritos, heat a non-stick skillet over medium heat. Place the burritos seam-side down in the skillet. Cook them for about 2-3 minutes on each side. Look for a golden brown and crispy texture. This step makes them extra tasty! Once cooked, remove the burritos from the skillet and let them cool slightly. Serve warm, topped with a dollop of sour cream or Greek yogurt, chopped cilantro, and lime wedges on the side for squeezing. Enjoy your smoky chipotle bean burritos! For more details, check out the Full Recipe. To boost the smoky taste, add more chipotle pepper. You can use two tablespoons if you like it hot. Smoked paprika also adds depth. I often sprinkle extra on top before serving. For a touch of sweetness, add a bit of honey. This balance makes the flavors pop. You can make these burritos in advance. Prepare the filling and wrap them in tortillas. Then, wrap each burrito in foil. Store them in the fridge for up to three days. When you're ready, heat them in the oven for a quick meal. This method keeps them tasty and fresh. A few tools help make this recipe easier. Use a large bowl for mixing the bean filling. A non-stick skillet is great for cooking the burritos. A spatula helps flip them without breaking. If you have a tortilla press, it can shape the tortillas perfectly. Lastly, kitchen scissors can cut cilantro quickly. For the full recipe, check out the [Full Recipe]. {{image_2}} You can make this recipe vegetarian or vegan easily. Use plant-based cheese for a vegan choice. You can also swap sour cream for cashew cream or avocado. Both options add creaminess without dairy. This way, everyone can enjoy these burritos. Feel free to add more veggies to your burritos. Try diced bell peppers, zucchini, or spinach. Sauté them before mixing with the beans for extra flavor. You can also add roasted veggies for a smoky taste. This adds color and nutrition, making your meal even better. If you want to change the protein, use lentils or quinoa. Both provide great texture and nutrients. You can also try chickpeas for a different flavor. They blend well with the smoky spices. These options keep your burritos hearty and satisfying. You can keep your Smoky Chipotle Bean Burritos in the fridge. Place them in an airtight container. They will stay fresh for about 3 to 4 days. If you want to keep them longer, consider freezing. To freeze the burritos, wrap each one tightly in plastic wrap. Then, place them in a freezer-safe bag. This keeps them safe from freezer burn. They can last in the freezer for up to 3 months. When you’re ready to eat, just thaw them in the fridge overnight. To reheat, you can use an oven or a skillet. If using the oven, preheat it to 350°F (175°C). Wrap the burrito in foil and heat for about 15-20 minutes. If using a skillet, heat it over medium heat. Cook the burrito for about 3-4 minutes on each side. This keeps them crispy and warm. For a quick option, you can use the microwave. Heat it for 1-2 minutes, but it may not stay crispy. Enjoy your delicious burritos! For the full recipe, check out the Smoky Chipotle Bean Burritos recipe. You can use any beans you like. Great options include kidney beans or chickpeas. You can also blend beans for a smoother texture. If you want a meat option, try shredded chicken or ground beef. Remember to adjust the seasoning to fit the new beans or meat. To add heat, try more chipotle peppers in adobo sauce. You can also mix in diced jalapeños or a splash of hot sauce. If you like it really spicy, use a pinch of cayenne pepper. Taste the filling as you go to reach your perfect heat level. Yes, you can use corn tortillas! They add a nice flavor and texture. Just be careful, as they can tear more easily than flour tortillas. Warm them slightly before filling to make them more pliable. This way, they’ll hold up better when you roll them. For the full recipe, check out the details above. In this post, I covered how to make smoky chipotle bean burritos. We explored key ingredients, spices, and toppings. I shared simple steps for preparation, assembly, and cooking. Helpful tips improved smoky flavors and storage methods. I also offered vegetarian options and variations. These burritos are easy, tasty, and fun to make. You can adapt them to your taste and enjoy any time. With these insights, you are ready to create a delicious meal. Happy cooking!](https://dailydishly.com/wp-content/uploads/2025/06/6af8d986-bcf9-4176-ab5b-3d565f261c50-768x768.webp)

