Savory Air Fryer Avocado Fries with Chipotle Mayo

Looking for a tasty twist on a classic snack? Try my savory Air Fryer Avocado Fries with Chipotle Mayo! These crispy bites combine creamy avocado with a spicy dipping sauce that packs a flavor punch. Whether you’re in the mood for a healthy appetizer or a fun side dish, this recipe has got you covered. Let’s dive into the simple steps to make your new favorite treat!
Ingredients
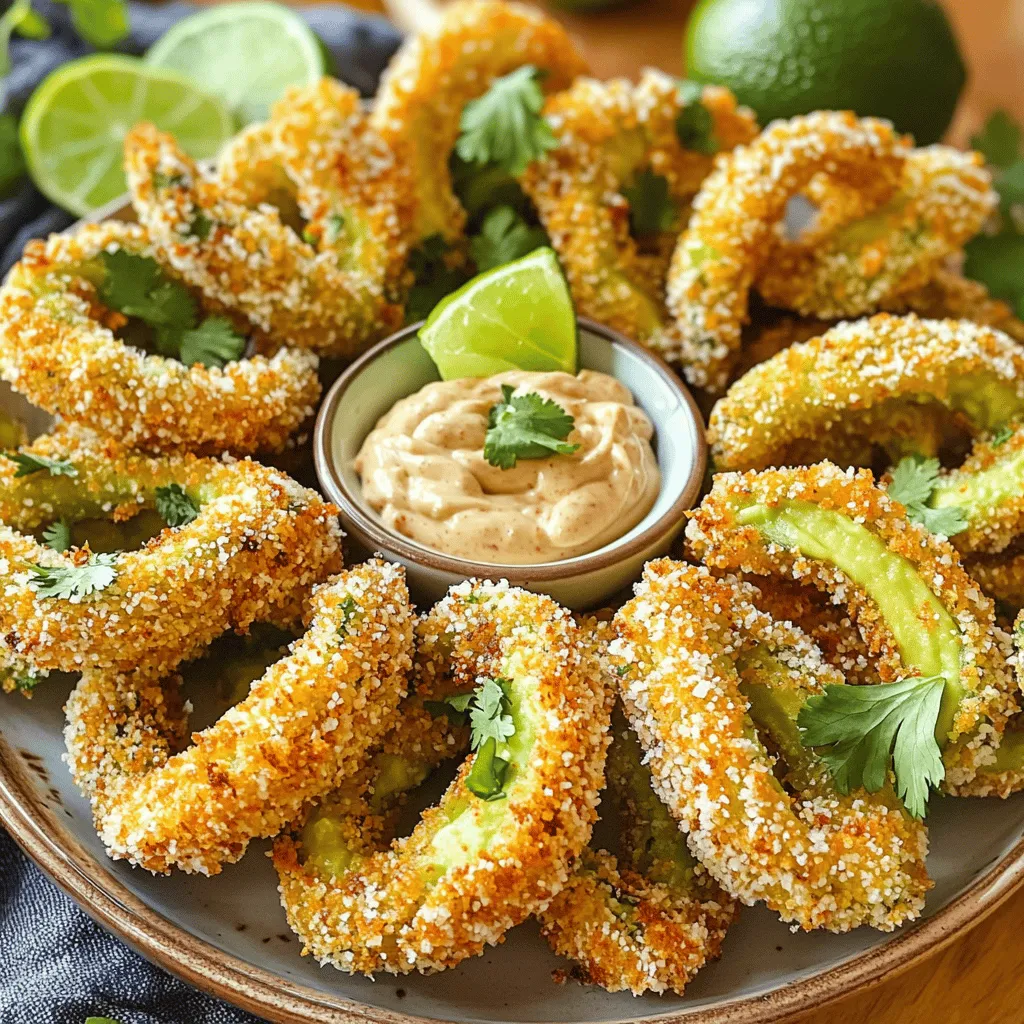
List of Ingredients for Air Fryer Avocado Fries
– 2 ripe avocados, halved and pitted
– ½ cup all-purpose flour
– 1 teaspoon garlic powder
– 1 teaspoon smoked paprika
– 2 large eggs, beaten
– 1 cup panko breadcrumbs
– 1 teaspoon salt
– ½ teaspoon black pepper
– 1 teaspoon lime juice
Ingredients for Chipotle Mayo
– ½ cup mayonnaise
– 1-2 tablespoons chipotle in adobo sauce (adjust to taste)
– 1 teaspoon lime juice
– Salt to taste
Optional Ingredients for Variations
You can switch things up if you want. Here are some ideas:
– Try using whole wheat flour for a healthier option.
– Swap panko breadcrumbs for crushed cornflakes for extra crunch.
– Add fresh herbs like cilantro or parsley to the mayo for a fresh twist.
– For a kick, mix in diced jalapeños or hot sauce in the mayo.
This recipe is flexible, so feel free to get creative!
Step-by-Step Instructions
Preparing the Avocado Wedges
Start by preheating your air fryer to 375°F (190°C). This step is key for crispy fries. Next, take two ripe avocados and slice them in half. Remove the pit carefully. Cut each half into thick wedges, about four pieces per avocado. Thick pieces hold up well during cooking and taste great.
Breading Process Explained
Now, let’s get our breading setup ready. In a shallow bowl, mix together ½ cup of all-purpose flour, 1 teaspoon of garlic powder, 1 teaspoon of smoked paprika, 1 teaspoon of salt, and ½ teaspoon of black pepper. This mix gives your fries a nice flavor. In another bowl, beat two large eggs. The eggs help the breading stick. In a third bowl, place 1 cup of panko breadcrumbs.
Take each avocado wedge and first coat it in the flour mix. Shake off any extra flour. Next, dip it into the beaten eggs. Finally, roll it in the panko breadcrumbs. Press gently to help the crumbs stick well. This three-step process creates a crunchy coating.
Cooking in the Air Fryer
Place the breaded avocado fries in the air fryer basket. Make sure they are in a single layer and not touching. This spacing helps them cook evenly. Air fry for about 10-12 minutes, flipping them halfway through. You want them golden brown and crispy. While the fries cook, mix your chipotle mayo. In a small bowl, whisk together ½ cup of mayonnaise, 1-2 tablespoons of chipotle in adobo sauce, and 1 teaspoon of lime juice. Add salt to taste. Adjust the spice by adding more chipotle if you like it hot.
When the fries are done, remove them from the air fryer. Drizzle some lime juice over them for a fresh taste. Serve your crispy avocado fries on a plate with the chipotle mayo. Enjoy your snack!
Tips & Tricks
Tips for Selecting Ripe Avocados
To make great avocado fries, you need ripe avocados. Look for avocados that yield slightly when you press them. The skin should be dark green or almost black. Avoid avocados with large dark spots or cracks. These signs mean the fruit may be overripe or spoiled. If you want to use avocados later, pick ones that are firm. You can ripen them at home by placing them in a paper bag.
Adjustments for Optimal Crispiness
For crispy avocado fries, you can make a few adjustments. First, make sure your air fryer is preheated. This helps the fries cook evenly. Use panko breadcrumbs for the best crunch. They are lighter and crispier than regular breadcrumbs. If you want extra crunch, spray the fries lightly with cooking oil before air frying. The oil helps them brown nicely.
Best Practices for Air Frying
Air frying is a great way to cook avocado fries. Do not overcrowd the basket. Leave space between the fries for air to circulate. This makes them crispier. Flip the fries halfway through cooking time for even browning. Keep an eye on them. Cooking times can vary based on your air fryer. Aim for a golden brown color for the best results.

Variations
Alternative Dipping Sauces
You can try different sauces for dipping. Here are some ideas:
– Sriracha Mayo: Mix mayo with sriracha for a spicy kick.
– Honey Mustard: Blend honey with mustard for a sweet and tangy dip.
– Garlic Aioli: Combine mayo with minced garlic and lemon juice.
– Ranch Dressing: Use ranch for a creamy and herby flavor.
These sauces add more fun to your fries. You can mix and match based on your taste.
Spice Level Modifications
Adjust the spice in your chipotle mayo easily. Here’s how:
– Mild: Use just one tablespoon of chipotle sauce.
– Medium: Stick with one to two tablespoons.
– Hot: Add more than two tablespoons for a fiery dip.
– Add Jalapeños: Chop fresh jalapeños into the mayo for extra heat.
You can control the heat level to match what you like best.
Different Seasoning Blends
Changing the seasoning can make your avocado fries unique. Here are some suggestions:
– Italian Herbs: Use dried oregano, basil, and thyme for an Italian twist.
– Cajun Spice: Add cayenne, thyme, and paprika for a Southern feel.
– Curry Powder: Mix in curry powder for a bold flavor.
– Taco Seasoning: Use taco mix for a fun, zesty taste.
Experiment with these seasonings to create your perfect avocado fries.
Storage Information
How to Store Leftover Avocado Fries
To store leftover avocado fries, place them in an airtight container. Line the container with a paper towel to absorb extra moisture. This keeps your fries crispy longer. You can store them in the fridge for up to three days. If you want the best taste, eat them fresh!
Reheating Instructions for Best Results
To reheat avocado fries, use your air fryer again. Set it to 350°F (175°C). Place the fries in a single layer. Heat them for about 5 minutes. This makes them crispy again. You can also use an oven if you prefer. Preheat it to 350°F (175°C) and bake for 10 minutes.
Freezing Options and Tips
You can freeze avocado fries for later. First, bread the fries but do not cook them. Place them on a baking sheet in a single layer. Freeze them for 1-2 hours until solid. Then, transfer the fries to a freezer bag. They can stay frozen for about a month. When you are ready to cook, just air fry them straight from the freezer. Adjust the cooking time to about 15 minutes.
FAQs
Can I use frozen avocados for this recipe?
No, I do not recommend using frozen avocados. Frozen avocados can become mushy when cooked. Fresh ripe avocados give the best flavor and texture. Choose firm but ripe avocados for this recipe.
What can I substitute for panko breadcrumbs?
You can use regular breadcrumbs instead of panko. They will work fine but may not be as crispy. Another option is crushed cornflakes or crushed crackers. These can add a nice crunch to your avocado fries.
How do I make the chipotle mayo spicier?
To make the chipotle mayo spicier, add more chipotle in adobo sauce. Start with one extra tablespoon and taste it. You can also add a dash of hot sauce for more heat. Adjust to your preference for the perfect kick!
In this post, we explored making air fryer avocado fries. We covered the key ingredients, both main and optional, for creating a rich flavor. I walked you through step-by-step instructions for preparing, breading, and cooking these fries. We also shared tips for choosing ripe avocados and achieving the best crispiness. Finally, we discussed various ways to store and reheat leftovers.
You now have a tasty dish to impress your friends and family. Enjoy your cooking!


![- 8 oz fusilli or rotini pasta - 1 cup cherry tomatoes, halved - 1 cup cucumber, diced - 1/2 cup red bell pepper, diced - 1/4 cup red onion, finely chopped - 1/2 cup Kalamata olives, pitted and sliced - 1/3 cup fresh basil leaves, torn - 1/4 cup crumbled feta cheese (optional) - 1/4 cup olive oil - 3 tablespoons fresh lemon juice - 1 teaspoon lemon zest - 1 teaspoon honey or maple syrup - Salt and pepper to taste In this Lemon Basil Pasta Salad, I use fresh and vibrant ingredients. The pasta holds the flavors well. I like using fusilli or rotini because they catch the dressing and veggies nicely. Cherry tomatoes add a pop of color and sweetness. They brighten the salad. Cucumbers bring a cool crunch. Red bell pepper adds sweetness and color too. The red onion gives a nice bite, while Kalamata olives add a salty touch. Fresh basil is the star here. Its aroma and flavor are amazing. I often tear the leaves to release their oils. If you want, you can add crumbled feta cheese for a creamy texture. For the dressing, I mix olive oil, fresh lemon juice, lemon zest, and honey or maple syrup. This blend makes the salad bright and zesty. I also add salt and pepper to balance the flavors. Remember, you can find the full recipe at the end of the article. This salad is not just tasty; it looks great too. It’s perfect for gatherings or a simple meal at home! Start by bringing a large pot of salted water to a boil. Use about 1 tablespoon of salt for every 4 quarts of water. Add the pasta once the water is boiling. Cook it according to the package instructions until it is al dente. This usually takes about 8 to 10 minutes. After it cooks, drain the pasta and rinse it under cold water. This helps cool it down quickly, so it won’t cook anymore. While the pasta cooks, chop your vegetables. Use a sharp knife for clean cuts. I like to slice the cherry tomatoes in half and dice the cucumber and bell pepper into small pieces. Finely chop the red onion to add a nice bite. In a large mixing bowl, combine the chopped cherry tomatoes, cucumber, red bell pepper, red onion, and Kalamata olives. This mix brings bright colors and flavors to your salad. In a small bowl, whisk together the olive oil, lemon juice, and lemon zest. Add honey or maple syrup for a touch of sweetness. A pinch of salt and pepper helps balance the flavors. Whisk until all the ingredients blend well. This dressing should be bright and tangy, perfect for your salad. Now, it’s time to mix everything. Add the cooled pasta to the vegetable bowl. Pour the dressing over the pasta and vegetables. Gently toss everything together so that the pasta and veggies are evenly coated. This ensures every bite is full of flavor. Lastly, fold in the torn basil leaves and crumbled feta cheese if you choose to include it. Cover the salad with plastic wrap and place it in the fridge. Let it chill for at least 30 minutes. This waiting time allows the flavors to meld together nicely. For covering, you can also use a large bowl with a lid. Chilling the salad enhances its taste and makes it refreshing when served. For the full recipe, check out the details above. Enjoy your Lemon Basil Pasta Salad! To get the best taste, store the pasta until you’re ready to mix. This keeps it from getting soggy. Rinse the pasta in cold water after cooking. This cools it down and stops the cooking. Adjusting seasoning is key. Always taste your salad before serving. If it needs more flavor, add salt, pepper, or lemon juice. A little extra lemon juice can brighten everything up. For a wow factor, garnish your salad with more fresh basil leaves. Thin lemon slices also add a nice touch. Serve the salad in a big, colorful bowl to catch the eye. Individual plates work well, too, for a personal touch. Pre-preparing ingredients can save time. Chop your veggies the day before. This makes cooking day easier. You can also make the dressing ahead of time. Store it in the fridge until you're ready to mix everything. For quick dressing options, try a simple mix of olive oil and lemon juice. This adds flavor fast and keeps it healthy. You can find the full recipe for Lemon Basil Pasta Salad [Full Recipe]. {{image_2}} You can change the vegetables in your Lemon Basil Pasta Salad. Consider using: - Zucchini, diced small - Spinach, chopped - Broccoli florets, blanched These swaps keep the dish fresh and exciting. You can also try different pasta shapes like: - Penne - Farfalle - Whole wheat pasta These changes can enhance the taste and texture of your salad. To make the salad more filling, add some proteins. Great options include: - Grilled chicken, diced - Shrimp, cooked and peeled - Chickpeas, drained and rinsed If you prefer vegetarian options, try: - Black beans - Edamame - Tofu, cubed and sautéed These additions make the dish heartier while keeping it flavorful. You can play with the dressing to fit your taste. For citrus variations, consider: - Lime juice instead of lemon - Orange juice for a sweet twist If you want a creamy dressing, try: - Greek yogurt mixed with lemon juice - A creamy vinaigrette made with tahini These alternatives can add new layers of flavor to your Lemon Basil Pasta Salad. For the full recipe, check out the detailed instructions above. Enjoy your cooking! To keep Lemon Basil Pasta Salad fresh, store it in an airtight container. This helps prevent drying out. Place the salad in the fridge right after serving. It will stay good for about 3 to 5 days. Keep an eye on the vegetables. If they start to look mushy, it's time to toss them. Yes, you can freeze this salad, but it's best to leave out the fresh herbs and cheese. These ingredients do not freeze well. If you want to freeze it, do so in a freezer-safe container. This way, you can enjoy it later. When you're ready to eat, thaw it in the fridge overnight. This keeps the flavors intact. When you reheat the salad, avoid using the microwave. This can make the pasta too mushy. Instead, let it come to room temperature on its own. You can also serve it cold straight from the fridge. If you want it warm, mix it with a little olive oil in a pan over low heat. This will keep the flavors bright and fresh. You can prepare this salad a day in advance. Store it in an airtight container. Keep it in the fridge. This way, the flavors blend well. When ready to serve, give it a quick toss. If it seems dry, add a bit more olive oil or lemon juice. This pasta salad pairs well with grilled chicken or fish. It also goes great with fresh bread or a side of fruit. You can serve it at picnics or barbecues. It makes a perfect light lunch or dinner. Yes, you can make it your own! Add your favorite veggies or proteins. Try roasted peppers or artichokes for extra flavor. You can even swap the feta for goat cheese. Make it suit your taste! Yes, you can make this salad gluten-free. Use gluten-free pasta like rice or quinoa pasta. These options work well. They will keep the dish delicious and light. The salad lasts about 3 days in the fridge. Store it in a tight container. The flavors will stay fresh, but the veggies may soften. Enjoy it within this time for the best taste. You can find the Full Recipe for more details. This blog post covers how to make a tasty Lemon Basil Pasta Salad. We discussed the best ingredients, how to prepare them, and smart tips for a perfect dish. With simple steps and easy variations, you can customize it to fit your taste. Remember, letting the salad chill enhances its flavor. Enjoy this dish at your next gathering! It’s fresh, easy, and packed with flavor, making it a hit for everyone. Dive in and experiment using your favorite ingredients!](https://dailydishly.com/wp-content/uploads/2025/07/2e0c17ed-3df4-4b24-b113-5392c2bd150f-768x768.webp)