Craving a warm and flavorful dish? Let me guide you through my savory Slow Cooker Thai Coconut Curry Chicken recipe. This easy-to-follow guide features tender chicken thighs simmering in creamy coconut milk, packed with fresh herbs and spices. You’ll discover tips, ingredient swaps, and serving ideas that will elevate your meal. Whether you’re an expert or a beginner, you’ll enjoy this deliciously simple dish. Let’s get cooking!
Ingredients
List of Ingredients
– 2 lbs chicken thighs, boneless and skinless
– 1 can (14 oz) coconut milk
– 2 tablespoons red curry paste
– 1 tablespoon fresh ginger, grated
– 3 cloves garlic, minced
– 1 tablespoon soy sauce (or tamari for gluten-free)
– 1 tablespoon brown sugar
– 1 bell pepper (red or yellow), sliced
– 1 cup snap peas
– 1 cup broccoli florets
– Fresh basil leaves for garnish
– Juice of 1 lime
– Salt and pepper to taste
For this dish, I prefer chicken thighs. They stay juicy and tender. Boneless and skinless thighs work best. You can also use chicken breast, but it may dry out.
Coconut milk gives a rich and creamy base. If you want a lighter option, try light coconut milk. For a nutty flavor, almond milk can work too, but it changes the taste.
The herbs and spices are key. Red curry paste adds heat and depth. Fresh ginger wakes up the dish, while garlic gives warmth. Always taste as you go.
Condiments and Vegetables
I recommend using red curry paste. It has a balanced heat. You can try green or yellow curry paste for a different twist.
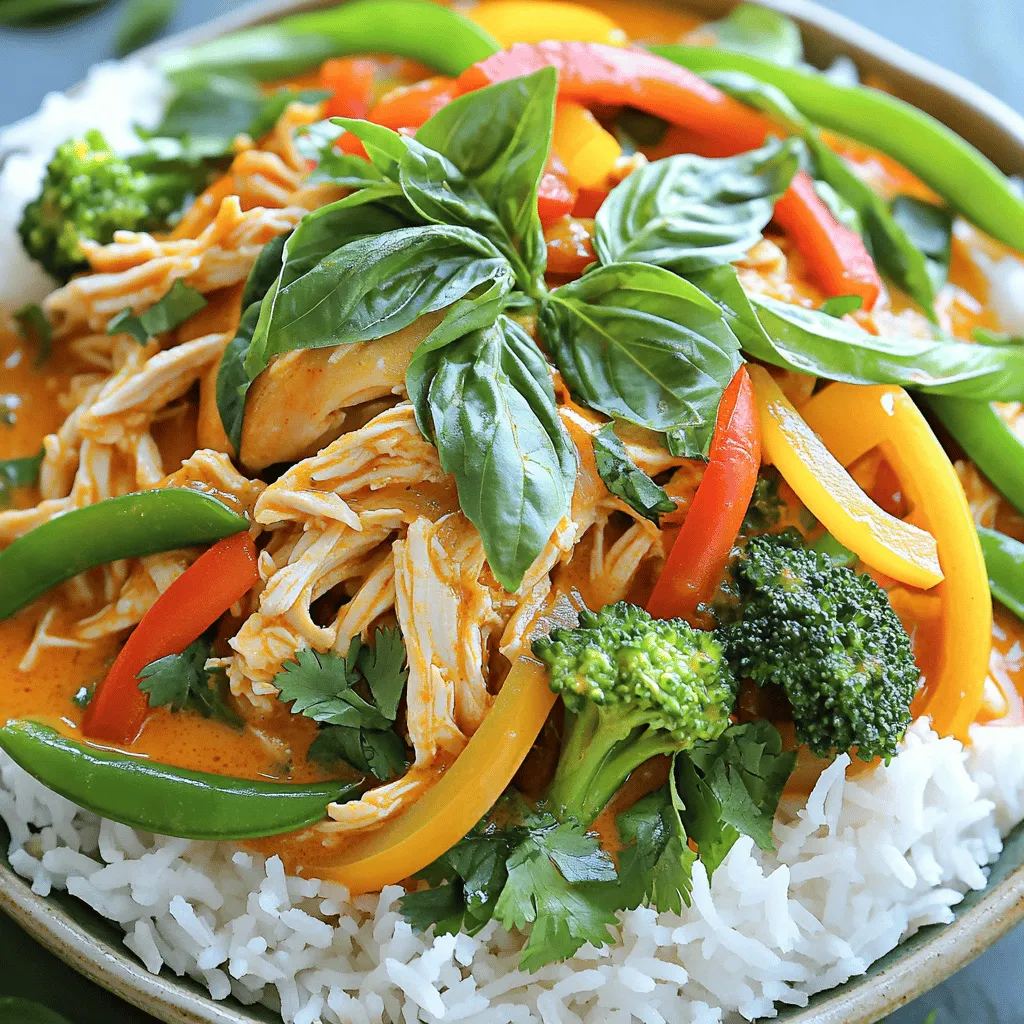
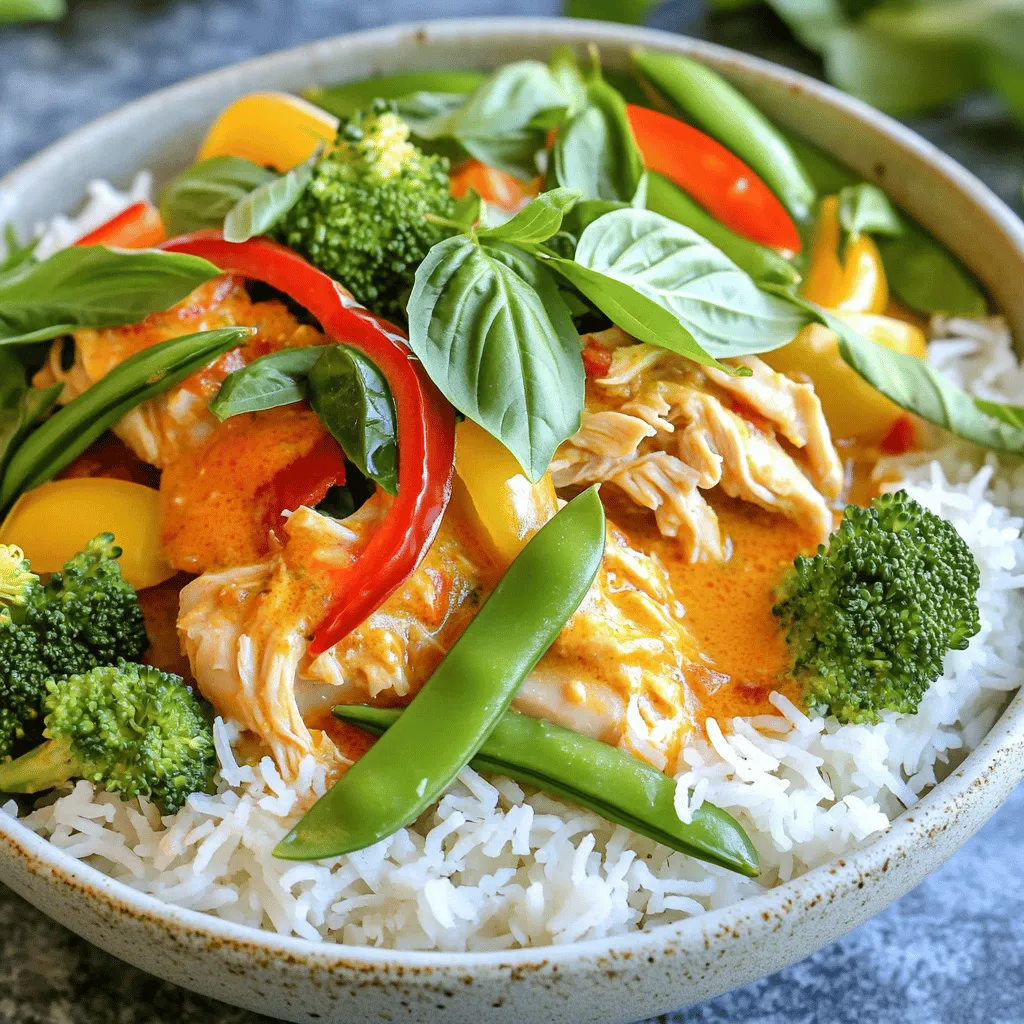
Fresh ingredients like bell peppers, snap peas, and broccoli add crunch and color. They help make the dish vibrant and fresh. You can add other veggies like carrots or zucchini if you like.
Optional Add-ins
For extra nutrition, consider adding carrots, spinach, or mushrooms. These can boost flavor and texture.
For garnishing, fresh basil leaves are a must. They add a pop of flavor. You can also use lime wedges for a zesty kick. A sprinkle of chopped cilantro can provide freshness too.
Step-by-Step Instructions
Preparation Steps
1. Start with the chicken thighs. Remove any skin and bones. Rinse them under cold water. Pat them dry with paper towels. This helps the chicken absorb flavors.
2. In your slow cooker, add the chicken thighs. Pour in the coconut milk. Add the red curry paste. Stir it all together until mixed well.
3. Next, grate fresh ginger and mince garlic. Add them to the slow cooker along with soy sauce and brown sugar. Mix until the curry paste dissolves.
Layering the Ingredients
1. Now, it’s time to layer the vegetables. Slice the bell pepper into thin strips. Place the bell pepper, snap peas, and broccoli florets on top of the chicken. This keeps the veggies crisp and colorful.
2. Cover the slow cooker. Set it on low for 6-7 hours or high for 3-4 hours. The chicken should be tender and easy to shred.
Final Steps and Serving
1. Once cooked, taste the curry. Adjust with salt, pepper, and lime juice for balance. This brightens the flavors.
2. Use two forks to shred the chicken right in the slow cooker. This adds flavor to the sauce.
3. Serve the curry over steamed jasmine rice or rice noodles. Top with fresh basil leaves for a pop of color and taste.
Tips & Tricks
Cooking Tips
– Best practices for using a slow cooker: Always place the chicken at the bottom. This helps it cook evenly. Layer vegetables on top for the best texture. Don’t peek too often. Lifting the lid lets heat escape.
– Adjusting spice levels: If you like it mild, use less red curry paste. You can add more later if needed. Taste as you go to find the right balance for you.
Serving Suggestions
– Ideal sides to serve with the dish: Serve your curry with jasmine rice or rice noodles. These sides soak up the sauce well. Fresh lime wedges add a nice zing too.
– Creative ways to use leftovers: Use leftover curry in a wrap. You can also add it to a salad for extra flavor. It makes great filling for tacos, too!
Common Mistakes to Avoid
– Pitfalls when cooking with coconut milk: Avoid cooking on high too long. Coconut milk can separate and lose creaminess. Stir gently to keep it smooth and rich.
– Avoiding overcooked vegetables: Add delicate veggies like snap peas near the end. They cook fast and stay crisp. Overcooked veggies turn mushy and lose their bright color.
Variations
Ingredient Swaps
You can easily swap ingredients to suit your needs. If you want to change the chicken thighs, try using chicken breasts. They work well too but may cook faster. For a vegan option, replace the chicken with chickpeas or tofu. Both options soak up the curry flavor nicely.
Flavor Infusions
Add more depth to the curry by using different spices or herbs. Fresh cilantro and lime zest can brighten the dish. You can also add a pinch of cumin or coriander for a twist. If you want to change the heat level, try different curry pastes. Green curry paste adds a fresh kick, while yellow curry paste is milder.
Cooking Method Alternatives
If you don’t have a slow cooker, try using an Instant Pot. Cook on high pressure for about 15 minutes. You can also make this dish on the stovetop. Just simmer everything in a pot for about 30 minutes. Serve the curry over rice or noodles. You can also serve it in a bowl with crunchy toppings like peanuts or crispy shallots.
Storage Info
Proper Storage Techniques
To keep your Slow Cooker Thai Coconut Curry Chicken fresh, follow these tips:
– Refrigerating leftovers: Let the dish cool completely. Store it in an airtight container. It will stay fresh for up to 4 days.
– Freezing: Use a freezer-safe container or bag. Label it with the date. It will last for up to 3 months in the freezer.
Reheating Instructions
When you want to enjoy your curry again, here’s how to reheat it:
– Stovetop method: Place the curry in a pot. Heat it over low heat. Stir often to keep it from sticking.
– Microwave method: If using a microwave, transfer it to a microwave-safe bowl. Heat in short bursts, stirring in between. This helps it heat evenly.
Avoid overheating, as it can change the flavors and texture.
Shelf Life
It’s important to know how long your dish will last:
– In the fridge: The curry will last for up to 4 days.
– In the freezer: You can keep it for up to 3 months.
Watch for spoilage signs like off smells or changes in color. If anything seems off, it’s best to toss it.
FAQs
Common Questions About Slow Cooker Thai Coconut Curry Chicken
How long does it take to cook in a slow cooker?
The cooking time depends on your slow cooker setting. Cook on low for 6 to 7 hours. If you’re short on time, you can cook on high for 3 to 4 hours. The chicken will be tender and full of flavor.
Can I use frozen chicken for this recipe?
Yes, you can use frozen chicken! Just add an extra hour to the cooking time. Be sure to check that the chicken is fully cooked before serving.
Nutrition Information
Nutritional breakdown per serving
Each serving has about 350 calories. It includes roughly 25 grams of protein, 20 grams of fat, and 15 grams of carbs. This dish provides a good balance of nutrients.
Tips for making it healthier
To lighten this dish, use light coconut milk. You can also add more vegetables, like zucchini or spinach, to boost fiber. Serve it with brown rice instead of white for added health benefits.
Adjusting the Recipe
Can I make this dish spicier?
Absolutely! To make it spicier, add more red curry paste. You can also toss in some sliced jalapeños or red pepper flakes. Adjust it to your taste for a kick.
How to adjust for smaller servings?
If you need smaller servings, cut the recipe in half. Use 1 pound of chicken and reduce the other ingredients too. This will help keep the flavors balanced while making enough for two to three people.
This article covered the essential parts of making Slow Cooker Thai Coconut Curry Chicken. We discussed key ingredients, from chicken thighs to spices. You learned how to layer flavors and avoid common cooking mistakes. I shared tips for storage and reheating to keep your dish tasty. Remember, cooking is about experimenting, so don’t hesitate to try variations. Enjoy your cooking adventure and make this dish your own!


