Savory S’mores Skillet Cookie Easy and Delicious Treat

Are you ready to indulge in a warm, gooey treat? This Savory S’mores Skillet Cookie is your new favorite dessert! It’s easy to make and tastes just like summer campfires, without the hassle. I’ll share steps, tips, and tasty variations to make this treat your own. Get your ingredients ready, and let’s fire up that skillet for a fun dessert adventure you won’t forget!
Ingredients
List of Ingredients Required
To make the S’mores Skillet Cookie, gather these ingredients:
– 1 cup all-purpose flour
– 1/2 teaspoon baking soda
– 1/4 teaspoon salt
– 1/2 cup unsalted butter, softened
– 1/2 cup brown sugar, packed
– 1/4 cup granulated sugar
– 1 large egg
– 1 teaspoon vanilla extract
– 1/2 cup semi-sweet chocolate chips
– 1/2 cup mini marshmallows
– 1/2 cup crushed graham crackers
– Extra marshmallows and chocolate for topping
Tips for Selecting Quality Ingredients
Choosing the right ingredients can make a big difference. Here are some tips:
– Butter: Use unsalted butter for better control over the salt.
– Chocolate Chips: Go for semi-sweet chips for a nice balance of sweet and rich.
– Marshmallows: Mini marshmallows melt easily and spread flavor well.
– Graham Crackers: Look for fresh graham crackers; they give the best crunch.
Possible Ingredient Substitutions
If you need to make swaps, here are some ideas:
– Gluten-Free: Use a gluten-free flour mix instead of all-purpose flour.
– Dairy-Free: Substitute the butter with coconut oil or a dairy-free spread.
– Sugar Alternatives: Use coconut sugar or honey if you want a different sweetness.
– Chocolate Options: You can try milk chocolate or dark chocolate for a richer taste.
Step-by-Step Instructions
Preparation Steps
1. Start by preheating your oven to 350°F (175°C). This step is key for even baking.
2. In a medium bowl, whisk together 1 cup of all-purpose flour, 1/2 teaspoon of baking soda, and 1/4 teaspoon of salt. Set this mixture aside for now.
3. In a large bowl, cream together 1/2 cup of softened unsalted butter, 1/2 cup of packed brown sugar, and 1/4 cup of granulated sugar. Mix until it looks light and fluffy.
4. Next, beat in 1 large egg and 1 teaspoon of vanilla extract. Make sure these ingredients blend well.
5. Gradually add your dry mixture into the wet ingredients. Mix until a dough forms.
6. Now, fold in 1/2 cup of semi-sweet chocolate chips, 1/2 cup of mini marshmallows, and 1/2 cup of crushed graham crackers. Ensure they are evenly mixed.
7. Grease a cast-iron skillet with cooking spray or butter. This helps the cookie come out easily.
8. Spread the cookie dough evenly in the skillet. Make sure it reaches the edges for a nice shape.
9. For extra flavor, top the cookie batter with more marshmallows and chocolate pieces if you wish.
Baking Instructions
10. Place your skillet in the oven and bake for 20-25 minutes. Keep an eye on it until the top turns golden brown. The edges should pull away from the skillet.
11. Once baked, remove it from the oven.
Cooling and Serving Tips
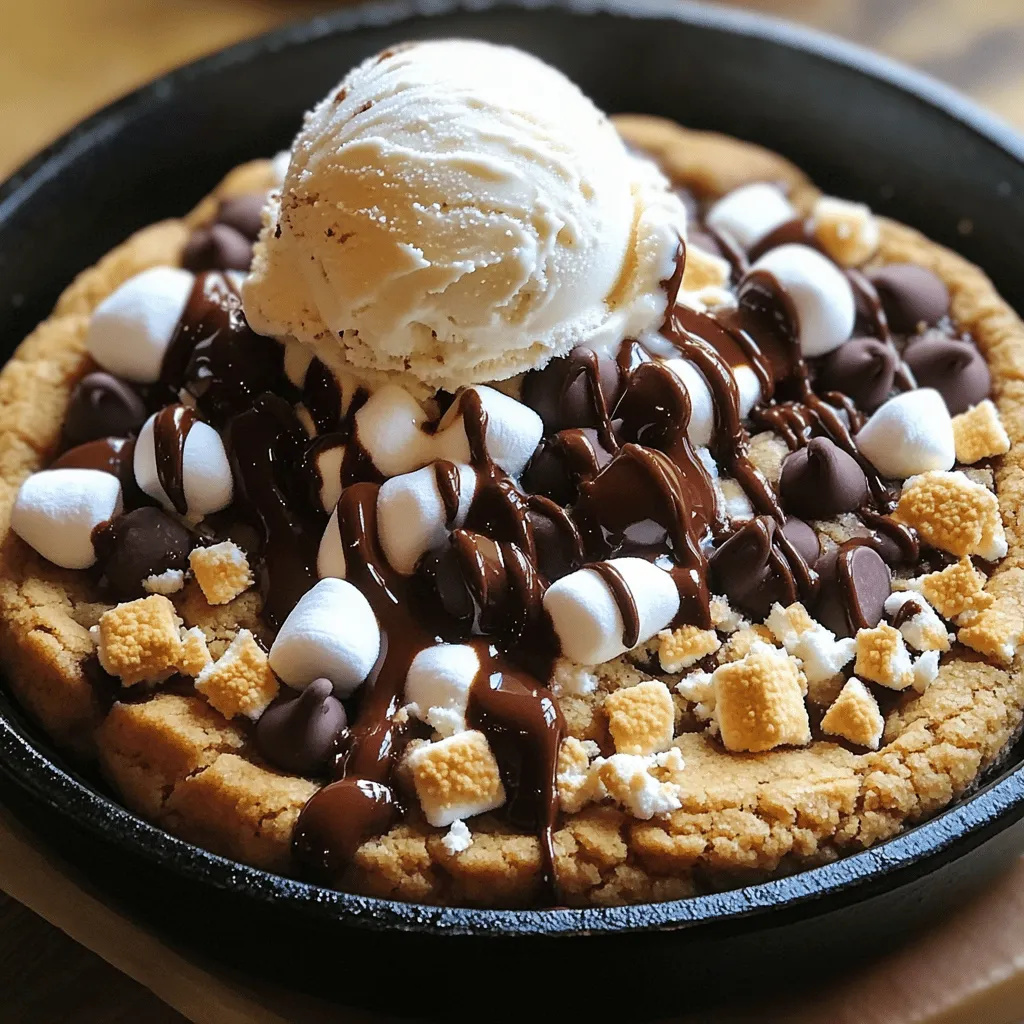
12. Allow the skillet cookie to cool for a few minutes. This makes it easier to serve.
13. Serve it directly in the skillet for a fun look. I love adding a scoop of vanilla ice cream on top. Drizzle it with chocolate sauce and sprinkle more graham cracker crumbles for a tasty touch. Enjoy your delicious treat!
Tips & Tricks
Best Practices for Perfecting Your Skillet Cookie
To make your s’mores skillet cookie just right, follow these tips:
– Preheat your oven: Always preheat to 350°F for even baking.
– Use room temperature butter: Softened butter mixes better, giving a nice texture.
– Don’t overmix the dough: Mix just until combined to keep it soft.
– Spread evenly: Make sure the dough reaches the edges of the skillet.
Serving Suggestions
This skillet cookie is best served warm. Here are some fun ideas:
– Serve in the skillet: It looks great and keeps it warm.
– Add ice cream: A scoop of vanilla ice cream on top is a must.
– Drizzle chocolate sauce: Add some chocolate sauce for extra sweetness.
– Graham cracker crumbles: Sprinkle extra crushed graham crackers for crunch.
Enhancing Flavor with Add-Ins
You can mix in extra flavors for a twist:
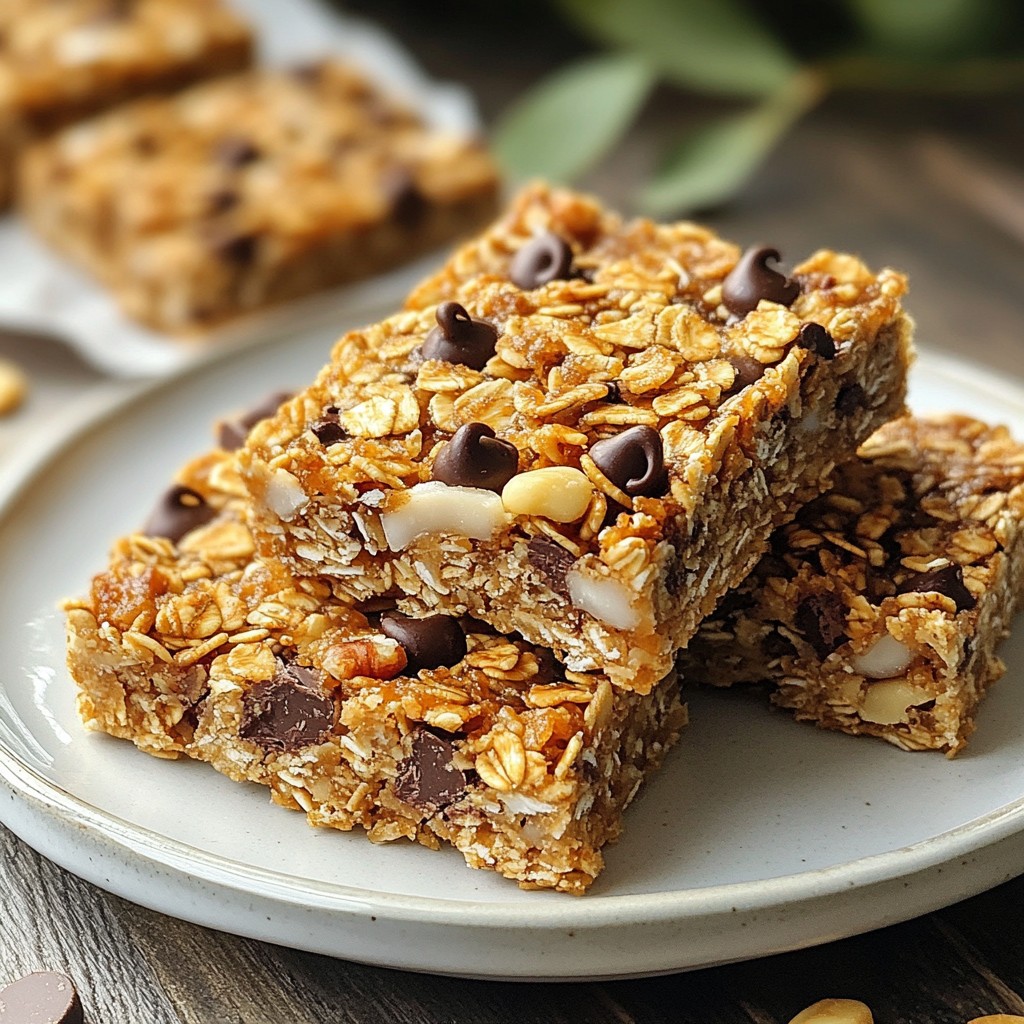
– Peanut butter chips: Swap some chocolate chips with peanut butter ones.
– Fun toppings: Add nuts or candies for a fun crunch.
– Flavored extracts: Use almond or coconut extract for a different taste.
– Seasonal spices: A pinch of cinnamon or nutmeg can elevate the flavor.

Variations
Nutty S’mores Skillet Cookie
To add a nutty twist, try adding nuts. Chopped walnuts or pecans work great. Mix in 1/2 cup of nuts when you fold in the chocolate chips. The nuts give a nice crunch and flavor. You can also use nut butter for a rich taste. Just replace some butter with 1/4 cup of your favorite nut butter. This adds creaminess and a hint of nuttiness.
Gluten-Free S’mores Skillet Cookie
Want to make this cookie gluten-free? Simply swap the all-purpose flour for a gluten-free blend. Look for a blend that works in baking. Follow the rest of the recipe as usual. This way, you can enjoy all the gooey goodness while keeping it gluten-free.
Vegan S’mores Skillet Cookie
To make a vegan version, replace the egg with a flax egg. Mix 1 tablespoon of ground flaxseed with 2.5 tablespoons of water. Let it sit for 5 minutes to thicken. Use vegan butter instead of regular butter, and choose dairy-free chocolate chips. This way, you can enjoy a sweet treat without animal products. Follow the same steps for baking, and you’ll have a delicious vegan s’mores skillet cookie!
Storage Info
How to Store Leftovers
After enjoying your s’mores skillet cookie, you might have some left. To keep it fresh, let the cookie cool completely. Then, cover it tightly with plastic wrap or aluminum foil. You can also place it in an airtight container. Stored this way, it lasts for up to three days at room temperature. If you want to keep it longer, consider freezing it.
Reheating Instructions
When you’re ready to enjoy leftovers, you can easily reheat them. Preheat your oven to 350°F (175°C). Place the skillet cookie in the oven for about 10 minutes. This warms it up and keeps it soft. If you prefer, you can microwave a slice for about 20-30 seconds. Just be careful not to overheat, as it can get tough.
Freezing Tips
Freezing your s’mores skillet cookie is a great option for later. First, let it cool completely. Then, cut it into slices. Wrap each slice in plastic wrap and place them in a freezer bag. Remove as much air as possible before sealing. The cookie can stay in the freezer for up to two months. When you’re ready to enjoy it, thaw it overnight in the fridge and reheat as mentioned above.
FAQs
Can I make this S’mores Skillet Cookie in advance?
Yes, you can. Make the dough ahead of time. Store it in the fridge for up to 24 hours. When ready, spread it in the skillet and bake. This way, you save time when guests arrive.
What type of skillet is best for baking?
A cast-iron skillet works best. It heats evenly and gives a nice crust. You can also use an oven-safe pan. Just make sure it can hold the heat well. Avoid non-stick pans, as they might not give the best results.
How can I achieve a gooey center?
To get a gooey center, do not overbake the cookie. Check it around the 20-minute mark. The cookie should be golden on the edges but soft in the middle. Remember, it will keep cooking after you take it out.
Can I use different types of chocolate?
Absolutely! You can mix dark, milk, or white chocolate. Each type adds a different taste. Experiment with your favorites for a unique twist. You could also try chocolate bars instead of chips for a fun texture.
You learned how to make a tasty S’mores Skillet Cookie. I shared the key ingredients and tips for choosing the best ones. I also gave you simple steps for baking and cooling. Plus, I offered fun variations and storage ideas.
Remember, every tweak can make it special. Get creative with flavors and enjoy! You now have all you need to bake this delicious treat. Happy baking!


![- 200g dark chocolate (70% cocoa), chopped - 3 tablespoons unsalted butter - 3 large eggs, separated - 1/4 cup granulated sugar - 1 teaspoon vanilla extract - 1 cup heavy cream - A pinch of salt To make a great chocolate mousse, we need high-quality ingredients. The star of this dessert is dark chocolate, which gives it rich flavor. I always choose chocolate with at least 70% cocoa. This ensures a deep, intense taste. Next, we add unsalted butter. It helps the chocolate melt smoothly. Eggs are crucial, too. They add structure and richness. Separating them allows us to whip the whites for a light texture. Granulated sugar sweetens the mousse, while vanilla extract adds warmth. Heavy cream is essential for that luscious, creamy mouthfeel. Lastly, a pinch of salt balances the flavors. - Whipped cream - Chocolate shavings - Fresh berries While the mousse is delightful on its own, garnishes can elevate it. Whipped cream adds a fluffy touch. Chocolate shavings bring a nice crunch and more chocolate flavor. Fresh berries add color and a slight tartness. These toppings make your dessert even more appealing. For the full recipe, check [Full Recipe]. Melt Chocolate Start by chopping 200g of dark chocolate. Place it in a heatproof bowl with 3 tablespoons of unsalted butter. Put this bowl over a pot of simmering water. Stir it gently until the chocolate and butter melt and blend into a smooth mix. Once melted, take it off the heat and let it cool. Whisk Egg Yolks In another bowl, take 3 large egg yolks. Add 1/4 cup of granulated sugar. Whisk these together until the mix turns pale and creamy. Next, pour in the cooled chocolate and butter blend. Add 1 teaspoon of vanilla extract and mix until combined. Whip Egg Whites In a clean bowl, add 3 large egg whites with a pinch of salt. Beat them until soft peaks form. Now, slowly add the remaining sugar while beating until stiff peaks form. This will give your mousse a light texture. Fold Egg Whites into Chocolate Mixture Gently fold one-third of the whipped egg whites into the chocolate mix. This lightens it. Then, carefully fold in the remaining egg whites. This step is key to keeping your mousse fluffy. Incorporate Whipped Cream In a separate bowl, whip 1 cup of heavy cream until soft peaks form. Now, fold this whipped cream into the chocolate mixture. Do this slowly to avoid deflating the mousse. Spoon into Serving Cups Once everything is combined, spoon the mousse into serving cups. You can use bowls or fancy glasses. Chill Time Cover the cups and place them in the fridge. Chill for at least 2 hours, or until the mousse is set. This step is vital for the best texture. For the full recipe, check the detailed instructions above. Enjoy your creamy and decadent dessert! To get the best texture, I recommend using the right ingredients. Start with high-quality dark chocolate, about 70% cocoa. This gives your mousse a rich flavor. Room temperature ingredients are also key. Eggs and butter blend better when they are not cold. One common mistake is overwhipping the cream or egg whites. This can make your mousse grainy instead of smooth. Aim for soft peaks when whipping. Another pitfall is not cooling the chocolate properly. If you add hot chocolate to eggs, it can cook them. Let the melted chocolate cool a bit before mixing. By following these tips, you can create a mousse that is creamy and decadent. For a full recipe, check out the detailed instructions. {{image_2}} To make your chocolate mousse even more exciting, try adding some fun flavors. You can add espresso powder for a coffee twist. Just mix in one teaspoon of espresso powder with the melted chocolate. This gives the mousse a rich, coffee flavor that pairs well with chocolate. Another idea is to infuse your mousse with orange zest or mint. For orange, add one teaspoon of fresh zest to the chocolate mix. This adds a bright, citrus taste. For mint, use a few drops of mint extract. It creates a refreshing flavor that feels special. If you follow a vegan diet, you can still enjoy this dessert! Use aquafaba instead of eggs. Aquafaba is the liquid from canned chickpeas. It whips up just like egg whites. Replace the three egg whites with 1/2 cup of aquafaba. This keeps your mousse fluffy and light. For those looking for sugar-free options, try using sweeteners like erythritol or stevia. These substitutes can replace the granulated sugar in the recipe. Just follow the package instructions for the right amount. This way, you can enjoy a guilt-free treat without the extra sugar. These variations keep the mousse fun and fit for everyone. For the full recipe, check out the detailed instructions above. After you make the mousse, you can store leftovers in the fridge. Place the mousse in airtight containers. This keeps it fresh and prevents it from absorbing other smells. It lasts about 3 to 4 days in the fridge. Make sure to cover it well. If you want to keep it safe, place plastic wrap over the top of the container. You can freeze chocolate mousse if you want it to last longer. Use a freezer-safe container and fill it to leave some space. The mousse will expand as it freezes. It can stay in the freezer for up to 2 months. To thaw the mousse, take it out and place it in the fridge for several hours. This keeps the texture nice. Avoid using a microwave, as it may change the mousse's creamy feel. Once thawed, use it within a couple of days for the best taste. If you want the full recipe, check it out here: [Full Recipe]. Chocolate mousse can last about 3 to 5 days in the fridge. Make sure to cover the mousse well to keep it fresh. After a few days, the texture might change, but it should still taste good. Yes, you can make chocolate mousse ahead of time. It’s a great dessert for parties. Just make sure to chill it for at least 2 hours. You can prepare it a day before serving. This allows the flavors to develop fully. If you need a substitute for heavy cream, you can use coconut cream or full-fat yogurt. These options will change the flavor a bit but will still give a creamy texture. You can also whip silken tofu for a dairy-free alternative. Using raw eggs can be safe if they are pasteurized. Pasteurized eggs reduce the risk of foodborne illness. If you are concerned, you can use whipped aquafaba instead of egg whites. Aquafaba is the liquid from canned chickpeas and works well in this mousse. For the full recipe, check out the recipe section above. This blog post covers how to make a simple and delicious chocolate mousse. I shared key ingredients and easy steps to create the perfect dessert. Remember to avoid common mistakes, like overwhipping cream. You can also try different flavors or adjust for dietary needs. In the end, this mousse is a treat you can make any time. With practice, you'll impress everyone. Enjoy making it, and have fun with the toppings!](https://dailydishly.com/wp-content/uploads/2025/06/b5ca571b-81f1-451e-9d8a-f7e9dc6262da-768x768.webp)
. 1. In a mixing bowl, combine softened butter, brown sugar, and granulated sugar. 2. Beat this mixture until it is creamy and smooth. 3. Next, add the cream cheese and vanilla extract. 4. Continue to beat until the mix is fluffy and well combined. 5. Now, sift in the all-purpose flour and a pinch of salt. 6. Mix on low speed or gently by hand until just combined. 1. Fold in the mini chocolate chips and optional nuts if you like. 2. Make sure they are evenly mixed in the dip. 3. Transfer the dip to a serving bowl. 4. Cover it with plastic wrap and chill in the fridge. 1. Serve the dip after it has chilled for at least 30 minutes. 2. Pair it with graham crackers, pretzels, or apple slices for dipping. This simple process gives you a great treat to enjoy. For the full details, check the Full Recipe. - Ensure all ingredients are at room temperature. This helps them blend well. - Chill time enhances flavor. Let it sit for at least 30 minutes. - Skipping the chilling step can lead to a dip that's too soft. - Overmixing the batter makes it tough. Mix just until combined. - Experiment with flavored extracts like almond or hazelnut. A little goes a long way. - Adjust sweetness by varying sugar amounts. Taste as you go for the best balance. With these tips, you’ll create a dip that everyone will love! For the complete method, check the Full Recipe. {{image_2}} You can switch up the flavors to keep things fun. For a peanut butter twist, mix in ½ cup of creamy peanut butter. This adds a nutty taste that pairs great with chocolate. If you crave a coffee kick, try a mocha chocolate chip dip. Just add 1 tablespoon of instant coffee to the mix. The coffee brings a rich depth that coffee lovers will adore. If you need gluten-free options, use 1 cup of gluten-free flour. This swap works perfectly and keeps the dip tasty. For those avoiding dairy, choose a dairy-free cream cheese. Brands like Tofutti or Kite Hill offer great alternatives. They keep the creamy texture while being dairy-free. Make your dip festive with holiday-themed sprinkles. These colorful touches can brighten any dessert table. In summer, try adding dried fruit, like cranberries or apricots. This gives your dip a juicy burst and a fun twist. You can mix and match these ideas to find your favorite combo. For the full recipe, click [Full Recipe]. To keep your chocolate chip cookie dough dip fresh, store it in an airtight container. This helps prevent it from drying out. You can use any clean, sealable bowl or jar. Make sure the lid fits tight. For best results, place the dip in the fridge. This will keep it cool and tasty. The dip stays fresh for about 5 days in the fridge. After that, it may lose flavor or texture. Check for signs of spoilage. If it smells off or has a strange color, it's best to toss it. Always trust your senses when it comes to food safety. You can freeze this dip for later use. To do this, place it in a freezer-safe container. Leave some space at the top, as it will expand. When you want to enjoy it again, simply move it to the fridge to thaw overnight. This way, it stays creamy and delicious. Enjoy your dip with graham crackers, pretzels, or apple slices after thawing! You can swap the cream cheese for Greek yogurt or whipped silken tofu. Both options work well. Greek yogurt adds a nice tang, while silken tofu keeps it smooth. Make sure to choose plain yogurt. This change makes the dip lighter and still tasty. Yes, you can make this dip up to 2 days in advance. Just keep it in the fridge. This helps the flavors blend well. When you are ready to serve, just take it out and let it sit for a bit. Then, enjoy it with your favorite dippers. You have many options beyond graham crackers. Try cookies, fresh fruits, or pretzels. Each choice adds a fun crunch or sweetness. Apples and strawberries are great for a refreshing contrast. Have fun mixing and matching to find your favorite pairings! This blog post covered how to make a delightful chocolate chip cookie dough dip. You learned about essential ingredients like cream cheese, sugars, and mini chocolate chips. I shared tips for the best results and common mistakes to avoid. You also discovered flavor variations and storage tips. In my experience, this dip is fun and easy. It works well for gatherings or just a tasty snack. Enjoy trying out different dippers and flavors!](https://dailydishly.com/wp-content/uploads/2025/07/9841c43c-25b7-4553-9f85-c4e222a26afc-768x768.webp)