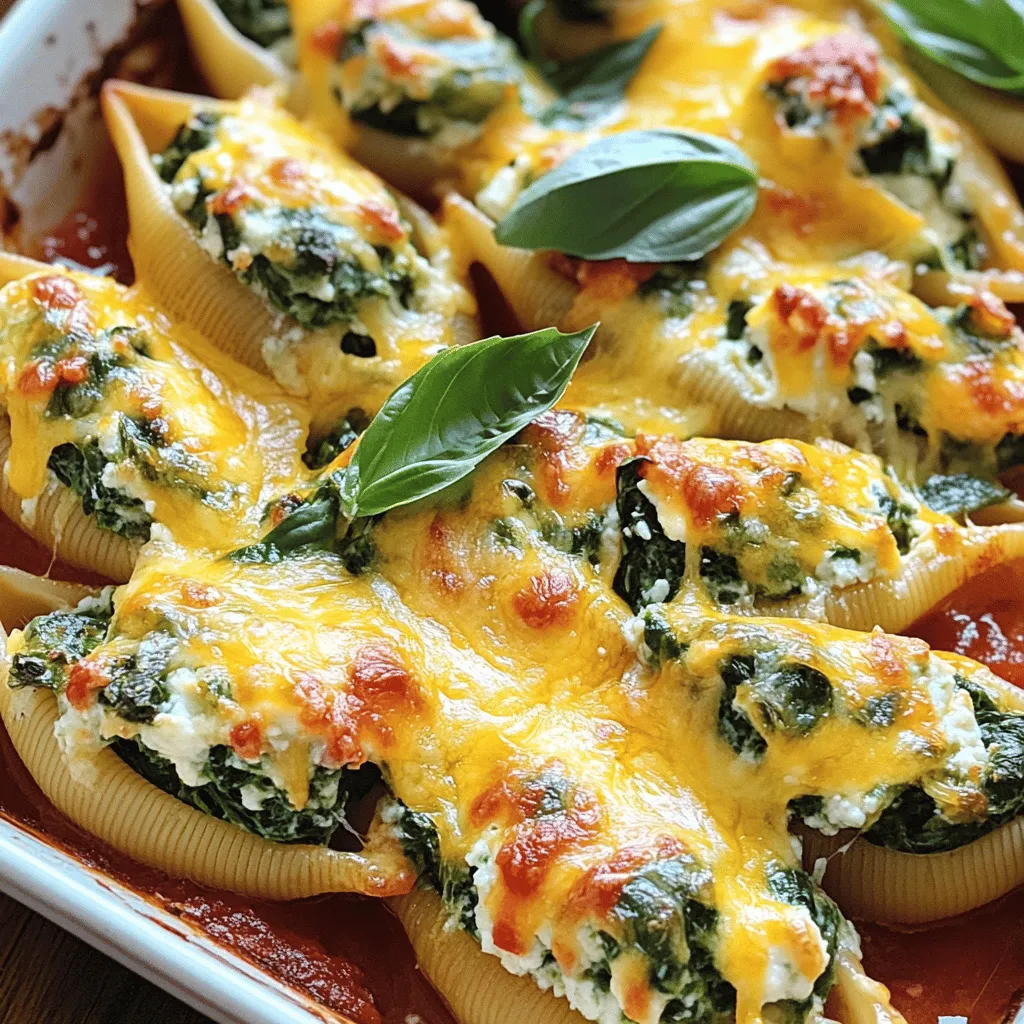
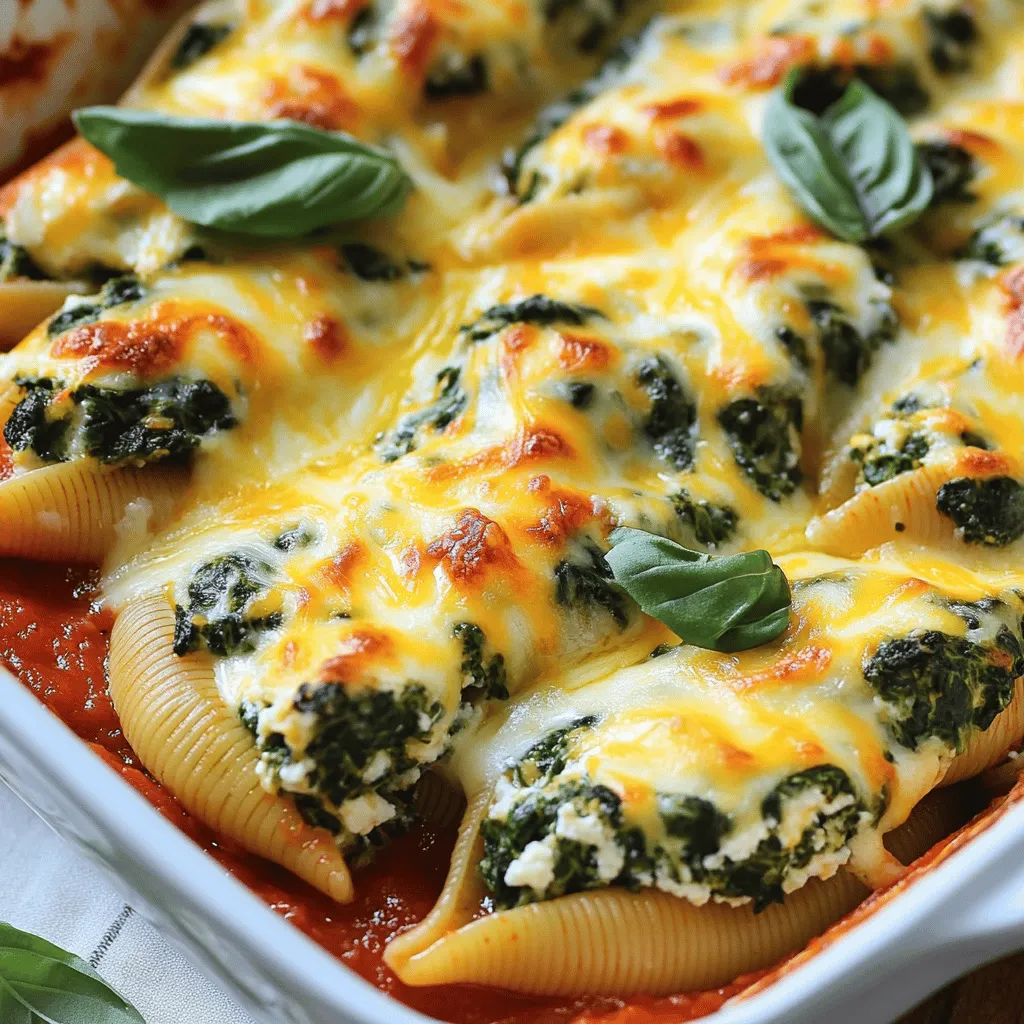
Looking for a hearty, comforting meal? Try my Savory Spinach Ricotta Stuffed Shells recipe! These creamy, cheesy shells are packed with fresh spinach and simple flavors. They’re easy to make and great for family dinners or meal prep. In this post, I’ll guide you through the ingredients, step-by-step instructions, and tips to ensure your stuffed shells turn out perfectly. Let’s dive in and get cooking!
Ingredients
List of Ingredients for Spinach Ricotta Stuffed Shells
To make these stuffed shells, gather these items:
– 20 jumbo pasta shells
– 2 cups fresh spinach, chopped
– 1 cup ricotta cheese
– 1 cup shredded mozzarella cheese
– ½ cup grated Parmesan cheese
– 1 large egg
– 2 cups marinara sauce
– 1 teaspoon garlic powder
– 1 teaspoon onion powder
– Salt and pepper to taste
– Fresh basil leaves for garnish
Recommended Types of Cheese
For the best flavor, I suggest using whole milk ricotta cheese. This type offers a creamy texture. You can also mix in some goat cheese for tang. For mozzarella, use fresh mozzarella for a rich taste. If you like a stronger flavor, add more Parmesan. These cheeses blend well for a delicious filling.
Suggested Herbs and Seasonings
Herbs make a big difference in taste. I love adding fresh basil and parsley to my filling. You can also use dried herbs like oregano and thyme for added depth. Garlic powder and onion powder bring in savory notes. Remember to adjust salt and pepper to your liking. This mix of herbs and spices will elevate your stuffed shells.
Step-by-Step Instructions
Preheating and Cooking the Pasta Shells
First, you need to preheat your oven. Set it to 375°F (190°C). This step is key for baking the shells perfectly. Next, bring a large pot of salted water to a rolling boil. Once the water is boiling, carefully add the jumbo pasta shells. Cook them for about 8 to 10 minutes. You want them al dente, meaning they should be firm to the bite. After cooking, drain the shells in a colander. Let them cool while you prepare the filling.
Preparing the Spinach and Cheese Filling
For the filling, you will need a mixing bowl. Combine the chopped spinach and ricotta cheese in it. Then, add half of the mozzarella cheese and the grated Parmesan cheese. Crack the large egg into the bowl, then add the garlic powder, onion powder, salt, and pepper. Mix everything well until it forms a creamy mixture. This filling is where the magic happens, so be sure it is blended properly.
Stuffing the Pasta Shells
Now it’s time to stuff the shells. Take a scoop of the filling and gently fill each jumbo shell. Ensure each shell is packed but not overstuffed. Place the stuffed shells in a greased baking dish. Once all the shells are filled, pour half of the marinara sauce over them. Make sure they are well-coated. Then, sprinkle the rest of the mozzarella cheese on top. Finally, pour the remaining marinara sauce over everything. Now, you’re ready to bake!
Tips & Tricks
How to Make the Perfect Filling
To make the best filling for your shells, start with fresh spinach. Chop it finely. This helps it mix well with the other ingredients. Use whole-milk ricotta for a creamier texture. Add half the mozzarella to the mix for extra flavor. Don’t forget the egg; it binds everything together. Season with garlic powder, onion powder, salt, and pepper for a tasty kick. Mix until smooth, but don’t overwork it. A well-blended filling makes for perfect stuffed shells.
Best Practices for Baking
Baking your shells just right is key. Preheat your oven to 375°F (190°C) before you start. This ensures even cooking. When you bake, cover the dish with foil. This keeps the moisture in and helps the cheese melt evenly. Remove the foil for the last 10 to 15 minutes to get that nice golden top. Keep an eye on the cheese. When it bubbles and turns golden, your shells are ready!
Keeping the Shells from Sticking
To prevent your shells from sticking, grease your baking dish well. Use cooking spray or a bit of olive oil. You can also add a thin layer of marinara sauce on the bottom. This not only adds flavor but also stops the shells from sticking. When cooking the pasta shells, don’t forget to salt the water. This adds flavor and helps keep the shells from sticking together. Always drain and cool them before stuffing. This makes the process easier!
Variations
Adding Protein: Chicken or Sausage Options
You can add chicken or sausage to your stuffed shells. Cooked chicken adds a nice texture. Use rotisserie chicken for ease. Just shred it and mix it in with your filling. For sausage, choose Italian sausage for great flavor. Brown it in a pan before mixing it in. This adds a savory touch and makes the dish heartier.
Vegetarian Variations: Extra Veggies to Include
If you want more veggies, try adding mushrooms or bell peppers. Chopped zucchini or sun-dried tomatoes work well too. Sauté your veggies first to soften them. Mix them into the ricotta filling for more taste. You can even add fresh herbs like parsley or oregano for a fresh kick. This keeps the dish vibrant and nutritious.
Gluten-Free Adaptations
For a gluten-free version, swap out the pasta. Look for gluten-free jumbo shells at the store. You can also use zucchini or eggplant slices as shells. Just bake them with the filling. They add a unique flavor and keep it healthy. Ensure your marinara sauce is gluten-free too. Enjoy this dish without worry!
Storage Info
How to Store Leftover Stuffed Shells
To store leftover stuffed shells, let them cool first. Use an airtight container for best results. This keeps the shells fresh and tasty. You can store them in the fridge for up to three days. If you plan to eat them later, it’s a good idea to separate layers with parchment paper. This helps stop them from sticking together.
Reheating Guidelines
When you’re ready to eat, reheating is simple. Preheat your oven to 350°F (175°C). Place the stuffed shells in a baking dish. Add a splash of marinara sauce to keep them moist. Cover the dish with foil to avoid drying out. Heat for about 20 minutes or until hot throughout. You can also reheat them in the microwave. Just cover them and heat for about 3-5 minutes.
Freezing for Future Meals
Freezing stuffed shells is a great way to save time. Prepare the shells as you normally would. Before baking, place them in a freezer-safe dish. Cover them tightly with plastic wrap and then foil. They can last in the freezer for up to three months. When you’re ready to enjoy them, thaw the shells in the fridge overnight.This keeps them delicious and easy to make!
FAQs
Can I make Spinach Ricotta Stuffed Shells ahead of time?
Yes, you can prepare Spinach Ricotta Stuffed Shells in advance. I often make them a day before. Just follow the recipe until you are ready to bake. Store the unbaked shells in the fridge, covered tightly. When you are ready to bake, just add a few extra minutes to the cooking time. This method keeps the flavors fresh and tasty.
What can I substitute for ricotta cheese?
If you don’t have ricotta cheese, try cottage cheese or cream cheese. Both work well in this recipe. Blend cottage cheese until smooth for a similar texture. You can also use Greek yogurt for a lighter option. Each choice brings a unique flavor but still keeps the dish creamy.
How do I know when the stuffed shells are done?
You can tell when the stuffed shells are done by checking the cheese on top. It should be golden brown and bubbly. The filling should also be hot all the way through. If you are unsure, use a fork to poke one shell open to check the heat. The shells should not be hard or dry.
Spinach ricotta stuffed shells are a tasty and easy dish. We explored key ingredients, including cheese and herbs. I shared step-by-step instructions for preparing and baking. Tips helped ensure a perfect filling and easy storage. You can also customize the dish with proteins or veggies.
In the end, enjoy experimenting with this recipe. You’ll make a meal that pleases everyone. Happy cooking!


